After you deploy an ApsaraMQ for Kafka instance, run a quick end-to-end test to confirm that the broker is healthy. In this guide, you:
Create a test topic.
Send a message to the topic.
Confirm the message arrived by checking partition status and querying by offset.
If all steps succeed, the broker works correctly. Repeat Steps 2 through 4 a few times for a thorough check.
If the broker test passes but your application fails to send messages, the issue is likely in the caller. Check your native client or ecosystem component configuration.
Prerequisites
An ApsaraMQ for Kafka instance is purchased, deployed, and in the Running state
Step 1: Create a test topic
Log on to the ApsaraMQ for Kafka console.
In the Resource Distribution section of the Overview page, select the region where your instance resides.
ImportantCreate the topic in the same region as the Elastic Compute Service (ECS) instance where your producers and consumers run. Topics cannot be used across regions. For example, if your ECS instance is in the China (Beijing) region, create the topic in the China (Beijing) region.
On the Instances page, click the name of your instance.
In the left-side navigation pane, click Topics.
Click Create Topic.
In the Create Topic panel, set the following parameters and click OK. For a quick test, use the defaults shown below. For production topics, see the full parameter descriptions in the table. After the topic is created, it appears on the Topics page.
Parameter Quick test value Description Name demoThe topic name. Description demo testA brief description. Partitions 12The number of partitions. Storage Engine Cloud Storage The storage backend. Cloud Storage uses Alibaba Cloud disks with three replicas for low latency and high reliability. Local Storage uses the open-source Apache Kafka in-sync replicas (ISR) algorithm with three replicas. Standard Edition instances default to Cloud Storage. You can select Local Storage only on Professional Edition instances. If you set Instance Edition to Standard (High Write) when creating the instance, only Cloud Storage is available. Message Type Normal Message Normal Message: Messages with the same key go to the same partition in send order. If a broker fails, message order may not be preserved. Automatically set when Storage Engine is Cloud Storage. Partitionally Ordered Message: Same ordering guarantee, but order is preserved even during broker failures. Some partitions may be temporarily unavailable until restored. Automatically set when Storage Engine is Local Storage. Log Cleanup Policy (Not applicable for Cloud Storage) Available only for Local Storage on Professional Edition instances. Delete (default): Retains messages based on the maximum retention period. When storage usage exceeds 85%, the earliest messages are deleted. Compact: Retains only the latest value for each key. Used with components like Kafka Connect and Confluent Schema Registry. For details, see log compaction in Apache Kafka and aliware-kafka-demos. Tag demoOptional resource tag.
Step 2: Send a test message
On the Topics page, click the name of the topic you created (for example,
demo).In the upper-right corner of the Topic Details page, click Send Message.
In the Start to Send and Consume Message panel, select a Sending Method: Console, Docker, or SDK. Follow the instructions for the method you selected.
Console
In the Message Key field, enter a key. Example:
demo.In the Message Content field, enter the message body. Example:
{"key": "test"}.For Send to Specified Partition:
Select Yes and enter a Partition ID (for example,
0) to send the message to a specific partition. To find partition IDs, see View partition status.Select No to let ApsaraMQ for Kafka assign the partition automatically.
Click OK to send the message.
Docker
Run the Docker commands in the Run the Docker container to produce a sample message section to send a test message.
Run the Docker commands in the How do I consume a message after the message is sent? section to consume the message.
SDK
Select an SDK for your programming language or framework, choose an access method, and follow the on-screen instructions to send and consume a test message.
Step 3: Check partition status
Check the partition status to verify that the message arrived.
On the Topics page, click the name of the topic you used (for example,
demo).On the Topic Details page, click the Partition Status tab.
Confirm that the partition you sent the message to shows an updated Maximum Offset and Last Updated At timestamp. An increase in Maximum Offset confirms the message was stored successfully.
Parameter Description Partition ID The partition ID. Minimum Offset The earliest offset in the partition. Maximum Offset The latest offset in the partition. If this value increased after you sent the message, the message was stored successfully. Messages The total number of messages in the partition. Last Updated At The time when the most recent message was stored. 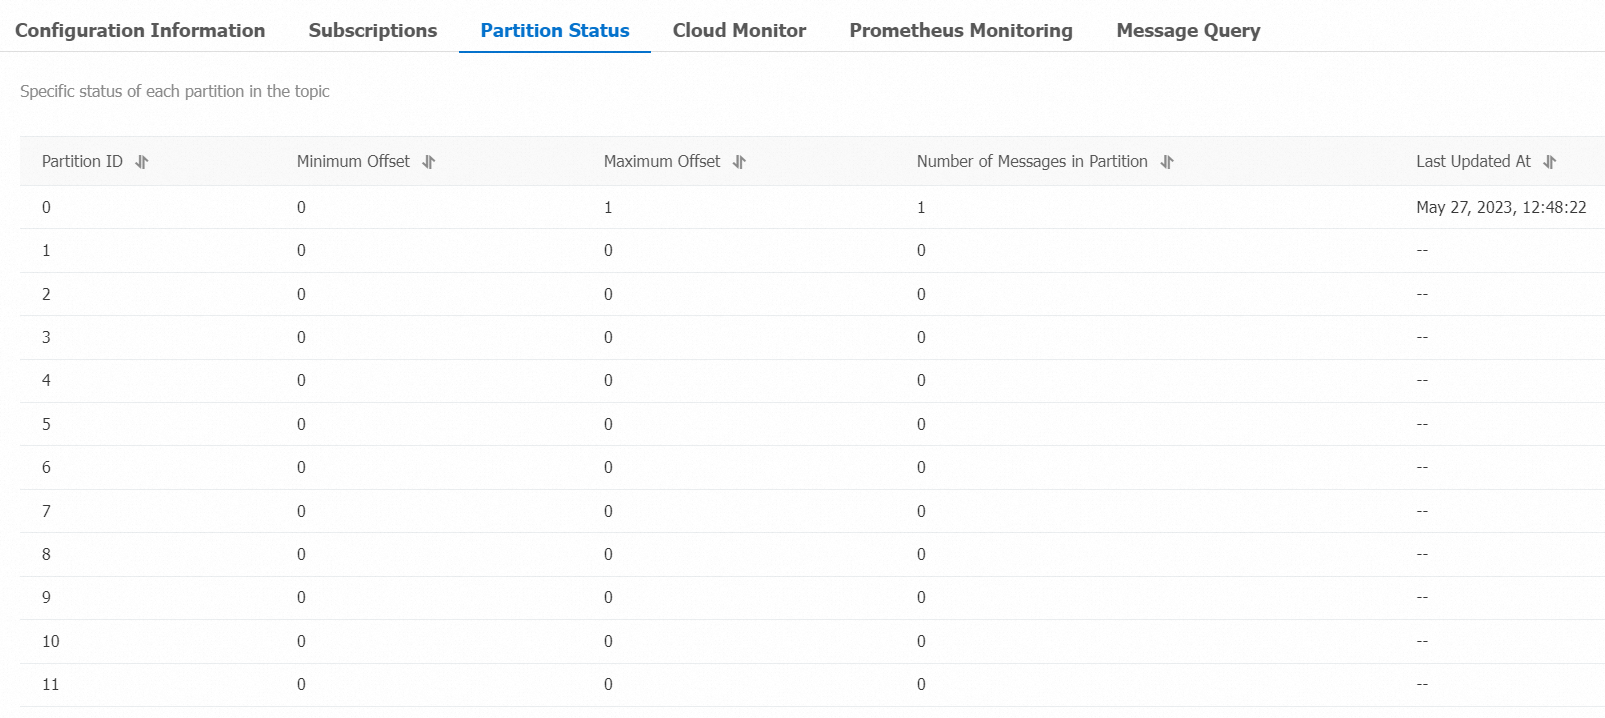
Step 4: Query the message by offset
Retrieve the test message to confirm it was stored correctly.
Log on to the ApsaraMQ for Kafka console.
In the Resource Distribution section of the Overview page, select the region where your instance resides.
On the Instances page, click the name of your instance.
In the left-side navigation pane, click Message Query.
From the Search Method drop-down list, select Search by offset.
Select the topic and partition from the Topic and Partition drop-down lists, enter an offset value in the Offset field, and click Search. Messages with offsets greater than or equal to the specified value are returned. For example, if you select Partition
5and enter Offset5, all messages with offsets equal to or greater than 5 from Partition 5 are displayed.Verify that the Key and Value columns match the message you sent. If the key is
demoand the value is{"key": "test"}, the broker stored and retrieved the message correctly.Parameter Description Partition The partition the message was retrieved from. Offset The message offset. Key The message key, displayed as a string. Value The message content, displayed as a string. Created At The timestamp when the message was sent. This is either the client-recorded timestamp or the value of the ProducerRecordtimestamp field. If you did not specify a value for the timestamp field, the local system time when the message was sent is displayed. If the timestamp field was set to0or an invalid value, the time is displayed in1970/x/x x:x:xformat. Clients on ApsaraMQ for Kafka version 0.9 or earlier cannot set the timestamp field.Actions Download Key: Download the message key. Download Value: Download the message content. ImportantThe console displays up to 1 KB of content per message. Longer messages are truncated. Download the message to view the full content.
Each download is limited to 10 MB. If the query results exceed 10 MB, only the first 10 MB can be downloaded.
Clean up test resources
After a successful test, delete the test topic to free storage and avoid unnecessary resource consumption. On the Topics page, locate the test topic and click Delete.