This topic describes how to create a whitelist group. After you add an IP address to a whitelist, the client with that IP address can access the tenant. You may create and edit whitelist groups.
Background
ApsaraDB for OceanBase supports whitelist groups. By default, ApsaraDB for OceanBase has one whitelist group that cannot be deleted. You can create up to 40 whitelists and up to 5 whitelist groups. The whitelist group names must be unique, and none of the groups can be empty.
Procedure
In the left-side navigation pane, click Instances and select the destination cluster instance to go to the Cluster Instance Workspace page.
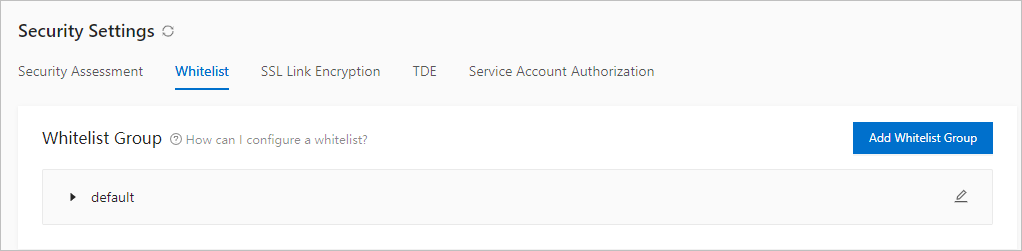
In the left-side navigation pane, click Security Settings.
On the Whitelist tab, click Add Whitelist Group.
NoteTo view the help information about how to add a whitelist group, click How can I configure a whitelist?.
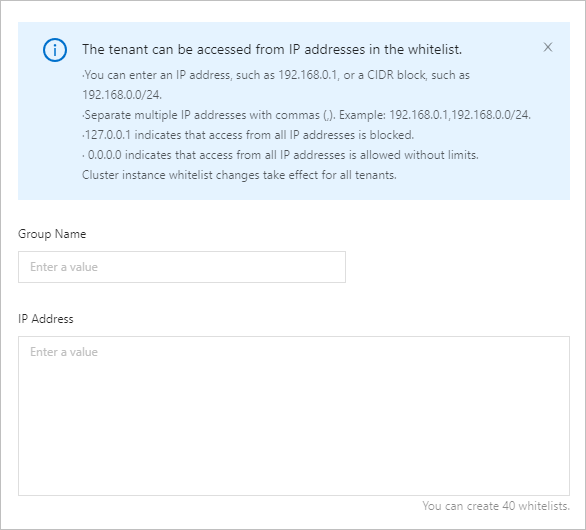
Specify Group Name and IP Address.
Parameter
Note
Group Name
The group name must be 2 to 32 characters in length, start with a lowercase letter, end with a lowercase letter or digit, and contain only lowercase letters, digits, and underscores (_).
IP Address
You can enter an IP address, for example, 192.168.0.1, or an IP address range, for example, 192.168.0.0/24.
Separate multiple IP addresses with commas (,), for example, 192.168.0.1,192.168.0.0/24.
127.0.0.1 indicates that no access is allowed from any IP address.
0.0.0.0 indicates that accesses from all IP addresses are allowed.
Changes to the whitelist of the cluster instance take effect for all tenants.
You can create up to 40 whitelists.
Click OK to complete the whitelist settings.
After a whitelist is added, click the edit icon next to the group to add or remove whitelists.