The cluster-level database and table recycle bin stores the databases and tables that are dropped from the tenants in the cluster. This topic describes operations on the recycle bin of a cluster instance. For example, you can enable, view, purge, and disable the recycle bin.
Background
Before you use the database and table recycle bin of a cluster instance, take note of the following considerations:
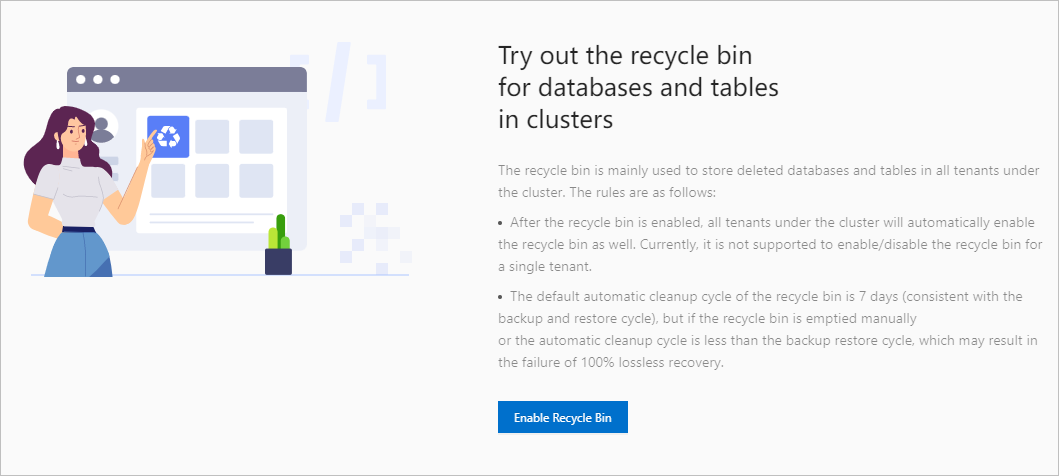
After the recycle bin feature is enabled for the cluster instance, the recycle bin is automatically enabled for all tenants in the cluster instance. At present, you cannot enable the recycle bin for a single tenant.
The recycle bin stores databases and tables dropped from all tenants in the cluster. You can restore your database and table data in the recycle bin. The occupied space is released after you delete the dropped databases and tables from the recycle bin.
If you enable or disable the recycle bin, the operation takes effect on only sessions that are created after the operation.
You cannot separately enable the recycle bin of a standby cluster instance. When you create a standby cluster instance, it inherits the status and parameters of the recycle bin of the primary cluster instance. The recycle bin of a standby instance is read-only.
DROP and RESTORE operations on the recycle bin of the primary cluster instance are automatically synchronized to standby cluster instances.
NoteOperations on the recycle bin of the primary cluster instance do not directly affect the objects in the recycle bin of a standby cluster instance. The data in the recycle bin of a standby cluster instance is updated when the standby cluster instance is synchronized with the primary cluster instance.
Enable the recycle bin
If a cluster instance is created before the recycle bin feature is enabled, you need to perform the following operations to manually enable the recycle bin feature:
Log on to the ApsaraDB for OceanBase console.
In the left-side navigation pane, click Instances.
In the instance list, click the name of the target cluster instance to go to the Cluster Instance Workspace page.
In the left-side navigation pane, click Recycle Bin.
Click Enable Recycle Bin to enable the recycle bin feature for the cluster instance.
View objects in the recycle bin
After the recycle bin feature is enabled for a cluster instance, you can view the databases and tables that are dropped from the tenants in this cluster.
Log on to the ApsaraDB for OceanBase console.
In the left-side navigation pane, click Instances.
In the instance list, click the name of the target cluster instance to go to the Cluster Instance Workspace page.
In the left-side navigation pane, click Recycle Bin.
You can view the information about databases dropped from the tenants in this cluster instance, such as the original database name, tenant name or ID, tenant mode, occupied disk space, recycling time, automatic purging time, status, and supported actions.
Click Delete in the Actions column to physically delete a database. Alternatively, select multiple databases and click Delete in the lower part of the page to physically delete the selected databases. After you confirm the deletion, the status of the selected databases changes to Deleting until the deletion task is completed.
Click Restore in the Actions column to restore a database. Alternatively, select multiple databases and click Restore in the lower part of the page to restore the selected databases. After you confirm the restoration, the status of the selected databases changes to Restoring until the restoration task is completed.
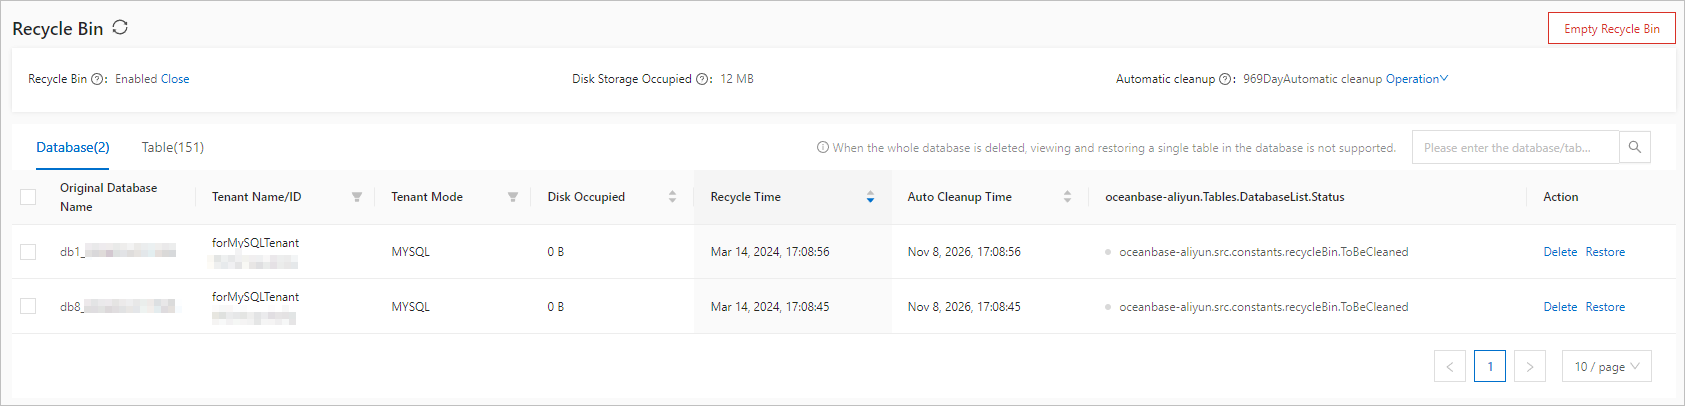
You can view the information about tables dropped from the tenants in this cluster instance, such as the original table name, original database name or schema name, tenant name or ID, tenant mode, occupied disk space, recycling time, automatic purging time, and status. Click Delete in the Actions column to physically delete a table in the recycle bin. Click Restore in the Actions column to restore a table from the recycle bin. You can select multiple tables in the recycle bin for batch dropping or restoration.

Click Delete in the Actions column to physically delete a table. Alternatively, select multiple tables and click Delete in the lower part of the page to physically delete the selected tables. After you confirm the deletion, the status of the selected tables changes to Deleting until the deletion task is completed.
Click Restore in the Actions column to restore a table. Alternatively, select multiple tables and click Restore in the lower part of the page to restore the selected tables. After you confirm the restoration, the status of the selected tables changes to Restoring until the restoration task is completed.
NoteIf a database is dropped as a whole, you cannot view or restore a single table of the database in the recycle bin.
If you physically drop or restore a database, the tables in the database are also physically dropped or restored. Physical dropping is irreversible. Proceed with caution in the production environment.
A restored database or table may have a duplicate name with other databases or tables. Therefore, you must rename a restored database or table when necessary.
When you perform a batch dropping or restoration, you can select at most 50 objects.
Purge the recycle bin
After dropped databases and tables are moved to the recycle bin, they still occupy storage space on the disk. You can configure to periodically purge the recycle bin and can also manually purge the recycle bin to release the occupied disk space.
Log on to the ApsaraDB for OceanBase console.
In the left-side navigation pane, click Instances.
In the instance list, click the name of the target cluster instance to go to the Cluster Instance Workspace page.
In the left-side navigation pane, click Recycle Bin.
On the recycle bin page, click the Actions drop-down list next to Auto Cleanup.
Select Modify to specify a custom automatic purging interval. After you save the modification, the system purges the recycle bin at the point in time when a daily major compaction starts and the specified point in time for automatic purging.
Select Disable to disable automatic purging. After being disabled, automatic purging can be enabled again.
On the recycle bin page, click Empty Recycle Bin in the upper-right corner to manually purge the recycle bin.
NoteBy default, the automatic purging interval of the recycle bin is 7 days, which is consistent with the backup and restore interval. The maximum automatic purging interval is 1,000 days. However, if the recycle bin is manually or automatically purged at an interval shorter than the backup and restore interval, objects in the recycle bin may be restored with data loss.
Disable the recycle bin
Log on to the ApsaraDB for OceanBase console.
In the left-side navigation pane, click Instances.
In the instance list, click the name of the target cluster instance to go to the Cluster Instance Workspace page. In the left-side navigation pane, click Recycle Bin.
On the recycle bin page, click Close next to the recycle bin. In the dialog box that appears, click OK.
NoteAfter the recycle bin feature is disabled for the cluster instance, the recycle bin is automatically disabled for all tenants in the cluster instance. At present, you cannot disable the recycle bin for a single tenant.
After you disable the recycle bin, existing objects in the recycle bin are not purged, and will be physically deleted upon next automatic purging. You can also select the objects in the list of the recycle bin and manually purge them.
The setting takes effect only for sessions established after the recycle bin is disabled. The objects dropped in existing sessions are still moved to the recycle bin.