This topic describes how to use the data transmission service to perform batch operations on data migration tasks.
Background
The data transmission service allows you to perform batch operations on data migration tasks on the Migration Tasks page. Supported batch operations on data migration tasks vary based on the task status.
Task status | Supported batch operation |
Not Configured | None |
Not Started | Batch start tasks and batch modify alert configuration. |
Running | Supported batch operations on running tasks vary with the scenarios.
|
Modifying | Batch modify alert configuration. |
Integrating | Batch modify alert configuration. |
Stopped | Batch resume tasks, batch end tasks, batch modify alert configuration, and batch skip full verification in the full verification phase. |
Failed | Batch resume tasks, batch end tasks, batch modify alert configuration, and batch skip full verification in the full verification phase. |
Completed | Batch end tasks. |
Ending | None |
Ended | None |
If you select multiple tasks for a batch operation while not all tasks support this batch operation, a dialog box appears and displays the tasks that support this batch operation.
Go to the Migration Tasks page
Log on to the
ApsaraDB for OceanBase console.In the left-side navigation pane, choose Data Transmission > Data Migration. The Migration Tasks page automatically appears.
You can select data migration tasks for a batch operation.
Batch stop tasks
The data transmission service allows you to batch stop data migration tasks in the Running state.
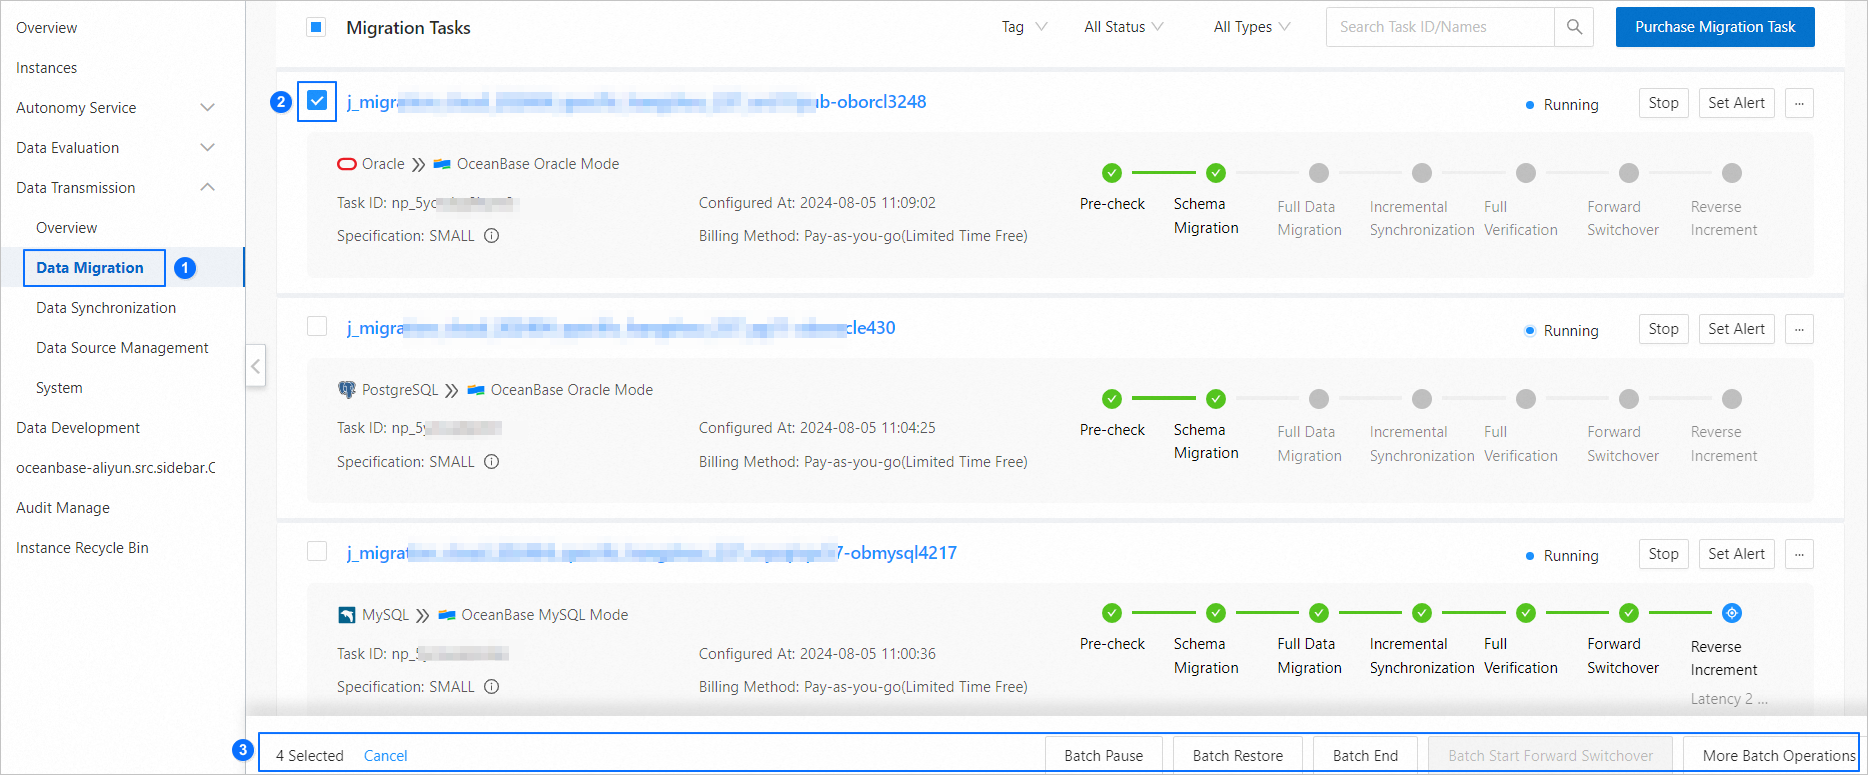
On the Migration Tasks page, select the data migration tasks to be stopped.
Click Batch Stop in the lower part of the page.
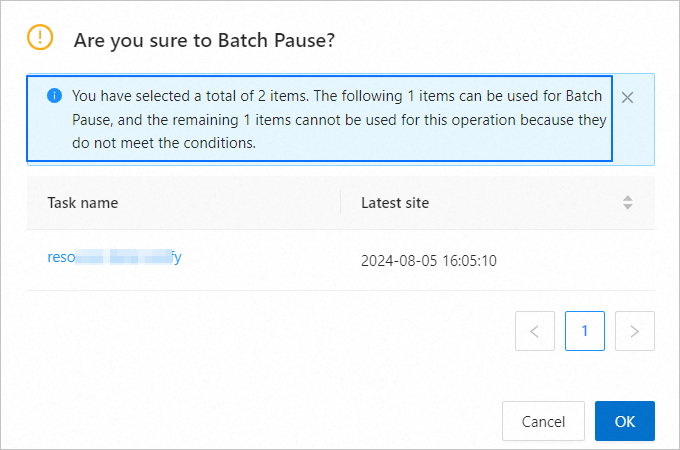
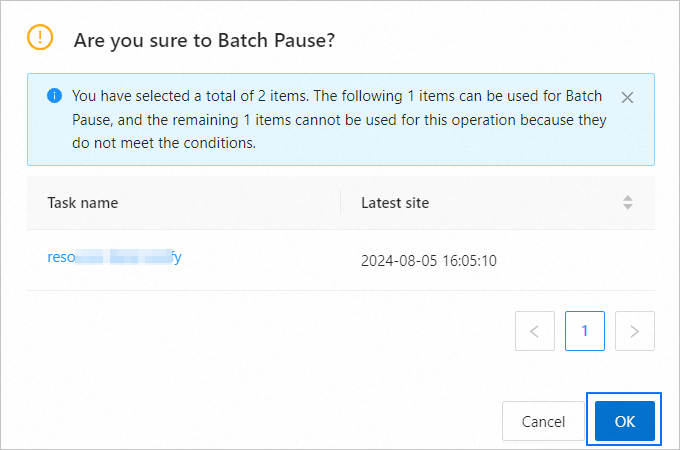
In the dialog box that appears, click OK.
This dialog box displays the number of tasks that support batch stop, the task names, and the latest timestamps.
After the operation succeeds, the number of tasks that are successfully stopped is displayed.
For any task that failed the batch operation, troubleshoot the issue as prompted.
Batch resume tasks
The data transmission service allows you to batch resume data migration tasks in the Stopped or Failed state.
On the Migration Tasks page, select the data migration tasks to be resumed.
Click Batch Resume in the lower part of the page.
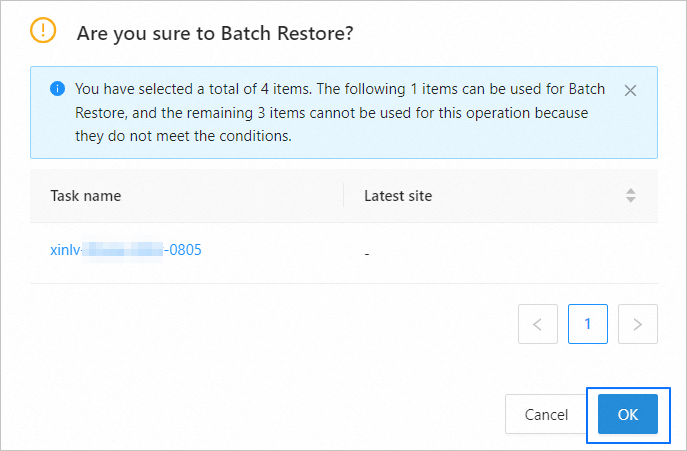
In the dialog box that appears, click OK.
This dialog box displays the number of tasks that support batch resume, the task names, and the latest timestamps.
After the operation succeeds, the number of tasks that are successfully resumed is displayed.
For any task that failed the batch operation, troubleshoot the issue as prompted.
Batch end tasks
The data transmission service allows you to batch end data migration tasks in the Stopped, Failed, or Completed state.
On the Migration Tasks page, select the data migration tasks to end.
Click Batch End in the lower part of the page.
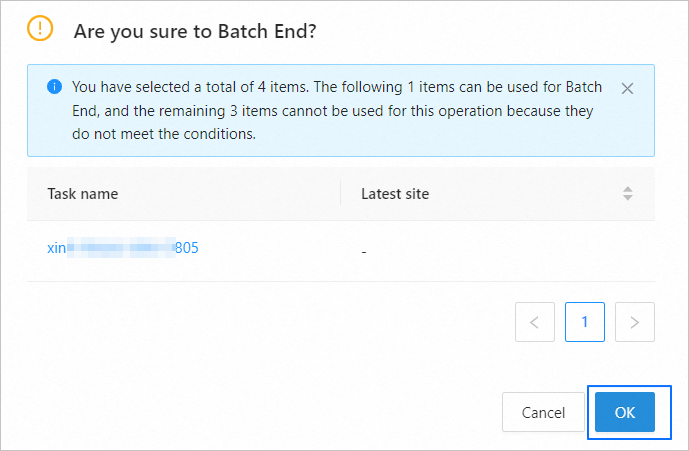
In the dialog box that appears, click OK.
This dialog box displays the number of tasks that support batch end, the task names, and the latest timestamps.
After the operation succeeds, the number of tasks that are successfully ended is displayed.
For any task that failed the batch operation, troubleshoot the issue as prompted.
Batch start forward switchover
The data transmission service allows you to batch start forward switchover on data migration tasks that are in the Running state and in the same step (except the switchover precheck step) of forward switchover.
Forward switchover consists of the following steps: start forward switchover, perform switchover precheck, start the target Store, confirm that writing has stopped in the source, confirm the writing stop timestamp upon synchronization completion, stop forward synchronization, process database objects, and start reverse increment.
The steps of forward switchover vary with the migration types specified when you created the task.
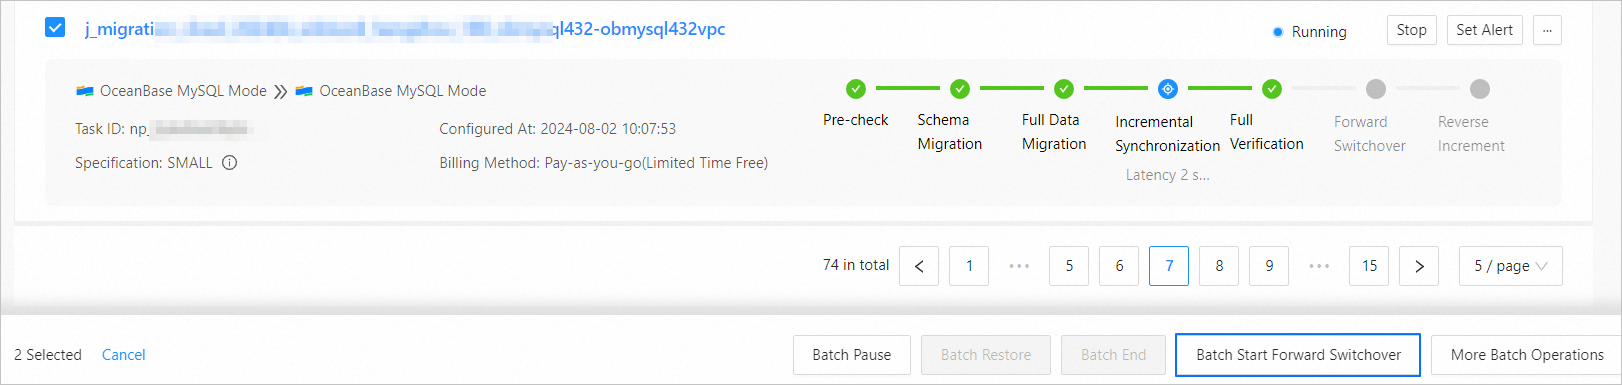
On the Migration Tasks page, select the data migration tasks for which you want to batch start forward switchover.
Click Batch Start Forward Switchover in the lower part of the page.
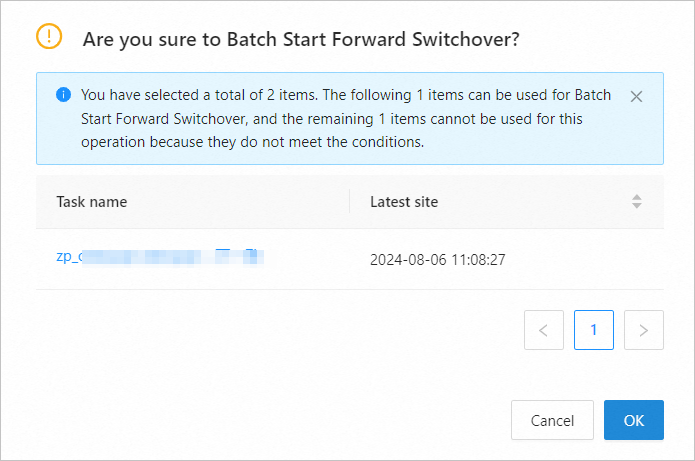
In the dialog box that appears, click OK.
This dialog box displays the number of tasks that support this batch operation, the task names, and the latest timestamps.
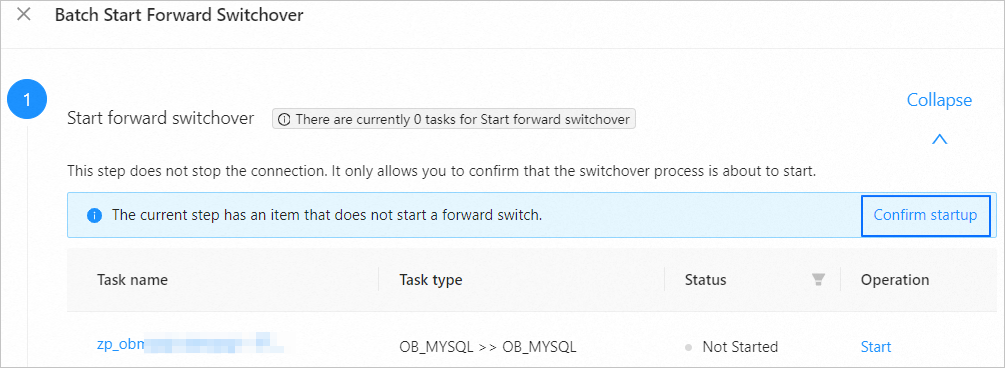
In the Batch Start Forward Switchover dialog box, perform operations as prompted.
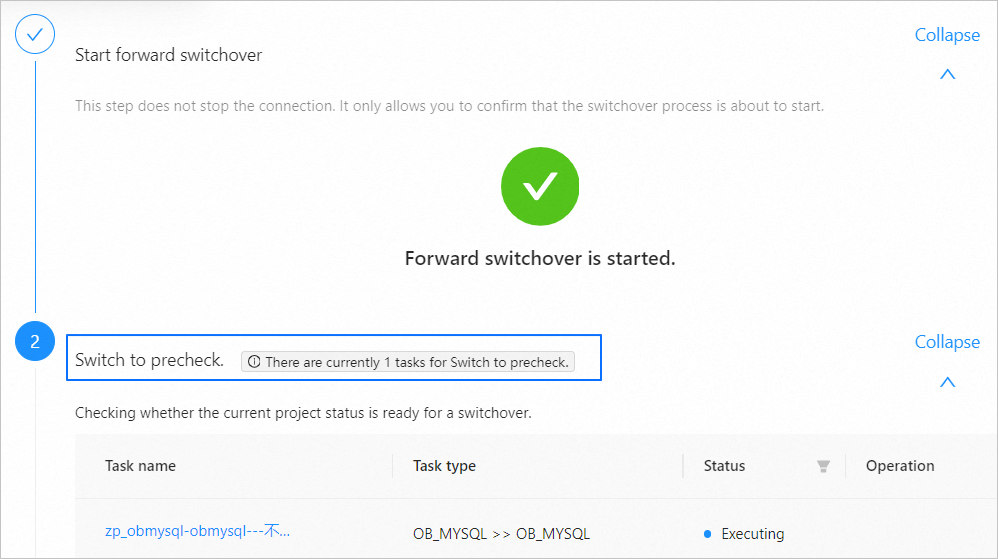
Start forward switchover.
You can click Confirm Start in the upper-right corner of the Start Forward Switchover section to batch start forward switchover for multiple tasks. You can also click Start next to a task to start forward switchover for a single task.
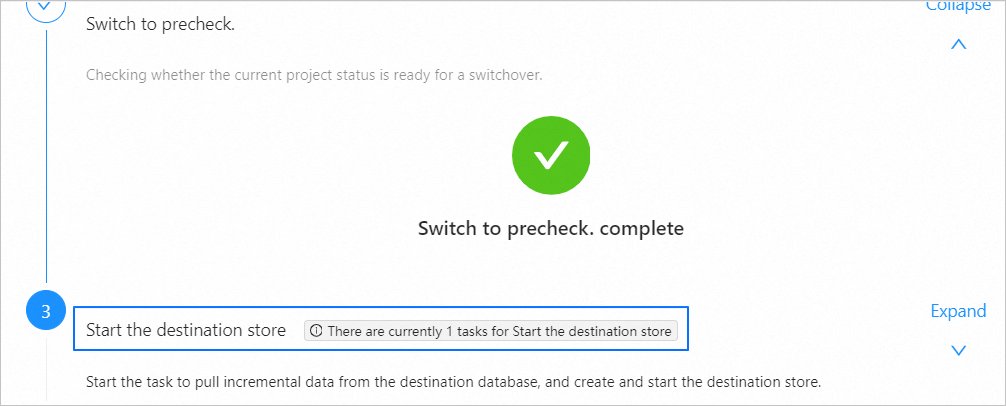
Perform switchover precheck.
The precheck in this step checks whether the task is ready for a switchover. If the task passes the precheck, the system automatically performs the next step. If the precheck fails, the system shows the error details.
In this case, you can retry or skip the precheck. After you click Skip, you need to click Skip again in the dialog box that appears.
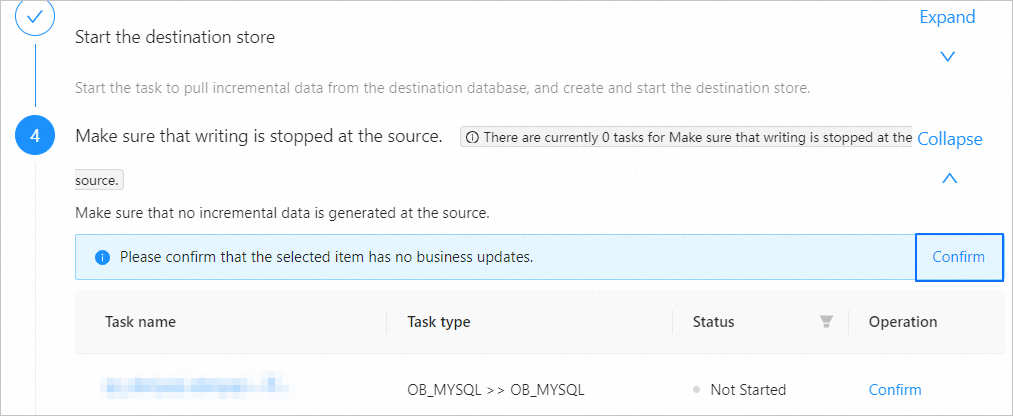
Start the destination Store.
Start incremental data pulling in the destination database. Create and start a destination Store task. If the start fails, you can choose to click Retry or Skip.
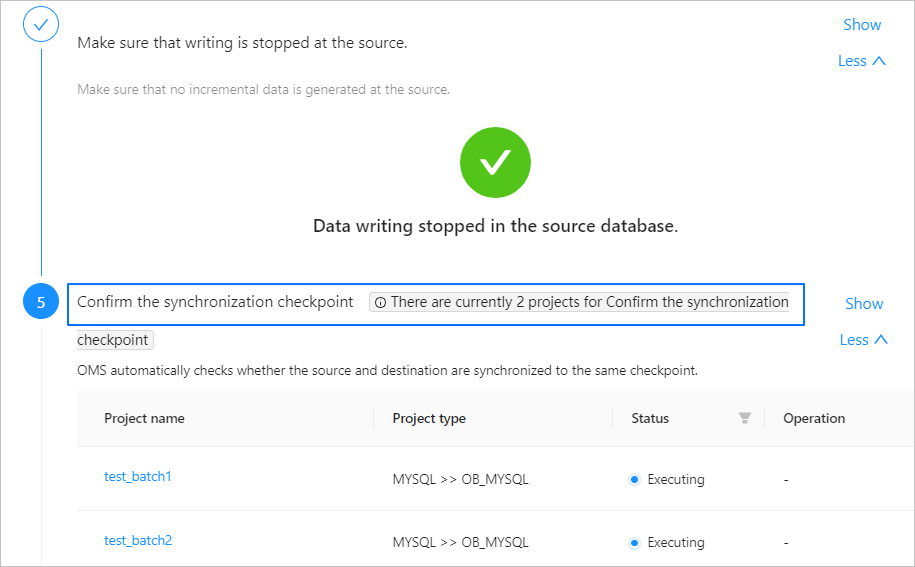
Confirm that writing has stopped in the source database.
You can click Confirm in the upper-right corner of the Confirm Writing Stopped at Source section to batch start this substep for multiple tasks. You can also click Confirm next to a task to start this substep for a single task.
Confirm the writing stop timestamp upon synchronization completion.
The data transmission service automatically checks whether the source and destination databases are synchronized to the same timestamp. After the check is completed, the latency and timestamp of the incremental synchronization are displayed. If the synchronization of incremental data failed, you can click Retry or Skip.
Stop forward synchronization.
You can stop the incremental synchronization from the source database to the destination database. If the forward synchronization fails to be stopped, you can choose to click Retry or Skip.

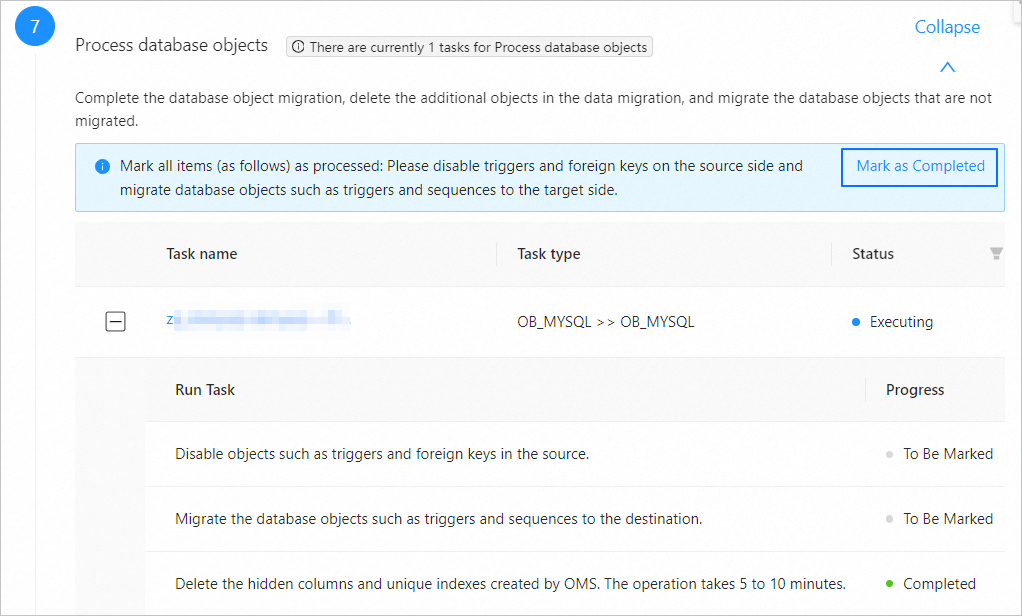
Process database objects.
You can click Mark as Completed in the upper-right corner of the Process Database Objects section to start batch processing multiple database objects. You can also click Mark as Completed next to a task to start this substep for a single task. After all projects have been marked as completed, proceed to the next step.
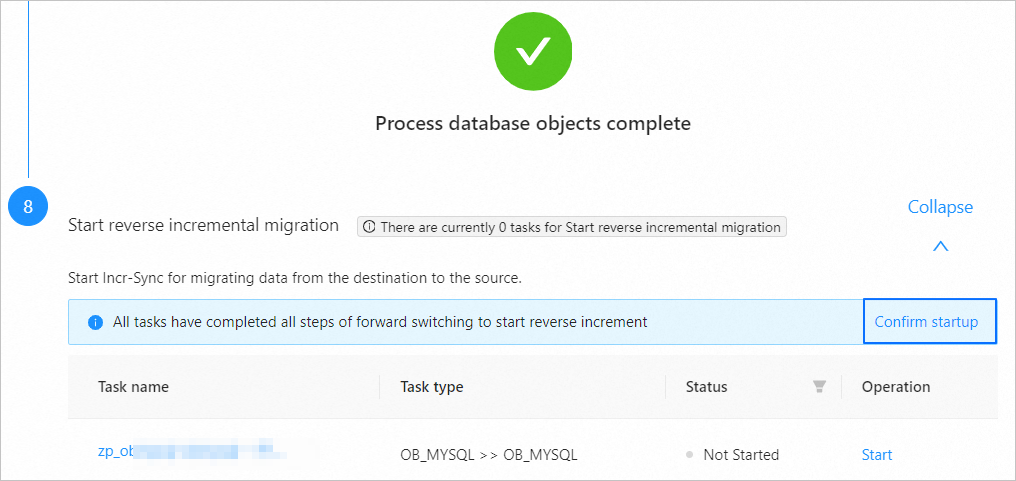
Start reverse increment.
You can click Confirm Start in the upper-right corner of the Start Reverse Increment section to batch start incremental writes from the destination to the source. You can also click Start next to a task to start this substep for a single task. Wait until the Reverse increment started message appears.
Batch start tasks
The data transmission service allows you to batch start data migration tasks in the Not Started state.
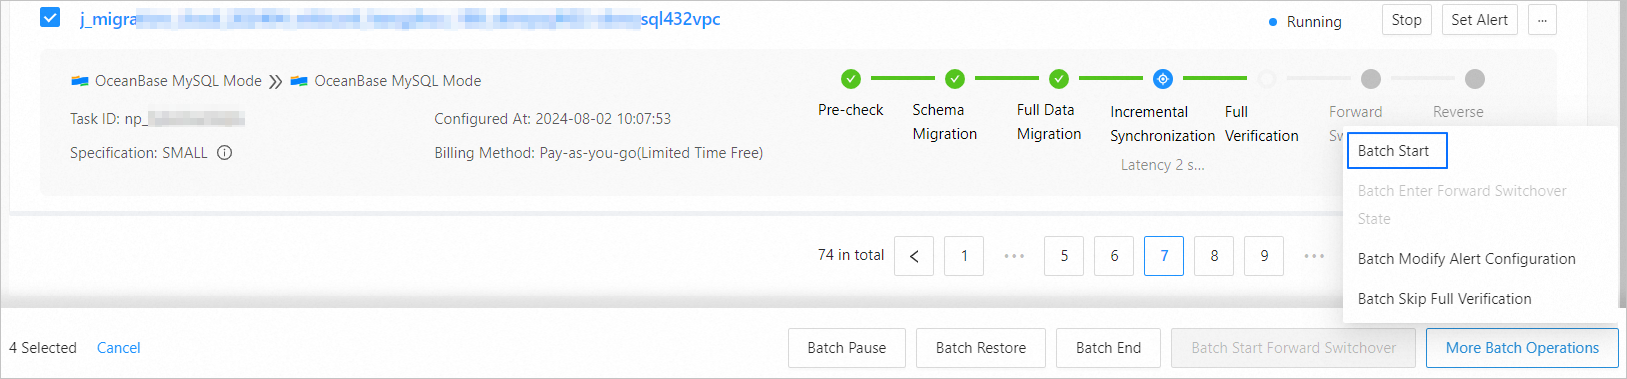
On the Migration Tasks page, select the data migration tasks to start.
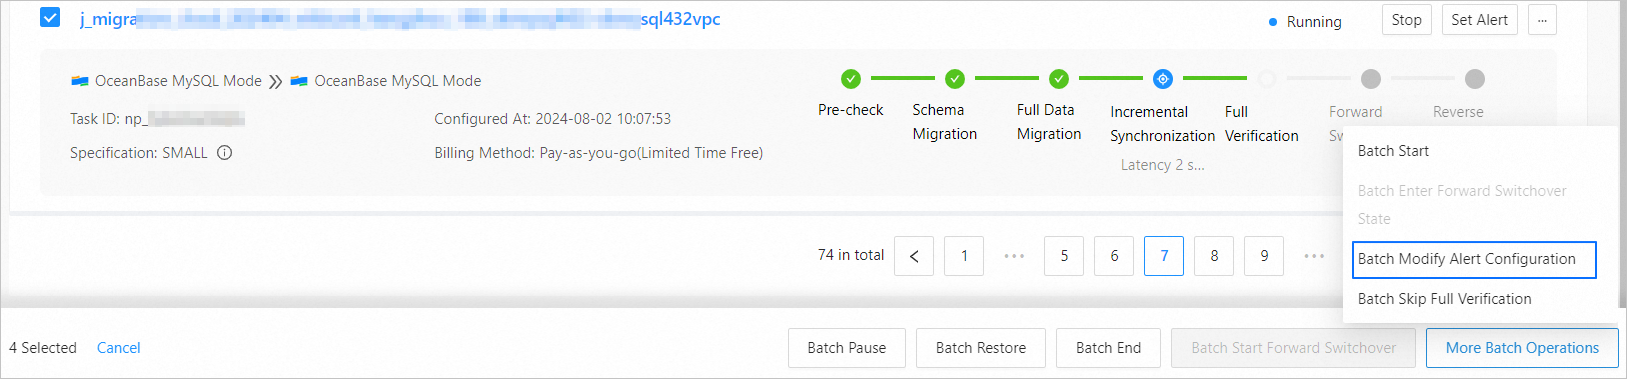
Choose More Batch Operations > Batch Start in the lower part of the page.
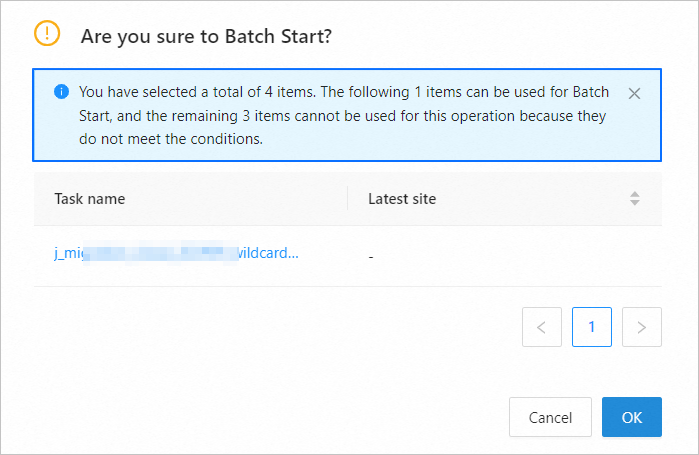
In the dialog box that appears, click OK.
This dialog box displays the number of tasks that support batch start, the task names, and the latest timestamps.
After the operation succeeds, the number of tasks that are successfully started is displayed.
For any task that failed the batch operation, troubleshoot the issue as prompted.
Batch enter the forward switchover phase
The data transmission service allows you to enable multiple data migration tasks that are in the Running state and that have completed full verification to enter the forward switchover phase.

On the Migration Tasks page, select the data migration tasks to enter the forward switchover phase.
Choose More Batch Operations > Batch Enter Forward Switchover in the lower part of the page.
In the dialog box that appears, click OK.
This dialog box displays the number of tasks that can enter the forward switchover phase, the task names, and the latest timestamps.
After the operation succeeds, the number of tasks that succeeded in the batch operation is displayed.
For any task that failed the batch operation, troubleshoot the issue as prompted.
Batch modify alert configuration
The data transmission service allows you to batch modify alert configuration of data migration tasks in the Not Started, Running, Modifying, Integrating, Stopped, or Failed state.
On the Migration Tasks page, select the data migration tasks whose alert configuration is to be modified.
Choose More Batch Operations > Batch Modify Alert Configuration in the lower part of the page.
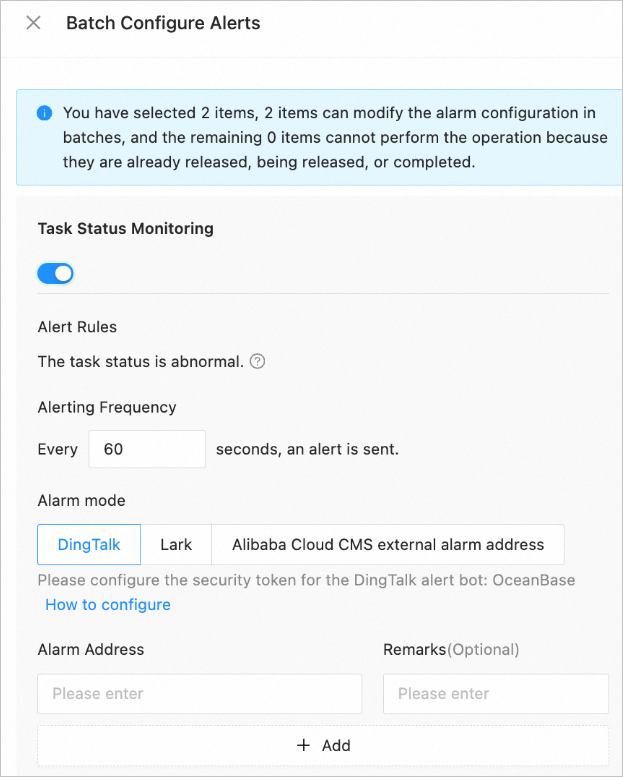
In the Batch Configure Alerts dialog box, set the related parameters
On the Migration Tasks page, you can check whether alert configuration is completed for a specific task. If alert configuration is not specified for a task, you can choose whether to enable Task Status Monitoring or Incremental Latency Monitoring based on your business needs. You can also modify the alert configuration of a task.
ImportantThe new configuration will overwrite the existing configuration of the selected tasks. Proceed with caution.
Category
Parameter
Description
Enable Task Status Monitoring
Alert Rules
An alert is triggered if an exception is detected in the task.
The rules apply to all exceptions that occur during the starting and running of the following processes: precheck, schema migration, full migration, incremental migration, and incremental synchronization.
Alerting Frequency
The interval for sending alerts, in seconds. Value range: 60 to 604800 (seven days).
Alert Method
The alert notification method. Valid values are DingTalk, Lark, and Alibaba Cloud CMS external alarm address.
Alert URL
The URL of the corresponding alert chatbot. For more information, see Configure an alert URL.
Remarks (Optional)
Additional information about the alert URL.
Enable Incremental Latency Monitoring
Incremental Latency
The alerting threshold of the incremental synchronization latency.
If the incremental synchronization latency of a data migration task exceeds the specified threshold, an alert is triggered.
Alerting Frequency
The interval for sending alerts, in seconds. Value range: 60 to 604800 (seven days).
Alert Method
The alert notification method. Valid values are DingTalk, Lark, and Alibaba Cloud CMS external alarm address.
Alert URL
The URL of the corresponding alert chatbot. For more information, see Configure an alert URL.
Remarks (Optional)
Additional information about the alert URL.
Click Submit.
You can also click Submit and Test to test whether an alert can be properly sent. Alerts are sent to the recipients by using the notification methods specified in the CloudMonitor console.
To view the alerts generated for a data migration or synchronization task, see View task alerts.
After the alert configuration is modified for the selected tasks, a prompt is displayed on the page. For any task that failed the batch operation, troubleshoot the issue as prompted.
Batch skip full verification
The data transmission service allows you to batch skip full verification for data migration tasks that are in the Running, Stopped, or Failed state in the full verification phase.

On the Migration Tasks page, select the data migration tasks to skip full verification.
Choose More Batch Operations > Batch Skip Full Verification in the lower part of the page.
In the dialog box that appears, click OK.
This dialog box displays the number of tasks for which full verification can be skipped, the task names, and the latest timestamps.
After the operation succeeds, the number of tasks that succeeded in the batch operation is displayed.
For any task that failed the batch operation, troubleshoot the issue as prompted.