This topic shows how to connect Realtime Compute for Apache Flink to AnalyticDB for PostgreSQL as both a dimension table source and a result table sink.
Limits
Realtime Compute for Apache Flink cannot read data from AnalyticDB for PostgreSQL in Serverless mode.
Only Ververica Runtime (VVR) 6.0.0 or later supports the AnalyticDB for PostgreSQL connector.
Only VVR 8.0.1 or later supports AnalyticDB for PostgreSQL V7.0.
If you use a custom connector, follow the instructions in Manage custom connectors.
Prerequisites
Before you begin, ensure that you have:
A fully managed Flink workspace. For more information, see Activate Realtime Compute for Apache Flink.
An AnalyticDB for PostgreSQL instance. For more information, see Create an instance.
The AnalyticDB for PostgreSQL instance and the fully managed Flink workspace in the same virtual private cloud (VPC).
Overview
This tutorial walks through four steps:
Configure an AnalyticDB for PostgreSQL instance — create the dimension table and result table.
Create a Flink draft — open the SQL Editor and set up a blank stream draft.
Write and deploy the draft — paste the SQL code, update the connection parameters, and start the deployment.
Query the results — verify that Flink wrote data to the result table.
Step 1: Configure an AnalyticDB for PostgreSQL instance
Log on to the AnalyticDB for PostgreSQL console.
Add the CIDR block of the fully managed Flink workspace to an IP address whitelist of the AnalyticDB for PostgreSQL instance. For more information, see Configure an IP address whitelist.
Click Log On to Database. For more information, see Client connection.
Create a dimension table named
adbpg_dim_tableand insert 50 rows of test data:-- Create a dimension table. CREATE TABLE adbpg_dim_table( id int, username text, PRIMARY KEY(id) ); -- Insert 50 rows. The id field ranges from 1 to 50, -- and the username field is the string "username" followed by the row number. INSERT INTO adbpg_dim_table(id, username) SELECT i, 'username'||i::text FROM generate_series(1, 50) AS t(i);Create a result table named
adbpg_sink_tableto store the data that Flink writes:CREATE TABLE adbpg_sink_table( id int, username text, score int );
Step 2: Create a Flink draft
Log on to the Realtime Compute for Apache Flink console. On the Fully Managed Flink tab, find the workspace and click Console in the Actions column.
In the left-side navigation pane, click SQL Editor. In the upper-left corner, click New.
In the New Draft dialog box, on the SQL Scripts tab, click Blank Stream Draft, then click Next.
Configure the following parameters and click Create.
Parameter Description Example Name The draft name. Must be unique in the current project. adbpg-testLocation The folder where the draft is saved. Click the icon next to an existing folder to create a subfolder. DraftEngine Version The Flink engine version. For version details, see Engine version. vvr-6.0.7-flink-1.15
Step 3: Write and deploy the draft
Copy the following SQL into the code editor. The code creates three tables — a Datagen source, an AnalyticDB for PostgreSQL dimension table, and an AnalyticDB for PostgreSQL result table — then joins the source with the dimension table and writes the result to AnalyticDB for PostgreSQL.
-- Source table: generates 50 rows with sequential IDs (1-50) and random scores (70-100).
CREATE TEMPORARY TABLE datagen_source (
  id INT,
  score INT
) WITH (
  'connector' = 'datagen',
  'fields.id.kind' = 'sequence',
  'fields.id.start' = '1',
  'fields.id.end' = '50',
  'fields.score.kind' = 'random',
  'fields.score.min' = '70',
  'fields.score.max' = '100'
);

-- Dimension table: reads from adbpg_dim_table using a lookup join.
CREATE TEMPORARY TABLE dim_adbpg(
  id int,
  username varchar,
  PRIMARY KEY(id) NOT ENFORCED
) WITH (
  'connector' = 'adbpg',
  'url' = 'jdbc:postgresql://<internal-endpoint>:<port>/<database>',
  'tablename' = 'adbpg_dim_table',
  'username' = '<db-username>',
  'password' = '<db-password>',
  'maxJoinRows' = '100',
  'maxRetryTimes' = '1',
  'cache' = 'lru',
  'cacheSize' = '1000'
);

-- Result table: writes joined data to adbpg_sink_table.
CREATE TEMPORARY TABLE sink_adbpg (
  id int,
  username varchar,
  score int
) WITH (
  'connector' = 'adbpg',
  'url' = 'jdbc:postgresql://<internal-endpoint>:<port>/<database>',
  'tablename' = 'adbpg_sink_table',
  'username' = '<db-username>',
  'password' = '<db-password>',
  'maxRetryTimes' = '2',
  'batchsize' = '5000',
  'conflictMode' = 'ignore',
  'writeMode' = 'insert',
  'retryWaitTime' = '200'
);

-- Join the source with the dimension table and insert results into the result table.
INSERT INTO sink_adbpg
SELECT ts.id, ts.username, ds.score
FROM datagen_source AS ds
JOIN dim_adbpg FOR SYSTEM_TIME AS OF PROCTIME() AS ts
ON ds.id = ts.id;
Replace the placeholders in the
dim_adbpgandsink_adbpgWITHclauses with your actual values.NoteFor the full list of connector parameters and data type mappings, see AnalyticDB for PostgreSQL connector.
Parameter Required Description urlYes The JDBC URL for the AnalyticDB for PostgreSQL instance. Format: jdbc:postgresql://<internal-endpoint>:<port>/<database>. Example:jdbc:postgresql://gp-xxxxxx.gpdb.cn-chengdu.rds.aliyuncs.com:3432/postgrestablenameYes The table name in the AnalyticDB for PostgreSQL database. usernameYes The database account name. passwordYes The database account password. In the upper-right corner of the SQL Editor page, click Validate to check for syntax errors.
Click Deploy.
On the Deployments page, find the deployment and click Start in the Actions column.
Step 4: Query the result table
Log on to the AnalyticDB for PostgreSQL console.
Click Log On to Database. For more information, see Client connection.
Run the following query to verify that Flink wrote data to the result table:
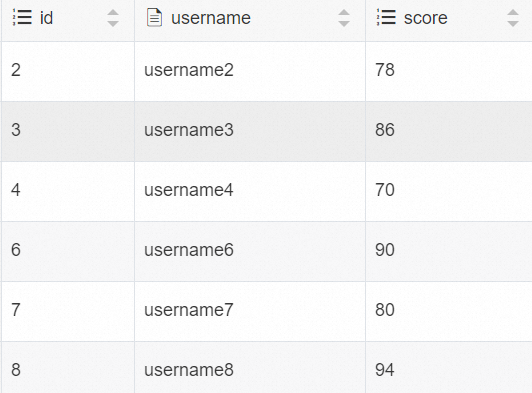
SELECT * FROM adbpg_sink_table;The result should contain 50 rows, each with an
id(1-50), ausername, and ascorebetween 70 and 100.