Data Warehouse Edition is no longer available for purchase. New clusters can be purchased as Enterprise Edition or Basic Edition. If you already have a Data Warehouse Edition cluster, follow this guide to set it up and start querying data.
AnalyticDB for MySQL is an online analytical processing (OLAP) service that processes petabytes of data in real time. This guide walks you through the five steps to go from a newly created cluster to running your first query.
By the end of this guide, you will have:
-
Created a database account and set a password
-
Configured an IP address whitelist to allow client connections
-
Connected to the cluster using Data Management (DMS) or a client of your choice
-
Created a database
-
Loaded data from Object Storage Service (OSS) and run a query

Prerequisites
Before you begin, make sure you have:
-
An AnalyticDB for MySQL Data Warehouse Edition cluster. Note the cluster ID and the region it is in.
-
An OSS bucket in the same region as the cluster, with a directory and a data file uploaded. To set up OSS:
For the import example in Step 5, this guide uses a file named oss_import_test_data.txt uploaded to <bucket-name>.oss-cn-hangzhou.aliyuncs.com/adb/. The file uses a line feed as the row delimiter and a semicolon (;) as the column delimiter:
uid;other
12;hello_world_1
27;hello_world_2
28;hello_world_3
33;hello_world_4
37;hello_world_5
40;hello_world_6
...
Step 1: Create a database account
AnalyticDB for MySQL supports two account types: privileged accounts and standard accounts. For a comparison of the two types, see the "Account types" section of Create a database account.
Create a privileged account
-
Log on to the AnalyticDB for MySQL console. In the upper-left corner, select a region. In the left-side navigation pane, click Clusters. Find the cluster and click the cluster ID.
-
In the left-side navigation pane, click Accounts.
-
On the Accounts tab, click Create Privileged Account.
-
In the Create Account panel, configure the following parameters.
Parameter Description Database Account The name of the privileged account. Must meet the on-screen requirements. Account Type Automatically set to Privileged Account for Data Warehouse Edition clusters. New Password The account password. Must meet the on-screen requirements. Confirm Password Re-enter the password. Description (Optional) A note to identify the account. -
Click OK.
Create a standard account
Standard accounts created via SQL statements are not shown in the console. Use the following SQL commands to manage them:
-
Create an account: CREATE USER
-
Grant permissions: GRANT
-
Revoke permissions: REVOKE
-
Rename an account: RENAME USER
-
Delete an account: DROP USER
Step 2: Configure an IP address whitelist
The default whitelist contains only 127.0.0.1, which blocks all external connections. Add your client's IP address or CIDR block to allow access.
The IP address 0.0.0.0 is not permitted in a whitelist.
Before you configure the whitelist:
-
To allow all IPs in a subnet, use CIDR notation — for example,
10.10.10.0/24. -
To add multiple entries, separate them with commas and no spaces — for example,
192.168.0.1,172.16.213.9. -
Changes take effect within 1 minute and do not interrupt the running cluster.
-
If your public IP changes frequently and you need to allow all public IPs, contact technical support.
Configure the whitelist
-
In the AnalyticDB for MySQL console, navigate to the cluster detail page.
-
In the left-side navigation pane, click Data Security.
-
On the Whitelist Settings tab, click Modify to the right of the default whitelist.
To create a separate whitelist instead of editing the default one, click Create Whitelist.
-
In the Edit Whitelist panel, remove
127.0.0.1, enter the IP addresses or CIDR blocks to allow, and click OK.To find the egress IP address of your client machine, see Connections.
Step 3: Connect to the cluster
Connect using any of the following methods.
Use DMS
-
In the AnalyticDB for MySQL console, navigate to the cluster detail page.
-
In the upper-right corner of the Cluster Information page, click Log On to Database.
-
In the dialog box, fill in the connection details.
- The first time you connect via DMS, the cluster is managed in Flexible ManagementEdit an instance mode. To change the control mode, see Modify database instances. For available control modes, see Control modes. - Click Test Connection in the lower-left corner to verify the connection before logging in. - DMS automatically adds its server IPs to the cluster's whitelist. If this fails, add them manually — see Add DMS IP addresses and CIDR blocks to security settings.
Parameter Description Database Type Defaults to AnalyticDB MySQL 3.0. Instance Region Defaults to the cluster's region. Instance ID Defaults to the current cluster ID. Database Account The name of the database account. Database Password The password for the account. Select Remember Password to skip entering credentials next time. -
Click Login.
Use a client or tool
MySQL clients:
Business intelligence (BI) tools:
Application code:
Step 4: Create a database
Each cluster supports up to 2,048 databases.
-
In DMS, select the INFORMATION_SCHEMA system database and open the SQL Console tab.

-
Run the following statement to create a database:
-
Be up to 64 characters long
-
Contain only letters, digits, and underscores (
_) -
Start with a lowercase letter
-
Not contain consecutive underscores
Do not use
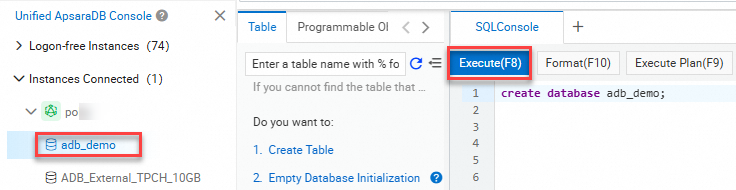
analyticdbas the database name. It is reserved for built-in databases.CREATE DATABASE [IF NOT EXISTS] db_name;The
db_namevalue must: Examples:CREATE DATABASE adb_demo; CREATE DATABASE IF NOT EXISTS adb_demo2; -
-
In the upper-left corner of the SQL Console tab, click Execute. The database is created.
Step 5: Import and query data
This step shows how to load data from OSS into AnalyticDB for MySQL using an external table, then copy it to an internal table for efficient querying.
Import data from OSS
-
In the SQL Console, select the
adb_demodatabase and create an OSS external table:CREATE TABLE oss_import_test_external_table ( uid STRING, other STRING ) ENGINE='OSS' TABLE_PROPERTIES='{ "endpoint": "oss-cn-hangzhou-internal.aliyuncs.com", "url": "oss://<bucket-name>/adb/oss_import_test_data.txt", "accessid": "<your-access-key-id>", "accesskey": "<your-access-key-secret>", "format": "csv", "delimiter": ";" }';For the full syntax and all supported parameters, see OSS external table reference.
-
Run a test query to verify the external table reads correctly:
For CSV and TEXT format files with large amounts of data, import the data into an internal table before querying. Direct queries against large external tables may have lower performance. For Parquet format files, direct queries are also supported.
SELECT uid, other
FROM oss_import_test_external_table
WHERE uid < 100
LIMIT 10;
The query returns rows from the OSS file. If no rows are returned, check that the endpoint, URL, and credentials are correct.
-
Create an internal destination table:
CREATE TABLE IF NOT EXISTS adb_oss_import_test ( uid STRING, other STRING ) DISTRIBUTED BY HASH(uid); -
Import the OSS data into the internal table. Choose one of the following methods based on your data volume: Method 1 — Synchronous import (small datasets): Use
INSERT INTOwhen duplicate primary keys should be ignored (equivalent toINSERT IGNORE INTO):ImportantBoth
INSERT INTOandINSERT OVERWRITE SELECTrun synchronously. For large datasets (hundreds of gigabytes), a network disconnection during a long-running import will cause the job to fail. Use Method 2 instead.INSERT INTO adb_oss_import_test SELECT * FROM oss_import_test_external_table;Use
INSERT OVERWRITEwhen duplicate primary keys should overwrite existing rows:INSERT OVERWRITE adb_oss_import_test SELECT * FROM oss_import_test_external_table;Method 2 — Asynchronous import (large datasets, recommended): Submit the import as a background job using
SUBMIT JOB. You can add a hint (/*+ direct_batch_load=true*/) to accelerate the load:SUBMIT JOB INSERT OVERWRITE adb_oss_import_test SELECT * FROM oss_import_test_external_table;The command returns a job ID immediately:
+---------------------------------------+
| job_id                                |
+---------------------------------------+
| 2020112122202917203100908203303****** |
+---------------------------------------+
To monitor the job status, see Asynchronously submit an import job.
-
After the import completes, query the internal table to verify the data:
SELECT * FROM adb_oss_import_test;
OSS external table reference
Non-partitioned tables
CREATE TABLE [IF NOT EXISTS] table_name
(column_name column_type[, ...])
ENGINE='OSS'
TABLE_PROPERTIES='{
    "endpoint":                   "endpoint",
    "url":                        "oss://bucket-name/path/",
    "accessid":                   "your-access-key-id",
    "accesskey":                  "your-access-key-secret",
    "format":                     "text|orc|parquet",
    "delimiter":                  ";",
    "skip_header_line_count":     1,
    "charset":                    "utf-8"
}';
Parameter reference:
| Parameter | Required | Description |
|---|---|---|
ENGINE='OSS' |
Yes | Set to OSS for all OSS external tables. |
endpoint |
Yes | The virtual private cloud (VPC) endpoint of the OSS bucket. AnalyticDB for MySQL accesses OSS over VPC. Find the endpoint on the Overview page of the bucket in the OSS console. |
url |
Yes | The path to the OSS object or directory. Three formats are supported: the absolute path of an object (oss://bucket/path/file.csv), a directory path ending with / (oss://bucket/path/), or a wildcard pattern ending with * (oss://bucket/path/prefix*). Setting url to a directory includes all objects in that directory. |
accessid |
Yes | The AccessKey ID of the Alibaba Cloud account or Resource Access Management (RAM) user that has OSS permissions. See Accounts and permissions. |
accesskey |
Yes | The AccessKey secret for the account or RAM user above. |
format |
For Parquet and ORC | Set to parquet for Parquet files or orc for ORC files. If omitted, CSV is assumed. |
delimiter |
For CSV | The column delimiter character. |
null_value |
No | The string that represents NULL in CSV files. Defaults to an empty string. Requires cluster version V3.1.4.2 or later. |
ossnull |
No | The NULL detection rule for CSV files. 1 (default): empty strings only. 2: quoted empty strings only. 3: both. 4: neither. |
skip_header_line_count |
No | The number of header rows to skip. Defaults to 0. Set to 1 to skip the first row. |
oss_ignore_quote_and_escape |
No | Whether to ignore quotation marks and escape characters. Defaults to false. Requires cluster version V3.1.4.2 or later. |
charset |
No | The character set of the file. utf-8 (default) or gbk. Requires cluster version V3.1.10.4 or later. |
When creating an external table for Parquet or ORC files:
Column names in the CREATE TABLE statement must match those in the file (case-insensitive).
Column order in the statement must match column order in the file.
Columns in the file that are not listed in the statement are excluded from the table.
Columns listed in the statement that do not exist in the file return NULL.
Partitioned tables
For OSS data organized into Hive-style directory partitions, specify partition_column to enable partition pruning during queries.
Example directory structure:
parquet_partition_classic/
├── p1=2020-01-01
│   ├── p2=4
│   │   ├── p3=SHANGHAI
│   │   │   ├── 000000_0
│   │   │   └── 000000_1
│   │   └── p3=SHENZHEN
│   │       └── 000000_0
│   └── p2=6
│       └── p3=SHENZHEN
│           └── 000000_0
├── p1=2020-01-02
│   └── p2=8
│       ├── p3=SHANGHAI
│       │   └── 000000_0
│       └── p3=SHENZHEN
│           └── 000000_0
└── p1=2020-01-03
    └── p2=6
        ├── p2=HANGZHOU
        └── p3=SHENZHEN
            └── 000000_0
Create statement:
CREATE TABLE [IF NOT EXISTS] table_name
(column_name column_type[, ...])
ENGINE='OSS'
TABLE_PROPERTIES='{
    "endpoint":         "endpoint",
    "url":              "oss://bucket-name/parquet_partition_classic/",
    "accessid":         "your-access-key-id",
    "accesskey":        "your-access-key-secret",
    "format":           "parquet",
    "partition_column": "p1, p2, p3"
}';
Partition key rules:
-
List partition key columns (
partition_column) in the same order as the directory hierarchy. -
Place partition key columns at the end of the column definition.
-
Partition key columns support:
BOOLEAN,TINYINT,SMALLINT,INT,INTEGER,BIGINT,FLOAT,DOUBLE,DECIMAL,VARCHAR,STRING,DATE,TIMESTAMP. -
Partition key columns can be queried and displayed like any other column.
Data type mappings between Parquet, ORC, and AnalyticDB for MySQL
Data type mappings between Parquet and AnalyticDB for MySQL
Parquet to AnalyticDB for MySQL:
| Parquet basic type | Parquet logical type | AnalyticDB for MySQL type |
|---|---|---|
| BOOLEAN | — | BOOLEAN |
| INT32 | INT_8 | TINYINT |
| INT32 | INT_16 | SMALLINT |
| INT32 | — | INT or INTEGER |
| INT64 | — | BIGINT |
| FLOAT | — | FLOAT |
| DOUBLE | — | DOUBLE |
| FIXED_LEN_BYTE_ARRAY / BINARY / INT64 / INT32 | DECIMAL | DECIMAL |
| BINARY | UTF-8 | VARCHAR / STRING / JSON |
| INT32 | DATE | DATE |
| INT64 | TIMESTAMP_MILLIS | TIMESTAMP or DATETIME |
| INT96 | — | TIMESTAMP or DATETIME |
Parquet external tables with columns of the STRUCT type cannot be created.
Data type mappings between ORC and AnalyticDB for MySQL
ORC to AnalyticDB for MySQL:
| ORC type | AnalyticDB for MySQL type |
|---|---|
| BOOLEAN | BOOLEAN |
| BYTE | TINYINT |
| SHORT | SMALLINT |
| INT | INT or INTEGER |
| LONG | BIGINT |
| DECIMAL | DECIMAL |
| FLOAT | FLOAT |
| DOUBLE | DOUBLE |
| BINARY / STRING / VARCHAR | VARCHAR / STRING / JSON |
| TIMESTAMP | TIMESTAMP or DATETIME |
| DATE | DATE |
ORC external tables with the LIST, STRUCT, or UNION type cannot be created. ORC external tables with the MAP type can be created but cannot be queried.
Reading Hive TEXT files
To read Hive TEXT files using a CSV external table, escape the default Hive delimiters:
-
Hive default column delimiter
\1— escape as\\1indelimiter -
Hive default NULL value
\N— escape as\\\\Ninnull_value -
Hive types
BINARY,CHAR(N), andVARCHAR(N)all map toVARCHARin AnalyticDB for MySQL
Example:
CREATE TABLE adb_csv_hive_format_oss (
    a TINYINT,
    b SMALLINT,
    c INT,
    d BIGINT,
    e BOOLEAN,
    f FLOAT,
    g DOUBLE,
    h VARCHAR,
    i VARCHAR,  -- BINARY in Hive
    j TIMESTAMP,
    k DECIMAL(10, 4),
    l VARCHAR,  -- CHAR(10) in Hive
    m VARCHAR,  -- VARCHAR(100) in Hive
    n DATE
)
ENGINE='OSS'
TABLE_PROPERTIES='{
    "format":                       "csv",
    "endpoint":                     "oss-cn-hangzhou-internal.aliyuncs.com",
    "accessid":                     "LTAI****************",
    "accesskey":                    "<your-access-key-secret>",
    "url":                          "oss://testBucketname/adb_data/",
    "delimiter":                    "\\1",
    "null_value":                   "\\\\N",
    "oss_ignore_quote_and_escape":  "true",
    "ossnull":                      2
}';
What's next
-
For other data ingestion options (Kafka, MySQL, and more), see Supported data sources.
-
To learn about AnalyticDB for MySQL concepts and use cases, see Product introduction.
-
To review billing details for Data Warehouse Edition, see Pricing.