By default, NetworkManager automatically manages /etc/resolv.conf in Alibaba Cloud Linux 3, overwriting the file whenever network parameters change. To set custom DNS configuration — such as specific nameservers or search domains — you must stop NetworkManager from overwriting the file. This topic explains how NetworkManager and systemd-resolved each handle the file, and walks you through enabling manual management.
How network management services manage /etc/resolv.conf
In Alibaba Cloud Linux 3, /etc/resolv.conf is a regular file (not a symbolic link). The two network management services handle it as follows:
NetworkManager creates the file the first time the system starts, after the primary network interface comes up and obtains an IP address. It updates the file whenever network interface controller (NIC) parameters change — device status, IP address, routes, DNS name, or hostname.
systemd-resolved reads the file but never writes to it.
How the file is managed in other Linux distributions
In other Linux distributions, /etc/resolv.conf may be a regular file or a symbolic link, and management policies vary accordingly:
| Service | Condition | Behavior |
|---|---|---|
| NetworkManager | Symbolic link points to /run/NetworkManager/resolv.conf | Manages the file through the symbolic link |
| NetworkManager | Regular file or file does not exist | Creates and automatically manages the file |
| systemd-resolved | Symbolic link points to /run/systemd/resolve/resolv.conf | Manages the file through the symbolic link |
| systemd-resolved | Any other target | Reads the file but does not update it |
Disable automatic management
To set custom DNS parameters in /etc/resolv.conf, stop NetworkManager from overwriting it by creating a drop-in configuration file.
Prerequisites
Before you begin, ensure that you have:
sudoprivileges on the Alibaba Cloud Linux 3 instance
Procedure
Open the NetworkManager drop-in configuration file:
sudo vim /etc/NetworkManager/conf.d/90-dns-none.confPress
Ito enter Insert mode and add the following:[main] dns=nonePress
Esc, type:wq, and pressEnterto save and close the file.Reload NetworkManager to apply the change:
sudo systemctl reload NetworkManager
If /etc/resolv.conf is not automatically created on system startup, the system cannot use the DNS server defined in the configuration file to perform DNS resolution. For more information, see the /etc/resolv.conf is not created after system startup section.
Re-enable automatic management
To let NetworkManager manage /etc/resolv.conf again, delete or comment out the [main] / dns=none block you added, then reload the service:
sudo systemctl reload NetworkManagerTroubleshooting
/etc/resolv.conf is not created after system startup
NetworkManager creates /etc/resolv.conf on first boot. If the file is missing, NetworkManager likely failed to start, which prevents DNS resolution.
Check the NetworkManager status:
sudo systemctl status NetworkManagerThe following output indicates that NetworkManager is running as expected.
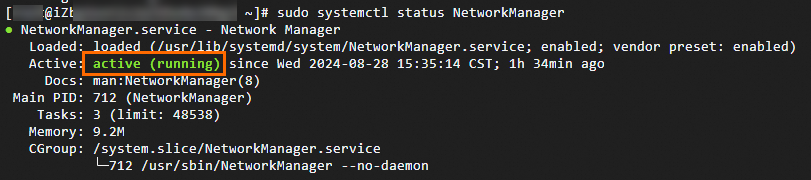
If the status shows anything other than
active (running), proceed to the next step.View the startup logs to identify the failure:
sudo journalctl -u NetworkManager -bAfter resolving the issue based on the logs, start NetworkManager:
sudo systemctl start NetworkManagerOnce NetworkManager starts successfully,
/etc/resolv.confis created automatically.