Deploy the ChatGLM3-6B language model on an AMD-based ECS instance by using Alibaba Cloud AI Containers (AC2) images, with a chatbot as a working example.
Background information
ChatGLM3 is the latest generation of open source models in the ChatGLM series. ChatGLM3-6B retains smooth conversation flow and low deployment requirements from earlier versions while adding a stronger foundation model, broader feature support, and a more comprehensive open source series (ChatGLM3-6B open source repository).
Step 1: Create an ECS instance
-
Go to the instance creation page.
-
Configure the instance with the following key parameters.
For all other parameters, follow Create a custom instance.
-
Instance: ChatGLM3-6B requires about 30 GiB of memory. Select at least ecs.g8a.4xlarge (64 GiB) for stable operation.
-
Image: Alibaba Cloud Linux 3.2104 LTS 64-bit.
-
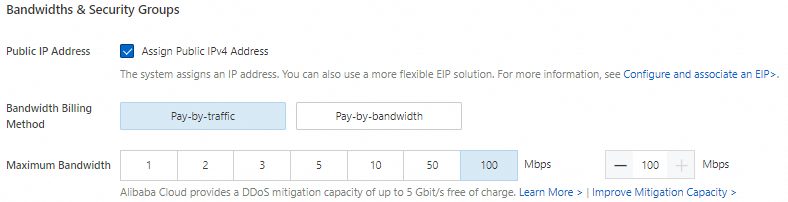
Public IP: Select Assign Public IPv4 Address. Set the billing method to Pay-By-Traffic with a peak bandwidth of 100 Mbps to speed up model downloads.
-
Data Disk: The model files require significant storage. Set the data disk size to 100 GiB.
-
Step 2: Create a Docker runtime environment
-
Install Docker.
Install Docker on Alibaba Cloud Linux 3 as described in Install and use Docker and Docker Compose.
-
Verify that the Docker daemon is running.
sudo systemctl status docker -
Create and run an AMD-optimized PyTorch container from AC2.
AC2 provides PyTorch images optimized for AMD CPUs to quickly set up a runtime environment.
sudo docker pull ac2-registry.cn-hangzhou.cr.aliyuncs.com/ac2/pytorch-amd:1.13.1-3.2304-zendnn4.1
sudo docker run -itd --name pytorch-amd --net host -v $HOME/workspace:/workspace \
  ac2-registry.cn-hangzhou.cr.aliyuncs.com/ac2/pytorch-amd:1.13.1-3.2304-zendnn4.1
Step 3: Deploy ChatGLM3-6B manually
-
Enter the container environment.
sudo docker exec -it -w /workspace pytorch-amd /bin/bashAll subsequent commands run inside the container. If you exit, re-run the preceding command to re-enter. To verify you are in the container, run
cat /proc/1/cgroup | grep docker— any output confirms the container environment. -
Install the required tools.
yum install -y tmux git git-lfs wget -
Enable Git LFS.
Git LFS is required to download the pre-trained model.
git lfs install -
Download the source code and model.
-
Start a tmux session.
tmuxNoteThe model download is time-consuming and network-dependent. Use tmux to prevent interruption if your SSH connection drops.
-
Download the ChatGLM3-6B source code and pre-trained model.
git clone https://github.com/THUDM/ChatGLM3.git git clone https://www.modelscope.cn/ZhipuAI/chatglm3-6b.git --depth=1 -
Verify the download.
ls -lAfter download, the directory contains the following.

-
-
Install the Python runtime dependencies.
AC2 containers bundle many Python AI components. Use
yumordnfto install the remaining dependencies.yum install -y python3-{transformers,sentencepiece,protobuf,accelerate} -
Run a chatbot conversation.
-
Modify the model loading parameters.
The source code includes a terminal chatbot script. Before running it, configure the model to load with BF16 precision, which uses the CPU's AVX-512 instruction set for acceleration.
cd /workspace/ChatGLM3/basic_demo grep "import torch" cli_demo.py 2>&1 >/dev/null || sed -i "3i\import torch" cli_demo.py sed -i 's/"auto")/"auto", torch_dtype=torch.bfloat16)/g' cli_demo.py -
Start the chatbot.
export MODEL_PATH="/workspace/chatglm3-6b"
python3 cli_demo.py
After startup, enter text at the
User:prompt to chat with ChatGLM3-6B in real time. Note
NoteEnter
stopto exit the chatbot.
-