To implement fine-grained control over service-to-service HTTP requests, you can configure authorization policies for HTTP requests to manage service interaction permissions. This guarantees that only authorized requests can access a specific service and improves service security and reliability.
Prerequisites
The Bookinfo application is deployed in the ASM instance. For more information, see Deploy an application in an ASM instance.
Istio resources are defined. For more information, see Use Istio resources to route traffic to different versions of a service.
Step 1: Configure a blank authorization policy
The following example shows you how to configure authorization policies to obtain access permissions on a workload based on a blank authorization policy. The blank authorization policy is a basic deny policy that denies all requests initiated to access the workload.
Log on to the ASM console. In the left-side navigation pane, choose .
On the Mesh Management page, click the name of the ASM instance. In the left-side navigation pane, choose . On the page that appears, click Create from YAML.
On the Create page, select default from the Namespace drop-down list, select a template, copy the following content to the YAML code editor, and then click Create.
apiVersion: security.istio.io/v1beta1
kind: AuthorizationPolicy
metadata:
  name: allow-nothing
  namespace: default
spec:
  {}
Then, you can view the allow-nothing authorization policy on the AuthorizationPolicy page.
In the address bar of your browser, enter
http://{IP address of your ASM gateway}/productpageto access the Bookinfo application.The
RBAC: access deniedmessage is returned, which indicates that you have no access permissions. For more information about how to obtain the IP address of your gateway, see Use Istio resources to route traffic to different versions of a service.
Step 2: Configure an authorization policy for the productpage service
Log on to the ASM console. In the left-side navigation pane, choose .
On the Mesh Management page, click the name of the ASM instance. In the left-side navigation pane, choose .
Use one of the following methods to configure an authorization policy to allow access to the Productpage service:
Method 1: Use YAML to create an authorization policy
On the AuthorizationPolicy page, click Create from YAML.
On the Create page, select default from the Namespace drop-down list, select a template, copy the following content to the YAML code editor, and then click Create.
apiVersion: security.istio.io/v1beta1
kind: AuthorizationPolicy
metadata:
  name: "productpage-viewer"
  namespace: default
spec:
  selector:
    matchLabels:
      app: productpage
  action: ALLOW
  rules:
  - to:
    - operation:
        methods: ["GET"]
Method 2: Use the graphical user interface (GUI) to create an authorization policy
On the AuthorizationPolicy page, click Create.
On the Create page, configure the following parameters and click Create.
Parameter
Description
Name
The name of the authorization policy. In this example, the value is set to productpage-viewer.
Policy Type
The authorization action. In this example, the value is set to ALLOW.
Namespace
The namespace in which you want to create the authorization policy. In this example, the Namespace parameter on the Workload Scope tab is set to default.
Effective Scope
The effective scope of the authorization policy. In this example, the value is set to Service.
Workload
The workload on which the authorization policy takes effect. In this example, the value is set to productpage.
Request Matching Rules
The method for processing HTTP requests. In this example, Methods is turned on in the Add Request Target section and the value is set to GET.
Then, the productpage-viewer authorization policy is displayed on the AuthorizationPolicy page.
In the address bar of your browser, enter
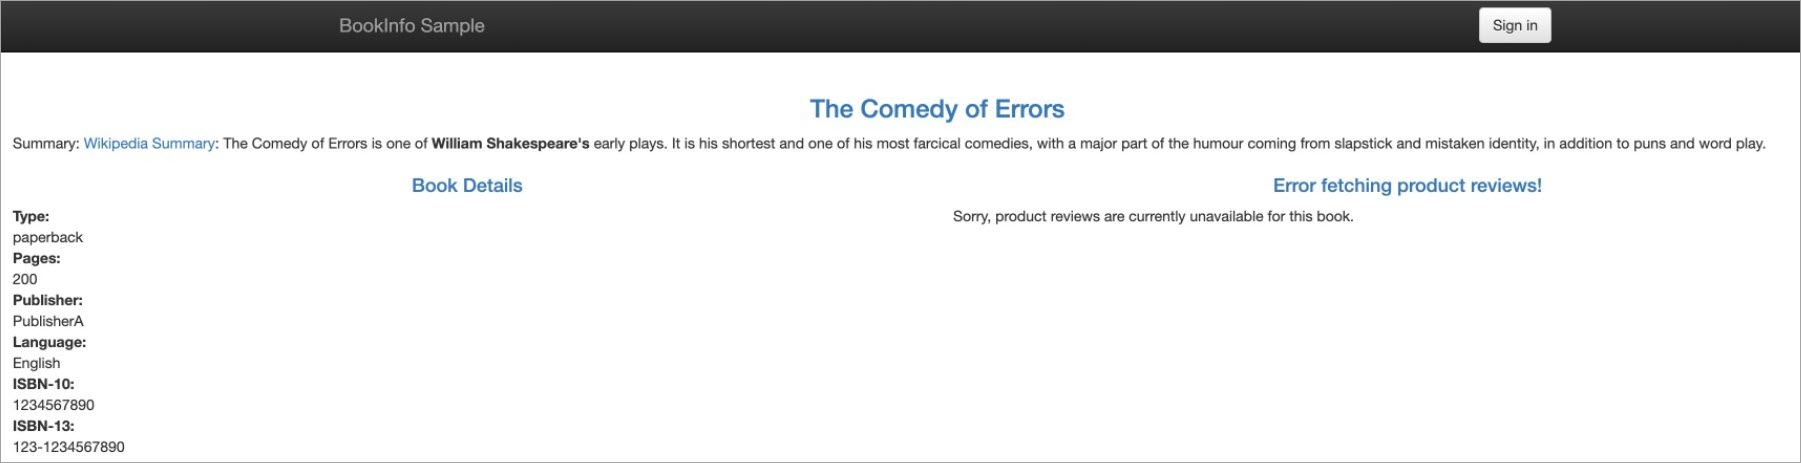
http://{IP address of your ASM gateway}/productpageto access the Bookinfo application.The result in the following figure indicates that you can access the productpage service, but not the details or reviews service. This is because the authorization policy that you configured for the productpage service allows HTTP GET requests to access the productpage service.

Step 3: Configure an authorization policy for the details service
You can configure an authorization policy for the details service to allow the requests that are sent by the service account of the productpage service to access the details service.
Obtain the service account of the productpage service.
Log on to the ACK console. In the left-side navigation pane, click Clusters.
On the Clusters page, click the name of the cluster that you want to manage and choose in the left-side navigation pane.
On the Deployments page, find the productpage-v1 service and choose in the Actions column. In the Edit YAML dialog box, obtain the value of the
serviceAccountparameter.As shown in the following figure, the value of the
serviceAccountparameter isbookinfo-productpage.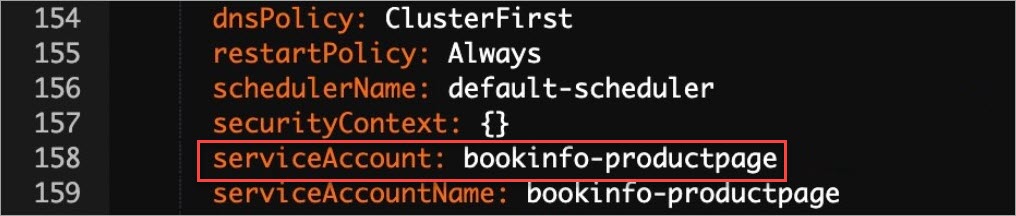
Create an authorization policy.
Log on to the ASM console. In the left-side navigation pane, choose .
On the Mesh Management page, click the name of the ASM instance. In the left-side navigation pane, choose .
Use one of the following methods to create an authorization policy.
Method 1: Use YAML to create an authorization policy
On the AuthorizationPolicy page, click Create from YAML.
On the Create page, select default from the Namespace drop-down list, select a template, copy the following content to the YAML code editor, and then click Create.
kind: AuthorizationPolicy
apiVersion: security.istio.io/v1beta1
metadata:
  name: details-viewer
  namespace: default
spec:
  action: ALLOW
  rules:
    - to:
        - operation:
            methods:
              - GET
    - from:
        - source:
            principals:
              - cluster.local/ns/default/sa/bookinfo-productpage # bookinfo-productpage is the value of the serviceAccount parameter, which is obtained in the previous step.
  selector:
    matchLabels:
      app: details
Method 2: Use the GUI to create an authorization policy
On the AuthorizationPolicy page, click Create.
On the Create page, configure the following parameters and click Create.
Parameter
Description
Name
The name of the authorization policy. In this example, the value is set to details-viewer.
Policy Type
The authorization action. In this example, the value is set to ALLOW.
Namespace
The namespace in which you want to create the authorization policy. In this example, the Namespace parameter on the Workload Scope tab is set to default.
Effective Scope
The effective scope of the authorization policy. In this example, the value is set to Service.
Workload
The workload on which the authorization policy takes effect. In this example, the value is set to details.
Request Matching Rules
The source of requests. In this example, Principals is turned on in the Add Request Source section and the value is set to cluster.local/ns/default/sa/bookinfo-productpage.
Notebookinfo-productpageis the value of theserviceAccountparameter, which is obtained in Substep 1.The method for processing HTTP requests. In this example, Methods is turned on in the Add Request Target section and the value is set to GET.
Then, the details-viewer authorization policy is displayed on the AuthorizationPolicy page.
In the address bar of your browser, enter
http://{IP address of your ASM gateway}/productpageto access the Bookinfo application.The result in the following figure indicates that you can access the details service on the left, but not the reviews service on the right.
Step 4: Configure an authorization policy for the reviews service
Log on to the ASM console. In the left-side navigation pane, choose .
On the Mesh Management page, click the name of the ASM instance. In the left-side navigation pane, choose .
Use one of the following methods to create an authorization policy.
Method 1: Use YAML to create an authorization policy
On the AuthorizationPolicy page, click Create from YAML.
On the Create page, select default from the Namespace drop-down list, select a template, copy the following content to the YAML code editor, and then click Create.
kind: AuthorizationPolicy
apiVersion: security.istio.io/v1beta1
metadata:
  name: reviews-viewer
  namespace: default
spec:
  action: ALLOW
  rules:
    - to:
        - operation:
            methods:
              - GET
    - from:
        - source:
            principals:
              - cluster.local/ns/default/sa/bookinfo-productpage
  selector:
    matchLabels:
      app: reviews
Method 2: Use the GUI to create an authorization policy.
On the AuthorizationPolicy page, click Create.
On the Create page, configure the following parameters and click Create.
Parameter
Description
Name
The name of the authorization policy. In this example, the value is set to reviews-viewer.
Policy Type
The authorization action. In this example, the value is set to ALLOW.
Namespace
The namespace in which you want to create the authorization policy. In this example, the Namespace parameter on the Workload Scope tab is set to default.
Effective Scope
The effective scope of the authorization policy. In this example, the value is set to Service.
Workload
The workload on which the authorization policy takes effect. In this example, the value is set to reviews.
Request Matching Rules
The source of requests. In this example, Principals is turned on in the Add Request Source section and the value is set to cluster.local/ns/default/sa/bookinfo-productpage.
Notebookinfo-productpageis the value of theserviceAccountparameter, which is obtained in Substep 1.The method for processing HTTP requests. In this example, Methods is turned on in the Add Request Target section and the value is set to GET.
Then, the reviews-viewer authorization policy is displayed on the AuthorizationPolicy page.
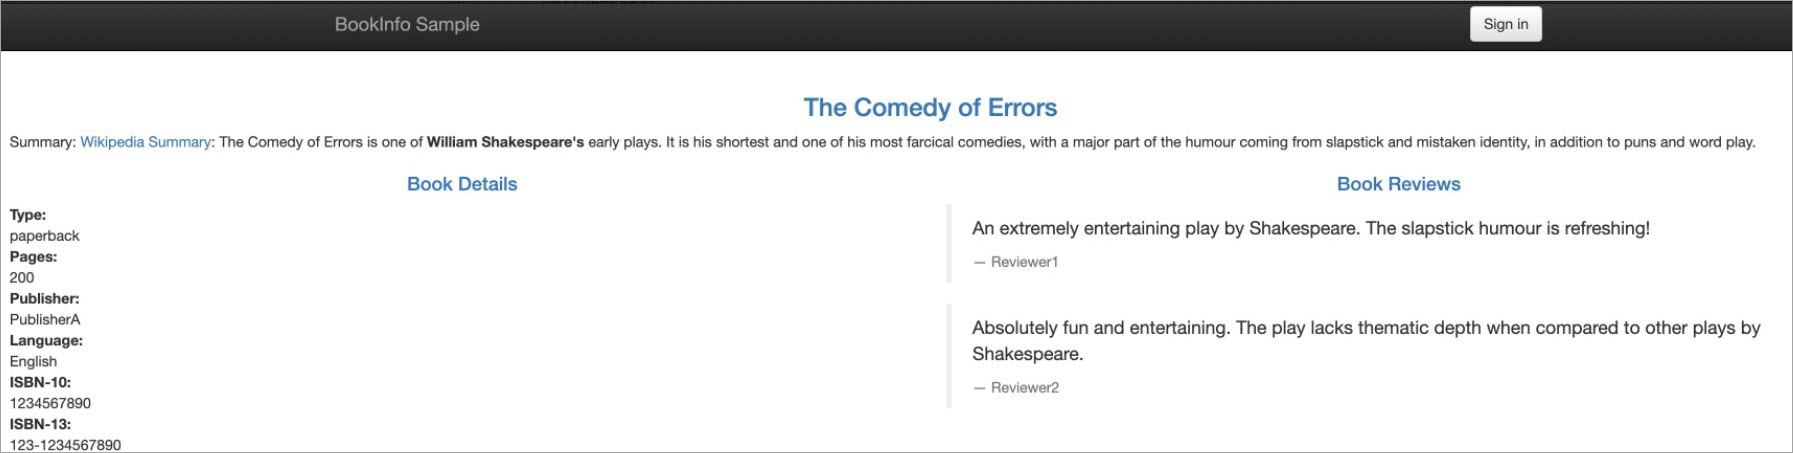
In the address bar of your browser, enter
http://{IP address of your ASM gateway}/productpageto access the Bookinfo application.The result in the following figure indicates that you can access the details service on the left and the reviews service on the right.
References
Improper configurations of authorization policies may cause unexpected access to be denied or allowed. You can use ASM authorization policies in trial mode to check whether the execution results of the authorization policies meet your expectations based on logs. If not, you can adjust the authorization policies until the execution results meet your expectations. Then, you can disable the trial mode to make the authorization policies take effect. For more information, see Run an ASM authorization policy in trial mode.
For more information about how to implement fine-grained control over service-to-service TCP requests, see Configure authorization policies for TCP requests.
For more information about how to control access traffic from services in an ASM instance to external services, see Use an authorization policy to control access traffic from services in an ASM instance to an external website and Use an authorization policy to control access traffic from services in an ASM instance to an external database.
You can customize the content of access logs of an ASM gateway to detect potential security risks in a timely manner. For more information, see Configure the features of generating and collecting the access logs of an ASM gateway.
You can enable the mesh audit feature to record or trace the daily operations of different users. You can also configure audit alerts for operations on ASM resources and send alert notifications to alert contacts in a timely manner when important resources change. For more information, see Use the KubeAPI operation audit feature in ASM and Configure audit alerts for operations on ASM resources.