This topic describes how to use a self-managed Keycloak instance as an identity provider (IdP) to provide identity services and enable single sign-on (SSO) for applications in a service mesh. Applications in the service mesh do not need to implement their own authentication or authorization logic. You can configure the ASM custom authorization service to use Keycloak and the OpenID Connect (OIDC) protocol to implement SSO. After authentication, requests are forwarded to the application along with the user information from Keycloak.
Prerequisites
An ASM instance is created. For more information, see Create an ASM instance.
An ACK managed cluster is created. For more information, see Create an ACK managed cluster.
Automatic sidecar injection is enabled for the default namespace. For more information, see Enable automatic injection.
Concepts
Concept | Description |
IdP | An IdP is a system that stores and verifies digital identities. For example, you can use an account and password to verify your identity. If you use an Alipay account and password to log on to Youku, Alipay is the IdP. |
OIDC | OIDC is a standard identity authentication protocol based on the OAuth 2.0 protocol. For more information, see the OpenID official website. |
Scope | Scope is a concept in OIDC. Each IdP stores various types of user information, such as email address. Each type corresponds to a scope. When you use an IdP to verify your identity to access an application, the application is allowed to obtain only the specified types of information. |
Procedure
Step 1: Deploy a demo application and Keycloak
Use the following YAML file and run the kubectl apply -n default -f <your_yaml_file>.yaml command to deploy the httpbin application to the `default` namespace of your ACK cluster.
Use the following YAML file and run the kubectl apply -n default -f <your_yaml_file>.yaml command to deploy the Keycloak application to the `default` namespace of your ACK cluster.
Step 2: Expose the demo application and Keycloak to the internet through an ASM gateway
This example uses HTTPS on port 443 to access the demo application and HTTP on port 80 to access the Keycloak console.
Create a certificate named myexample-credential for the HTTPS service. For more information, see Enable secure HTTPS services using an ASM gateway.
Use the following YAML files to create a gateway rule and a virtual service in the ASM instance to expose Keycloak to the internet.
In the ASM console, use the following YAML file to configure a gateway rule for the ASM instance. For more information, see Manage gateway rules.
Use the following YAML file to create a virtual service for the ASM instance. For more information, see Manage virtual services.
In your browser, navigate to http://${ingress_gateway_address} to access the Keycloak application.
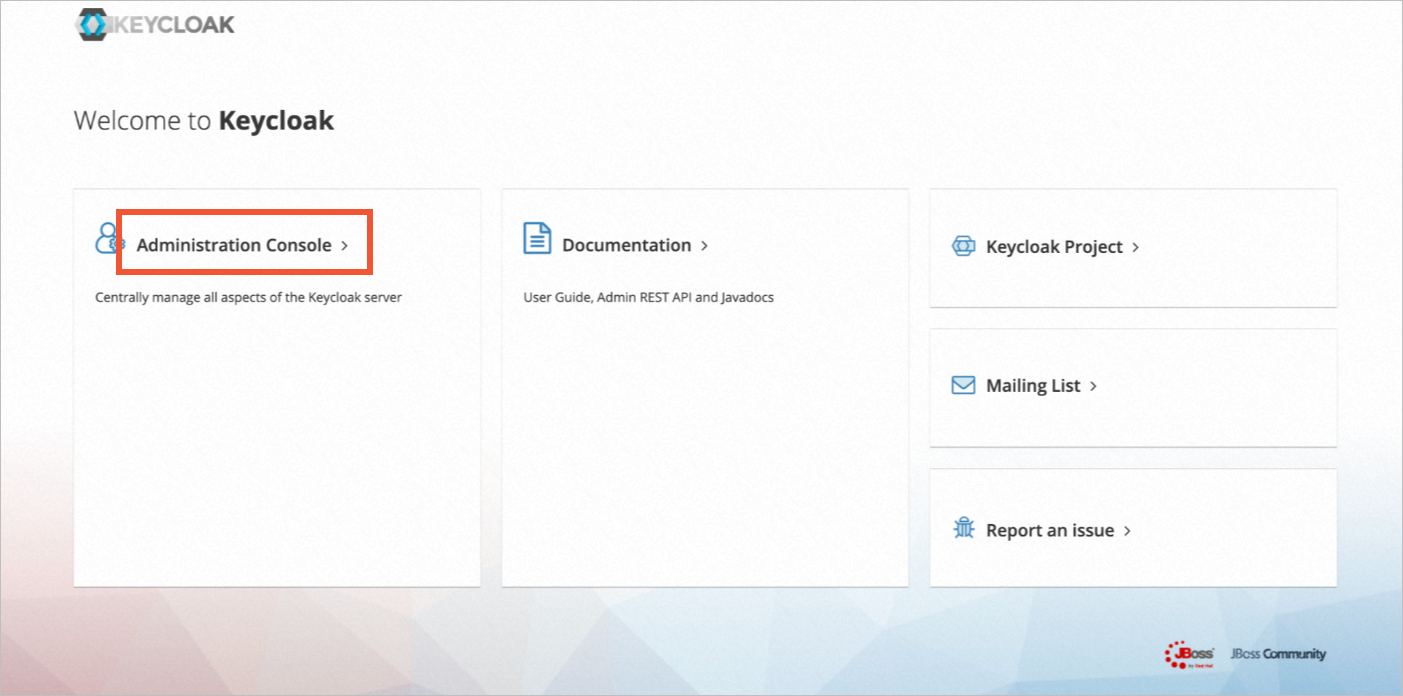
Click Administration Console. Log on with the administrator username and password that you specified when you deployed Keycloak.
Step 3: Configure Keycloak
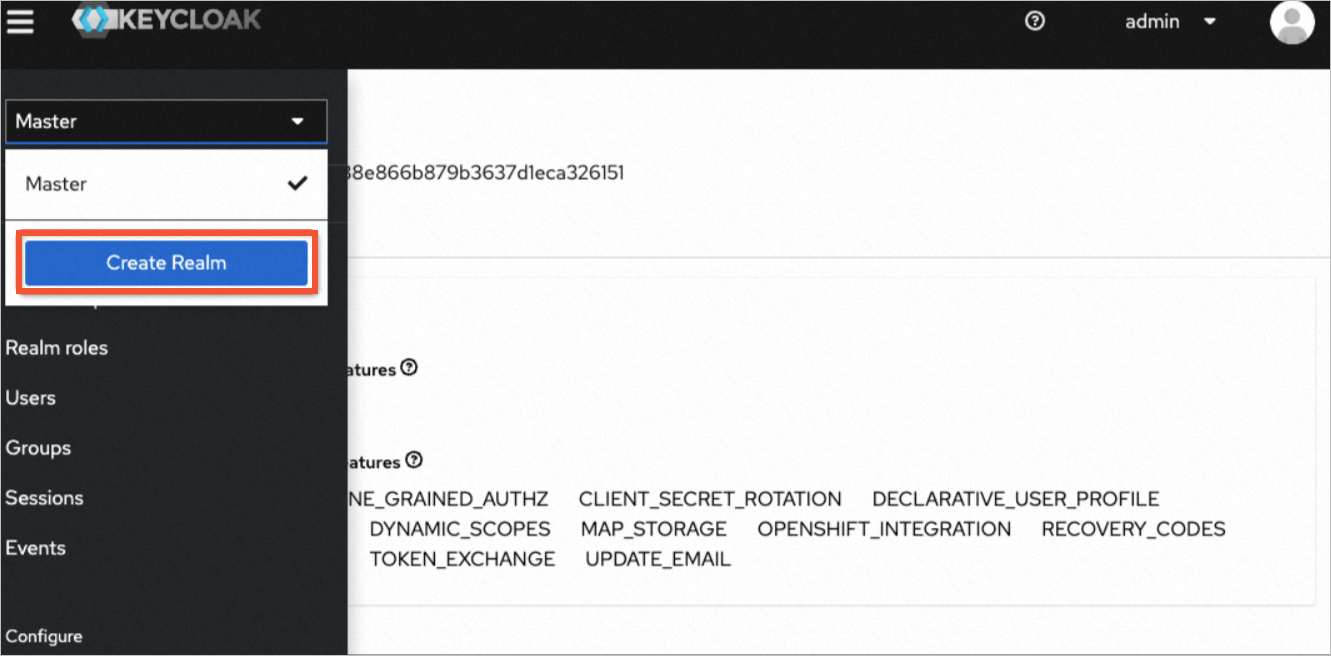
In the left navigation pane of the Keycloak console, click Create Realm from the Master drop-down list.
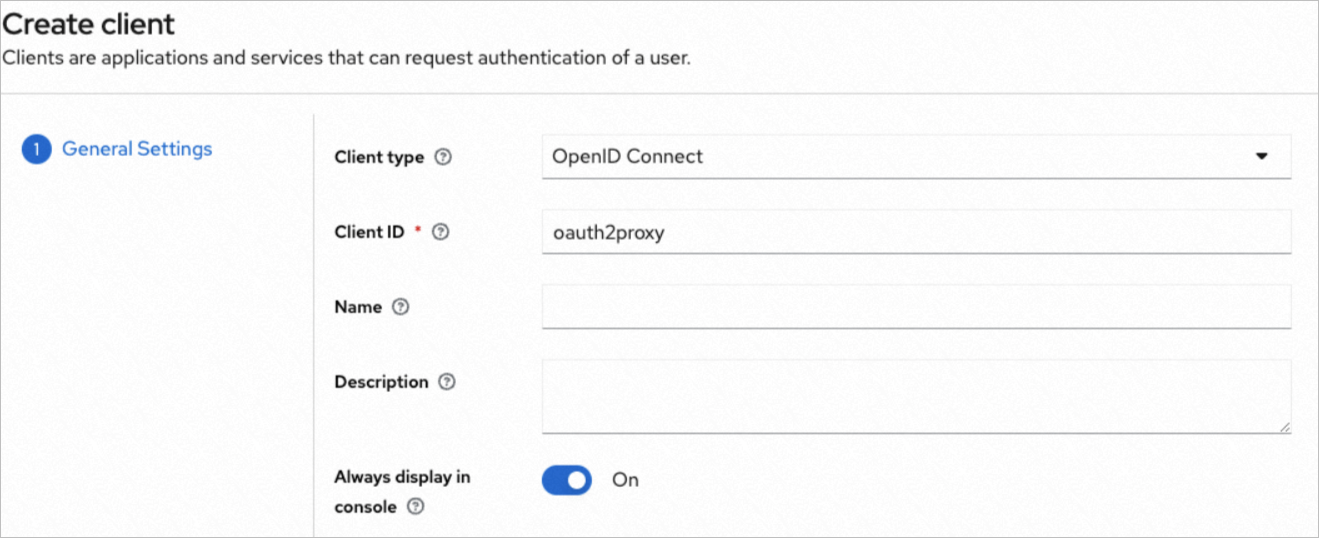
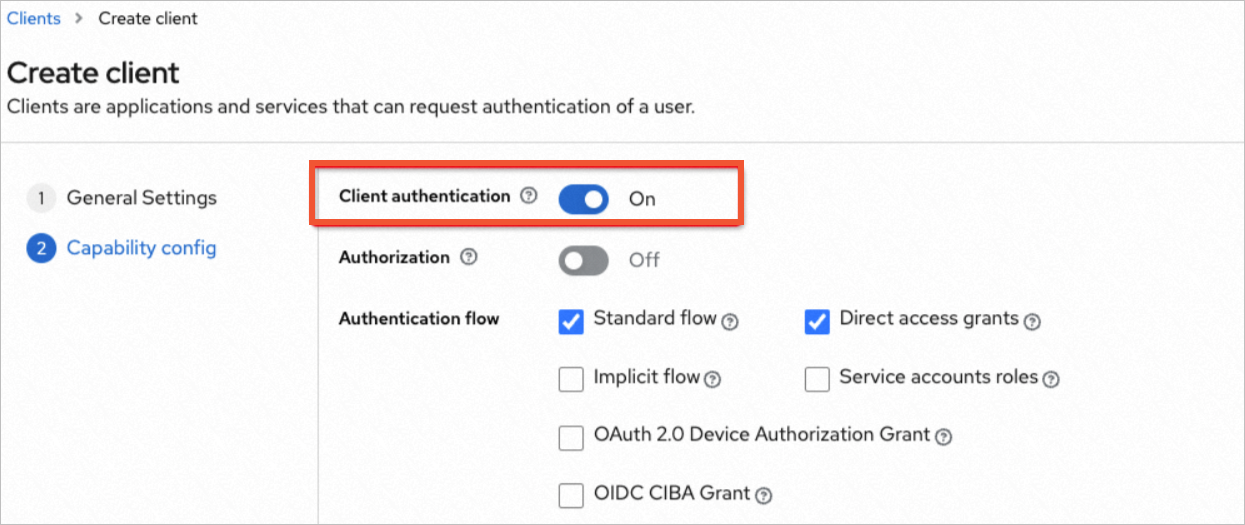
On the new realm configuration page, create a client as shown in the following figures.
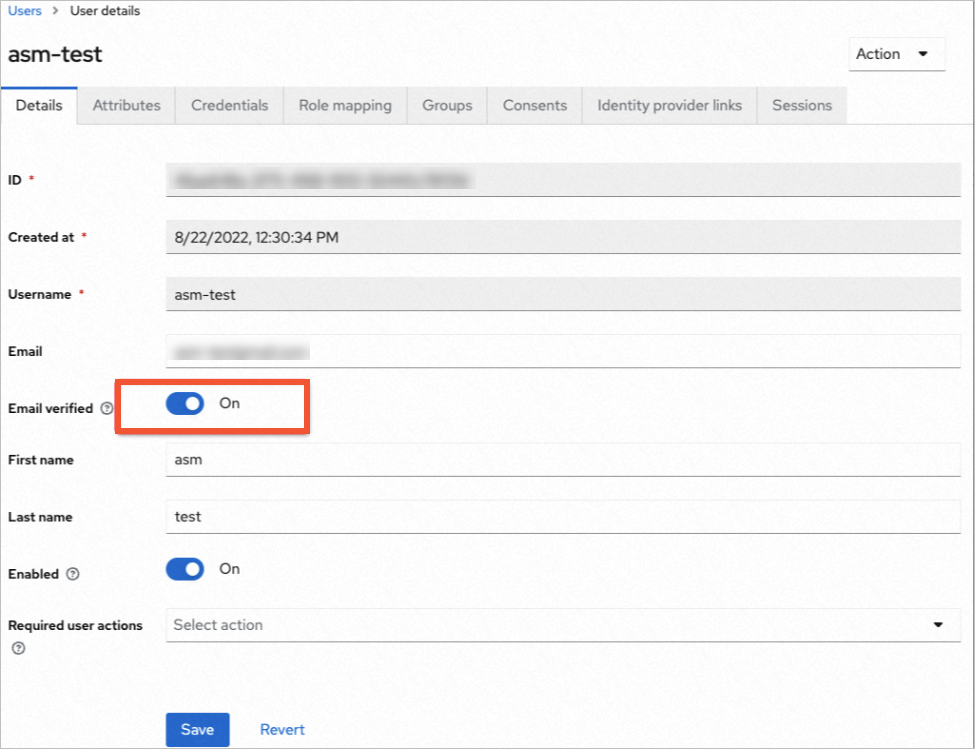
After the client is created, create a user on the Realm page. As shown in the following figure, click Save.
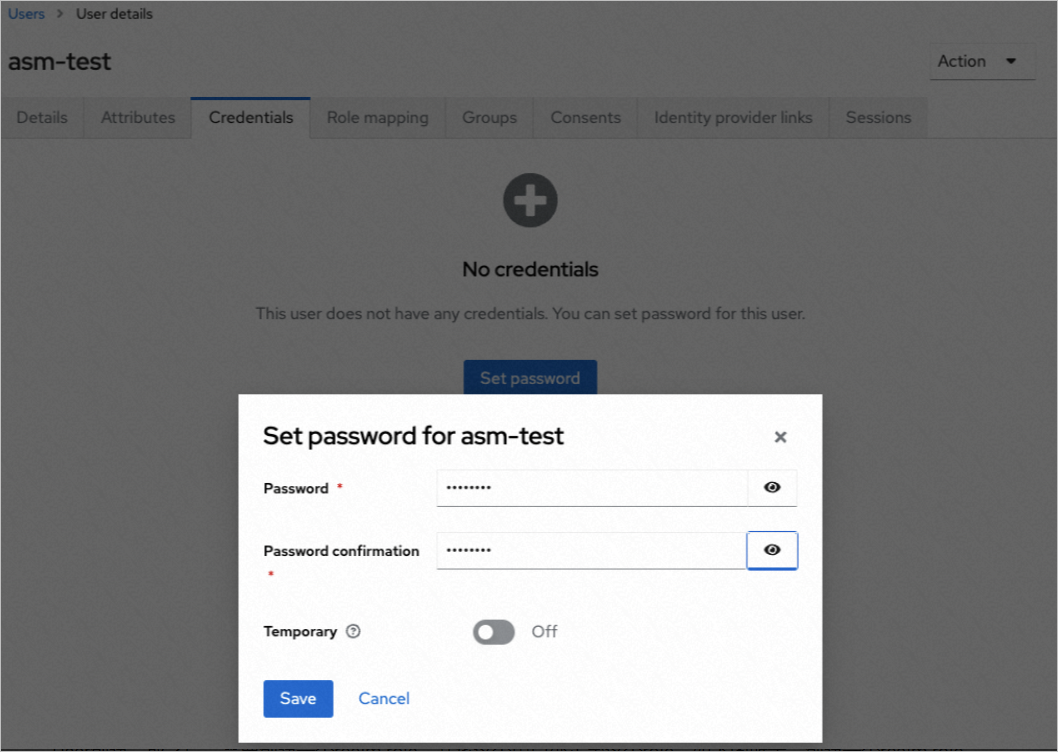
On the User details page, click the Credentials tab.
In the dialog box, set a logon password and click Save.
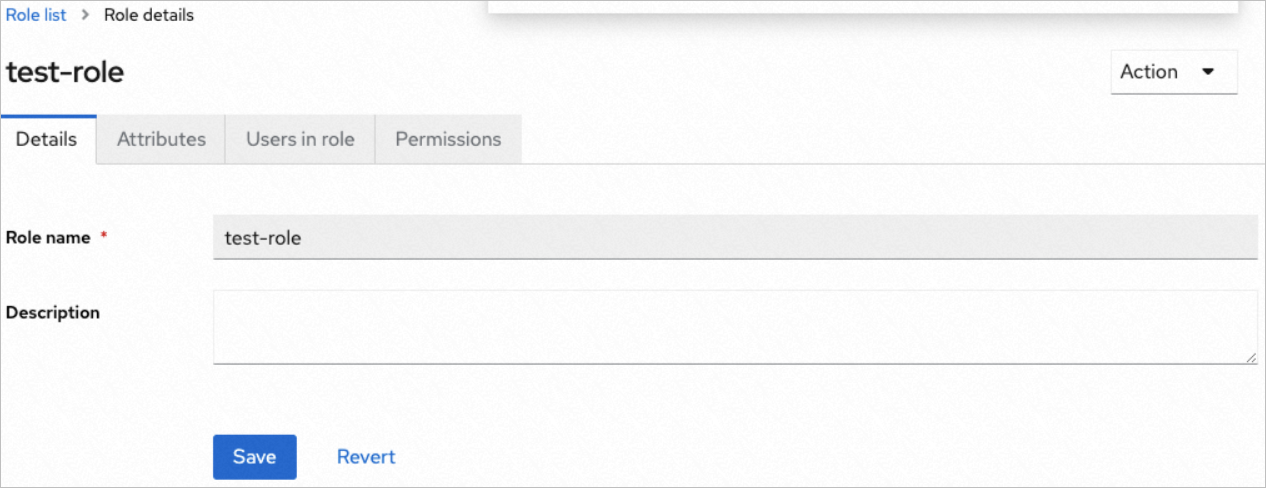
Create a realm role as shown in the following figure and click Save.
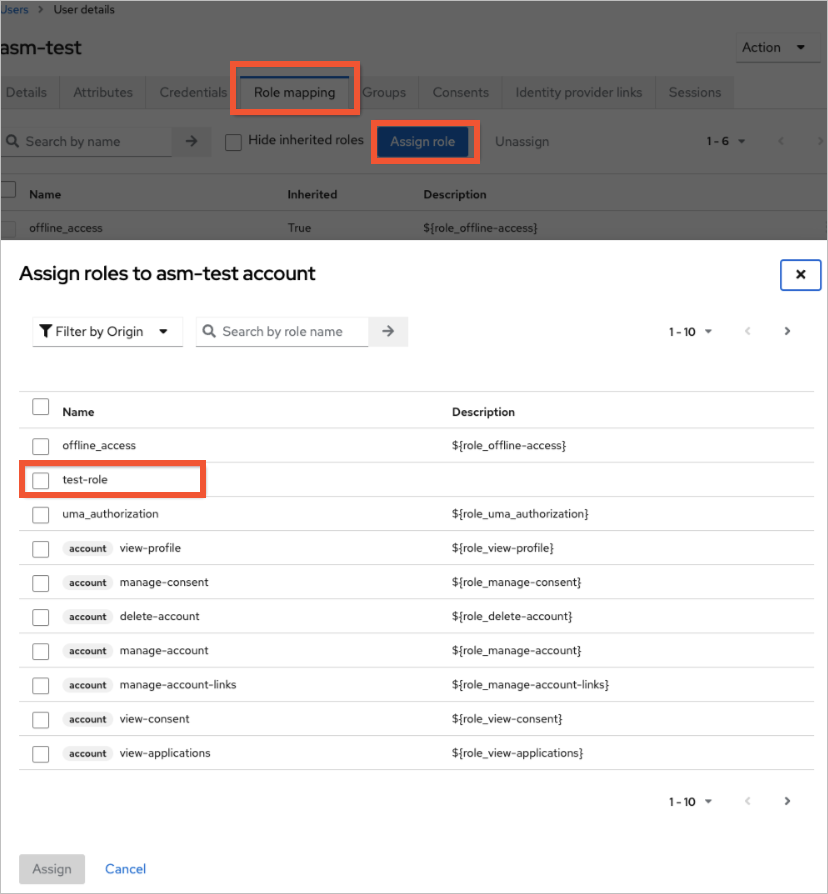
On the User details page, click the Role mapping tab.
On the Role mapping page, click Assign role. Assign the role created in step 6 to the current user.
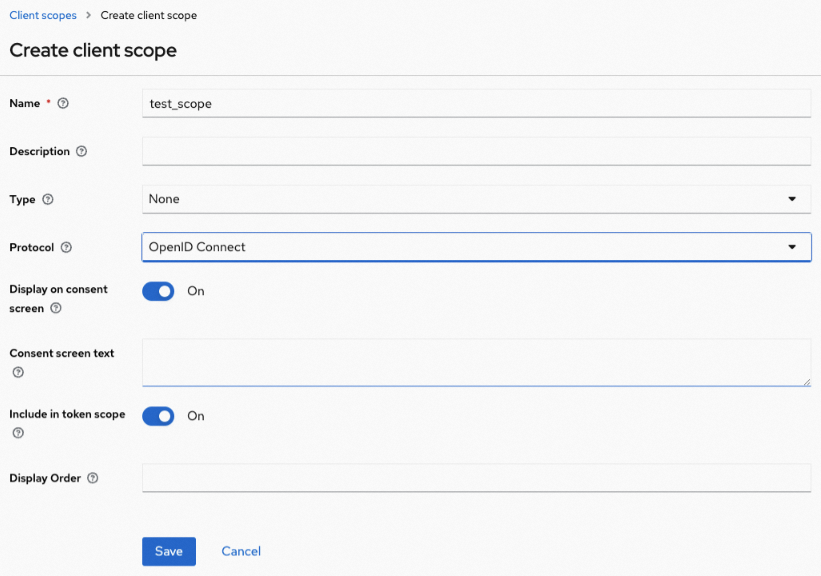
You can create a client scope as shown in the following figure. Click Save.
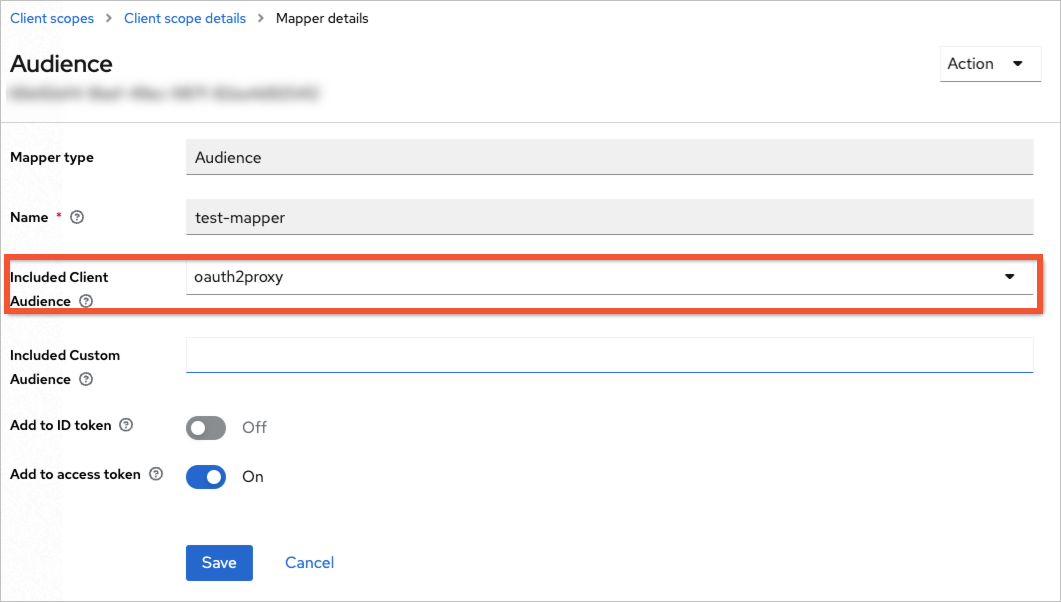
On the Client Scope page, click the Mappers tab, add a mapper as shown in the following figure, and click Save.
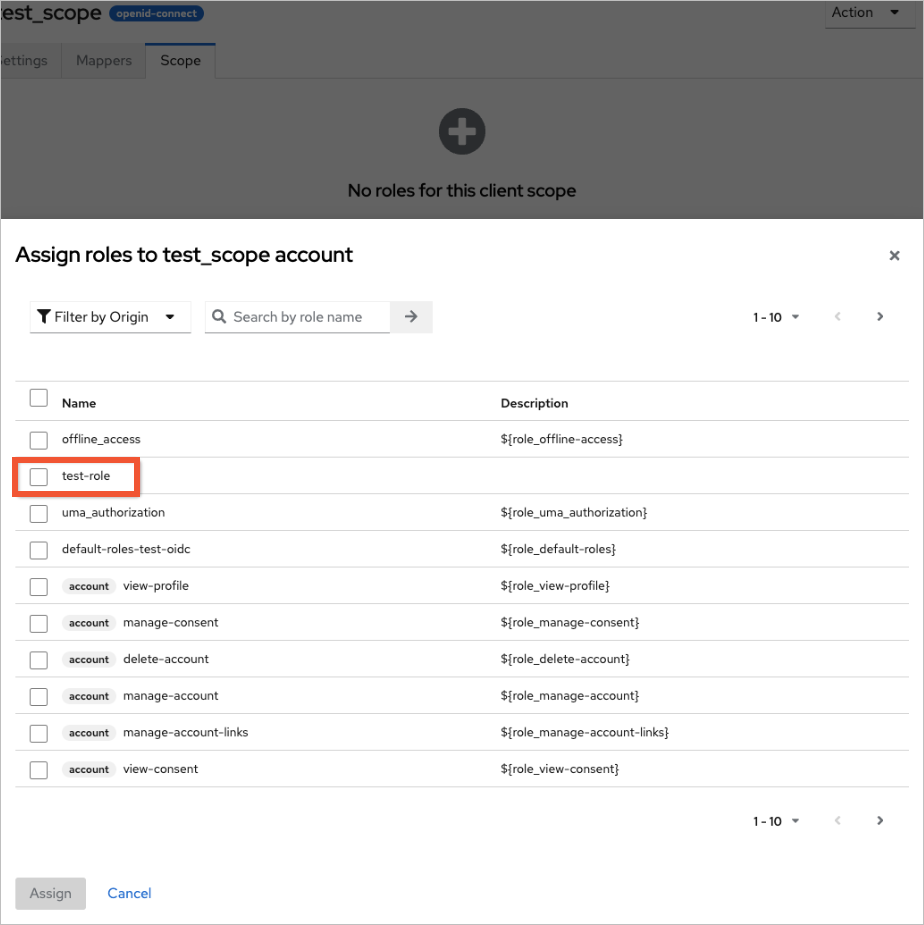
Click the scope tab. Select the check box for the role that you created in Step 6, and then click Assign.
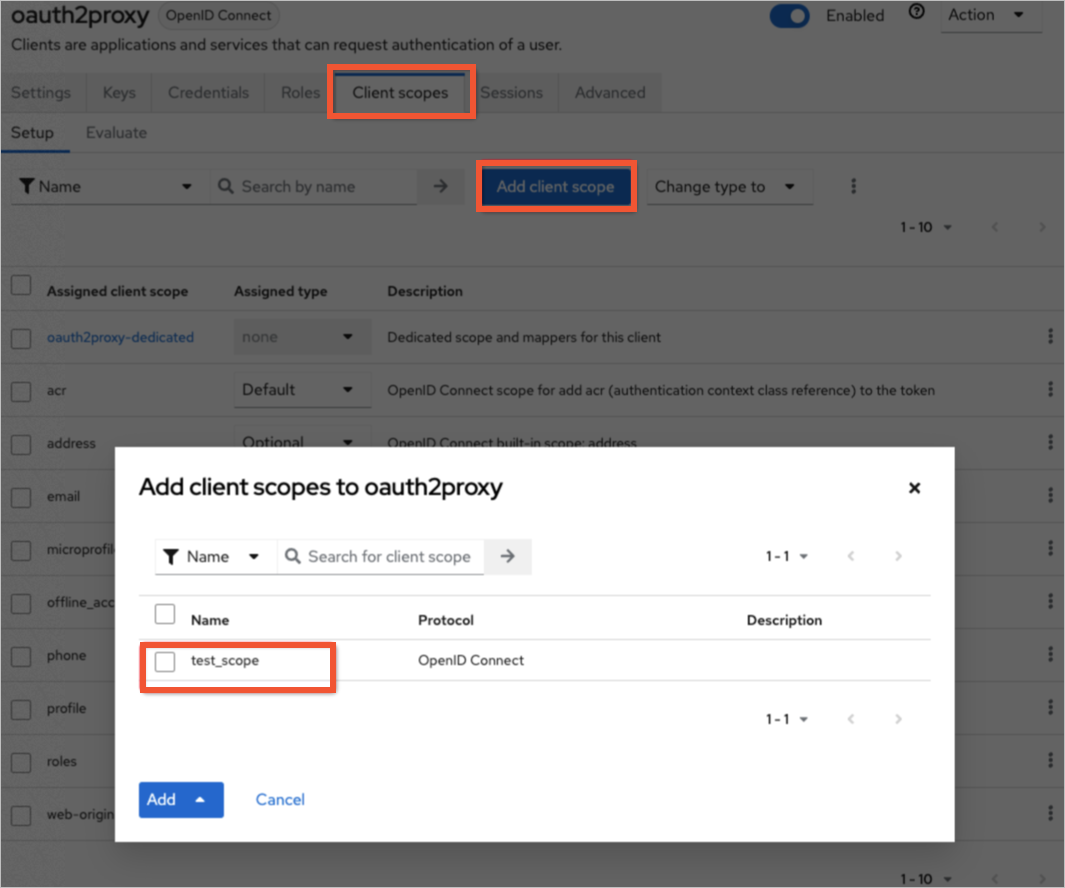
On the client settings page, click the client scope tab and add a default scope.
As shown in the following figure, in the Valid redirect URLs box, add the redirect URLs for the cluster's oauth2-proxy. Click Save.
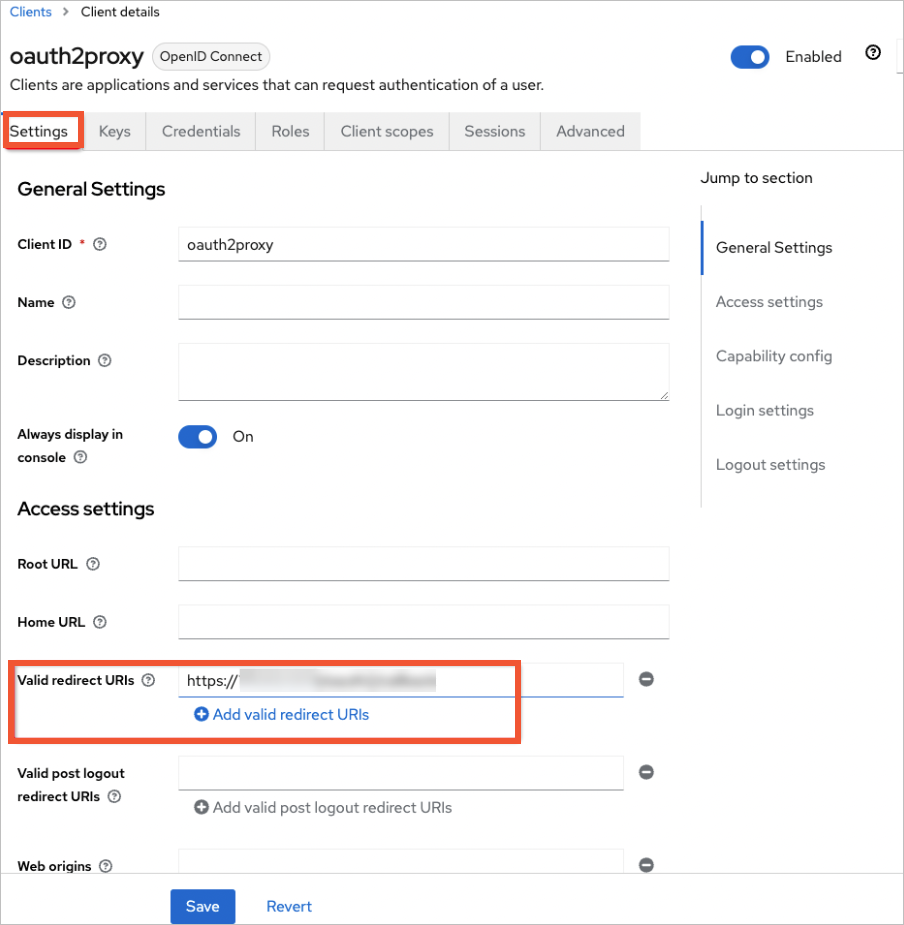
In this example, only the Keycloak service uses HTTP. All other services use HTTPS. Therefore, the format of the redirect URI is https://${your_ASM_gateway_address}/oauth2/callback.
The Keycloak configuration is complete. Record the following information:
The ID of the new realm: Test-oidc.
The client ID created in the realm: oauth2proxy.
The client secret from the Credentials tab of the client settings page.
Step 4: Enable ASM custom authorization and configure OIDC single sign-on
Log on to the ASM console. In the left-side navigation pane, choose .
On the Mesh Management page, click the name of the ASM instance. In the left-side navigation pane, choose .
On the Custom Authorization Service page, click Associate Custom Authorization Service, select OIDC Identity Authentication And Authorization Service, set the parameters for the service, and then click Create.
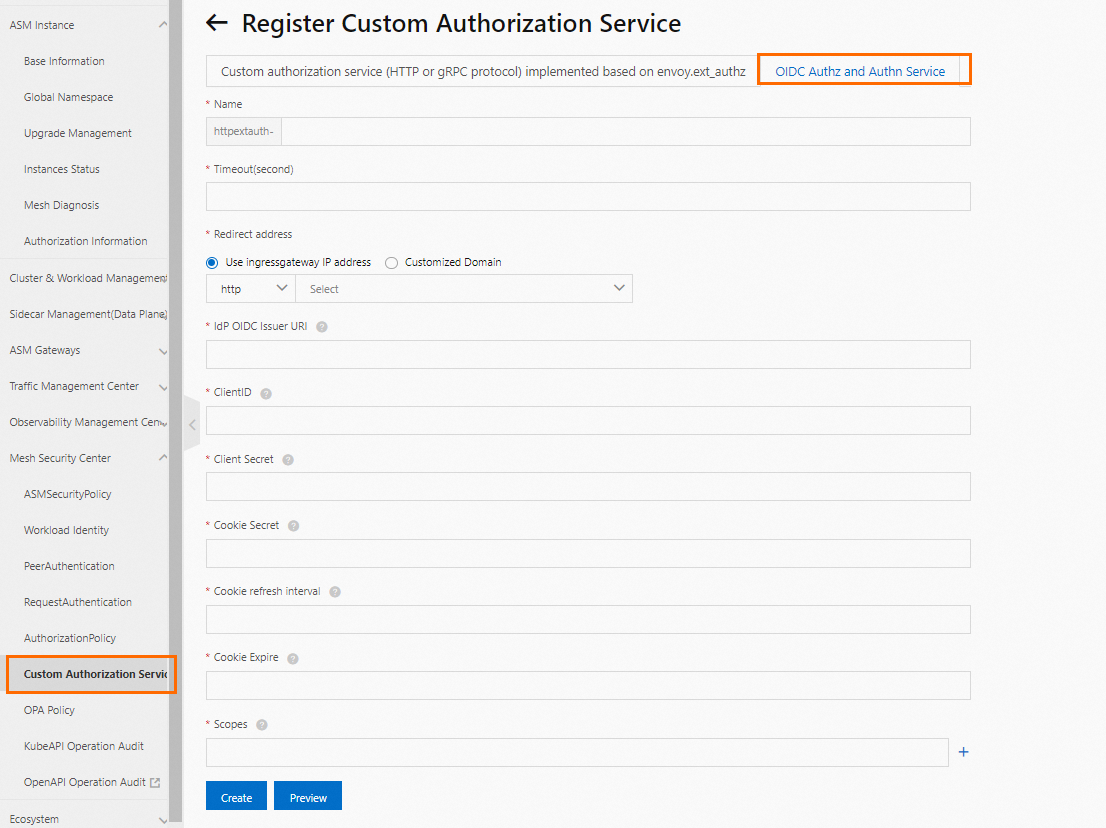
Configure the parameters based on the information of the OpenID Connect (OIDC) application that you created. You can use the ASM gateway as the logon redirection address. For more information about the cookie secret, see Generating a Cookie Secret.
IdP OIDC Issuer URL: http://${ASM_gateway_address}/realms/${realm_created_in_Keycloak}.
ClientID and Client Secret: Enter the parameters recorded in the previous step.
Scopes: The OpenID scope is required. You can add other scopes as needed.
Create a virtual service using the following YAML file.
apiVersion: networking.istio.io/v1beta1 kind: VirtualService metadata: name: oauth2-vs namespace: istio-system spec: gateways: - ingressgateway hosts: - '*' http: - match: - uri: prefix: /oauth2 name: oauth2 route: - destination: host: asm-oauth2proxy-httpextauth-oidc.istio-system.svc.cluster.local port: number: 4180NoteIn the route field, replace the host with the name of the Oauth2Proxy service in the istio-system namespace of your ACK cluster.
To prevent virtual service conflicts, make sure that no other virtual services match paths with the /oauth2 prefix.
Step 5: Create an authorization policy
On the Mesh Management page, click the name of the ASM instance. In the left-side navigation pane, choose .
On the authorization policy details page, click Create With YAML.
On the Create page, select a Namespace and a Scenario Template, configure the following YAML file, and click Create.
apiVersion: security.istio.io/v1beta1 kind: AuthorizationPolicy metadata: name: oidc namespace: istio-system spec: action: CUSTOM provider: name: httpextauth-oidc rules: - to: - operation: notPorts: - '80' selector: matchLabels: istio: ingressgatewayNoteThe AuthorizationPolicy specifies that access to any port except for port 80 requires authorization.
For the provider name, enter the name of your associated custom authorization service. You can find the name in the list of custom authorization services.
Step 6: Verification
In a browser, navigate to ${External_IP_of_ASM_gateway:80}.
Expected result:
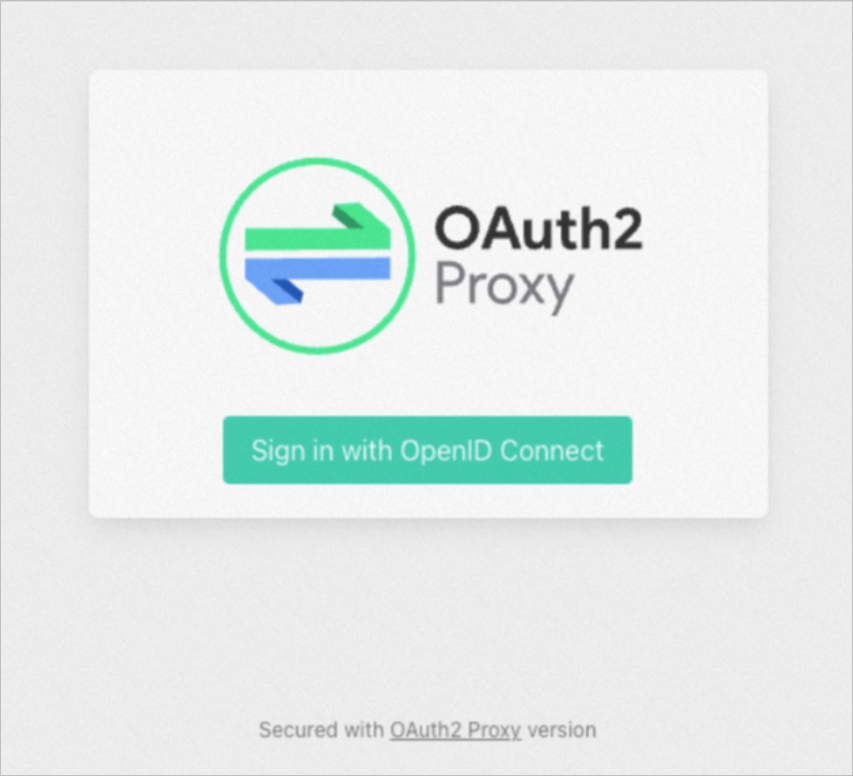 The page shown in the preceding figure appears. This indicates that single sign-on (SSO) is enabled.
Click Sign in with OpenID Connect. On the Keycloak logon page, enter the test account and password that you created in Step 3, and then click Log On.
Expected result:
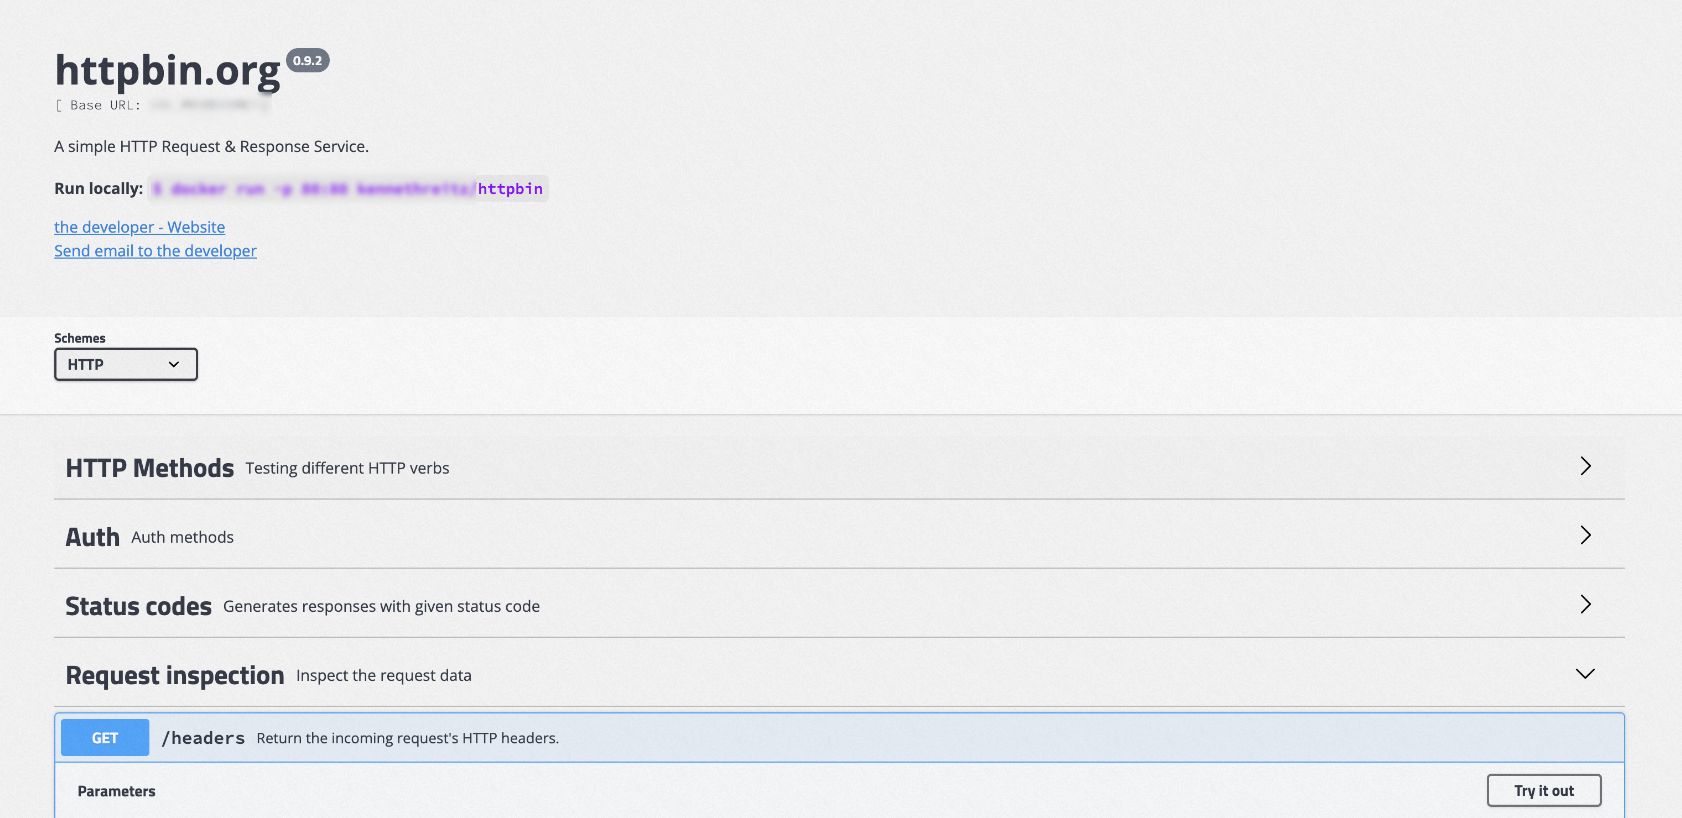
Click Request inspection, and then select .
Expected result:
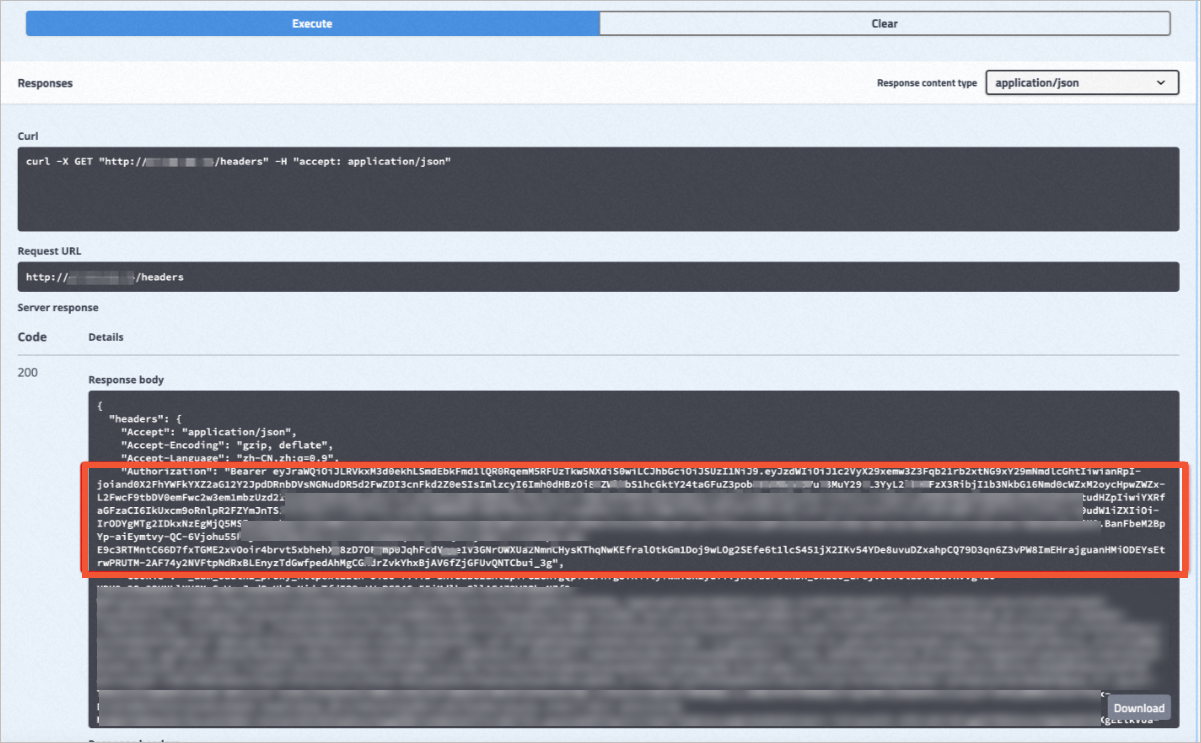
In a JWT debugger, parse the JSON Web Token (JWT) from the request in the previous step. The token is the value that follows Bearer. For more information, see JWT Debugger.
Expected result:
 After the token is parsed, the user information from Keycloak appears. This indicates that ASM has verified the JWT.