Use content analysis to audit the software composition of container images, detect vulnerabilities and compliance issues, manage image tags, and generate a software bill of materials (SBOM). The feature gives you full visibility into operating system packages and language packages in each image — helping you identify risky dependencies before they reach production.
Limitations
Supported regions: China (Hangzhou), China (Shanghai), China (Beijing), China (Shenzhen), China (Hong Kong), Singapore, US (Virginia), and Germany (Frankfurt).
Instance type: Enterprise Edition instances only.
Existing images: Automatic analysis applies only to newly pushed images. Use manual analysis for images already in the repository.
OS compatibility: Some operating systems cannot be scanned. Submit a ticket to request a scan for unsupported OS types.
How it works
Create a content analysis rule that defines the analysis scope (namespace or repository).
Push an image to trigger automatic analysis, or manually trigger analysis on existing images.
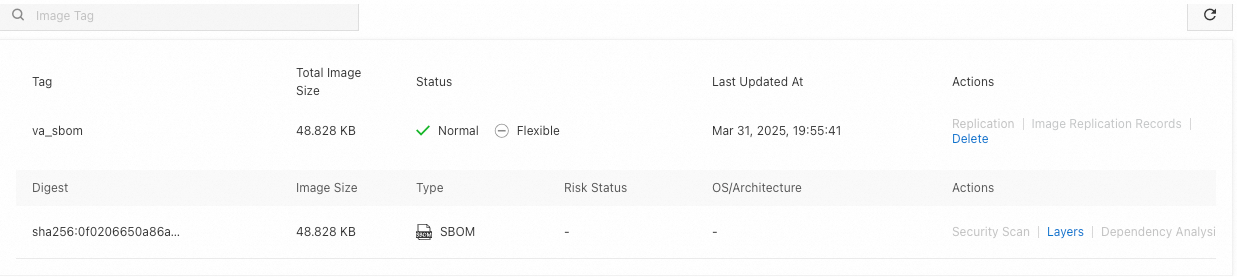
After analysis completes, view the package composition, risk status, and tag information for each image. An SBOM artifact is also generated automatically and stored as an Open Container Initiative (OCI) artifact with the
_sbomsuffix.Download the SBOM file using OCI Registry as Storage (ORAS) for offline auditing or compliance reporting.
Step 1: Create a content analysis rule
Log on to the Container Registry console.
In the top navigation bar, select a region.
In the left-side navigation pane, click Instances.
On the Instances page, click the Enterprise Edition instance that you want to manage.
In the left-side navigation pane of the Overview page, choose Security and Trust > Content Analysis.
On the Content Analysis page, click Create Rule. In the dialog box that appears, configure the following parameters and click OK.
| Parameter | Description |
|---|---|
| Rule Name | A name for the rule. |
| Analytics Method | Automatic Analysis is automatically used. |
| Analytics Scope | The scope of analysis. Select Namespace to analyze all repositories in a namespace, or select Repository to analyze a specific repository. |
Step 2: Trigger content analysis
After creating a rule, start content analysis using one of the following methods:
| Method | When to use | How to trigger |
|---|---|---|
| Automatic | Newly pushed images | Push an image to a repository within the rule scope. Analysis starts automatically. |
| Manual — all images | Existing images in the scope | In the Analytics Rules section, find the rule and click Scan in the Actions column. |
| Manual — specific image | A single image tag | On the Repositories page, click the repository name, go to Tags, find the tag, and click Dependency Analysis in the Actions column. On the Dependency Analysis page, click Analyze Now. |
After analysis completes, an SBOM OCI artifact with the _sbom suffix is generated. Use ORAS and the image tag to download this file (see Download the SBOM file).
Step 3: View the analysis result
On the Repositories page, click the repository name, then click Tags in the left-side navigation pane.
On the Tags page, find the tag and click Dependency Analysis in the Actions column.
On the Dependency Analysis page, review the analysis result. The result includes:
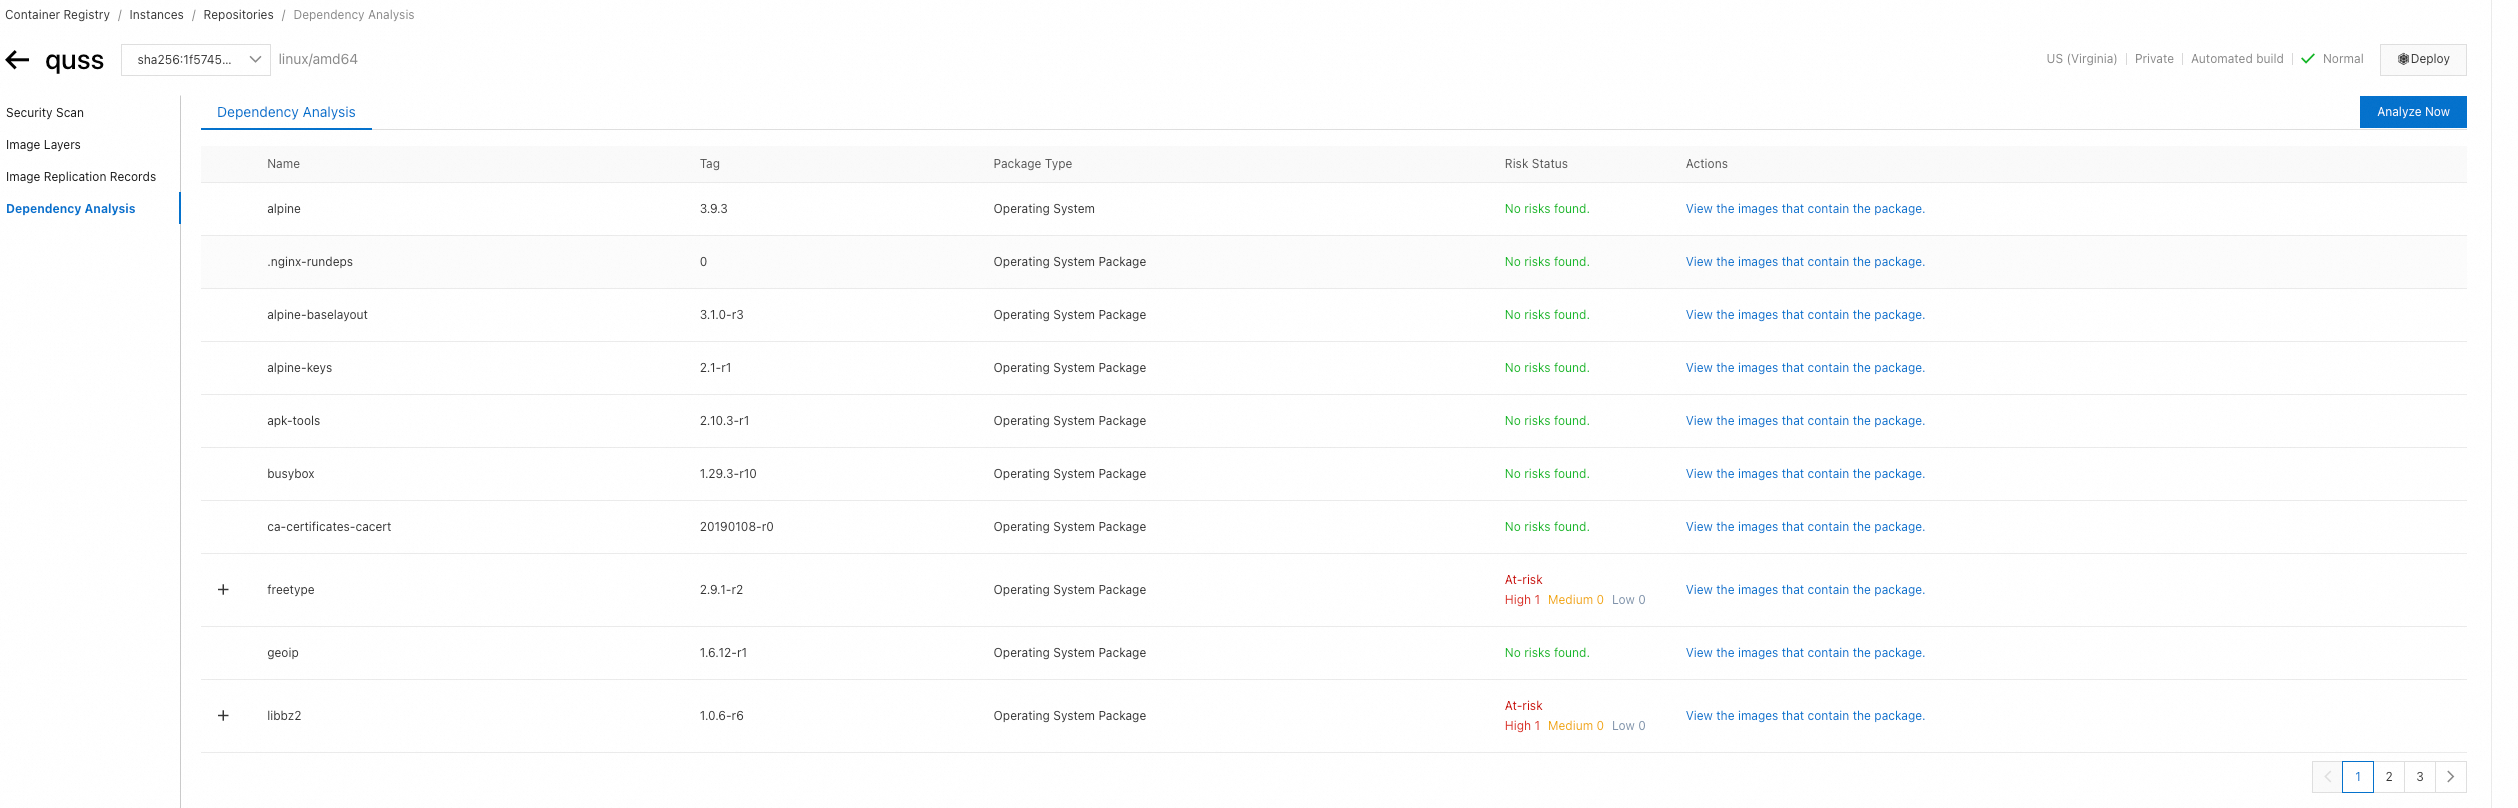
Package Type: Operating System, Operating System Package, or Language Package
Tags: Tags associated with the package
Risk Status: The risk level of the package
To find all images that contain a specific package, click View the images that contain the package in the Actions column. The panel shows all image tags within the analysis scope that include the package.
The result includes image tags that meet either of the following conditions: - The image was analyzed. - The image was not analyzed, but one of its layers shares the same digest as the layer containing the package. This means the layer is reused across multiple images. Multi-arch images and image tags overwritten by repeated pushes are also included and listed as
repo@digest.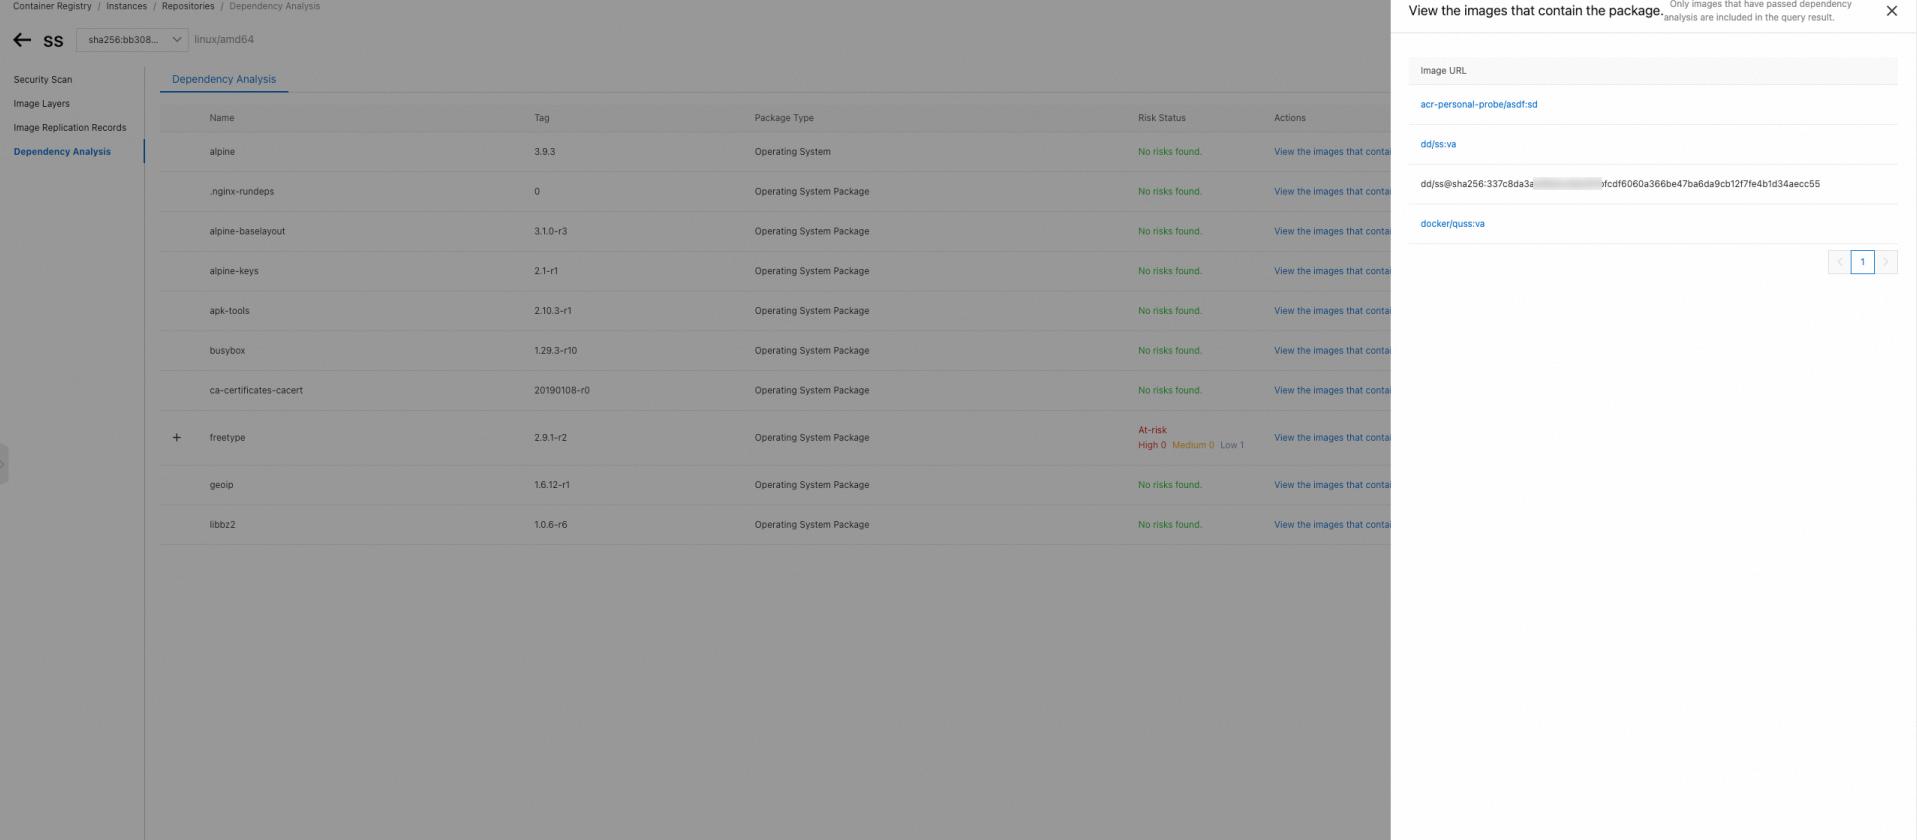
SBOM files
A software bill of materials (SBOM) lists the components in a software artifact — similar to a bill of materials in manufacturing. An SBOM captures component names, versions, licenses, and dependency relationships, making it essential for supply chain transparency, compliance auditing, and vulnerability response.
ACR generates SBOMs in CycloneDX 1.3 format. The following is an example:
{
  "bomFormat": "CycloneDX",        // SBOM format type
  "specVersion": "1.3",
  "serialNumber": "urn:uuid:47c90508-80a5-4cec-91f3-9920d765e3b5",
  "version": 1,
  "components": [                  // List of software components, each with type, name, version, license, and package URL (purl)
    {
      "type": "library",
      "name": "openssl",
      "version": "1.1.1",
      "licenses": [
        {
          "license": {
            "id": "Apache-2.0"
          }
        }
      ],
      "purl": "pkg:generic/openssl@1.1.1"
    },
    {
      "type": "library",
      "name": "curl",
      "version": "7.76.1",
      "licenses": [
        {
          "license": {
            "id": "MIT"
          }
        }
      ],
      "purl": "pkg:generic/curl@7.76.1"
    }
  ],
  "dependencies": [                // Dependency relationships between components
    {
      "ref": "pkg:generic/openssl@1.1.1",
      "dependsOn": []
    },
    {
      "ref": "pkg:generic/curl@7.76.1",
      "dependsOn": [
        "pkg:generic/openssl@1.1.1"
      ]
    }
  ]
}
Download the SBOM file
Two methods are available. Use Method 1 (by tag) if you know the image tag — it's simpler. Use Method 2 (by digest) if you need to locate the SBOM artifact by its content digest.
Prerequisites
Before you begin, ensure that you have:
An ORAS client installed and connected to Container Registry. See ORAS installation.
An Enterprise Edition instance in a region that supports content analysis (see Limitations).
Method 1: Pull by tag
Append _sbom to the image tag when pulling.
Log in to the image repository:
oras login --username=<username> <instance-name>-registry.-<region>.cr.aliyuncs.com
Password:
Login Succeeded
Pull the SBOM file:
oras pull <instance-name>-registry.<region>.cr.aliyuncs.com/<namespace>/<repository>:<tag>_sbom
Method 2: Pull by digest
Use oras discover to find the SBOM artifact digest, then pull by digest.
Log in to the image repository:
oras login --username=<username> <instance-name>-registry.-<region>.cr.aliyuncs.com
Password:
Login Succeeded
Get the image digest:
oras discover <instance-name>-registry.<region>.cr.aliyuncs.com/<namespace>/<repository>:<tag>Expected output:
<instance-name>-registry.<region>.cr.aliyuncs.com/<namespace>/<repository>@sha256:1f5745d79a9f820f5bXXXXXXXXXX5f626eb49aff9
└── application/vnd.cyclonedx+json
    └── sha256:0f0206650a86a16XXXXXXXX3891b22a9d649501229f83
Pull the SBOM file using the artifact digest from the previous step:
oras pull <instance-name>-registry.<region>.cr.aliyuncs.com/<namespace>/<repository>@sha256:0f0206650a86a16XXXXXXXX3891b22a9d649501229f83
Replace the following placeholders with actual values:
| Placeholder | Description | Example |
|---|---|---|
<username> | Username for logging in to the image repository | myuser |
<instance-name> | Name of the Enterprise Edition instance | my-registry |
<region> | Region where the instance resides | cn-hangzhou |
<namespace> | Namespace name | my-namespace |
<repository> | Image repository name | my-app |
<tag> | Image tag | v1.0.0 |