Java containerization is more complex than Go or Python due to self-managed Maven repositories and Docker caching pitfalls. Learn how to build Java container images, optimize build speed with dependency caching, and automate builds with ACR-EE.
Prerequisites
-
You have created a GitLab codebase.
-
You have created a Maven repository.
-
An ACR-EE instance is created. Create an Enterprise Edition instance.
Example project overview
The example uses two interdependent Java projects:
-
Provider: A service callable by other applications.
-
Core module: Provides common interfaces.
-
Service module: Implements the services.
-
-
Consumer: Calls the Provider service.
-
Service module: Depends on the Provider Core module. Project structure:
.
├── consumer
│ ├── Dockerfile
│ ├── consumer.iml
│ ├── pom.xml
│ └── service
│     ├── pom.xml
│     ├── src
│     └── target
└── provider
    ├── Dockerfile
    ├── core
    │ ├── pom.xml
    │ ├── src
    │ └── target
    ├── pom.xml
    ├── provider.iml
    └── service
        ├── pom.xml
        ├── src
        └── target
-
Build artifacts:
-
A Provider application image.
-
A Consumer application image.
Step 1: Upload common dependencies
Upload common dependencies to your self-managed Maven repository before building. Run the following command in the Provider directory:
mvn clean install org.apache.maven.plugins:maven-deploy-plugin:2.8:deploy -DskipTestsStep 2: Create a custom Maven base image
Include your Maven repository configuration in a custom base image built on the official Maven image. Application projects then inherit the repository access.
-
Save the following Dockerfile in the same directory as your Maven repository's settings.xml file.
FROM maven:3.8-openjdk-8 # Specify a Maven image that matches your project. This example uses Maven v3.8. ADD settings.xml /root/.m2/ # Add the custom Maven repository configuration to the appropriate directory. -
Build and push the image to a remote repository.
ls
Dockerfile   settings.xml

docker build -t demo-registry-vpc.cn-beijing.cr.aliyuncs.com/demo/maven-base:3.8-openjdk-8 -f Dockerfile .
Sending build context to Docker daemon   7.68kB
Step 1/2 : FROM maven:3.8-openjdk-8
 ---> a3f42bfde036
Step 2/2 : ADD settings.xml /root/.m2/
 ---> db0d5a5192e3
Successfully built db0d5a5192e3
Successfully tagged demo-registry-vpc.cn-beijing.cr.aliyuncs.com/demo/maven-base:3.8-openjdk-8

docker push demo-registry-vpc.cn-beijing.cr.aliyuncs.com/demo/maven-base:3.8-openjdk-8
Step 3: Build the consumer application image
Use the following Dockerfile. Push all required base images to your Alibaba Cloud image repository.
FROM demo-registry-vpc.cn-beijing.cr.aliyuncs.com/demo/maven-base:3.8-openjdk-8 AS builder

# add pom.xml and source code
ADD ./pom.xml pom.xml
ADD ./service service/

# package jar
RUN mvn clean package

# Second stage: minimal runtime environment
FROM demo-registry-vpc.cn-beijing.cr.aliyuncs.com/demo/openjdk:8-jre-alpine

# copy jar from the first stage
COPY --from=builder service/target/service-1.0-SNAPSHOT.jar service-1.0-SNAPSHOT.jar

EXPOSE 8080

CMD ["java", "-jar", "service-1.0-SNAPSHOT.jar"]
Step 4: Optimize the build speed
In Step 3: Build the Consumer application image (skip for the Provider project), you built a working image. However, every source code change triggers a full dependency re-download. Docker invalidates all layers after a changed ADD hash, including the RUN build layer. The Dockerfile best practices cover this caching behavior.
To optimize build speed, cache and reuse Maven dependencies across builds:
-
Copy only the pom.xml into the container and download dependencies. If the pom.xml is unchanged, subsequent builds reuse the cached dependency layer.
-
Copy the source code and compile.
The following Dockerfile separates dependency resolution from compilation. Initial builds take about 43 seconds; source-only rebuilds complete in about 7 seconds.
FROM demo-registry-vpc.cn-beijing.cr.aliyuncs.com/demo/maven-base:3.8-openjdk-8 AS builder

# To resolve dependencies in a safe way (no re-download when the source code changes)
ADD ./pom.xml pom.xml
ADD ./service/pom.xml service/pom.xml
RUN  mvn install

ADD ./service service/

# package jar
RUN mvn clean package

# Second stage: minimal runtime environment
FROM demo-registry-vpc.cn-beijing.cr.aliyuncs.com/demo/openjdk:8-jre-alpine

# copy jar from the first stage
COPY --from=builder service/target/service-1.0-SNAPSHOT.jar service-1.0-SNAPSHOT.jar

EXPOSE 8080

CMD ["java", "-jar", "service-1.0-SNAPSHOT.jar"]
Step 5: Automate builds with ACR-EE
ACR-EE provides enterprise-grade build services for automating image builds. Use an Enterprise Edition instance to build images.
Best practices for the ACR-EE build service:
-
Use the VPC secure build mode
For cloud-hosted self-managed GitLab repositories, use VPC secure build mode to avoid exposing services to the public internet. Build a container image in a VPC.
-
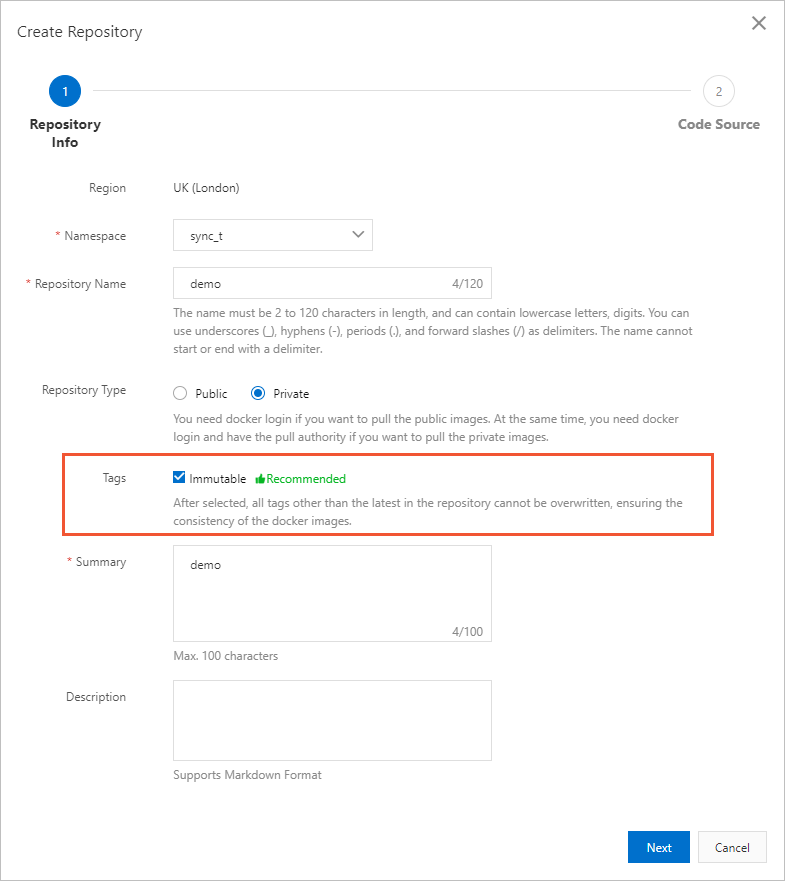
Use immutable image tags
Enable immutable image tags to prevent accidental overwrites of production tags.
-
Create a build rule based on commit IDs
Configure your build rule to generate two tags per build: one using the commit ID for version-to-code traceability, and
latestfor the most recent build.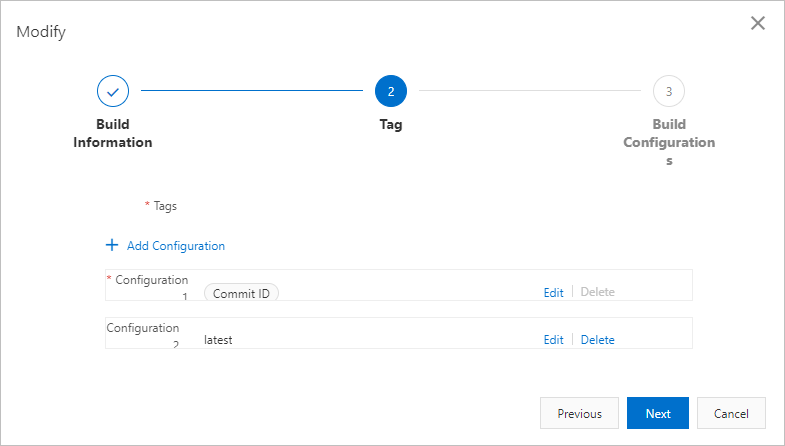
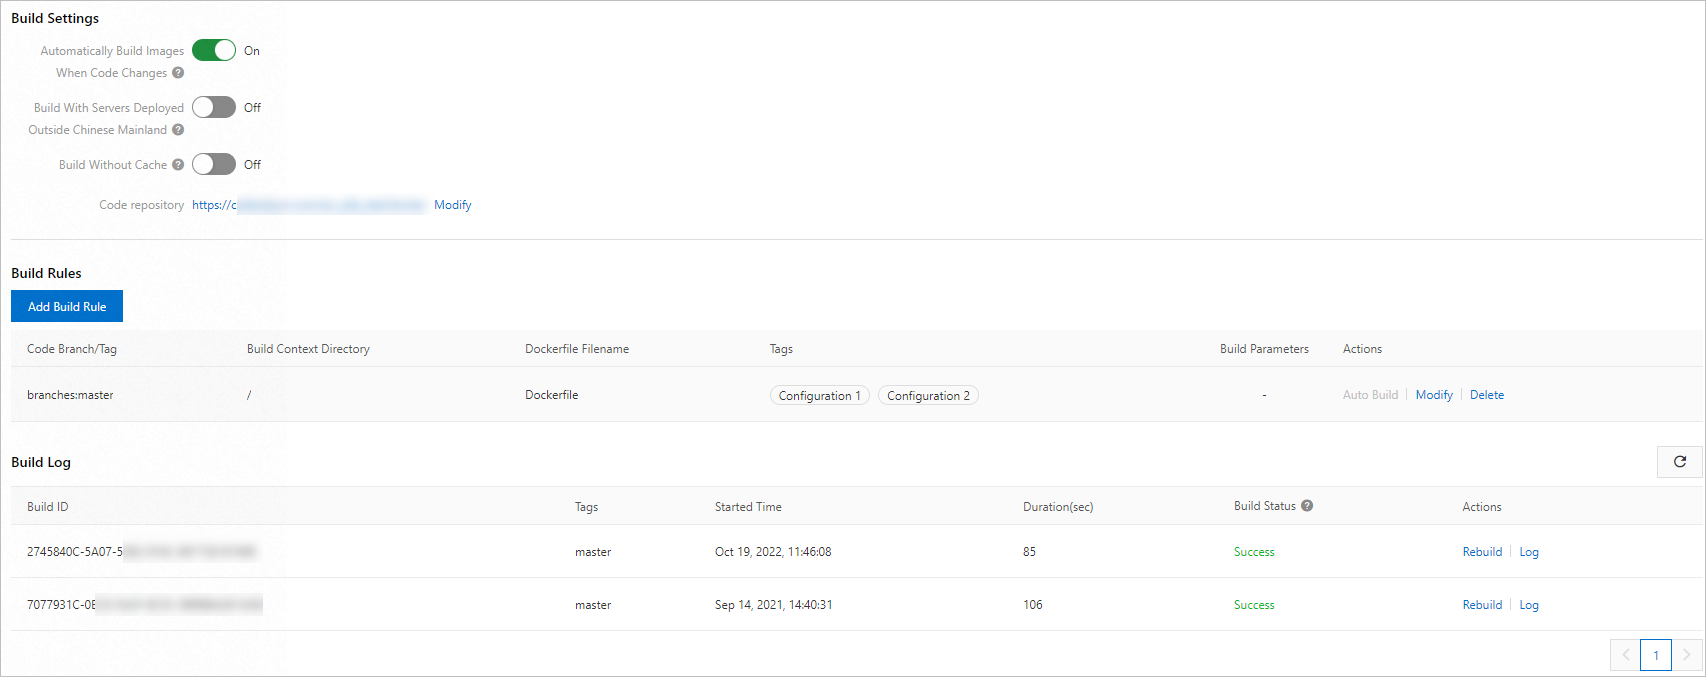
Each code commit triggers a build automatically. The following figure shows two builds from separate commits. Each build generates two images. The second build is faster because it reuses the cache.