If a program unexpectedly terminates or stops responding, the operating system records the content of the random access memory (RAM) that is allocated to the program and saves the content to a file for subsequent debugging and analysis. This process is called a core dump. This topic describes how to enable coredump for an elastic container instance (pod). This way, you can view and analyze the core files generated by coredump, find out the cause of the issue, and fix the program exceptions if a container is terminated due to exceptions.
Background information
In a Linux system, if a program unexpectedly terminates or stops responding, the operating system records the status of the random access memory (RAM) that is allocated to the program and saves the status to a file. This process is called a core dump. You can view and analyze the core file that is generated from the core dump to identify the cause of the issue.
The following figure shows the signals that indicate core dumps in Linux. The values of the signals in the Action column are Core.
 For more information, see Core dump file.
Description
By default, coredump is disabled in elastic container instances to prevent service unavailability that is caused by excessive disk usage. You can use one of the following methods to use coredump:
Method 1: Execute a coredump O&M task
After you enable coredump, the system generates an O&M task. If a container unexpectedly terminates or exits, the system triggers coredump to generate a core file and save the core file to an Object Storage Service (OSS) bucket.
Method 2: Specify a path to store core files
Elastic Container Instance allows you to use an external storage device to store core files. After you specify the storage device, coredump is automatically enabled for Elastic Container Instance. If a container unexpectedly terminates or exits, the system triggers coredump to generate a core file and save the core file to the specified external storage device.
Method 1 is easy to use, but has limits on the regions that you specify and the validity periods of the O&M tasks. Method 1 is suitable for temporary program debugging and diagnostics.
Generated O&M tasks can be executed only once. After an O&M task is executed and a core file is generated, coredump is disabled. The validity period of an O&M task is 12 hours.
You cannot manually execute coredump O&M tasks for the following regions: China (Ulanqab), China (Heyuan), China (Guangzhou), China (Nanjing - Local Region), Philippines (Manila), South Korea (Seoul), and Thailand (Bangkok).
Method 2 requires an external storage device. You can use this method to acquire core files even if the program is unstable. However, if the program repeatedly restarts, a large number of core files may be generated.
Method 1: Execute a coredump O&M task
By using the Elastic Container Instance console, you can manually enable coredump O&M tasks.
Log on to the Elastic Container Instance console.
Enable coredump for an instance.
In the left-side navigation pane, click Container Group. On the Container Group page, click the ID of the instance for which you want to enable coredump to go to the instance details page.
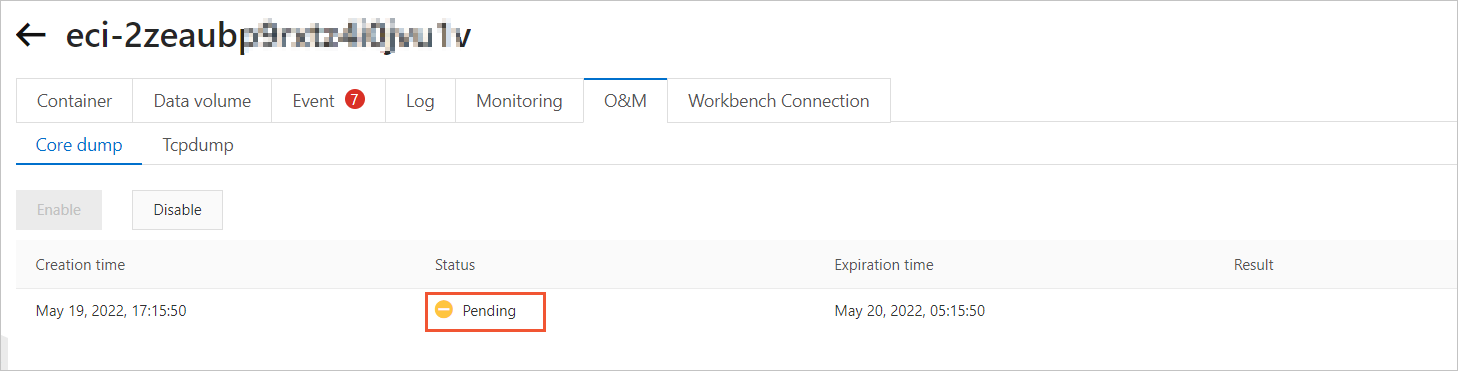
On the O&M tab, click the Core dump tab, and then click Enable.
After you enable coredump, the system generates an O&M task. Before coredump is triggered, the task is in the Pending state.
Trigger coredump.
Connect to the elastic container instance. After you run the following
sleep 100command in the container, press theCtrlkey and the\key at the same time to trigger coredump. A core file is automatically generated and saved to an OSS bucket.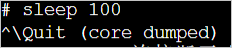
Download the core file.
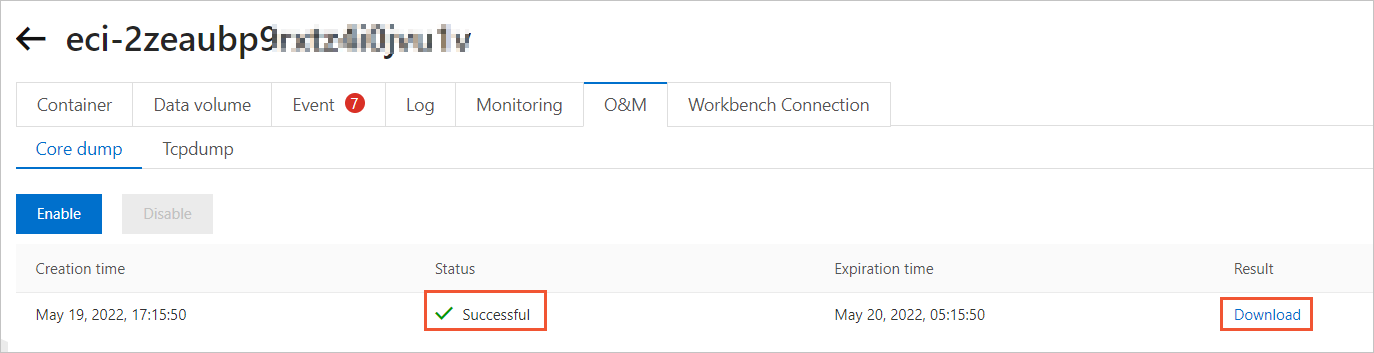
After coredump is triggered and the system generates a core file, the state of the O&M task changes to Successful. Click Download in the Result column to download the core file to your on-premises machine.
 Note
NoteIf the system does not respond, check the website permission settings of your browser.
Method 2: Specify a path to store core files
Core files are used to analyze issues offline. In most cases, core files are stored on external storage devices instead of local storage of containers. This prevents loss of core files if containers terminate. Elastic Container Instance allows you to specify a path to store core files. After you specify a path, coredump is automatically enabled.
The path cannot start with a vertical bar (|). You cannot use coredump to configure executable programs.
The following code provides a sample configuration in which a network-attached storage (NAS) file system is used as an external storage.
apiVersion: apps/v1
kind: Deployment
metadata:
  name: coredump-test
  labels:
    app: test
spec:
  replicas: 1
  selector:
    matchLabels:
      app: nginx
  template:
    metadata:
      name: nginx-test
      labels:
        app: nginx
        alibabacloud.com/eci: "true"
      annotations:
        k8s.aliyun.com/eci-core-pattern: "/data/dump-a/core"    # Specify the path to store core files.
    spec:
      containers:
      - name: nginx
        image: registry.cn-shanghai.aliyuncs.com/eci_open/nginx:1.14.2
        ports:
        - containerPort: 80
        volumeMounts:
          - name: nas-volume
            mountPath: /data/dump-a/
      volumes:     # Mount a NAS file system.
        - name: nas-volume
          csi:
            driver: nasplugin.csi.alibabacloud.com
            fsType: nas
            volumeAttributes:
              server: "0389a***-nh7m.cn-shanghai.extreme.nas.aliyuncs.com"
              path: "/"
              vers: "3"
              options: "nolock,tcp,noresvport"
FAQ
The system does not respond after coredump is triggered in the Elastic Container Instance console and I click Download in the Result column of the O&M task. What do I do?
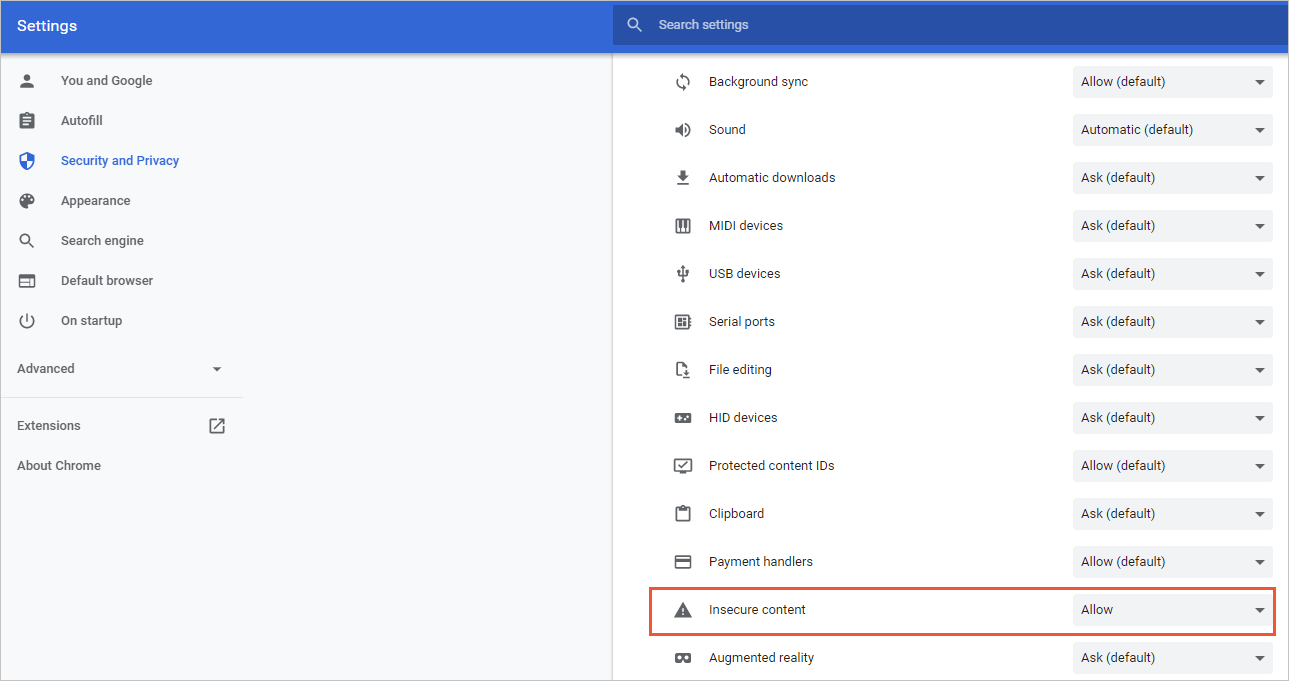
If the system does not respond, check the website permission settings of your browser. For example, if you use Google Chrome, you can use the following method to allow the download:
In the Elastic Container Instance console, click the
 icon in the address bar of your browser, and then select Site settings.
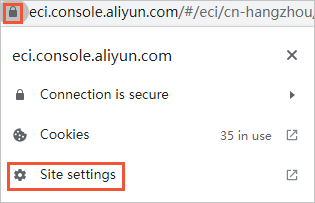
Change the settings of the configuration item Insecure content to Allow.