A workflow cluster can be integrated with Alibaba Cloud Simple Message Queue (formerly MNS). You can use Simple Message Queue (formerly MNS) as an intermediary to connect to various event sources and trigger workflows. When a new event, such as an OSS or EventBridge event, occurs, Simple Message Queue (formerly MNS) receives a corresponding message. Argo then automatically triggers a workflow based on the specified event trigger conditions. This process automates workflow execution.
Prerequisites
The following services and features are activated.
Activate Simple Message Queue (formerly MNS) and grant permissions. This feature incurs Simple Message Queue (formerly MNS) charges. For more information about billing, see Billing overview.
A workflow cluster is created and the Alibaba Cloud Argo command-line interface (CLI) is downloaded.
Step 1: Create an Event Bus
An Event Bus can be shared by event-driven workflows within a namespace. You can create an Event Bus using NATS or Simple Message Queue (formerly MNS). If you have already created an Event Bus, you can skip to Step 2: Create an Event Source.
Create via NATS
Create an
event-bus.yamlfile. The following code is an example:apiVersion: argoproj.io/v1alpha1 kind: EventBus metadata: name: default spec: nats: native: replicas: 3 auth: tokenRun the following command to create the EventBus.
kubectl apply -f event-bus.yamlNoteAfter the command runs successfully, an Event Bus pod is created in the default namespace. You must perform all subsequent operations in the same namespace.
Run the following command to verify that the Event Bus pod has started.
kubectl get pod
Create using Simple Message Queue (formerly MNS)
Log on to the SMQ console.
On the Topics page, create a topic named
argoeventbus. On the Topic Details page, obtain the endpoint from the Endpoint section.Log on to the RAM console as a RAM user who has administrative rights.
Create a RAM user, grant the
AliyunMNSFullAccesspermission to the RAM user, and then obtain the AccessKey ID and AccessKey secret of the RAM user.For more information, see Create a RAM user, Grant permissions to a RAM user, Create an AccessKey pair, and View the AccessKey information of a RAM user.
Run the following command to create a Secret to store the AccessKey ID and AccessKey secret.
kubectl create secret generic mns-secret\
  --from-literal=accesskey=*** \
  --from-literal=secretkey=***
Create an
event-bus-mns.yamlfile and replace the parameter values in the example with your actual values.topic: Replace this value with the name of the Simple Message Queue (formerly MNS) topic that you created in Step 2.endpoint: Replace this value with the endpoint that you obtained in Step 2.
apiVersion: argoproj.io/v1alpha1
kind: EventBus
metadata:
  name: default
spec:
  alimns:
    accessKey:
      key: accesskey
      name: mns-secret
    secretKey:
      key: secretkey
      name: mns-secret
    topic: argoeventbus  # The name of the Simple Message Queue (formerly MNS) topic.
    endpoint: http://165***368.mns.<region>.aliyuncs.com  # The endpoint of Simple Message Queue (formerly MNS).
Run the following command to apply the
event-bus-mns.yamlfile and create the Event Bus resource.kubectl apply -f event-bus-mns.yaml
Step 2: Create an Event Source
Log on to the SMQ console.
On the Queues page, create a queue named
test-event-queue. On the Queue Details page, obtain the endpoint from the Endpoint section.NoteIf you created the Event Bus using Simple Message Queue (formerly MNS), you can skip Step 3 to Step 5 and proceed directly to Step 6.
Log on to the RAM console as a RAM user who has administrative rights.
Create a RAM user, grant the
AliyunMNSFullAccesspermission to the RAM user, and then obtain the AccessKey ID and AccessKey secret of the RAM user.For more information, see Create a RAM user, Grant permissions to a RAM user, Create an AccessKey pair, and View the AccessKey information of a RAM user.
Run the following command to create a Secret to store the AccessKey ID and AccessKey secret.
kubectl create secret generic mns-secret\
  --from-literal=accesskey=*** \
  --from-literal=secretkey=***
Create an
event-source.yamlfile and replace the parameter values in the example with your actual values.topic: Set this parameter to the name of the topic in Simple Message Queue (formerly MNS) that you created in Step 2.endpoint: Replace this value with the endpoint that you obtained in Step 2.
apiVersion: argoproj.io/v1alpha1
kind: EventSource
metadata:
  name: ali-mns
spec:
  mns:
    example:
      jsonBody: true
      accessKey:
        key: accesskey
        name: mns-secret
      secretKey:
        key: secretkey
        name: mns-secret
      queue: test-event-queue # The name of the Simple Message Queue (formerly MNS) queue.
      waitTimeSeconds: 20
      endpoint: http://165***368.mns.<region>.aliyuncs.com # The endpoint of Simple Message Queue (formerly MNS).
Run the following command to apply the
event-source.yamlfile and create the Event Source.kubectl apply -f event-source.yamlRun the following command to check whether the Event Source pod starts as expected.
kubectl get pod
Step 3: Create an Event Sensor
Create an
event-sensor.yamlfile and embed the workflow definition to be run in the Event Sensor. The following code provides an example of an Event Sensor:Run the following command to apply the
event-sensor.yamlfile and create the Event Sensor.kubectl apply -f event-sensor.yamlRun the following command to check whether the Event Sensor pod starts as expected.
kubectl get pod
When you create an Event Bus using Simple Message Queue (formerly MNS), a corresponding Simple Message Queue (formerly MNS) queue is automatically created after you create the Event Sensor. The queue is named in the following format: ackone-argowf-<namespace>-<sensor-name>-<sensor-uid>.
Step 4: Verify that sending a message to Simple Message Queue (formerly MNS) triggers a workflow
Log on to the SMQ console.
On the Queues page, find the
test-event-queuequeue and click Send Messages in the Actions column.On the Quick Experience page, enter
test trigger argo workflowas the message content and then click Send Message.Run the following command to check the status of the workflow in the workflow cluster.
argo listThe following output is returned:
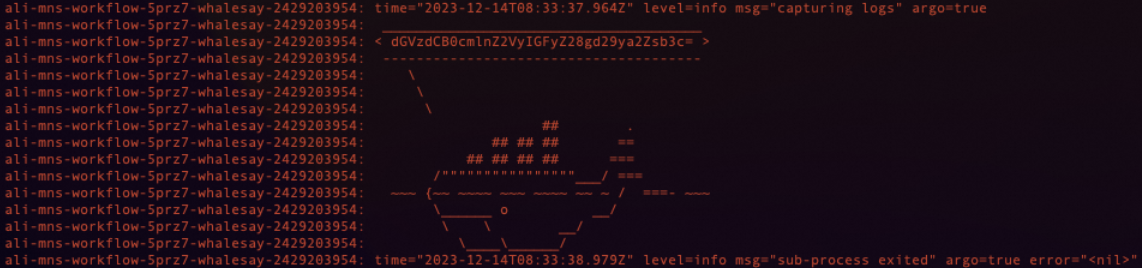
NAME                     STATUS    AGE   DURATION   PRIORITY
ali-mns-workflow-5prz7   Running   6s    6s         0
Run the following command to obtain the workflow logs and view the message content.
argo logs ali-mns-workflow-5prz7ImportantThe workflow name in this command must be the same as the workflow name that is returned in the previous step.
ali-mns-workflow-5prz7is an example. You must replace it with the actual return value in your environment.The message content is Base64-encoded.
The following output is returned:
Step 5: Delete event-related resources
Delete the related resources.
Delete the Event Sensor
kubectl delete sensor ali-mnsDelete the Event Source
kubectl delete eventsource ali-mnsDelete the Event Bus
kubectl delete eventbus default
Run the following command to check the pod status and confirm that all resources are deleted.
kubectl get pod