This topic applies only to nodes that are not managed by Auto Mode.
ContainerOS restricts direct shell access to prevent untraceable operations. To perform administrative tasks — such as troubleshooting, package installation, or system configuration — use the administrative container: a privileged environment with pre-installed tools, access to system processes, network state, and host file system.
Choose your access path based on your ContainerOS version:
| Version | Log on to administrative container | Log on to host |
|---|---|---|
| ContainerOS 3.5 and later | Workbench or VNC (shell removed from host) | Run sudo superman from within the container |
| ContainerOS earlier than 3.5 | SSH, using ECS Cloud Assistant + key pair | Workbench or VNC |
| All versions | kubectl debug (alternative method) |
— |
Administrative container overview
The administrative container runs alongside the host OS with the following properties:
-
Pre-installed with additional software packages; supports package installation via YUM.
-
Displays system processes, network state, and host configurations.
-
Mounts the host root file system in read-only mode at
/.lifsea/rootfs. -
Provides the
sudo supermancommand to enter the host environment.
Log on to the administrative container (ContainerOS 3.5 and later)
Log on to the host (ContainerOS earlier than 3.5)
For ContainerOS versions earlier than 3.5, log on to the host using Workbench or VNC.
Workbench logon
Before you begin, ensure that the node can access the Cloud Assistant service.
-
Log on to the ACK console. In the left navigation pane, click Clusters.
-
On the Clusters page, click the cluster name. In the left navigation pane, choose Nodes > Nodes.
-
In the Actions column of the target node, choose More > Workbench Remote Connection.
VNC logon
VNC logon requires password authentication. Before you begin, set the logon password using the Workbench secret-free logon method above.
-
Log on to the ACK console. In the left navigation pane, click Clusters.
-
On the Clusters page, click the cluster name. In the left navigation pane, choose Nodes > Nodes.
-
In the Actions column of the target node, choose More > VNC Remote Connection, and follow the prompts to complete identity authentication.
Log on to the administrative container via SSH (ContainerOS earlier than 3.5)
This method uses ECS Cloud Assistant to start the administrative container, then connects via SSH.
Prerequisites
Before you begin, ensure that you have:
-
An SSH key pair bound to the node. For new node pools, configure the logon mode as Key Pair when creating the node pool — see Create and manage node pools. For existing node pools, bind an SSH key pair to the running instance
-
ECS Cloud Assistant installed on the node — see Install Cloud Assistant Agent
-
Port 22 open in the security group — see Manage security group rules
-
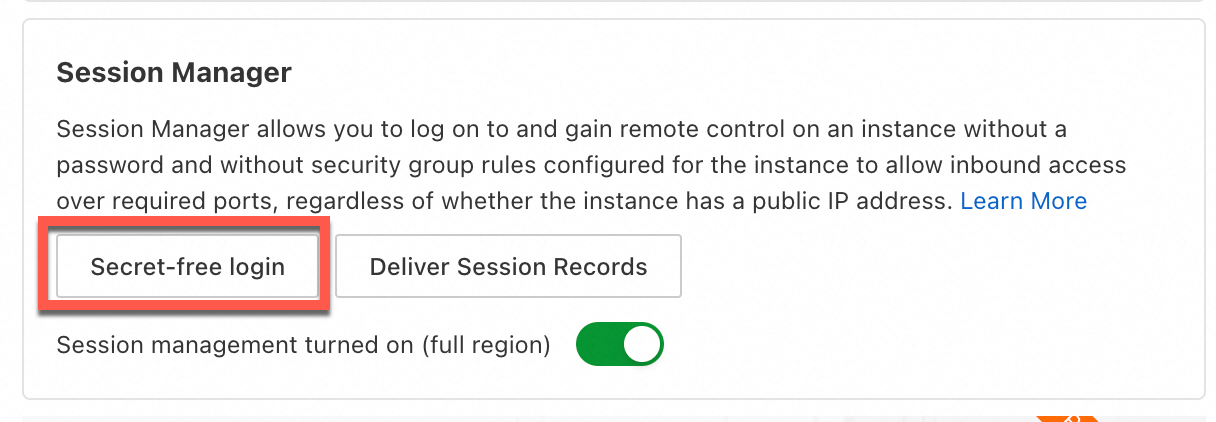
Secret-free login configured on the ECS instance
Start the administrative container
-
Log on to the ECS Cloud Assistant console and click Create/Run Command in the upper-right corner. For details, see Create and run commands.ECS console
-
In the Create Command panel, run the following command:
sudo lifseacli container startThe following output confirms that Cloud Assistant started the administrative container successfully:

Connect via SSH
-
From a terminal that supports SSH, connect to the administrative container using the private key bound to the instance:
ssh -i <ssh-private-key.pem> admin@<instance-ip>Replace
<ssh-private-key.pem>with your private key file and<instance-ip>with the instance IP address. Alternatively, log on asadmindirectly through Workbench using the same key pair — port 22 must be open. After a successful logon, the administrative container interface appears. The host root file system is mounted in read-only mode at/.lifsea/rootfs.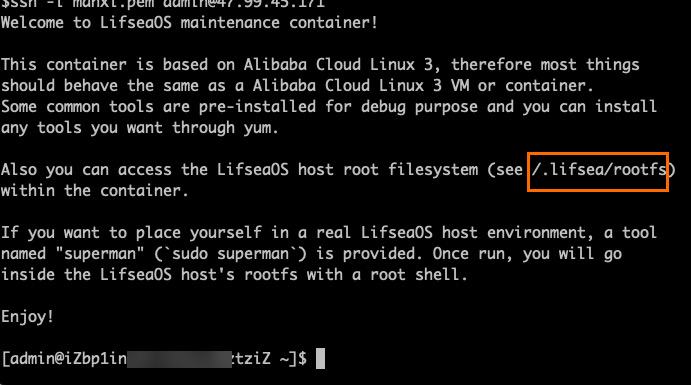
Enter the host environment
-
From inside the administrative container, run the following command to enter the host:
sudo superman -
Run
lsto list the available commands on the host. The host provides a limited set of system commands.
Exit
Run exit to leave the host environment. Run exit again to disconnect from the administrative container. The container continues running and remains accessible via SSH.
Manage the administrative container
Use lifseacli to stop, restart, delete, or check the status of the administrative container. Run these commands via ECS Cloud Assistant or from a terminal connected to the node.
| Operation | Command |
|---|---|
| Stop | sudo lifseacli container stop |
| Restart | sudo lifseacli container restart |
| Delete | sudo lifseacli container rm |
| Query status | sudo lifseacli container status |
If you bind a new key pair to or unbind the key pair from the instance after starting the administrative container, restart the container for the change to take effect.
Deleting the administrative container removes all installed software and saved files. Restarting the container initializes a new environment. Do not save important data in the administrative container.
Troubleshooting
Error: UNPROTECTED PRIVATE KEY FILE!

The private key file is accessible by other users. Run the following command to restrict access:
chmod 400 <ssh-private-key.pem>Replace <ssh-private-key.pem> with the name of your private key file.