The Agent2Agent (A2A) protocol is an open standard for communication and collaboration between AI agents. Deploying an A2A server in Knative lets you take advantage of auto-scaling (including scaling to zero), on-demand resource use, and rapid version iteration.
How it works
AI agents combine inference, planning, and memory capabilities to learn autonomously and complete tasks for users. The A2A protocol defines a standard framework for interoperability between agents, similar to how other protocols give large language models (LLMs) access to data and tools.
Deploying an A2A server in Knative exposes your agent as a network-accessible service:
Before deployment:
+-------------------+
| Your agent code   |
|   (standalone)    |
+-------------------+

After deployment:
+---------------------------+
|  Knative service (A2A)    |
+---------------------------+
            |
            v
+-------------------+         (network)        +-------------------+
| Your agent code   | <----------------------> |  Remote agents    |
| (now accessible)  |                          | (other services)  |
+-------------------+                          +-------------------+
Deploying an A2A server in Knative involves three core interactions:
-
Discovery: After deployment, the service exposes its interface through a standard Agent Card. Other agents query the Agent Card to discover the service's skills (AgentSkill) and capabilities (AgentCapabilities).
-
Communication: Agents exchange messages over HTTP or gRPC, routed through Knative's gateway and service routing layer.
-
Collaboration: Agents delegate tasks and coordinate actions through APIs.
For details on the protocol architecture and its core concepts, see the A2A specification and key concepts.
Prerequisites
Before you begin, ensure that you have:
-
Knative deployed in your cluster. See Deploy and manage Knative components
-
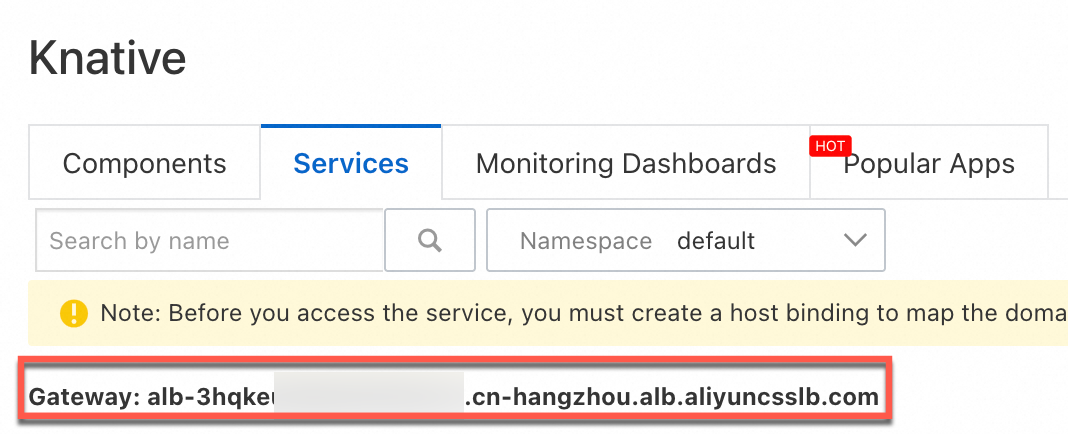
The gateway address, available on the Add-ons or Services tab in the Knative console
Step 1: Deploy the A2A server
This example deploys a basic agent service named helloworld-agent-server.
-
Create the
a2a-service.yamlfile with the following content:apiVersion: serving.knative.dev/v1 kind: Service metadata: name: helloworld-agent-server # Modify the namespace based on your requirements. namespace: default annotations: # Use a wildcard domain name for quick verification. knative.aliyun.com/serving-ingress: / spec: template: spec: containers: # Replace {region} with your actual region, such as cn-hangzhou. - image: registry-{region}-vpc.ack.aliyuncs.com/acs/knative-samples-a2a:v1.0-952c112 name: user-container env: # INVOKE defines the invocation URL returned in the Agent Card. # Replace the placeholder with the gateway address of your service. - name: INVOKE value: http://<YOUR_GATEWAY_ADDRESS>/invoke ports: - containerPort: 9001 name: http1 protocol: TCP -
Apply the manifest:
kubectl apply -f a2a-service.yaml -
Verify the service is ready:
kubectl get ksvc helloworld-agent-serverThe service is ready when the
READYcolumn showsTrue:NAME URL LATESTCREATED LATESTREADY READY REASON helloworld-agent-server http://helloworld-agent-server.default.example.com helloworld-agent-server-00001 helloworld-agent-server-00001 True
Step 2: Verify the Agent Card
After deployment, confirm the service returns a valid A2A Agent Card.
-
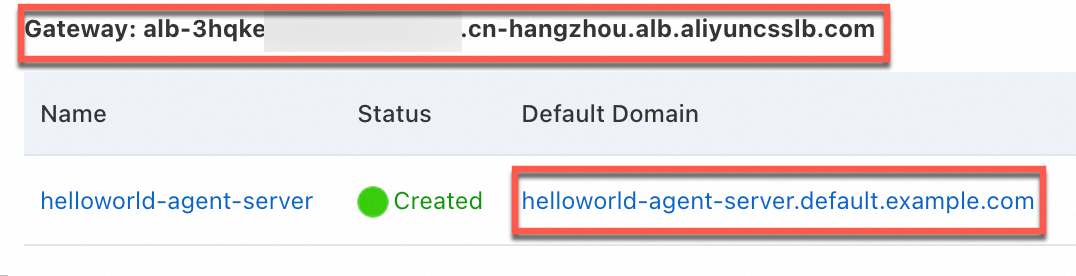
Get the gateway address and default domain name:
-
On the ACK Clusters page, click the name of your cluster. In the left navigation pane, click Applications > Knative.
-
On the Services tab, note the Gateway and Default Domain values.
-
-
Fetch the Agent Card from the service's metadata endpoint:
# Replace <GATEWAY_ADDRESS> with the gateway address you obtained.
curl http://<GATEWAY_ADDRESS>/.well-known/agent-card.json | jq .
A successful response looks like the following. Confirm that
capabilities.streamingistrue,preferredTransportisJSONRPC, andskillscontains at least one entry:{ "capabilities": { "streaming": true }, "defaultInputModes": [ "text" ], "defaultOutputModes": [ "text" ], "description": "Just a hello world agent", "name": "Hello World Agent", "preferredTransport": "JSONRPC", "protocolVersion": "", "skills": [ { "description": "Returns a 'Hello, world!'", "examples": [ "hi", "hello" ], "id": "hello_world", "name": "Hello, world!", "tags": [ "hello world" ] } ], "url": "http://XXX/invoke", "version": "" }
Step 3: Call the service with an A2A client
The following Go client simulates another agent communicating with the deployed A2A server.
-
Create a
main.gofile with the following code:package main import ( "context" "flag" "log" // Import the core libraries for the A2A protocol. "github.com/a2aproject/a2a-go/a2a" "github.com/a2aproject/a2a-go/a2aclient" "github.com/a2aproject/a2a-go/a2aclient/agentcard" // Import the gRPC-related libraries. "google.golang.org/grpc" "google.golang.org/grpc/credentials/insecure" ) // Replace <GATEWAY_ADDRESS> with your actual gateway address. var cardURL = flag.String("card-url", "http://<GATEWAY_ADDRESS>", "Base URL of AgentCard client.") func main() { flag.Parse() ctx := context.Background() // Discover the service via its Agent Card. card, err := agentcard.DefaultResolver.Resolve(ctx, *cardURL) if err != nil { log.Fatalf("Failed to resolve an AgentCard: %v", err) } // Configure the transport layer. withInsecureGRPC := a2aclient.WithGRPCTransport(grpc.WithTransportCredentials(insecure.NewCredentials())) // Create the client. client, err := a2aclient.NewFromCard(ctx, card, withInsecureGRPC) if err != nil { log.Fatalf("Failed to create a client: %v", err) } // Build and send a message. msg := a2a.NewMessage(a2a.MessageRoleUser, a2a.TextPart{Text: "Hello, world"}) resp, err := client.SendMessage(ctx, &a2a.MessageSendParams{Message: msg}) if err != nil { log.Fatalf("Failed to send a message: %v", err) } log.Printf("Server responded with: %+v", resp) } -
Initialize the module and run the client:
go mod init a2a-demo
go mod tidy
go run main.go
The client successfully connected to the Knative service when you see output similar to the following. The
Partsfield contains the agent's reply text andRole:agentconfirms the response came from the server:2025/11/27 17:24:21 Server responded with: &{ID:019ac4a0-c386-7cdc-9aad-d40fb8f98ae2 ContextID: Extensions:[] Metadata:map[] Parts:[{Text:Hello, world! Metadata:map[]}] ReferenceTasks:[] Role:agent TaskID:}
Apply in production
Before moving to production, address the following considerations:
Custom domain name and HTTPS: Do not use the wildcard test domain in production. Configure a custom domain name and enable an HTTPS certificate to secure communication between agents.
Cold start latency: When an agent is called infrequently, Knative scales instances down to zero. To prevent cold start latency from affecting users, configure a minimum number of instances using MinScale, or configure a reserved instance.
Billing
Knative itself has no additional cost. You pay for the underlying cloud resources provisioned while running your service, such as Elastic Compute Service (ECS) instances and Application Load Balancer. Each resource is billed separately by its respective cloud service. For pricing details, see Cloud resource fees.