Update the cloud-config ConfigMap to add pod routes to multiple VPC route tables in ACK managed and dedicated clusters.
Prerequisites
-
An ACK cluster with the Flannel network plugin is created, and the cloud-controller-manager component meets these version requirements:
-
ACK managed clusters:
-
Kubernetes ≥ 1.18
-
cloud-controller-manager ≥ v2.4.0
-
-
ACK dedicated clusters:
-
cloud-controller-manager ≥ v1.9.3.105-gfd4e547-aliyun
-
Manually upgrade the cluster as needed. Check or update the component version in Cloud Controller Manager.
-
-
The cluster VPC has multiple route tables.
NoteSkip this task if the VPC has only one route table.
Background
A VPC with multiple route tables lets you associate Elastic Compute Service (ECS) instances with different route tables. Earlier Cloud Controller Manager (CCM) versions support only one route table per VPC. To enable multiple route tables, update the CCM to the latest version. See Manage components.
Obtain route table IDs
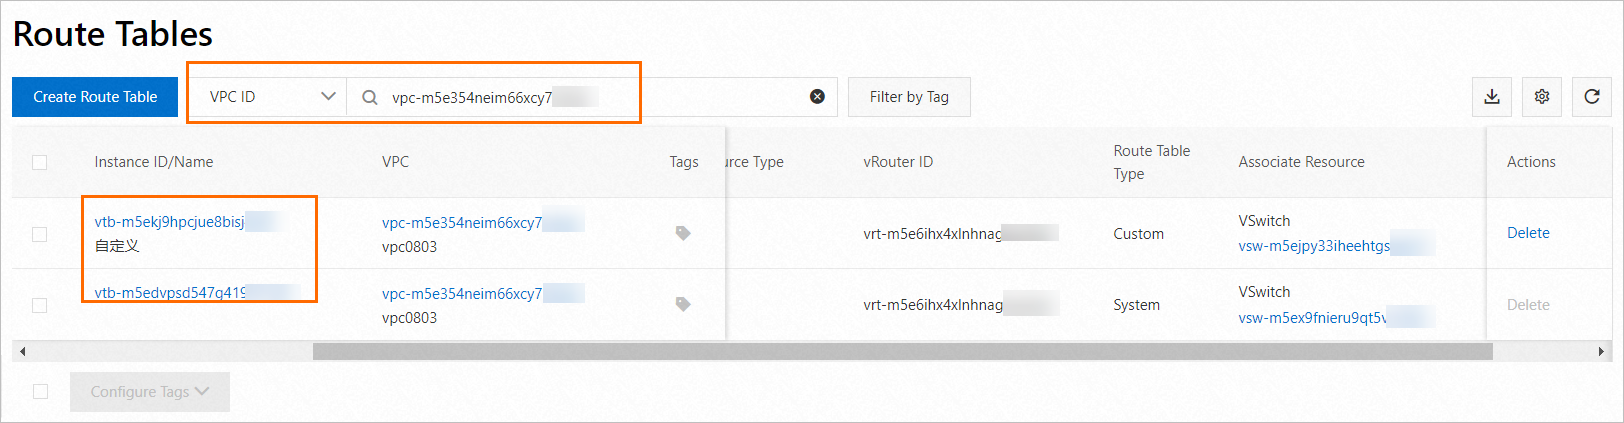
Obtain the route table IDs from the VPC console.
-
Log on to the VPC console. In the left-side navigation pane, click Route Tables.
-
On the Route Tables page, set the filter to VPC ID, enter your cluster's VPC ID, and click the search icon.
Configure multiple route tables for an ACK managed cluster
Specify route table IDs in the CCM configuration on the Add-ons page.
-
Log on to the ACK console. In the left navigation pane, click Clusters.
-
On the Clusters page, click the name of your cluster. In the left navigation pane, click Components and Add-ons .
-
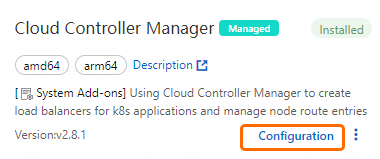
On the Add-ons page, find the CCM and click Configuration.
-
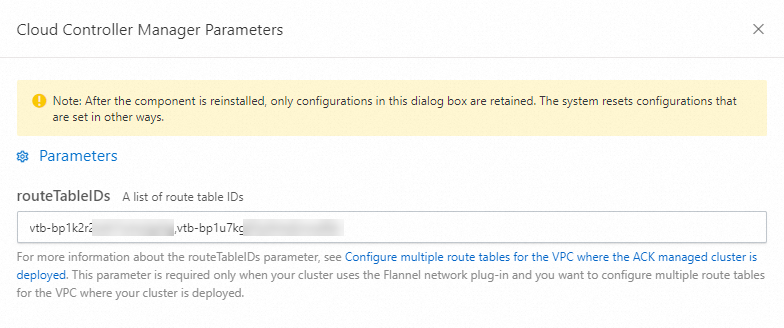
In the routeTableIDs field, enter the route table IDs and click OK.
Include the system route table ID. Separate IDs with commas (,). Example: vtb-t4n788888****,vtb-t4n7k6u3m0n840799***. The routeTableIDs parameter is required only for Flannel-based clusters that use multiple VPC route tables. Terway-based clusters do not require this parameter.
Configure multiple route tables for an ACK dedicated cluster
Specify route table IDs via kubectl or the ACK console.
Configure with kubectl
Ensure your kubectl client is connected to the dedicated cluster. See Obtain the kubeconfig file of a cluster and use kubectl to connect to the cluster.
-
Open the cloud-config ConfigMap for editing:
kubectl edit cm -n kube-system cloud-config -
Replace
${ROUTE_TABLES_IDS}with your VPC route table IDs. Include the system route table ID. Separate IDs with commas (,). Example:vtb-t4n788888****,vtb-t4n7k6u3m0n840799****.ImportantModify only the
${ROUTE_TABLES_IDS}value in the cloud-config ConfigMap."routeTableIDs": "${ROUTE_TABLES_IDS}" -
Restart the CCM pod:
kubectl -n kube-system delete po -lapp=cloud-controller-managerAfter the pod restarts, cluster node routes appear in the specified route tables.
Configure in the ACK console
-
Log on to the ACK console. In the left navigation pane, click Clusters.
-
On the Clusters page, click the name of your cluster. In the left navigation pane, click .
-
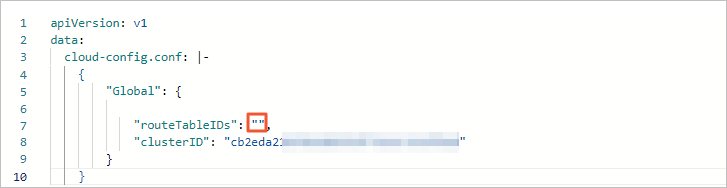
Select the kube-system namespace. Find the cloud-config ConfigMap and click Edit YAML.
-
In the View in YAML panel, set routeTableIDs to your VPC route table IDs. Include the system route table ID. Separate IDs with commas (,). Example: vtb-t4n788888****,vtb-t4n7k6u3m0n840799****. Click OK.
In the left navigation pane of the cluster management page, choose .
-
Select the kube-system namespace. Find the cloud-controller-manager DaemonSet and click Batch Redeploy.
After redeployment, cluster node routes appear in the specified route tables.