Deploy Unity Render Streaming on ACK GPU nodes to stream real-time 3D rendering to browsers without client-side GPU hardware.
Prerequisites
Ensure that you have:
-
An ACK managed cluster with a GPU node pool
-
kubectlconfigured to connect to the cluster -
Unity Editor installed locally
-
Docker installed locally to build container images
Environment used in this guide:
| Component | Version / specification |
|---|---|
| ACK managed cluster | 1.22.3-aliyun.1 |
| Node pool operating system | Alibaba Cloud Linux 2.1903 |
| Instance type | ecs.gn6v-c8g1.2xlarge |
| Docker Engine | 19.3.15 |
Step 1: Build the Unity Render Streaming application
This step uses Unity Editor 2021.3.2f1c1 for Mac M1 Silicon.
-
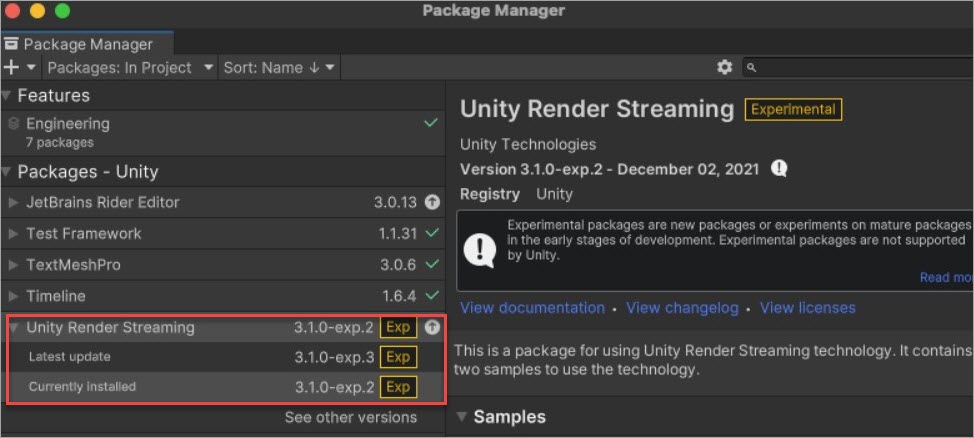
In Unity Editor, open Package Manager from the top-left menu.
-
Search for
com.unity.renderstreaming@3.1.0-exp.2and click Add. -
Click Yes to restart the project. After restarting, the Unity Render Streaming package appears on the Package Manager page.
-
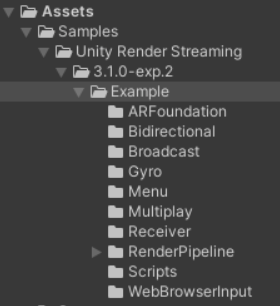
On the Package Manager page, scroll to Samples and click Import (1.19 MB). The Assets folder updates after importing.
-
Open Build Settings from the top-left menu. Set the fields as follows, then click Build and name the output mac-linux. After the build, the output directory looks like this:
Field Value Platform Windows, Mac, Linux Target Platform Linux Scenes WebBrowserInput 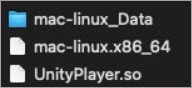
-
Download the official web server sample from the top-left menu. The web server handles WebSocket signaling between browsers and the Unity application's WebRTC stream. Your remote rendering application is now complete with a Unity executable and a web server binary. Other implementation options are covered in About Unity Render Streaming.
Step 2: Containerize and deploy the application
Containerize the Unity application and web server
-
Build the Unity application image. Follow Linux graphics application best practices for containerization steps. Use a
unityci/editorbase image matching your Unity Editor version — available tags are on unityci/editor on Docker Hub. This guide usesubuntu-2021.3.2f1-mac-mono-1.0.1with additional packages:vulkan-util,libc++1, andlibc++abi1. -
Build the web server image. Use the following Dockerfile:
FROM ubuntu:20.04
WORKDIR /run
COPY webserver ./
CMD webserver -w
Deploy to ACK
-
Create a file named
unity-demo.yamlwith the following content:apiVersion: v1 kind: Pod metadata: name: unity-demo namespace: default spec: # The Linux web server sample binds WebSocket to 127.0.0.1 only. # Use host network mode so browsers can reach it through the node's EIP. hostNetwork: true nodeName: <your-gpu-node-name> containers: - image: <your-unity-image>:<tag> name: unity command: ["/run/mac-linux/mac-linux.x86_64"] securityContext: # privileged: true is required for the Unity process to access # the GPU device on the host. privileged: true - image: <your-webserver-image>:<tag> name: webserver ports: - containerPort: 80 protocol: TCP restartPolicy: AlwaysBoth containers share the Pod network namespace. Unity connects to the web server at
127.0.0.1:80via WebSocket; the web server accepts browser connections on port 80.Key fields explained:
-
hostNetwork: true— The web server sample binds to127.0.0.1only. Host network mode makes it reachable via the node's elastic IP address (EIP). -
privileged: true— Required for the Unity container to access the host GPU. -
nodeName— Pins the Pod to a specific GPU node. Replace<your-gpu-node-name>with your node name.
-
-
Apply the manifest:
kubectl apply -f unity-demo.yaml -
Verify the Pod is running:
kubectl get pod unity-demoExpected output:
NAME         READY   STATUS    RESTARTS   AGE
unity-demo   2/2     Running   0          30s
If the Pod is not running, check the container logs:
kubectl logs unity-demo -c unity
kubectl logs unity-demo -c webserver
Step 3: Access the remote rendering stream
Connection path:
Browser -> EIP (port 80) -> web server (WebSocket signaling) -> Unity application (WebRTC stream)In your browser, go to EIP:80. Click VideoPlayer Sample to start the stream.
Stream quality depends on network stability.