mysqldump exports a database's schema and data as a SQL file containing CREATE TABLE and INSERT statements, then replays that file on the target instance. Use this method when your data volume is small or your business can tolerate extended downtime during migration.
To migrate without service interruptions, use Data Transmission Service (DTS) instead. DTS supports continuous replication and minimal-downtime cutover.
Prerequisites
Before you begin, ensure that you have:
-
Configured an IP address whitelist for the RDS instance
-
Obtained the public endpoint of the RDS instance
-
Created the destination databases and accounts on the RDS instance
For setup instructions, see General workflow to use ApsaraDB RDS for MySQL.
Use cases
mysqldump is the right choice when:
-
Data volume is small — the export and import complete within your maintenance window
-
Downtime is acceptable — writes to the source database must stop during export to guarantee consistency
-
No continuous replication is needed — a one-time logical copy is sufficient
Use DTS instead if you need zero-downtime cutover or ongoing replication.
Usage notes
After migration, all table names from the self-managed MySQL instance are stored in lowercase on the RDS instance. To preserve case-sensitive table names, use one of the following methods:
-
New instances: When creating an RDS for MySQL instance, set Table Name Case Sensitivity to Case-sensitive.
-
Existing instances: Set
lower_case_table_namesto0in the ApsaraDB RDS console. For details, see Modify the parameters of an ApsaraDB RDS for MySQL instance.
After you set lower_case_table_names to 0, do not change it back to 1. Doing so may trigger ERROR 1146 (42S02): Table doesn't exist and seriously affect your workloads. If your RDS instance runs MySQL 8.0, lower_case_table_names cannot be reconfigured after the instance is created.
Migrate data with mysqldump
The following steps use a Linux environment. The same commands work in macOS Terminal or Windows Command Prompt.
Step 1: Export data from the self-managed MySQL instance
Stop all writes to the source database before running the export. Updating data during export can corrupt the dump file.
The account used for the export must have the required permissions. For more information, see the official MySQL documentation.
Export schema and data (excluding stored procedures, triggers, and functions):
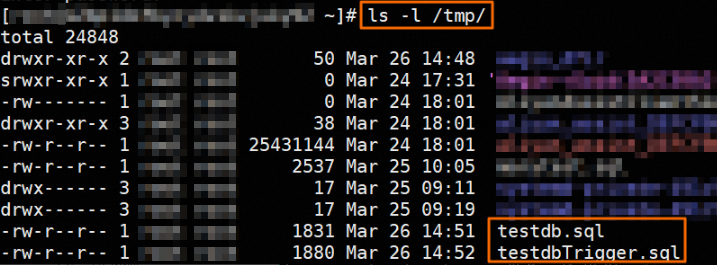
mysqldump -h 127.0.0.1 -u user -p --opt --default-character-set=utf8 --hex-blob <db_name> --skip-triggers --skip-lock-tables > /tmp/<db_name>.sqlExample:
mysqldump -h 127.0.0.1 -u user -p --opt --default-character-set=utf8 --hex-blob testdb --skip-triggers --skip-lock-tables > /tmp/testdb.sqlTo export data from an RDS for MySQL instance instead, replace the host, username, and database name with the corresponding RDS values.
The --default-character-set=utf8 flag sets the character set for the dump file. If the source database uses a different character set, set this flag to match it. A mismatch between the dump file's character set and the target instance's character set causes garbled text after import.
Export stored procedures, triggers, and functions:
mysqldump -h 127.0.0.1 -u user -p --opt --default-character-set=utf8 --hex-blob <db_name> -R | sed -e 's/DEFINER[ ]*=[ ]*[^*]*\*/*/' > /tmp/<db_name>Trigger.sqlExample:
mysqldump -h 127.0.0.1 -u user -p --opt --default-character-set=utf8 --hex-blob testdb -R | sed -e 's/DEFINER[ ]*=[ ]*[^*]*\*/\*/' > /tmp/testdbTrigger.sqlSkip this command if the source database has no stored procedures, triggers, or functions.
Step 2: Upload the exported files to an ECS instance
Upload the .sql files from Step 1 to the /tmp directory on an Elastic Compute Service (ECS) instance that can reach the RDS instance.
Skip this step if the self-managed MySQL instance already runs on an ECS instance.
Step 3: Import the files into the RDS instance
Run the following commands on the ECS instance. Replace the placeholders with your RDS connection details.
mysql -h <RDS endpoint> -P <port> -u <account> -p <database> < /tmp/<db_name>.sql
mysql -h <RDS endpoint> -P <port> -u <account> -p <database> < /tmp/<db_name>Trigger.sql
Example:
mysql -h rm-bpxxxxx.mysql.rds.aliyuncs.com -P 3306 -u testuser -p testdb < /tmp/testdb.sql
mysql -h rm-bpxxxxx.mysql.rds.aliyuncs.com -P 3306 -u testuser -p testdb < /tmp/testdbTrigger.sql| Placeholder | Description | Example |
|---|---|---|
<RDS endpoint> |
Public endpoint of the RDS instance | rm-bpxxxxx.mysql.rds.aliyuncs.com |
<port> |
Port of the RDS instance | 3306 |
<account> |
RDS account (privileged account, or standard account with read and write permissions) | testuser |
<database> |
Destination database name — must already exist on the RDS instance | testdb |
To create the destination database if it doesn't exist yet, see Manage databases.
Step 4: Verify the migration
Use DMS to log on to the RDS instance and confirm that tables, row counts, and data look correct.
What's next
-
Overview of data migration methods — compare mysqldump with DTS and other migration approaches
-
Modify the parameters of an ApsaraDB RDS for MySQL instance — tune
lower_case_table_namesand other instance parameters