Migrate data between Alibaba Cloud Object Storage Service (OSS) buckets to copy data from one bucket to another. This feature helps you efficiently transfer and manage data for backup and disaster recovery. This topic describes usage notes, limitations, and migration procedures.
Usage notes
Source API behavior: Data Online Migration accesses the source data address through public APIs provided by the source storage service provider. Actual behavior depends on the provider's API implementation.
Resource impact: Migration consumes resources at both the source and destination data addresses and may affect business workloads. To reduce impact, enable throttling for migration tasks or run tasks during off-peak hours after assessment.
Overwrite behavior: Before a task starts, Data Online Migration compares files at the source and destination data addresses. If files have the same name and the Overwrite Method is set to Overwrite, the destination file is overwritten during migration. If same-name files contain different data and the destination file must be retained, rename one file or back up the destination file first.
Lifecycle interaction: The source file's LastModifyTime attribute is retained after migration to the destination bucket. If lifecycle rules are configured on the destination bucket, migrated files whose last modification time falls within a rule window may be deleted or archived to a specified storage class.
Limitations
Static website hosting scan behavior: If static website hosting is enabled for source files, migration scans may detect directory objects that do not actually exist. For example, if myapp/resource/1.jpg exists, the scan may also return myapp/ and myapp/resource/. The non-existent directory objects fail to migrate, while myapp/resource/1.jpg is migrated as expected.
Symbolic links: Symbolic links at the source data address are migrated directly to the destination data address. For more information, see Symbolic links.
Task scope: Each task can migrate data from only one bucket. You cannot migrate all data in your account in a single task.
Attribute migration support: Only specific attributes are migrated between OSS buckets.
Migrated attributes:
x-oss-meta-*,LastModifyTime,Content-Type,Cache-Control,Content-Encoding,Content-Disposition,Content-Language, andExpires.Attributes not migrated (including but not limited to):
StorageClass,Acl, server-side encryption settings,Tagging, and user-definedx-oss-persistent-headers.NoteThe preceding list is not exhaustive. Verify actual migration results to identify additional attributes that are not migrated.
Step 1: Select a region
How to select a region
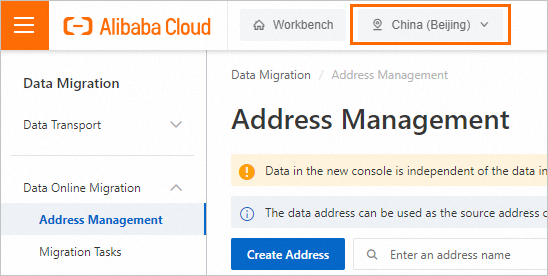
The region in which you access the Data Online Migration console determines whether you are charged for reading data from the source OSS bucket. The following figure shows how to select the region in which you access the Data Migration console. You must select a region before you create a migration task.
1. If the source OSS bucket resides in the region in which you access the Data Migration console, you are not charged for reading data from the source OSS bucket over the Internet.
For example, if the source and destination OSS buckets reside in the China (Beijing) region and you select the China (Beijing) region in the Data Online Migration console, no fees are generated for reading data from the source OSS bucket over the Internet during the migration.

2. If the source OSS bucket does not reside in the region in which you access the Data Migration console, you are charged for reading data from the source OSS bucket over the Internet.
For example, if you migrate data from an OSS bucket that resides in the China (Beijing) region to an OSS bucket that resides in the Singapore region, and you select the Singapore region in the Data Online Migration console, fees are generated for reading data from the source OSS bucket over the Internet.

To transfer data by using the shortest connection, select the region in which the source OSS bucket resides when you access the Data Online Migration console. If no region is available, select a region that is close to your business to ensure high migration performance.
Procedure
Log on to the Data Online Migration console as the Resource Access Management (RAM) user that you created for data migration.
NoteTo migrate data across Alibaba Cloud accounts, log on as a RAM user that is created within the source or destination Alibaba Cloud account.
In the upper-left corner of the top navigation bar, select the region where the source data address resides, or the closest available region.
The selected region is where Data Online Migration is deployed. Supported regions in China include China (Beijing), China (Shanghai), China (Hangzhou), China (Shenzhen), China (Ulanqab), and China (Hong Kong). Supported regions outside China include Singapore, Germany (Frankfurt), and US (Virginia).
ImportantThe data addresses and migration tasks that you create in a region cannot be used in another region. Select the region with caution.
Select the region where the source data address resides. If that region is not supported by Data Online Migration, select the closest supported region.
To speed up cross-border migration, enable transfer acceleration. If you enable transfer acceleration for OSS buckets, transfer acceleration fees apply. For more information, see Access OSS using transfer acceleration.
Step 2: Create a source data address
In the left-side navigation pane, choose Data Online Migration > Address Management. On the Address Management page, click Create Address.
In the Create Address panel, configure the parameters and click OK. The following table describes the parameters.
Parameter
Required
Description
Name
Yes
The name of the source data address. The name must meet the following requirements:
The name is 3 to 63 characters in length.
The name must be case-sensitive and can contain lowercase letters, digits, hyphens (-), and underscores (_).
The name is encoded in the UTF-8 format and cannot start with a hyphen (-) or an underscore (_).
Type
Yes
The type of the source data address. Select Alibaba OSS.
Custom Domain Name
No
Specifies whether custom domain names are supported.
Region
Yes
The region in which the source data address resides. Example: China (Hangzhou).
Authorize Role
Yes
The source bucket belongs to the Alibaba Cloud account that is used to log on to the Data Online Migration console
Create and authorize a RAM role in the Data Online Migration console. For more information, see Authorize a RAM role in the Data Online Migration console.
Alternatively, manually attach policies to a RAM role in the RAM console. For more information, see "Step 3: Grant permissions on the source bucket to a RAM role" in the Owned source bucket topic.
The source bucket does not belong to the Alibaba Cloud account that is used to log on to the Data Online Migration console
Attach policies to a RAM role in the OSS console. For more information, see "Step 3: Grant permissions on the source bucket to a RAM role" in Preparations topic.
Bucket
Yes
The name of the OSS bucket in which the data to be migrated is stored.
Prefix
No
The prefix of the source data address. Specify a prefix to migrate specific data. The prefix cannot start with a forward slash (/) but must end with a forward slash (/). Example:
data/to/oss/.Specify a prefix for the source data address: For example, you set the prefix of the source data address to
example/src/, store a file named example.jpg in example/src/, and set the prefix of the destination data address toexample/dest/. After the example.jpg file is migrated to the destination data address, the full path of the file isexample/dest/example.jpg.Do not specify a prefix for the source data address: For example, you specify no prefix for the source data address, the path of the file to be migrated is
srcbucket/example.jpg, and you set the prefix of the destination data address todestbucket/. After the example.jpg file is migrated to the destination data address, the full path of the file isdestbucket/srcbucket/example.jpg.
Tunnel
No
The name of the tunnel that you want to use.
ImportantThis parameter is required only when you migrate data to the cloud by using Express Connect circuits or VPN gateways or migrate data from self-managed databases to the cloud.
If data at the destination data address is stored in a local file system or you need to migrate data over an Express Connect circuit in an environment such as Alibaba Finance Cloud or Apsara Stack, you must create and deploy an agent.
Agent
No
The name of the agent that you want to use.
ImportantThis parameter is required only when you migrate data to the cloud by using Express Connect circuits or VPN gateways or migrate data from self-managed databases to the cloud.
Select up to 200 agents for a specific tunnel at a time.
Step 3: Create a destination data address
In the left-side navigation pane, choose Data Online Migration > Address Management. On the Address Management page, click Create Address.
In the Create Address panel, configure the parameters and click OK. The following table describes the parameters.
The name is 3 to 63 characters in length.
The name must be case-sensitive and can contain lowercase letters, digits, hyphens (-), and underscores (_).
The name is encoded in the UTF-8 format and cannot start with a hyphen (-) or an underscore (_).
The destination bucket belongs to the Alibaba Cloud account that is used to log on to the Data Online Migration console
Create and authorize a RAM role in the Data Online Migration console. For more information, see Authorize a RAM role in the Data Online Migration console.
Alternatively, manually attach policies to a RAM role in the RAM console. For more information, see "Step 4: Grant permissions on the destination bucket to the RAM role" in the Preparations topic.
The destination bucket does not belong to the Alibaba Cloud account that is used to log on to the Data Online Migration console
Attach policies to a RAM role in the OSS console. For more information, see "Step 4: Grant permissions on the destination bucket to the RAM role" in Preparations topic.
Specify a prefix for the destination data address: For example, you set the prefix of the source data address to
example/src/, store a file named example.jpg in example/src/, and set the prefix of the destination data address toexample/dest/. After the example.jpg file is migrated to the destination data address, the full path of the file isexample/dest/example.jpg.Do not specify a prefix for the destination data address: If you do not specify a prefix for the destination data address, the source data is migrated to the root directory of the destination bucket.
This parameter is required only when you migrate data to the cloud by using Express Connect circuits or VPN gateways or migrate data from self-managed databases to the cloud.
If data at the destination data address is stored in a local file system or you need to migrate data over an Express Connect circuit in an environment such as Alibaba Finance Cloud or Apsara Stack, you must create and deploy an agent.
This parameter is required only when you migrate data to the cloud by using Express Connect circuits or VPN gateways or migrate data from self-managed databases to the cloud.
Select up to 200 agents for a specific tunnel at a time.
Parameter | Required | Description |
Name | Yes | The name of the destination data address. The name must meet the following requirements: |
Type | Yes | The type of the destination data address. Select Alibaba OSS. |
Custom Domain Name | No | Specifies whether custom domain names are supported. |
Region | Yes | The region in which the destination data address resides. Example: China (Hangzhou). |
Authorize Role | Yes | |
Bucket | Yes | The name of the OSS bucket to which the data is migrated. |
Prefix | No | The prefix of the destination data address. Specify a prefix to migrate specific data. The prefix cannot start with a forward slash (/) but must end with a forward slash (/). Example: |
Tunnel | No | The name of the tunnel that you want to use. Important |
Agent | No | The name of the agent that you want to use. Important |
Step 4: Create a migration task
Up to five concurrent migration tasks can run in each region. If the number of concurrent tasks exceeds this limit, periodic scheduling may not run as expected.
In the left-side navigation pane, choose Data Online Migration > Migration Tasks. On the Migration Tasks page, click Create Task.
In the Select Address step,configure the parameters. The following table describes the parameters.
Parameter
Required
Description
Name
Yes
The name of the migration task. The name must meet the following requirements:
The name is 3 to 63 characters in length.
The name must be case-sensitive and can contain lowercase letters, digits, hyphens (-), and underscores (_).
The name is encoded in the UTF-8 format and cannot start with a hyphen (-) or an underscore (_).
Source Address
Yes
The source data address that you created.
Destination Address
Yes
The destination data address that you created.
In the Task Configurations step, configure the parameters. The following table describes the parameters.
Parameter
Required
Description
Migration Bandwidth
No
The maximum bandwidth that is available to the migration task. Valid values:
Default: Use the default upper limit for the migration bandwidth. The actual migration bandwidth depends on the file size and the number of files.
Specify an upper limit: Specify a custom upper limit for the migration bandwidth as prompted.
ImportantActual migration speed depends on multiple factors, such as the source data address, network conditions, throttling at the destination data address, and file size. As a result, actual speed may not reach the specified upper limit.
Specify a reasonable value for the upper limit of the migration bandwidth based on the evaluation of the source data address, migration purpose, business situation, and network bandwidth. Inappropriate throttling may affect business performance.
Files Migrated Per Second
No
The maximum number of files that can be migrated per second. Valid values:
Default: Use the default upper limit for the number of files that can be migrated per second.
Specify an upper limit: Specify a custom upper limit as prompted for the number of files that can be migrated per second.
ImportantActual migration speed depends on multiple factors, such as the source data address, network conditions, throttling at the destination data address, and file size. As a result, actual speed may not reach the specified upper limit.
Specify a reasonable value for the upper limit of the migration bandwidth based on the evaluation of the source data address, migration purpose, business situation, and network bandwidth. Inappropriate throttling may affect business performance.
Overwrite Method
Yes
Specifies whether to overwrite a file at the destination data address if the file has the same name as a file at the source data address. Valid values:
Do not overwrite: does not migrate the file at the source data address.
Overwrite All: overwrites the file at the destination data address.
Overwrite based on the last modification time:
If the last modification time of the file at the source data address is later than that of the file at the destination data address, the file at the destination data address is overwritten.
If the last modification time of the file at the source data address is the same as that of the file at the destination data address, the file at the destination data address is overwritten if the files differ from one of the following aspects: size and Content-Type header.
If you select Overwrite based on the last modification time, there is no guarantee that newer files won’t be overwritten by older ones, which creates a risk of losing recent updates.
If you select Overwrite based on the last modification time, ensure that files at the source data address contain the last modification time, size, and Content-Type header. Otherwise, the overwrite policy may be ineffective and result in unexpected migration outcomes.
If you select Do not overwrite or Overwrite based on the last modification time, the system sends a request to the source and destination data addresses to obtain the meta information and determines whether to overwrite a file. Therefore, request fees are generated for the source and destination data addresses.
WarningMigration Report
Yes
Specifies whether to push a migration report. Valid values:
Do not push (default): does not push the migration report to the destination bucket.
Push: pushes the migration report to the destination bucket. For more information, see What to do next.
ImportantThe migration report occupies storage space at the destination data address.
The migration report may be pushed with a delay. Wait until the migration report is generated.
A unique ID is generated for each task execution. A migration report is pushed only once. Do not delete the migration report unless necessary.
Migration Logs
Yes
Specifies whether to push migration logs to Simple Log Service (SLS). Valid values:
Do not push (default): Does not push migration logs.
Push: Pushes migration logs to SLS. View the migration logs in the SLS console.
Push only file error logs: Pushes only error migration logs to SLS. View the error migration logs in the SLS console.
If you select Push or Push only file error logs, Data Online Migration creates a project in SLS. The name of the project is in the aliyun-oss-import-log-Alibaba Cloud account ID-Region of the Data Online Migration console format. Example: aliyun-oss-import-log-137918634953****-cn-hangzhou.
ImportantTo prevent migration task errors, ensure that the following requirements are met before you select Push or Push only file error logs:
SLS is activated.
You have confirmed the authorization on the Authorize page.
Authorize
No
This parameter is displayed if you set the Migration Logs parameter to Push or Push only file error logs.
Click Authorize to go to the Cloud Resource Access Authorization page. On this page, click Confirm Authorization Policy. The RAM role AliyunOSSImportSlsAuditRole is created and permissions are granted to the RAM role.
File Name
No
The filter based on the file name.
Both inclusion and exclusion rules are supported. However, only the syntax of specific regular expressions is supported. For more information about the syntax of regular expressions, visit re2. Example:
.*\.jpg$ indicates all files whose names end with .jpg.
By default, ^file.* indicates all files whose names start with file in the root directory.
If a prefix is configured for the source data address and the prefix is data/to/oss/, you need to use the ^data/to/oss/file.* filter to match all files whose names start with file in the specified directory.
.*/picture/.* indicates files whose paths contain a subdirectory called picture.
ImportantIf an inclusion rule is configured, all files that meet the inclusion rule are migrated. If multiple inclusion rules are configured, files are migrated as long as one of the inclusion rules is met.
For example, the picture.jpg and picture.png files exist and the inclusion rule .*\.jpg$ is configured. Only the picture.jpg file is migrated. If the inclusion rule .*\.png$ is configured at the same time, both files are migrated.
If an exclusion rule is configured, all files that meet the exclusion rule are not migrated. If multiple exclusion rules are configured, files are not migrated as long as one of the exclusion rules is met.
For example, the picture.jpg and picture.png files exist and the exclusion rule .*\.jpg$ is configured. Only the picture.png file is migrated. If the exclusion rule .*\.png$ is configured at the same time, neither file is migrated.
Exclusion rules take precedence over inclusion rules. If a file meets both an exclusion rule and an inclusion rule, the file is not migrated.
For example, the file.txt file exists, and the exclusion rule .*\.txt$ and the inclusion rule file.* are configured. In this case, the file is not migrated.
File Modification Time
No
The filter based on the last modification time of files.
Specify the last modification time as a filter rule. If you specify a time period, only files whose last modification time falls within that period are migrated. Examples:
If you specify January 1, 2019 as the start time and do not specify the end time, only the files whose last modification time is not earlier than January 1, 2019 are migrated.
If you specify January 1, 2022 as the end time and do not specify the start time, only the files whose last modification time is not later than January 1, 2022 are migrated.
If you specify January 1, 2019 as the start time and January 1, 2022 as the end time, only the files whose last modification time is not earlier than January 1, 2019 and not later than January 1, 2022 are migrated.
Execution Time
No
ImportantIf the current execution of a migration task is not complete by the next scheduled start time, the task starts its next execution at the subsequent scheduled start time after the current migration is complete. This process continues until the task is run the specified number of times.
If Data Online Migration is deployed in the China (Hong Kong) region or the regions in the Chinese mainland, up to 10 concurrent migration tasks are supported. If Data Online Migration is deployed in regions outside China, up to five concurrent migration tasks are supported. If the number of concurrent tasks exceeds the limit, executions of tasks may not be complete as scheduled.
The time when the migration task is run. Valid values:
Immediately: The task is immediately run.
Scheduled Task: The task is run within the specified time period every day. By default, the task is started at the specified start time and stopped at the specified stop time.
Periodic Scheduling: The task is run based on the execution frequency and number of execution times that you specify.
Execution Frequency: Specify the execution frequency of the task. Valid values: Every Hour, Every Day, Every Week, Certain Days of the Week, and Custom. For more information, see the Supported execution frequencies section of this topic.
Executions: Specify the maximum number of execution times of the task as prompted. By default, if you do not specify this parameter, the task is run once.
ImportantYou may manually start and stop tasks at any time. This action is not affected by custom task execution times.
Read and confirm the Data Online Migration Agreement. Then click Next.
Verify that the configurations are correct and click OK. The migration task is created.
Supported execution frequencies
Execution frequency | Description | Example |
Hourly | Select an hourly frequency. You can use this with the maximum number of runs. | The current time is 8:05. You set the frequency to hourly and the number of runs to 3. The first task starts at the next hour, 9:00.
|
Daily | When you select a daily frequency, you must set a specific hour (0–23) for the task to start. You can use this with the maximum number of runs. | The current time is 8:05. You set the task to run daily at 10:00 for 5 runs. The first task starts at 10:00 on the same day.
|
Weekly | When you select a weekly frequency, you must specify a day of the week and an hour (0–23) for the task to start. You can use this with the maximum number of runs. | The current time is Monday at 8:05. You set the task to run every Monday at 10:00 for 10 runs. The first task starts at 10:00 on the same day.
|
Specific days of the week | When you select specific days of the week, you can choose any days of the week and set an hour (0–23) for the task to start. | The current time is Wednesday at 8:05. You set the task to run every Monday, Wednesday, and Friday at 10:00. The first task starts at 10:00 on the same day.
|
Custom | Use a cron expression to set a custom start time for the task. | Note A cron expression consists of six fields separated by spaces. They represent the execution time rule for the task: second, minute, hour, day of the month, month, and day of the week. The minimum interval is 1 hour. The following cron expression examples are for reference only. For more information, see a cron expression generator:
|
Step 5: Verify data
Data Online Migration only transfers data and does not guarantee data consistency or integrity. After a migration task is complete, review all migrated data and verify consistency between the source and destination data addresses.
Verify migrated data at the destination data address after the migration task is complete. If you delete source data before verification is complete, you are responsible for any resulting data loss and consequences.