Security audits, threat tracing, and emergency response depend on centralized log management and analysis. The log analysis feature collects host logs and security logs. Host logs include logon, process, and network connectivity logs. Security logs from Security Center include alerts, vulnerabilities, and baseline checks. This feature solves issues such as scattered logs, difficult queries, and a lack of association analysis. It helps you quickly understand security events and meet compliance audit requirements.
View log reports
After the log analysis feature of Security Center is enabled, the system automatically creates report dashboards. These dashboards display data related to host logs and security logs.
Scope
The supported report types are listed in the following table. For more information, see Appendix: Log report details.
Log type | Log report | Description |
Host log | Logon Center | Analyzes server logon activities to identify abnormal logons. |
Process Center | Audits process startups on servers to find abnormal programs. | |
Network Connectivity Center | Monitors network connectivity to identify suspicious outbound or inbound traffic. | |
Security log | Baseline Center | Provides insights into the configuration risk distribution and remediation trends of assets. |
Vulnerability Center | Shows the vulnerability distribution, types, and remediation status of assets. | |
Alert Center | Provides an overview of the alert levels, types, and handling status of all security events. |
Procedure
Log on to the console
Go to the Security Center console - Risk Governance - Log Analysis page. In the upper-left corner of the page, select the region where your assets are located: Chinese Mainland or Outside Chinese Mainland.
Enable log delivery
On the Log Analysis page, turn on the Enable switch.

Click a report tab to view its dashboard.

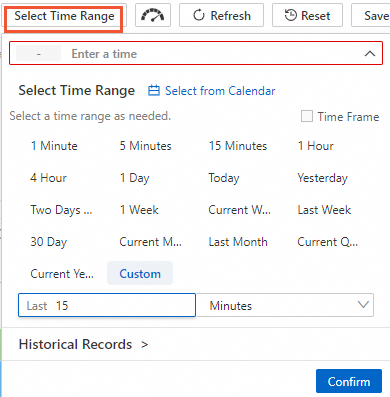
Set the query time range
In the upper-right corner of the report tab, select time range. In the dialog box that appears, set the time range for the log query.
NoteThis setting is temporary and applies only to the current page. The next time you open the report page, the dashboard reverts to the default time range.
Set the refresh rate (Optional)
In the upper-right corner of the report tab, click Refresh to set the refresh rate for the log report.
Once: Refreshes immediately.
Automatic Refresh: You can set the report to refresh automatically every 15 seconds, 60 seconds, 5 minutes, or 15 minutes.

Export logs
Log on to the Security Center console.
In the navigation pane on the left, choose . In the upper-left corner of the console, select the region where your assets are located: Chinese Mainland or Outside Chinese Mainland.
In the upper-left corner, select a log type from the drop-down list and query the logs. For more information, see Customize log queries and analysis.

Above the log list on the Raw Logs tab, click the
 icon and select Download Log.
In the Log Download dialog box, configure the parameters and click Confirm.
ImportantA maximum of 20 million logs can be downloaded for a standard query.
Time Range: (Read-only) The time period covered by the export task.
Search Statement: (Read-only) The search statement used for the export task.
Task Name: A custom name for the task for easy identification.
Number of Logs: Export all (up to 20 million) or a custom number of logs.
Data Format: Select
CSVorjson.Quote Character: For CSV format only. Wraps field content in quotation marks to prevent errors. Options:
"or'.Allow Inaccurate Results: Used for estimated queries.
Yes: Faster, but results may be approximate.
No: Slower and may fail, but results are accurate.
Compression Method: The compression format for the exported file. Options: None,
gzip, orzstd.Sort Order: The order in which to sort logs by time. Options: Ascending (asc) or Descending (desc).
Download the file
Above the log list on the Raw Logs tab, click the
icon and select Download Tasks.In the Download Tasks dialog box, check the status of the export task. When the task status is success, click Download.
The Simple Log Service (SLS) console provides more download methods, such as downloading through Cloud Shell or the command line. For more information, see Download logs.
Advanced log management
The log analysis feature of Security Center provides advanced log management capabilities. You can go to the Simple Log Service page to perform operations such as setting alerts and notification methods, subscribing to and consuming data in real time, and shipping data.
Go to the Security Center console - Risk Governance - Log Analysis page. In the upper-left corner of the page, select the region where your assets are located: Chinese Mainland or Outside Chinese Mainland.
In the upper-right corner of the Log Analysis page, click Advanced Management of Simple Log Service.
You are redirected to the Simple Log Service console to perform more operations. For more information, see Set alerts, Notification methods, and Data shipping.
NoteSimple Log Service also provides APIs to write and query log data, and manage projects and Logstores. For more information, see Simple Log Service API.
Appendix: Log report details
Host logs
Logon Center
Chart name | Chart type | Default time range | Description | Example |
Logon Count | Single value comparison | 1 hour (relative)/Day-over-day | The total number of logons and the percentage change compared with the same period on the previous day. | 10.0, 10% |
Number of Logged-on Devices | Single value comparison | Today (time frame)/Day-over-day | The number of Unique Host Devices that have been logged on to, and the increase or decrease compared to the previous full day. | 10, -10% |
Number of Unique Logon Source IPs | Single value comparison | Today (time frame)/Day-over-day | The number of unique source IPs for device logons, and the increase or decrease compared to the previous full day. | 10, 10% |
Number of Unique Logon Usernames | Single value comparison | Today (time frame)/Day-over-day | The number of unique usernames that logged on from a device, and the increase or decrease compared to the entire previous day. | 10, 10% |
Endpoint Logon Monitoring Trend | Column and line chart | Today (time frame) | A trend chart of the number of devices with logon events and the number of logons per hour. | None |
Logon Method Trend | Flow chart | Today (time frame) | A trend chart of logon methods, such as RDP and SSH, per hour. Unit: times/hour. | None |
Logon Method Distribution | Pie chart | 4 hours (relative) | The distribution of logon methods, such as RDP and SSH. | None |
Device Distribution | Map (global) | 4 hours (relative) | The geographical distribution of devices with public IP addresses that have logon events. | None |
Logon Source Distribution | Map (global) | 4 hours (relative) | The geographical distribution of logon sources for devices with public IP addresses. | None |
Unique Logon Source Distribution | Map (global) | 4 hours (relative) | The geographical distribution of unique logon sources for devices with public IP addresses. | None |
Top 10 Users by Logon Count | Pie chart | 4 hours (relative) | The top 10 usernames with the most logons. | None |
Top 10 Ports by Logon Count | Pie chart | 4 hours (relative) | The top 10 destination ports with the most logons. | None |
Each logon machine supports up to 30 users and sources. | Table | 4 hours (relative) | The top 30 users and sources with the most machine logons. Information includes source network, logon IP, username, logon method, number of unique devices logged on to, and logon count. | None |
Process Center
Chart name | Chart type | Default time range | Description | Example |
Process Startup Count | Single value comparison | 1 hour (relative)/Day-over-day | The total number of process startup events and the percentage change compared with the same period on the previous day. | 10.0 thousand, 0.01% |
Number of Related Devices | Single value comparison | Today (time frame)/Day-over-day | The number of Unique Host Devices where process start events occurred, and the increase or decrease compared to the previous day. | 10.0, 0.01% |
Number of Unique Started Process Names | Single value comparison | Today (time frame)/Day-over-day | The number of unique started process names, and the increase or decrease compared to the entire previous day. | 10.0, 0.01% |
Number of Endpoint Devices | Column and line chart | Today (time frame) | A trend chart of the number of devices with process startups and the number of unique process names per hour. Unit: number/hour. | None |
Process Startup Trend | Line chart | Today (time frame) | The average number of processes started per device per hour. Unit: number/hour. | None |
Public Device Distribution | Map (global) | Today (time frame) | The geographical distribution of devices with public IP addresses that have process startup events. | None |
Process Startup Count Distribution on Public Devices | Map (global) | Today (time frame) | The geographical distribution of process startup events on devices with public IP addresses. | None |
Top 20 Processes by Startup Count | Table | Today (time frame) | The top 20 processes with the most startups. Information includes process name, process path, and startup count. | None |
Top 20 Processes That Triggered Bash Most Frequently | Table | Today (time frame) | The top 20 processes that triggered Bash most frequently. Information includes parent process name and total trigger count. | None |
Top 30 Java Files by Process Startup Count | Table | Today (time frame) | The top 30 Java files that started the most processes. Information includes JAR file name, JAR file path, and total startup count. | None |
Top 30 Clients by Process Startup Count | Table | Today (time frame) | The top 30 clients that started the most processes. Information includes the client, total startup count, the command line with the most startups on the client, the corresponding process name, count, and percentage. | None |
Network Connectivity Center
Chart name | Chart type | Default time range | Description | Example |
Number of Connectivity Events | Single value comparison | 1 hour (relative)/Day-over-day | The total number of network connectivity change events on devices and the percentage change compared with the same period on the previous day. | 10.0, -0.01% |
Number of Related Devices | Single value comparison | Today (time frame)/Day-over-day | The number of Unique Host Devices that experienced connection change events, and the increase or decrease compared with the previous day. | 10.0, 0.01% |
Number of Unique Processes | Single value comparison | Today (time frame)/Day-over-day | The count of Unique Process Names associated with network connectivity change events, and the increase or decrease compared to the previous day. | 10.0, 0.01% |
Number of Unique Source IPs | Single value comparison | Today (time frame)/Day-over-day | The number of Unique Source IPs involved in network connectivity change events, and the increase or decrease compared with the entire previous day. | 10.0, 0.01% |
Number of Unique Destination IPs | Single value comparison | Today (time frame)/Day-over-day | The number of Unique Destination IPs involved in network connectivity change events, and the increase or decrease compared with the previous day. | 1.0 thousand, 0.01% |
Network Connectivity Trend | Dual line chart | 1 hour (relative) | A trend chart of the number of devices with network connectivity events and the number of events per hour. Unit: number/hour. | None |
Connection Type Trend | Dual line chart | 1 hour (relative) | A trend chart of the distribution of connection types (outbound, inbound) for network connectivity change events per hour. Unit: number/hour. | None |
Connection Type Distribution | Pie chart | 1 hour (relative) | The distribution of connection types (outbound, inbound) for network connectivity change events. | None |
Protocol Type Distribution | Pie chart | 1 hour (relative) | The distribution of connection protocols (TCP, UDP, etc.) for network connectivity change events. | None |
Public Device Distribution | Map (global) | 1 hour (relative) | The geographical distribution of devices with network connectivity change events. | None |
Public Device Event Distribution | Map (global) | 1 hour (relative) | The geographical distribution of network connectivity change events on devices with public IP addresses. | None |
Outbound Connection Destination Distribution | Map (global) | 1 hour (relative) | The geographical distribution of outbound connection destinations for network connectivity change events. | None |
Inbound Connection Source Distribution | Map (global) | 1 hour (relative) | The geographical distribution of inbound connection sources for network connectivity change events. | None |
Top 30 Devices by Outbound Connection Count | Table | 1 hour (relative) | The top 30 devices with the most outbound network connectivity change events. Information includes the device, number of outbound connection events, number of unique destination connections, and examples. | None |
Top 30 Devices by Inbound Connection Count | Table | 1 hour (relative) | The top 30 devices with the most inbound network connectivity change events. Information includes the device, listening IP, number of inbound connection events, number of listening ports, and examples. | None |
Top 30 Devices by Outbound Connection Destination Count | Table | 1 hour (relative) | The top 30 devices with the most outbound network connectivity change event destinations. Information includes the device, number of outbound connection events, number of unique destination connections, and examples. | None |
Top 30 Listening Ports by Inbound Connection Count | Table | 1 hour (relative) | The top 30 listening ports with the most inbound network connectivity change events. Information includes the listening port, number of inbound connection events, and examples. | None |
Top 30 Processes by Outbound Connection Count | Table | 1 hour (relative) | The top 30 processes with the most outbound network connectivity change events. Information includes the process name, number of outbound connection events, number of related devices, and path examples. | None |
Top 30 Processes by Inbound Connection Count | Table | 1 hour (relative) | The top 30 processes with the most inbound network connectivity change events. Information includes the process name, number of inbound connection events, number of related devices, and path examples. | None |
Security logs
Baseline Center
Chart name | Chart type | Default time range | Description | Example |
Number of Related Clients | Single value comparison | Today (time frame)/Day-over-day | The number of Unique Host Devices that have baseline issues, and the increase or decrease compared to the entire previous day. | 10.0, 0.01% |
Number of New Baselines | Single value comparison | Today (time frame)/Day-over-day | The number of new baseline events, and the increase or decrease compared to the previous day. | 10.0, -0.01% |
Number of Verified Baselines | Single value comparison | Today (time frame)/Day-over-day | Number of baseline authentication events, and the increase or decrease compared to the previous day. | 10.0, -0.01% |
Number of High-priority Baselines | Single value comparison | Today (time frame)/Day-over-day | The number of high-priority baseline events, and the increase or decrease compared to the entire previous day. | 10.0, 0.01% |
Baseline Operation Trend | Flow chart | Today (time frame) | A trend chart of various baseline operations (new, verified, etc.) per hour. Unit: number. | None |
Baseline Subtype Trend | Flow chart | Today (time frame) | A trend chart of various baseline subtypes (system account security, registry, etc.) per hour. Unit: number. | None |
Baseline Status Trend | Flow chart | Today (time frame) | A trend chart of various baseline statuses (unfixed, fixed) per hour. Unit: number. | None |
Baseline Operation Distribution | Doughnut chart | Today (time frame) | The distribution of various baseline operations (new, verified, etc.). | None |
Baseline Subtype Distribution | Doughnut chart | Today (time frame) | The distribution of various baseline subtypes (system account security, registry, etc.). | None |
Baseline Status Distribution | Doughnut chart | Today (time frame) | The distribution of the latest baseline statuses (unfixed, fixed, failed to fix, etc.). Important If a baseline on a server has multiple status changes, the latest status is used for categorization. | None |
Top 10 New Baselines | Doughnut chart | Today (time frame) | The top 10 baselines with the most new occurrences across all devices. | None |
Top 10 Verified Baselines | Doughnut chart | Today (time frame) | The top 10 baselines with the most verifications across all devices. | None |
Top 20 Clients by Baseline Event Count | Table | Today (time frame) | The top 20 devices with the most baseline events. Information includes the client, number of baseline events, number of new baselines, number of handled baselines, and number of high- or medium-priority baselines. | None |
Vulnerability Center
Chart name | Chart type | Default time range | Description | Example |
Number of Related Clients | Single value comparison | Today (time frame)/Day-over-day | The number of Unique Host Devices with vulnerabilities, and the increase or decrease compared with the previous day. | 10.0, 0.01% |
Number of New Vulnerabilities | Single value comparison | Today (time frame)/Day-over-day | The number of new security vulnerability events, and the increase or decrease compared with the entire previous day. | 10.0, 0.01% |
Number of Verified Vulnerabilities | Single value comparison | Today (time frame)/Day-over-day | The number of authenticated security vulnerability events, and the increase or decrease compared to the entire previous day. | 10.0, -0.01% |
Number of Fixed Vulnerabilities | Single value comparison | Today (time frame)/Day-over-day | The number of fixed security vulnerability events, and the increase or decrease compared to the previous day. | 10.0, -0.01% |
Vulnerability Operation Trend | Flow chart | Today (time frame) | A trend chart of various vulnerability operations (new, verified, etc.) per hour. Unit: number. | None |
Vulnerability Type Trend | Flow chart | Today (time frame) | A trend chart of various vulnerability types (Windows vulnerabilities, Linux vulnerabilities, Web-CMS vulnerabilities, etc.) per hour. Unit: number. | None |
Vulnerability Status Trend | Flow chart | Today (time frame) | A trend chart of various vulnerability statuses (unfixed, fixed) per hour. Unit: number. | None |
Vulnerability Operation Distribution | Doughnut chart | Today (time frame) | The distribution of various vulnerability operations (new, verified, etc.). | None |
Vulnerability Type Distribution | Doughnut chart | Today (time frame) | The distribution of various vulnerability types (Windows vulnerabilities, Linux vulnerabilities, web vulnerabilities, etc.). | None |
Vulnerability Status Distribution | Doughnut chart | Today (time frame) | The distribution of the latest vulnerability statuses (unfixed, fixed, failed to fix, etc.). Important If a vulnerability on a machine has multiple status changes, the latest status is used for categorization. | None |
Top 10 New Vulnerabilities | Doughnut chart | Today (time frame) | The top 10 vulnerabilities with the most new occurrences across all devices. | None |
Top 10 Verified Vulnerabilities | Doughnut chart | Today (time frame) | The top 10 vulnerabilities with the most verifications across all devices. | None |
Top 10 Fixed Vulnerabilities | Doughnut chart | Today (time frame) | Fix the 10 most common vulnerabilities on each device. | None |
Top 20 Clients by Vulnerability Event Count | Table | Today (time frame) | The top 20 devices with the most vulnerabilities. Information includes the client, total number of vulnerability events, number of new vulnerabilities, number of verified vulnerabilities, number of fixed vulnerabilities, and number of vulnerabilities of each type. | None |
Alert Center
Chart name | Chart type | Default time range | Description | Example |
Number of Related Clients | Single value comparison | Today (time frame)/Day-over-day | The number of Unique Host Devices with security alerts, and the increase or decrease compared to the previous day. | 10.0, 0.01% |
Number of New Alerts | Single value comparison | Today (time frame)/Day-over-day | Number of new security alert events, and the increase or decrease compared to the entire previous day. | 10.0, -0.01% |
Number of Handled Alerts | Single value comparison | Today (time frame)/Day-over-day | The number of processed security alert events, and the increase or decrease compared to the previous day. | 10.0, 0.01% |
Number of High-priority Alerts | Single value comparison | Today (time frame)/Day-over-day | The number of critical security alert events, and the increase or decrease compared to the previous day. | 10.0, -0.01% |
Alert Operation Trend | Flow chart | Today (time frame) | A trend chart of various alert operations (new, handled, etc.) per hour. Unit: number. | None |
Alert Level Trend | Flow chart | Today (time frame) | A trend chart of various alert levels (critical, suspicious, informational, etc.) per hour. Unit: number. | None |
Alert Status Trend | Flow chart | Today (time frame) | A trend chart of various alert statuses (unhandled, handled) per hour. Unit: number. | None |
Alert Operation Distribution | Doughnut chart | Today (time frame) | The distribution of various alert operations (new, handled, etc.). | None |
Alert Level Distribution | Doughnut chart | Today (time frame) | The distribution of various alert levels (critical, suspicious, informational, etc.). | None |
Alert Status Distribution | Doughnut chart | Today (time frame) | The distribution of the latest alert statuses (unhandled, handled, failed to handle, etc.). Important If an alert on a machine has multiple status changes, the latest status is used for categorization. | None |
Top 10 New Alerts | Doughnut chart | Today (time frame) | The top 10 alerts with the most new occurrences across all devices. | None |
Top 10 Handled Alerts | Doughnut chart | Today (time frame) | The top 10 alerts that were handled most frequently across all devices. | None |
Top 20 Clients by Alert Event Count | Table | Today (time frame) | The top 20 devices with the most alert events. Information includes the client, number of alert events, number of new or handled events, number of critical or suspicious events, and alert types. | None |
FAQ
Why did my log export task fail?
Possible causes and solutions are as follows:
The number of logs to query exceeds the limit of 20 million.
The search statement is too complex and causes a calculation timeout. Try narrowing the time range or simplifying the search statement, and then retry.
Why is there no data in my report?
Check the following items:
Confirm that the Enable switch is turned on on the Log Analysis page.
Confirm that you selected the correct time range.
If you just enabled the feature, data shipping and processing take some time. Wait 5 to 10 minutes.