This topic describes how an overdue payment affects your IoT Platform instance resources, how to handle overdue payments, and how to renew a trial or purchased IoT Platform instance before it expires and is released.
Background information
IoT Platform manages and maintains devices based on instances. For more information about instances, see Instance overview. For more information about instance billing, see Billing overview.
Overdue payments
Causes of overdue payments
For pay-as-you-go resources, bills are typically generated within four hours after a billing cycle ends. If your available credit, including your account balance and coupons, is less than the amount due, your account will have an overdue payment.
Impact of overdue payments
Ensure that you have a sufficient account balance. An overdue payment may cause your devices to become unavailable.
After you add funds to your account or renew your service, it may take up to 30 minutes for services to be fully restored.
|
Instance |
Overdue payment impact |
|
Enterprise Edition instance |
If your account has an overdue payment, you can continue to use the subscription resources of your Enterprise Edition instance. However, you cannot perform operations that incur fees, such as purchasing new instances, upgrading instance configurations, or renewing subscriptions. |
|
New public instance |
No impact. This public instance is configured with fixed specifications and does not incur fees. If the resources do not meet your business requirements, you can add funds to your account and upgrade the public instance to an Enterprise Edition instance. For more information, see Upgrade to an Enterprise Edition instance. |
|
Legacy public instance |
If an overdue payment occurs, your service remains available for 24 hours. Warning
After 24 hours, the service is automatically stopped, which may cause business disruptions. To avoid impacts on your business, add funds to your account within 24 hours of the overdue payment. |
Handling overdue payments
-
Add funds to settle overdue bills
If your account has an overdue payment, your instances are at risk of service suspension. To avoid service disruptions, promptly add funds to your account to settle overdue bills. For more information, see Introduction to Alibaba Cloud payment methods.
-
Set up low balance alerts
You can log on to the Billing Management console and configure low balance alerts on the Account Overview page. When your available account balance falls below the specified threshold, the system automatically sends you an SMS notification.
Expiration
Enterprise Edition instances
Enterprise Edition instances use the subscription billing method. The subscription duration determines the validity period of an instance.
After an instance expires, its service is stopped. If the instance is not renewed within 15 days after expiration, it is released. All data on the instance, such as products and devices, is permanently deleted and cannot be recovered.
Service suspension and data deletion can lead to service unavailability and business disruptions. To avoid disrupting your business, renew your instance before it expires.
Public instances
Currently, new and legacy public instances do not have an expiration date.
If a new public instance is Frozen, go to the Overview tab in the IoT Platform console, click the instance card, and choose to continue the trial of the public instance.
A dialog box appears, indicating that the instance is frozen because no devices have been online for an extended period. Besides continuing the trial, you can also click Upgrade to Enterprise Edition (Recommended) to upgrade to an Enterprise Edition instance.
Renewal methods
To continue using your trial or purchased Enterprise Edition instance of IoT Platform, you can renew it at any time before it expires and is released.
You can renew your subscription Enterprise Edition instance at various stages: at purchase, before expiration, or after expiration but before its release.
-
Expiration: The last day of the instance's availability. A successful renewal extends the expiration date.
-
Release: If an instance is not renewed within 15 days of expiration, the instance and its data are deleted on the 15th day after expiration.

Manual renewal
Renew a single instance
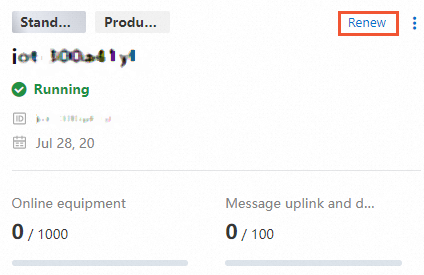
On the Overview page of the IoT Platform console, find the instance that you want to renew and click Renew. On the renewal page, select a subscription duration and complete the purchase.
Renew multiple instances in bulk
-
Go to the Renewal Management page. From the Product list, select IoT Platform Enterprise Edition Instance, and click the Manual Renewal tab.
-
Select one or more IoT Platform instances, click Bulk Renew at the bottom of the page, select a renewal duration, and then complete the payment.
Auto-renewal
If you purchased a subscription Enterprise Edition instance with a short billing cycle, such as three months or less, and need to use the service long-term, we recommend that you enable auto-renewal. This feature helps ensure business continuity, prevents data loss due to instance expiration, and reduces manual effort.
|
Item |
Description |
|
Prerequisites |
|
|
Renewal rules |
|
Enable auto-renewal
-
When you purchase or manually renew an Enterprise Edition instance, select the Auto-renewal upon Expiration checkbox and complete the payment.
After you enable auto-renewal, the renewal period is monthly. The system starts to automatically process the payment nine days before the resource expires. If a payment fails, the system retries on the next day until the payment is successful or until one day before expiration. Auto-renewal payments are deducted only from your available account balance. Direct debits from bank cards, Alipay balances, or credit cards are not supported. Coupons are supported. You can cancel auto-renewal at any time.
-
Enable auto-renewal for an Enterprise Edition instance in the Billing Management console:
-
Go to the Renewal Management page, select IoT Platform Enterprise Edition instance for Product Name, and click the Manual Renewal tab.
-
Select one or more IoT Platform instances, click Enable Auto-renewal at the bottom of the page, select an auto-renewal period, and confirm the settings.
-
Modify or disable auto-renewal
-
Go to the Renewal Management page, select IoT Platform Enterprise Edition instance for Product Name, and click the Auto-renewal tab.
-
Select one or more IoT Platform instances, click Modify Auto-renewal or Set to Manual Renewal at the bottom of the page, and follow the prompts to confirm your changes.
FAQ
-
How do I stop being charged for a public instance of IoT Platform?
-
How do I disable a new public instance of Alibaba Cloud IoT Platform?
-
How are trial Enterprise Edition instances of IoT Platform billed?
-
Is the pay-as-you-go billing method available for Enterprise Edition instances of IoT Platform?
-
Will activated devices in IoT Platform be deleted if my account has an overdue payment?
-
Are there additional charges for adding devices to an Alibaba Cloud IoT Platform instance?