This topic describes how to configure Active Directory (AD) identity authentication for an Alibaba Cloud Elasticsearch instance. This allows users with specific roles in an AD domain to access the Alibaba Cloud Elasticsearch instance.
Prerequisites
You have completed the following operations:
An Alibaba Cloud Elasticsearch instance is created. This topic uses an Elasticsearch V7.10 instance as an example.
For more information, see Create an Alibaba Cloud Elasticsearch instance.
An AD domain environment and data are available in the same virtual private cloud (VPC) as the Alibaba Cloud Elasticsearch instance. This topic uses Windows Server 2012 as an example.
In this topic, the username is ccy1, and the root domain is ccy.com
Limits
Since October 2020, Alibaba Cloud has adjusted the network architecture for Elasticsearch in different regions. This adjustment affects instances in the following ways:
For instances on the old network architecture, you must use the SNAT feature or a self-managed Nginx proxy to connect to the Internet.
For instances on the new network architecture, the AD feature is subject to network limitations. You must use PrivateLink to establish a private network peering between VPCs. For more information, see Configure a private connection for an instance. To access the Internet, you must configure an Nginx proxy to forward requests.
On the old network architecture, Alibaba Cloud Elasticsearch supports AD authentication only for single-zone instances.
For more information about the network architecture, see Notice: Network architecture adjustment.
Procedure
Step 1: (Optional) Obtain an endpoint domain name
Elasticsearch clusters created in October 2020 or later are deployed in the new network architecture. These Elasticsearch clusters reside in the VPC of the Elasticsearch service account. If your Elasticsearch cluster is deployed in the new network architecture, you need to use the PrivateLink service to establish a private connection between the VPC and your VPC. Then, obtain the domain name of the related endpoint for future use. To obtain the domain name of an endpoint, perform the following steps:
- Create a Classic Load Balancer (CLB) instance that supports the PrivateLink service and resides in the same VPC as the created Elasticsearch cluster.
For more information, see Step 1: Create and configure an SLB instance.
Configure the SLB instance.
When you configure the instance, specify the server that hosts the Lightweight Directory Access Protocol (LDAP) service as the backend server and set the listening port to 389.
For more information, see Configure a private connection for an Elasticsearch cluster.
- Create an endpoint service.
For more information, see Step 2: Create an endpoint service.
- Configure a private connection to the Elasticsearch cluster.
For more information, see Step 3: Configure a private connection for the Alibaba Cloud ES cluster.
- Obtain the domain name of the endpoint that is used to access the endpoint service.
For more information, see Configure a private connection for an Elasticsearch cluster.
Note Record the obtained domain name, which will be used in subsequent configurations.
Step 2: Configure AD authentication
Elasticsearch security features can communicate with an AD domain to perform user identity authentication. These features use LDAP to communicate with the AD domain, which makes an active_directory realm similar to an ldap realm. Like an LDAP directory, an AD domain stores users and groups hierarchically. To authenticate a user, the AD domain sends an LDAP bind request. After successful authentication, the AD domain searches for the user's entry in Active Directory. Once the user is found, the AD domain retrieves the user's group memberships from the tokenGroups attribute of the user's entry. For more information, see Configuring an Active Directory realm.
For Alibaba Cloud Elasticsearch V6.x, V7.x, and V8.x instances:
Add the following configurations to the YML file of your Elasticsearch instance to set up AD authentication. For more information, see Configure YML parameters.
For other versions of Alibaba Cloud Elasticsearch instances:
Add the following configurations to the YML file of your Elasticsearch instance. If the operation fails in the console or the instance does not restart to apply the YML configuration changes, submit a ticket and provide the configurations to technical support.
xpack.security.authc.realms.active_directory.my_ad.order: 2
xpack.security.authc.realms.active_directory.my_ad.domain_name: ccy.com
xpack.security.authc.realms.active_directory.my_ad.url: ldap://ep-bp1i321219*********-cn-hangzhou-h.epsrv-bp15571d5ps*********.cn-hangzhou.privatelink.aliyuncs.com:389
xpack.security.authc.realms.active_directory.my_ad.bind_dn: cc**@ccy.com
xpack.security.authc.realms.active_directory.my_ad.bind_password: your_password
Parameter | Description |
order | The order in which the configured AD domain is checked during identity authentication. Note For V8.x instances, the order value must be unique. Set it to 2. |
domain_name | The name of the root domain. |
url | The URL and port for the private connection between the AD domain and the ECS instance. For more information, see Configuring an Active Directory realm. Important For the new network architecture, set this to |
bind_dn | The user who executes all Active Directory search requests. |
bind_password | The password used to authenticate the identity in the AD domain. |
Step 3: Map a domain account to a role
Log on to the Kibana console of your Elasticsearch instance.
For more information, see Log on to the Kibana console.
NoteThe operations may vary slightly based on the Kibana version. The actual user interface prevails.
On the Kibana homepage, click Dev Tools.
On the Console tab, run the following command to map the ccy1 user in the AD domain to the administrator role.
PUT /_security/role_mapping/basic_users
{
  "roles": [ "superuser" ],
  "enabled": true,
  "rules": {
    "any": [
      {
        "field": {
          "groups": "cn=ali,dc=ccy,dc=com"
        }
      },
      {
        "field": {
          "dn": "cn=ccy1,cn=ali,dc=ccy,dc=com"
        }
      }
    ]
  }
}
Step 4: Verify the result
Log on to the Kibana console of your Elasticsearch instance as the authorized ccy1 user.
On the Kibana homepage, click Dev Tools.
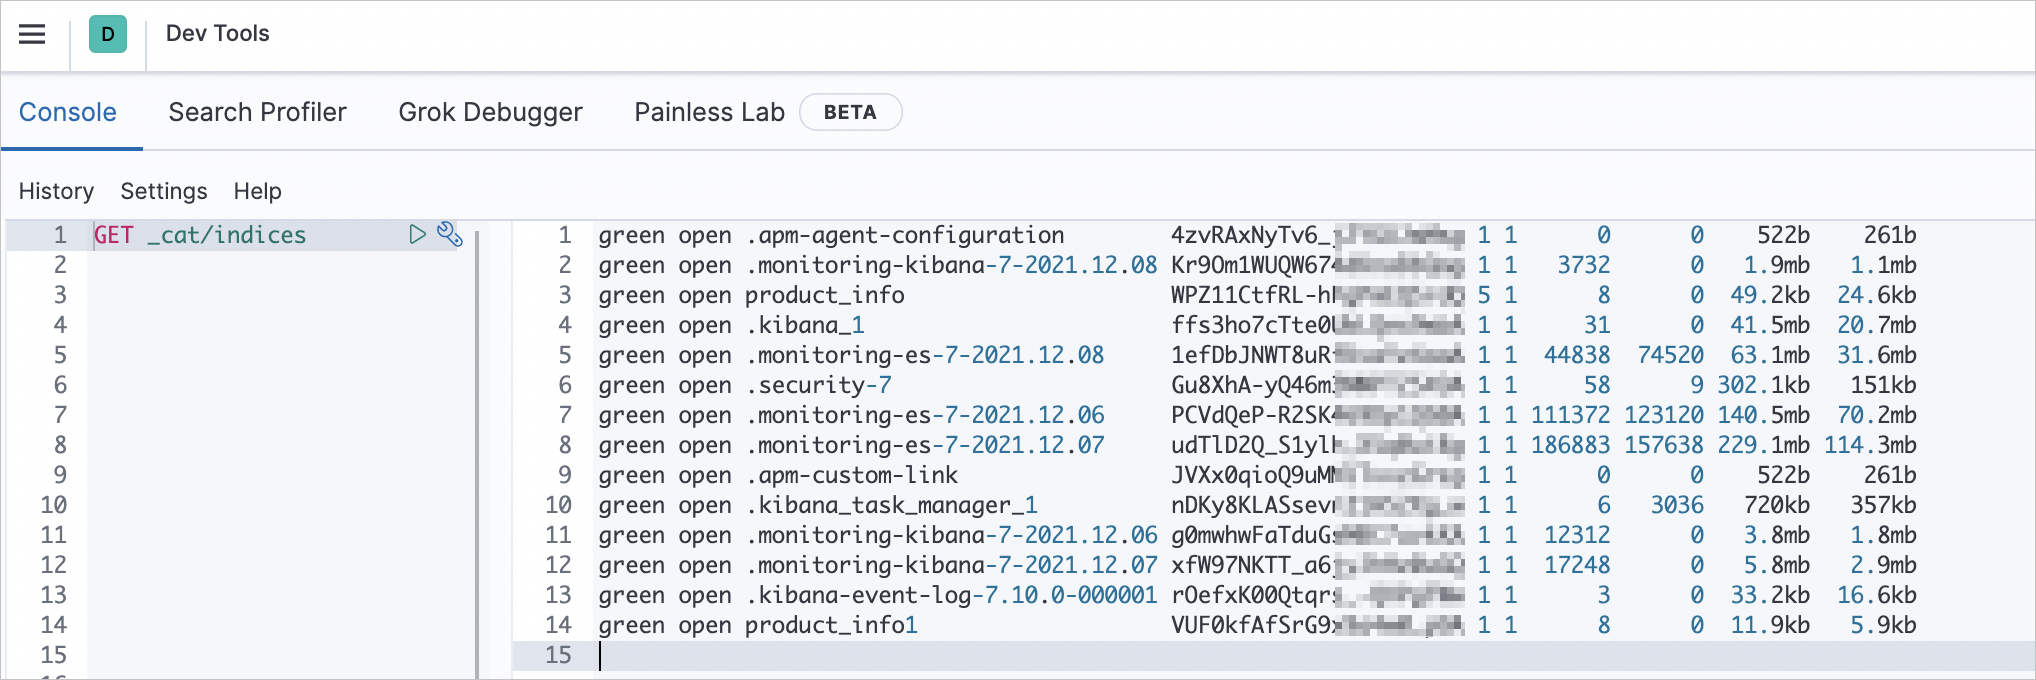
On the Console tab, run the following command to verify that the ccy1 user has the required permissions.
GET _cat/indicesIf the ccy1 user has the required permissions, a result is returned. This indicates that the permissions for the ccy1 user in the AD domain are configured.