RDS Supabase supports OAuth 2.0 authentication through major identity providers (IdPs), including GitHub, Google, WeChat, and Alipay. This guide walks you through the full setup: registering a GitHub OAuth App, configuring credentials in your RDS Supabase instance, opening network access, and verifying the end-to-end logon flow.
For a complete list of supported providers and their configuration parameters, see Alibaba Cloud RDS Supabase Authentication.
Prerequisites
Before you begin, ensure that you have:
An active RDS Supabase instance
A GitHub account
How it works
The setup consists of four stages:
Register a GitHub OAuth App to get a Client ID and Client Secret.
Enter the credentials in your RDS Supabase instance and enable GitHub logon.
Open network access so your instance can reach GitHub's OAuth servers.
Verify the full logon flow.
Tip: Keep two browser tabs open throughout — one for GitHub developer settings and one for the RDS console. You'll copy values between them.
Step 1: Create a GitHub OAuth App
First, create an OAuth application on GitHub to obtain the Client ID and Client Secret for API authentication.
In GitHub, go to developer settings.
In the left navigation pane, click OAuth Apps, then click New OAuth App.
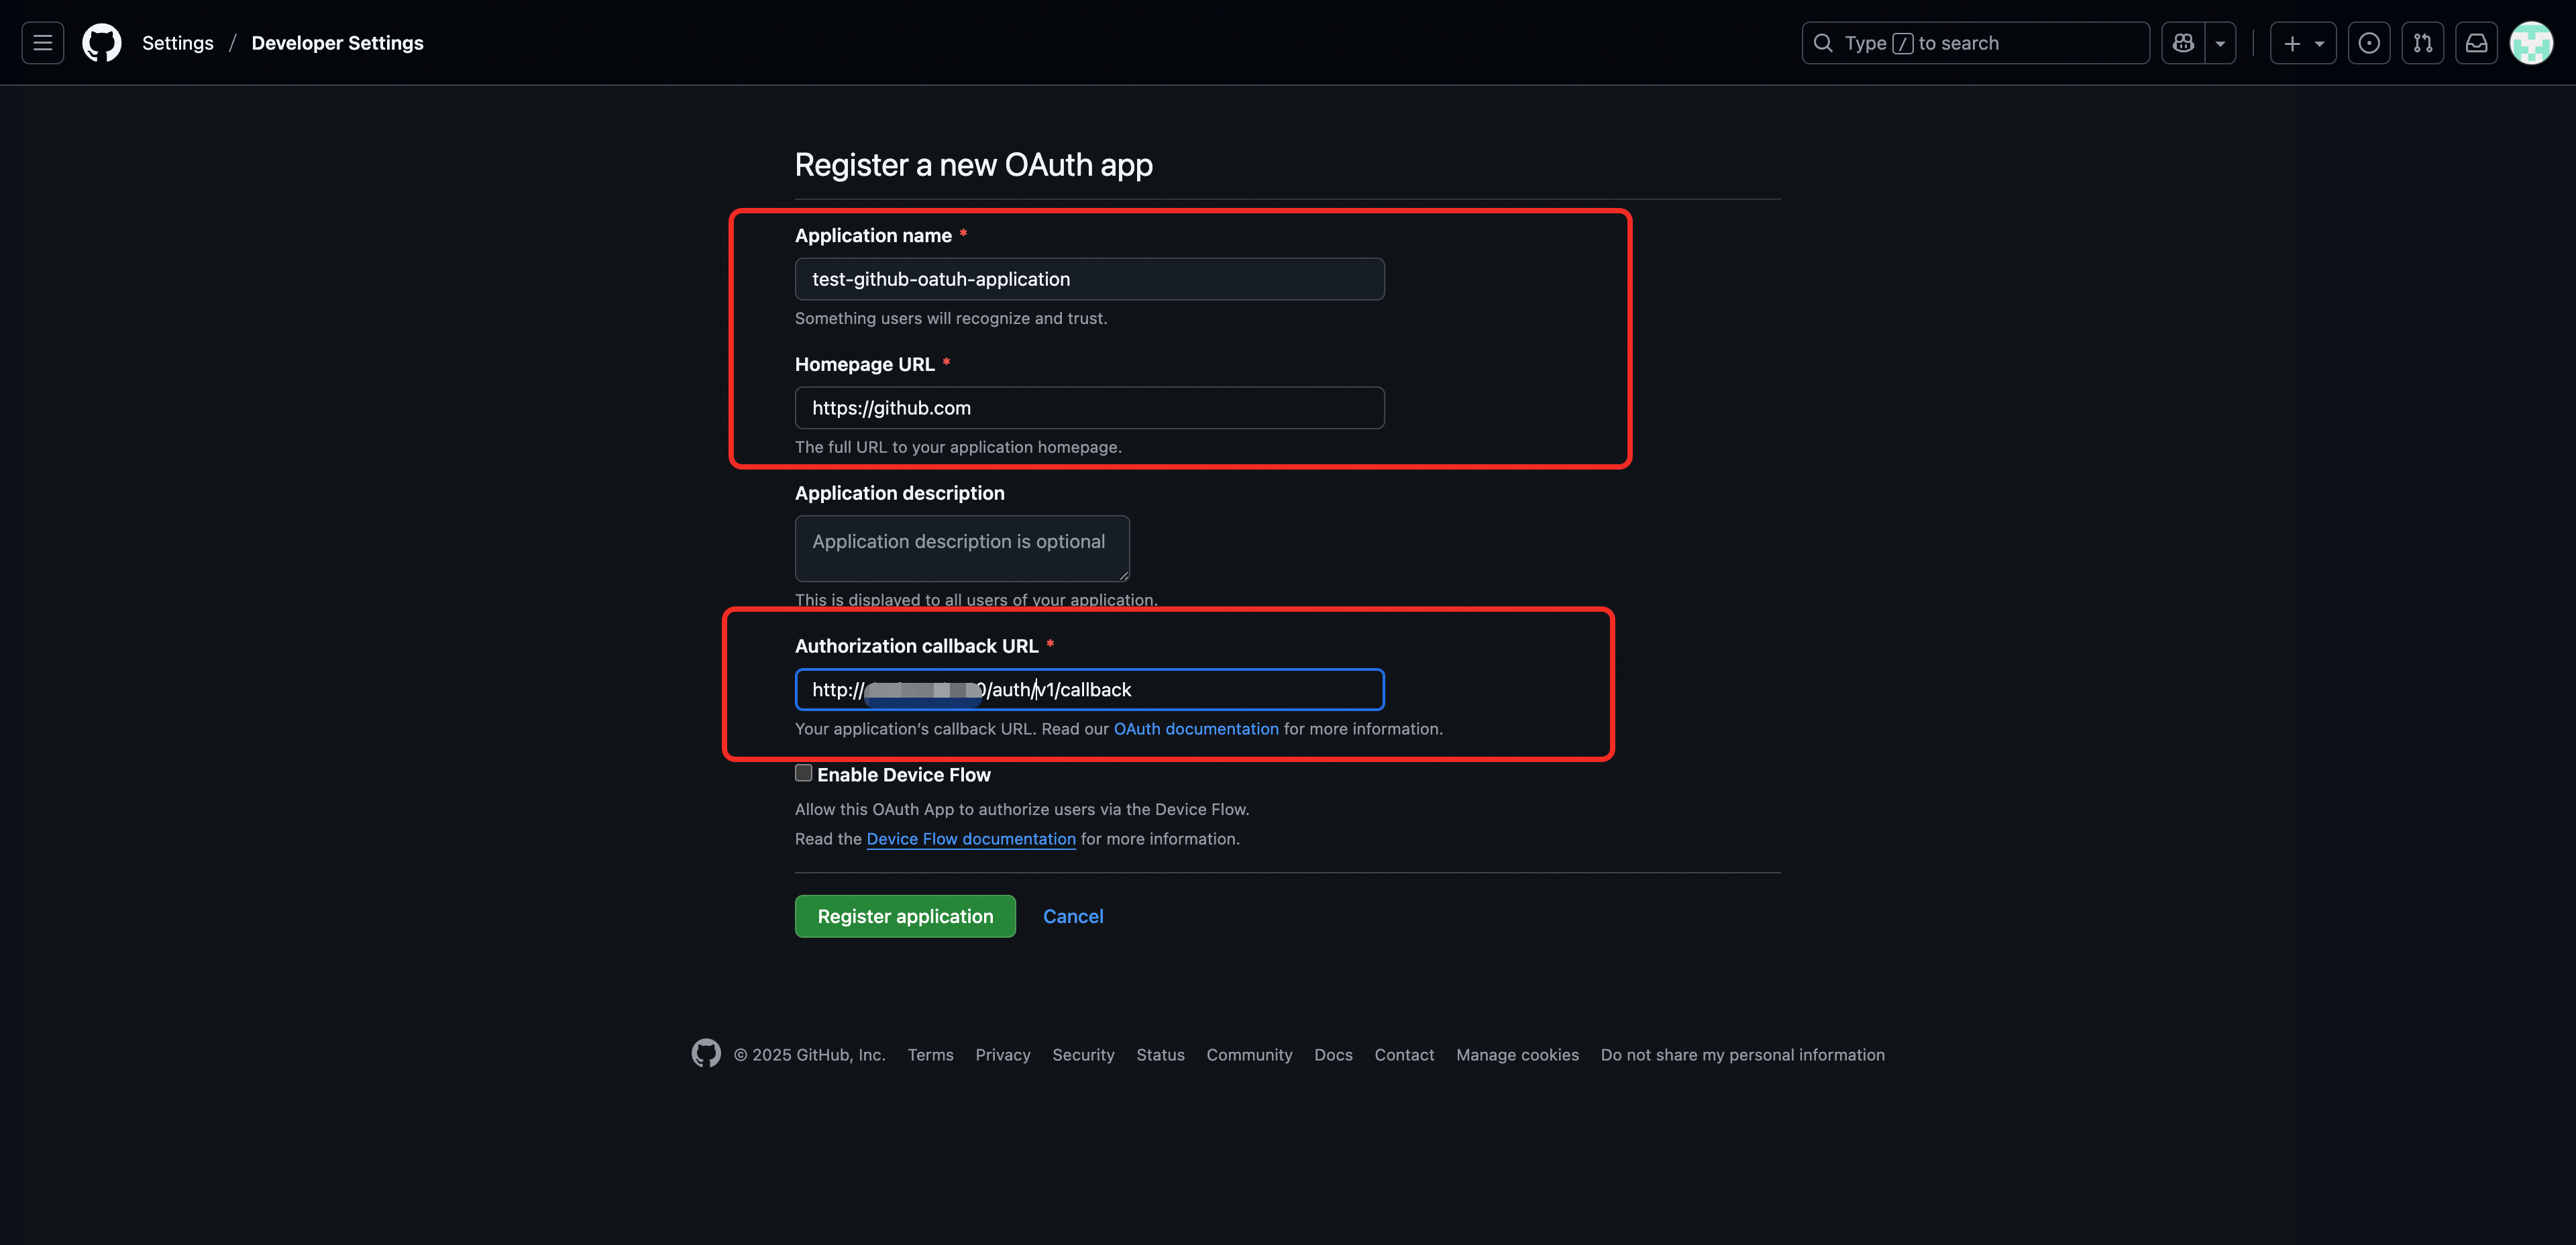
Fill in the registration form:
Do not include a port number in the Supabase public endpoint.
Field Value Application name A name for your application Homepage URL The homepage URL of your application Authorization callback URL The public endpoint of your RDS Supabase instance with the path /auth/v1/callbackappended. The format ishttps://<Supabase public endpoint>/auth/v1/callback.Click Register application.
On the application details page, record the Client ID.
Click Generate a new client secret and save the secret immediately.
ImportantThe Client Secret is shown in full only once. Save it securely before leaving this page.
Step 2: Configure GitHub authentication in RDS Supabase
After you obtain the credentials for the GitHub OAuth App, configure the required parameters in your RDS Supabase instance to enable this authentication method.
Go to the RDS console. In the left navigation pane, click AI Application Development.
Select a region, then click the Project ID of your instance.
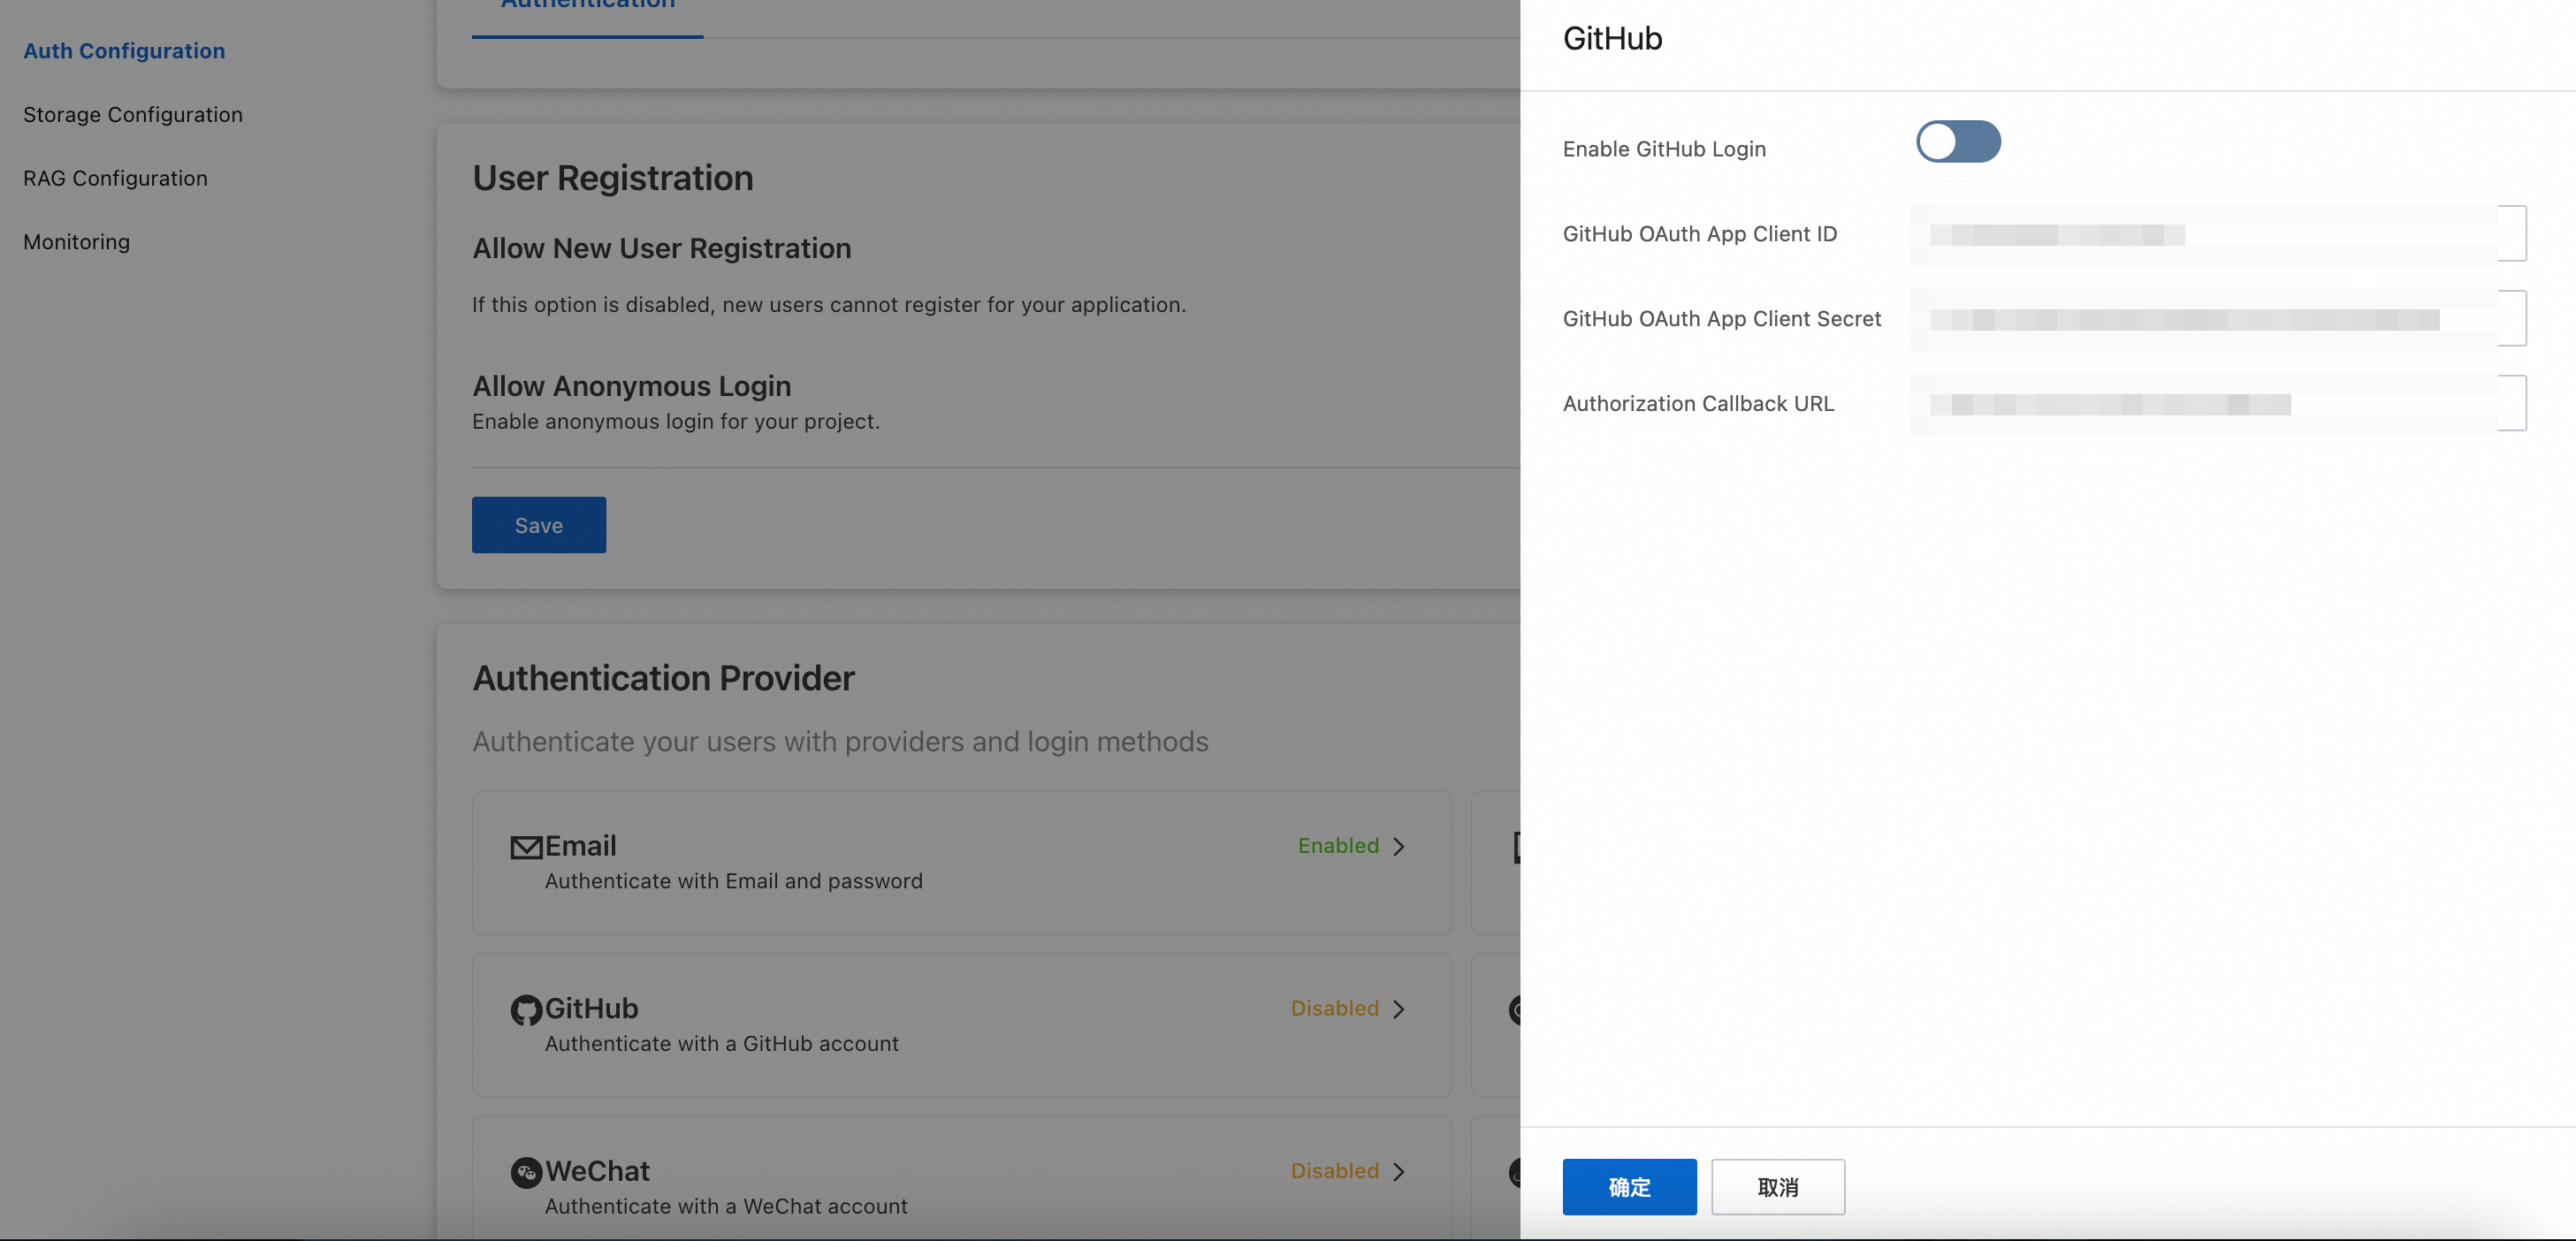
In the left navigation pane, click Auth Configuration.
Click Identity Providers > GitHub and configure the following parameters:
Parameter Value Enable GitHub Logon Turn on this switch Client ID of the GitHub OAuth App The Client ID from Step 1 Client Secret of the GitHub OAuth App The Client Secret from Step 1 Authorization callback URL The same Authorization callback URL that you configured in Step 1 Click Confirm. The instance restarts automatically to apply the settings. Wait for the restart to complete.
Step 3: Configure network access
Two network settings are required for the OAuth flow to work: your client's IP address must be whitelisted, and the instance must be able to send outbound requests to GitHub.
Add your client IP to the whitelist
Go to the RDS console. In the left navigation pane, click AI Application Development.
Select a region. In the RDS Supabase list, click the Project ID of your instance.
On the Basic Information page, scroll to the Whitelist Information section.
Click Add Whitelist Group and add the public IP address of your client.
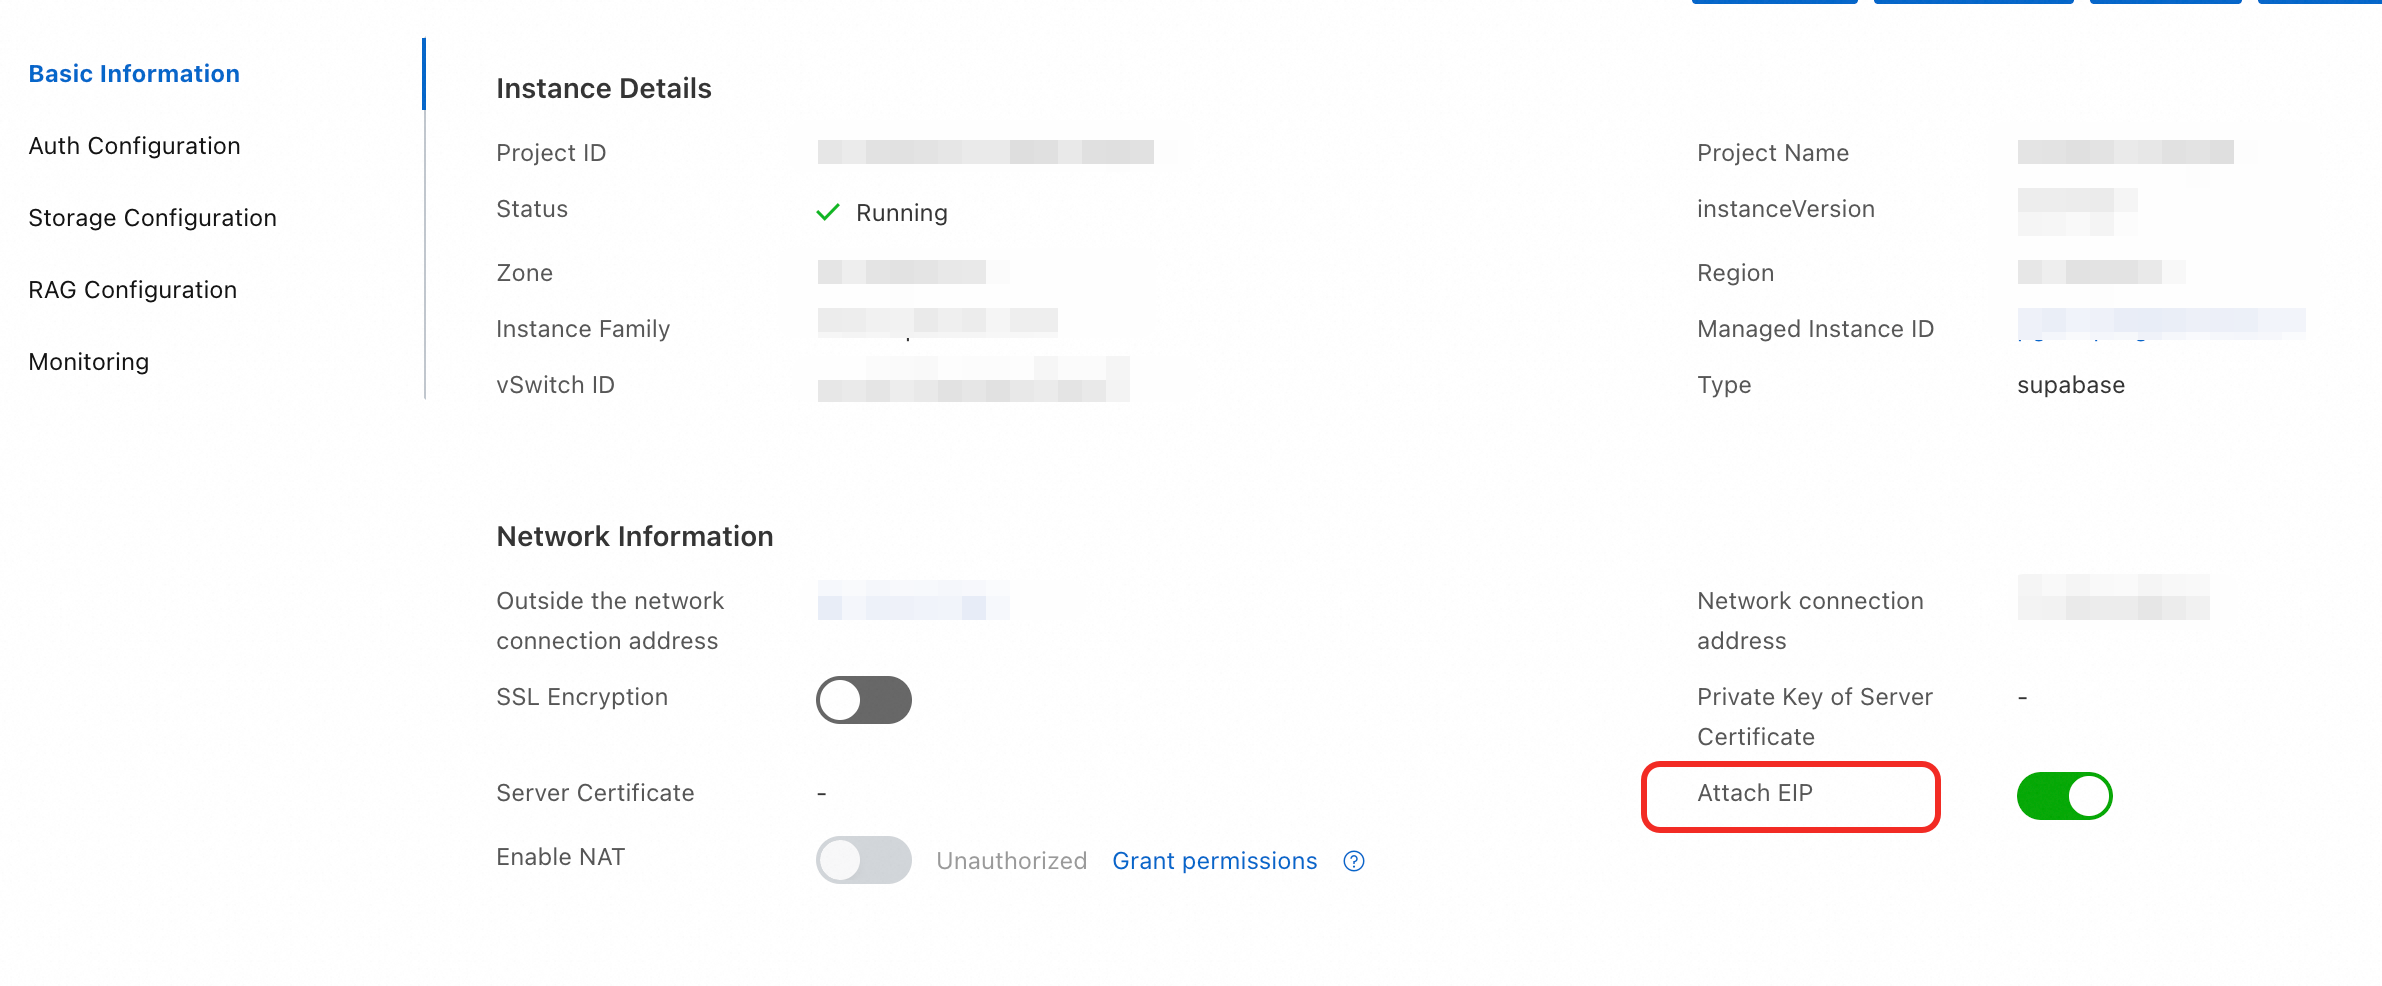
Allow outbound public network access
On the Basic Information page, scroll to the Network Information section.
Turn on the Allow Instance to Access Public Network switch.
If your application is deployed in a region outside China, use an RDS Supabase instance in a region outside China to ensure stable performance for the OAuth flow.
Step 4: Verify the GitHub authentication flow
The core client-side call that triggers GitHub OAuth is:
const { data, error } = await supabase.auth.signInWithOAuth({
  provider: 'github',
  options: {
    redirectTo: window.location.origin
  }
});
The full working example below builds a minimal Vite frontend project to confirm the end-to-end logon flow.
Initialize the project
Create a project folder with the following files:
index.html— frontend pagemain.js— authentication logicsupabase-config.js— RDS Supabase connection configurationpackage.json— dependencies
Configure the connection
Replace the placeholder values in supabase-config.js with your actual credentials. See the RDS Supabase SDK user guide to get the SUPABASE_URL and Anon Key for your instance.
Run and test
In the project root directory, run the following commands to install dependencies and start the dev server:
npm install
npm run dev
Open a browser and go to
http://localhost:5173.Click Log on with GitHub. The page redirects to the GitHub authorization page.
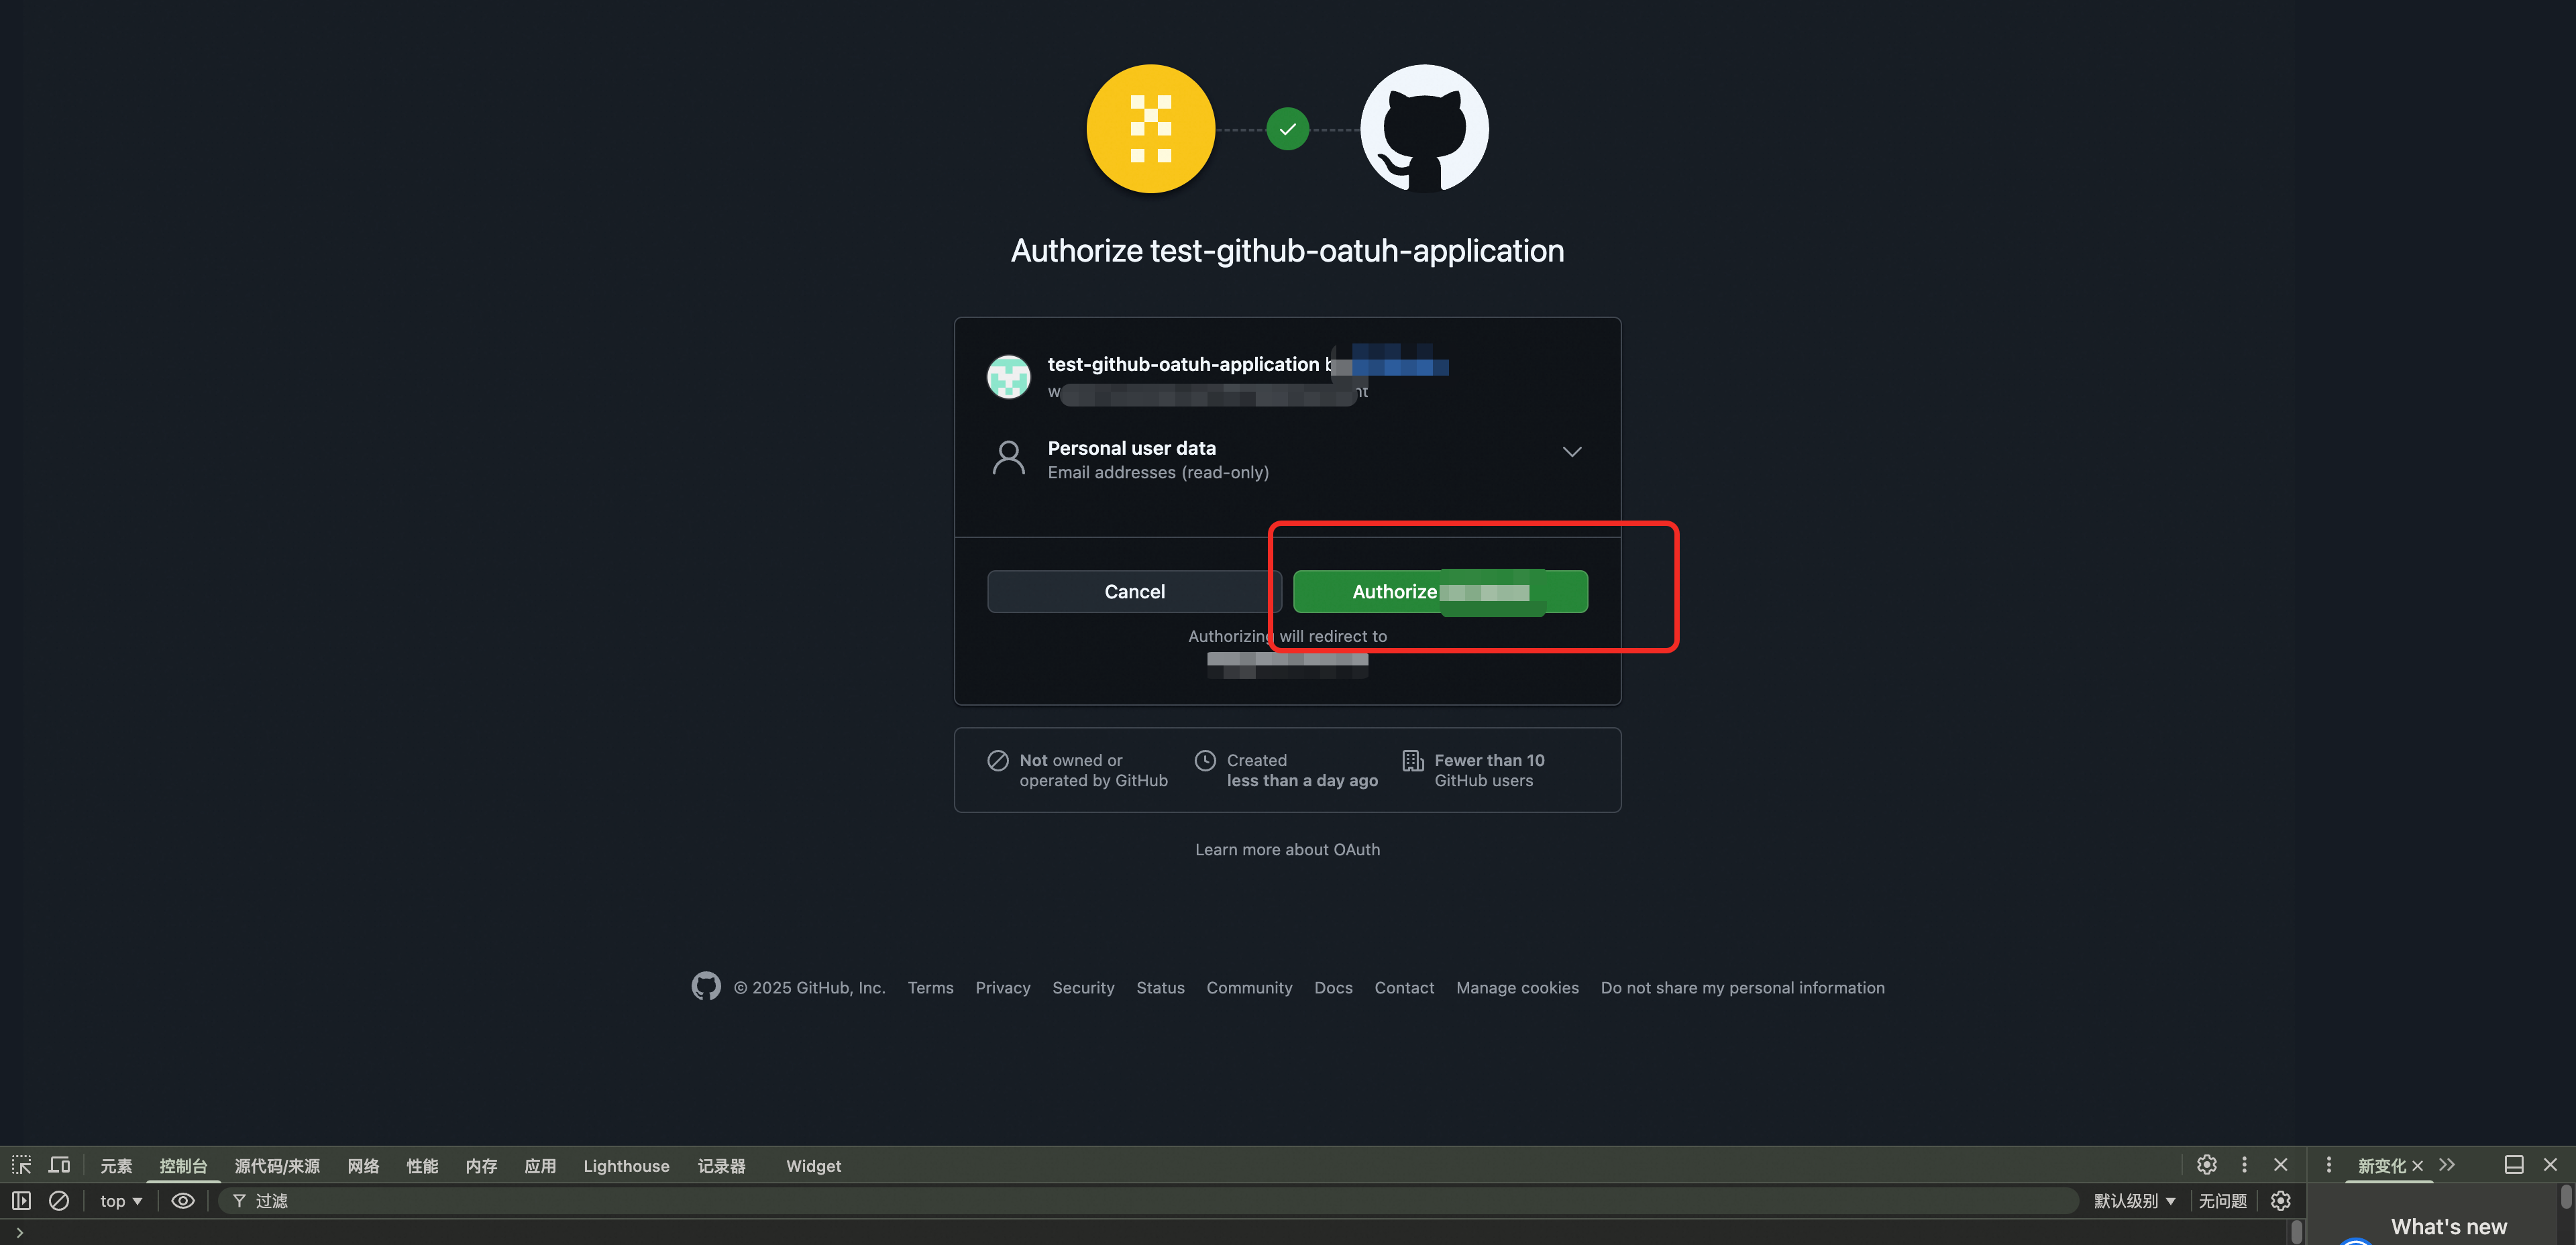
After authorization, the page redirects back and displays the user's ID, username, and email from GitHub — confirming the authentication flow works.
Verify backend data
Confirm that the authenticated user's data has been synchronized to RDS Supabase:
In the RDS console, go to AI Application Development > your instance.
Click Network Information > Public Endpoint to open the Supabase logon page.
If your client is an ECS instance in the same VPC as the RDS Supabase instance, use the Internal Endpoint instead.
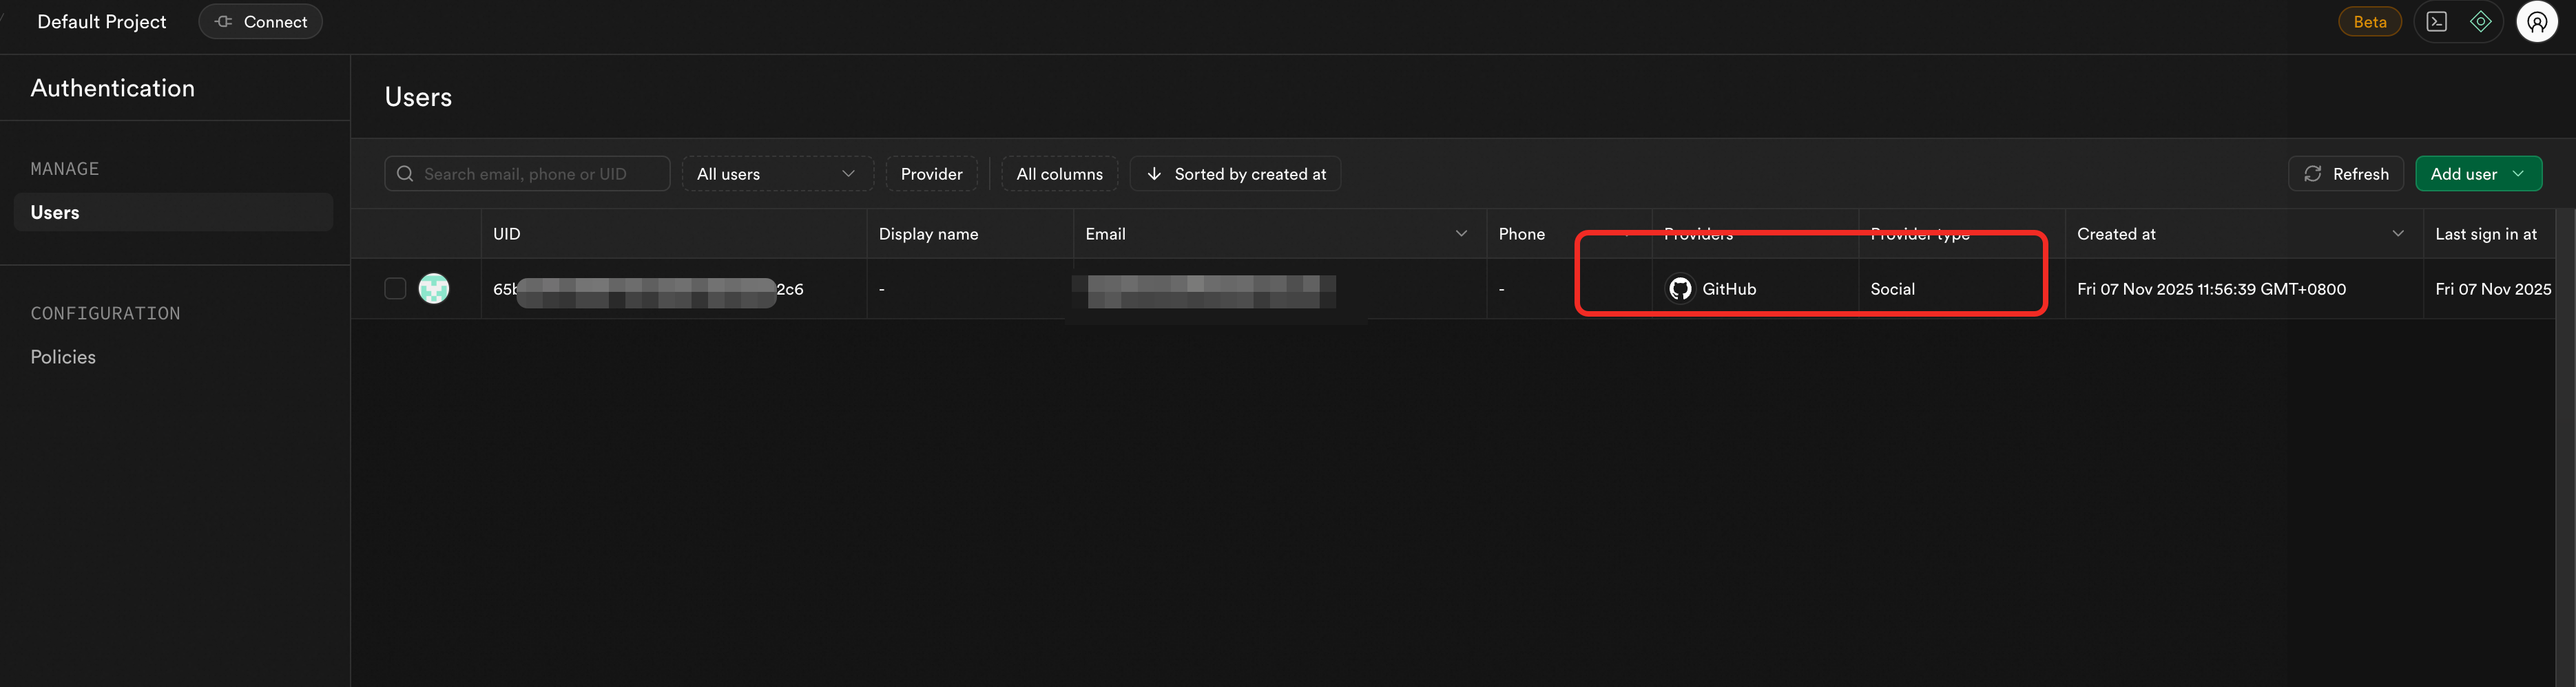
In the left navigation pane, click Authentication > Users. The new user who just logged on with GitHub should appear in the list, confirming that user data is synchronized to RDS Supabase.
What's next
Review all supported identity providers and their configuration parameters: Alibaba Cloud RDS Supabase Authentication