AnalyticDB for PostgreSQL hosts a Supabase authentication service that supports third-party identity providers (IdPs), including Alipay, WeChat, and Google. This guide walks you through configuring Google as an OAuth 2.0 provider end to end — from obtaining credentials in Google Cloud to calling the sign-in API from your application.
Prerequisites
Before you begin, ensure that you have:
A Supabase project created after the following dates (earlier projects do not support this feature): For setup instructions, see Create a Supabase project.
China regions: September 4, 2025
Singapore: August 29, 2025
To check whether your project's region is supported, sign in to the Supabase Dashboard and confirm that Authentication > Sign In/Providers appears in the left navigation pane.
Public network access enabled for your Supabase project.
How it works
The configuration involves three parties: your application, Supabase (hosted on AnalyticDB for PostgreSQL), and Google.
Your application redirects the user to Supabase's authorization endpoint.
Supabase redirects the user to Google's consent screen using the OAuth 2.0 client credentials you configured.
After the user consents, Google sends an authorization code to Supabase's callback URL.
Supabase exchanges the code for tokens and redirects the user to your application's site URL.
Configure Google sign-in
To make setup efficient, open two browser tabs: one for the Google Identity Platform console and one for the Supabase Dashboard. You will copy values back and forth between them.
Step 1: Get your OAuth 2.0 credentials from Google
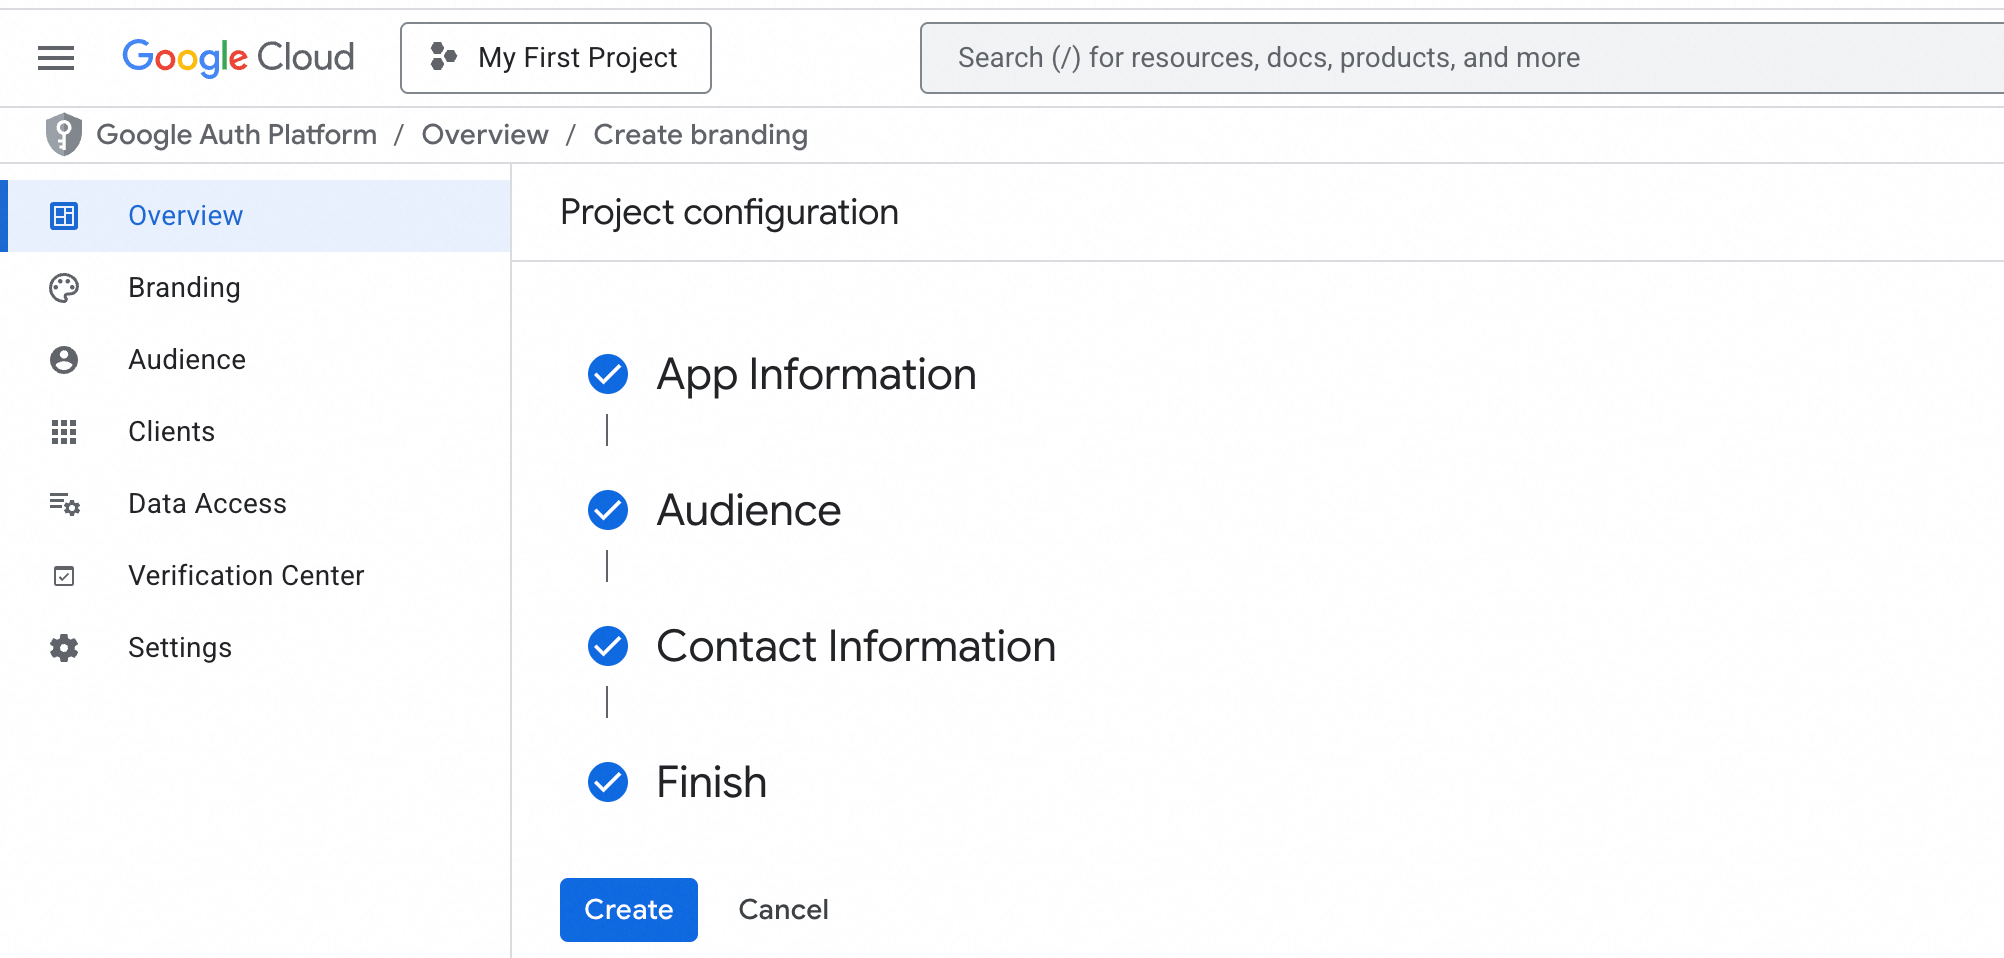
Sign in to Google Cloud Platform and open or register a project.
Go to the Google Identity Platform console and configure your application.
In the left navigation pane, click Clients and create an OAuth 2.0 client ID.
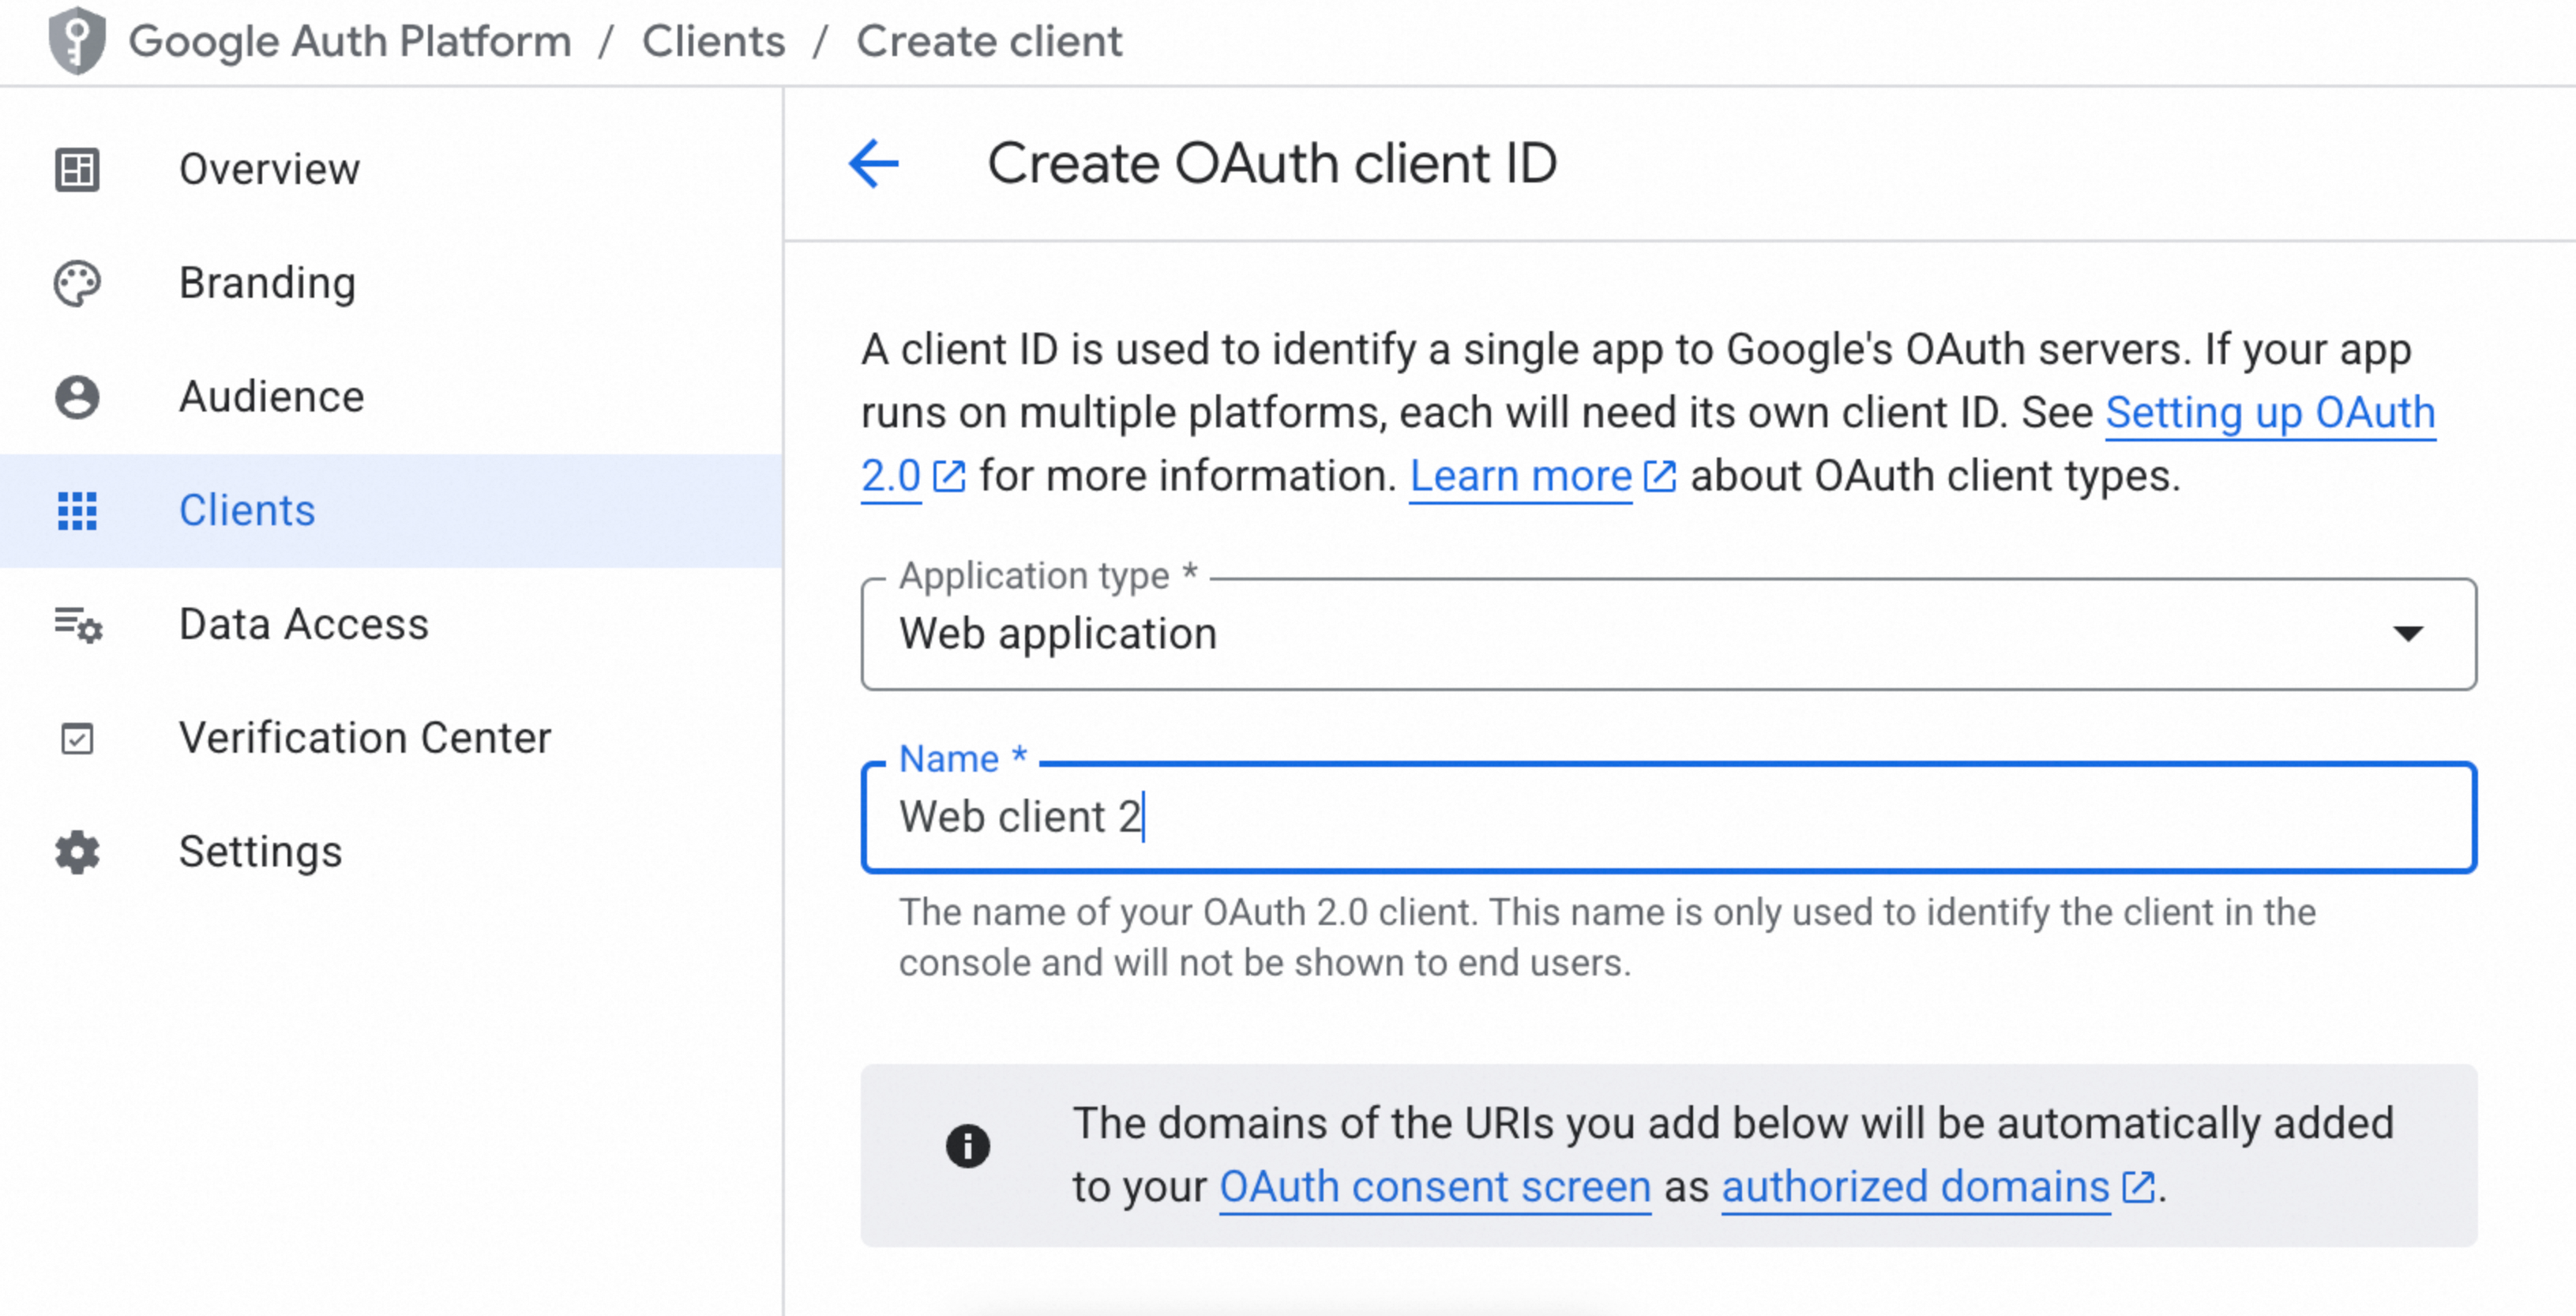
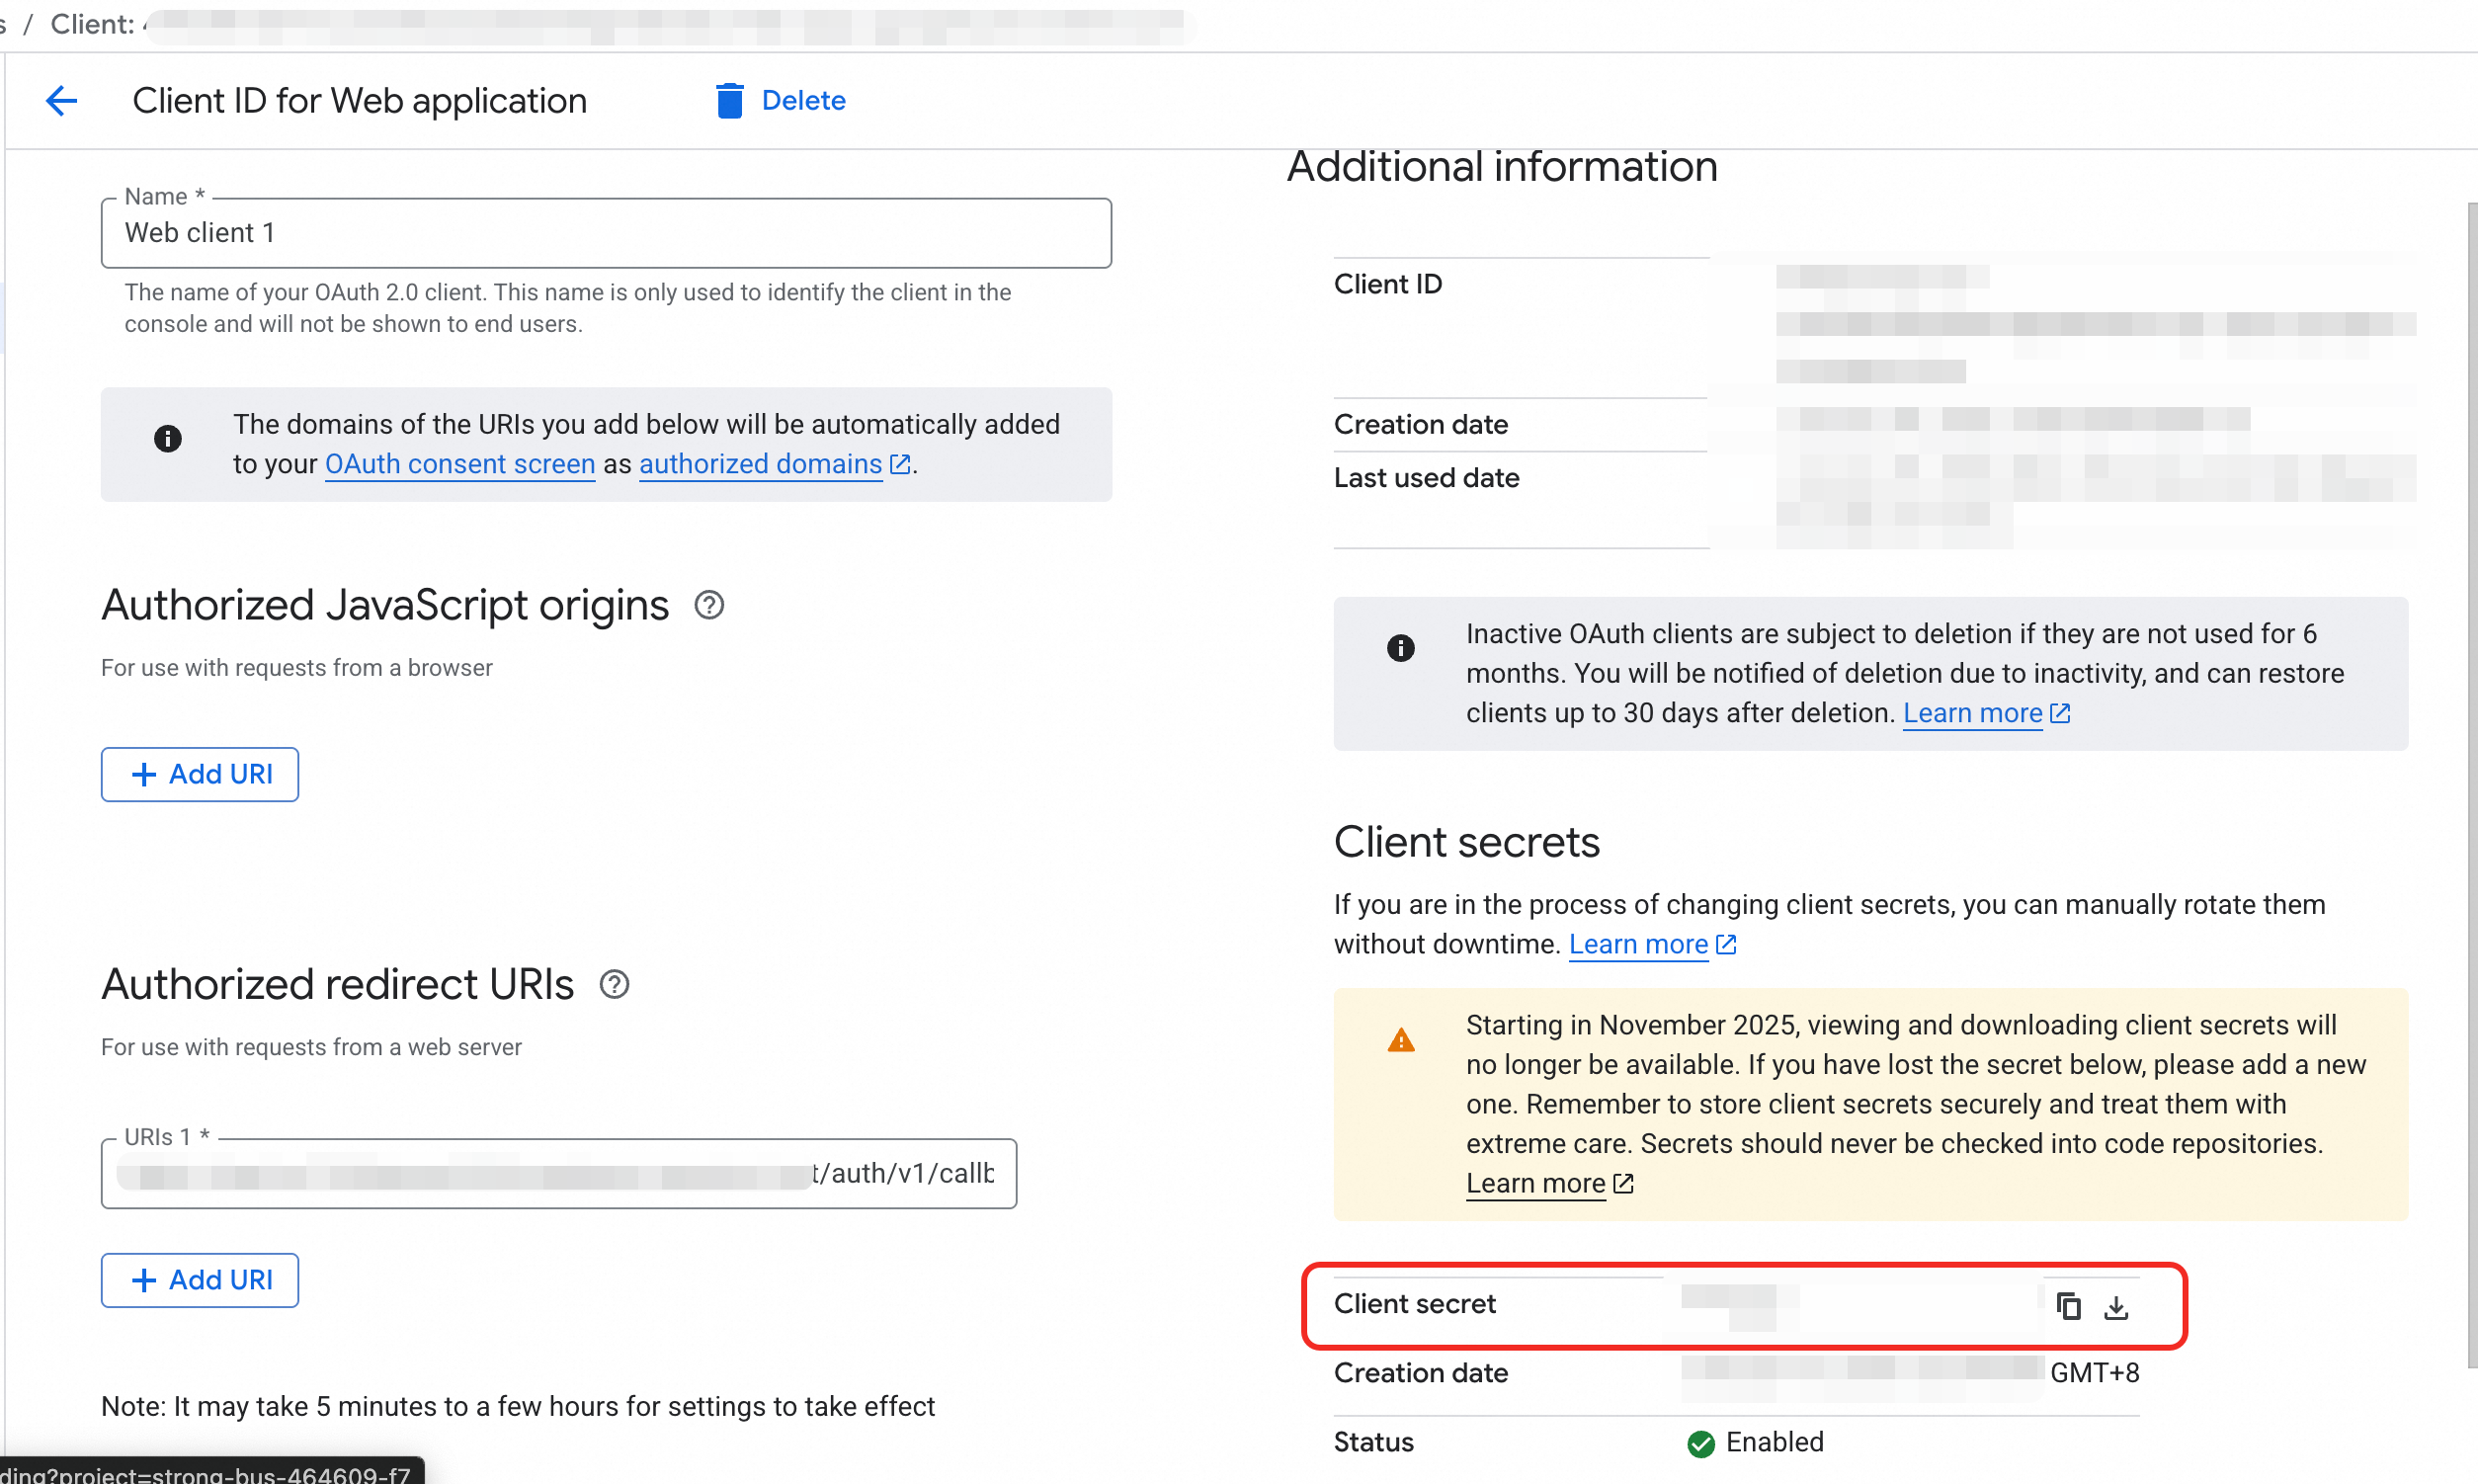
Under OAuth 2.0 Client IDs, click the client you just created. Copy and save the client ID and client secret — you will need both in the next step.
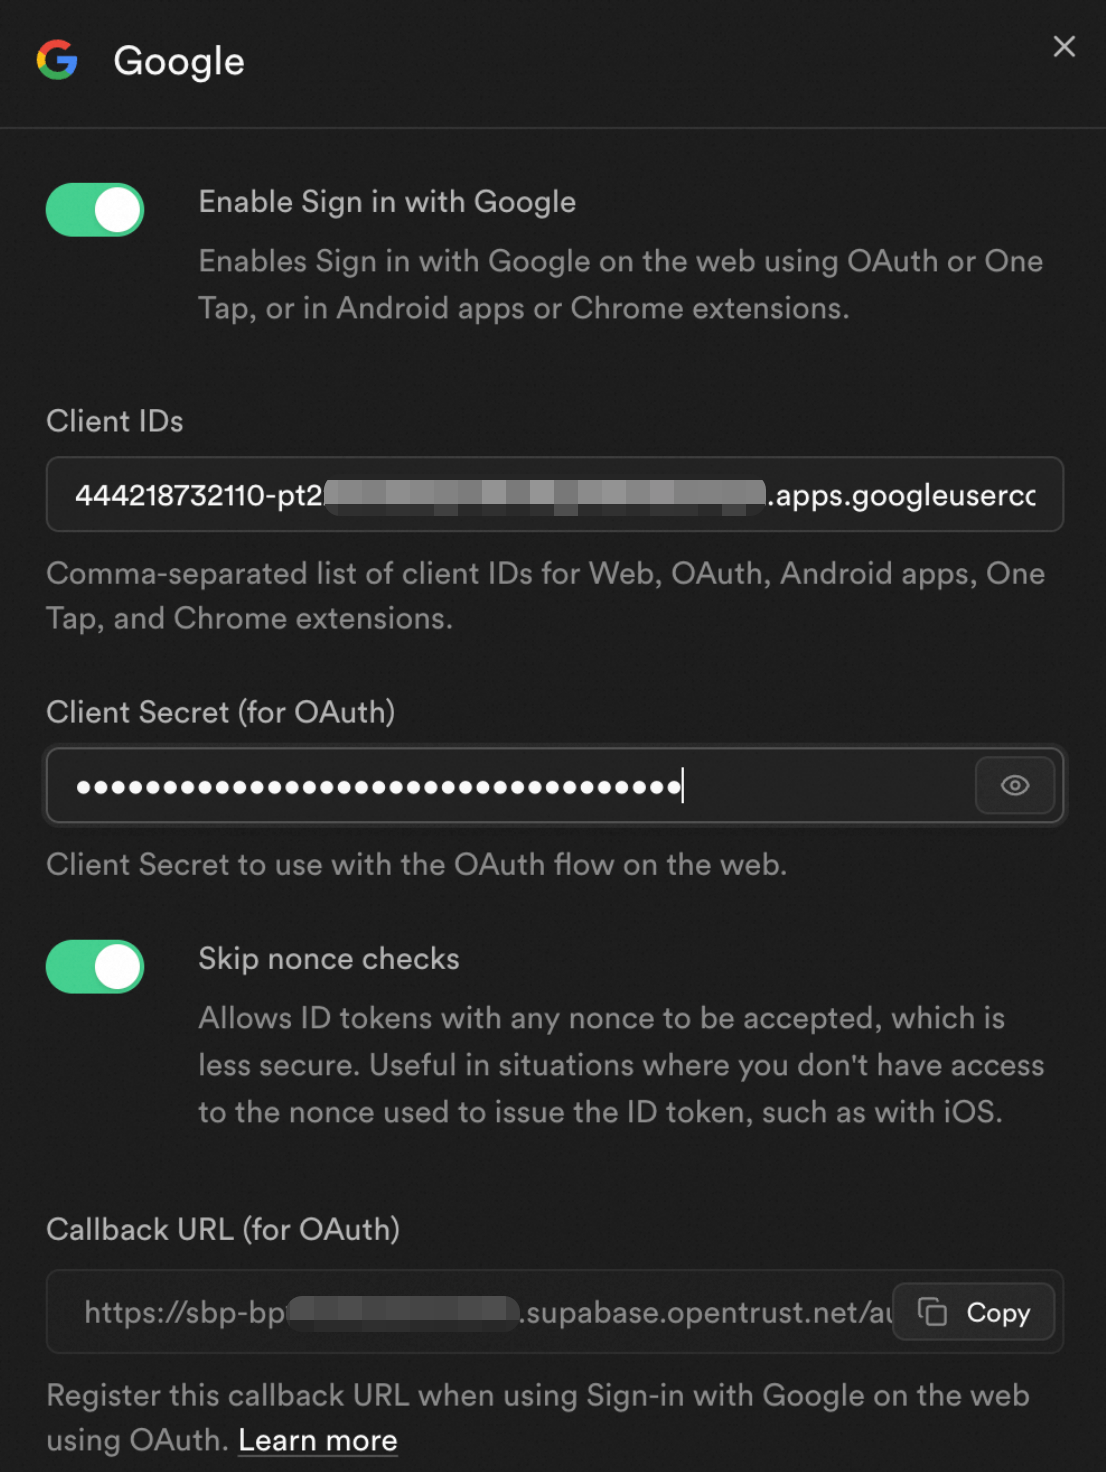
Step 2: Enable Google in the Supabase Dashboard
In the Supabase Dashboard, go to Authentication > Sign In/Providers.
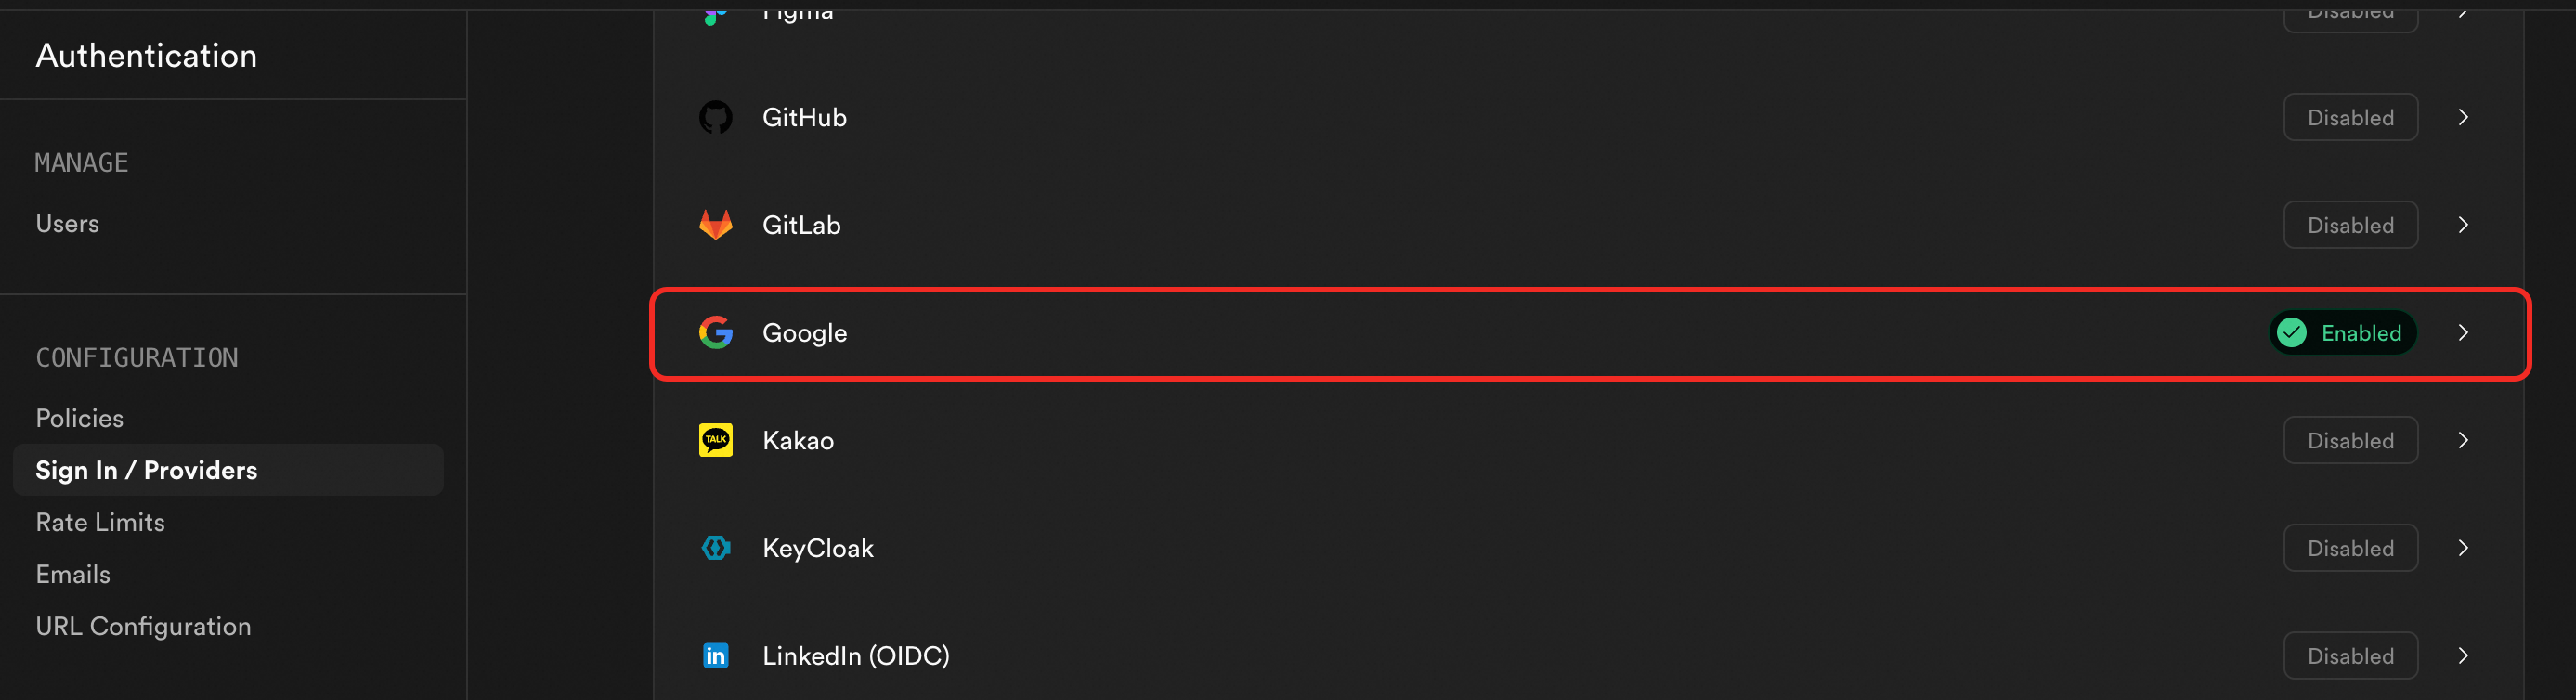
Enable Google, paste in the client ID and client secret from Step 1, then copy the callback URL shown on this page. Click Save. The callback URL follows this format:
http://<SUPABASE_PUBLIC_URL>/auth/v1/callbackKeep this URL — you will register it with Google in the next step.
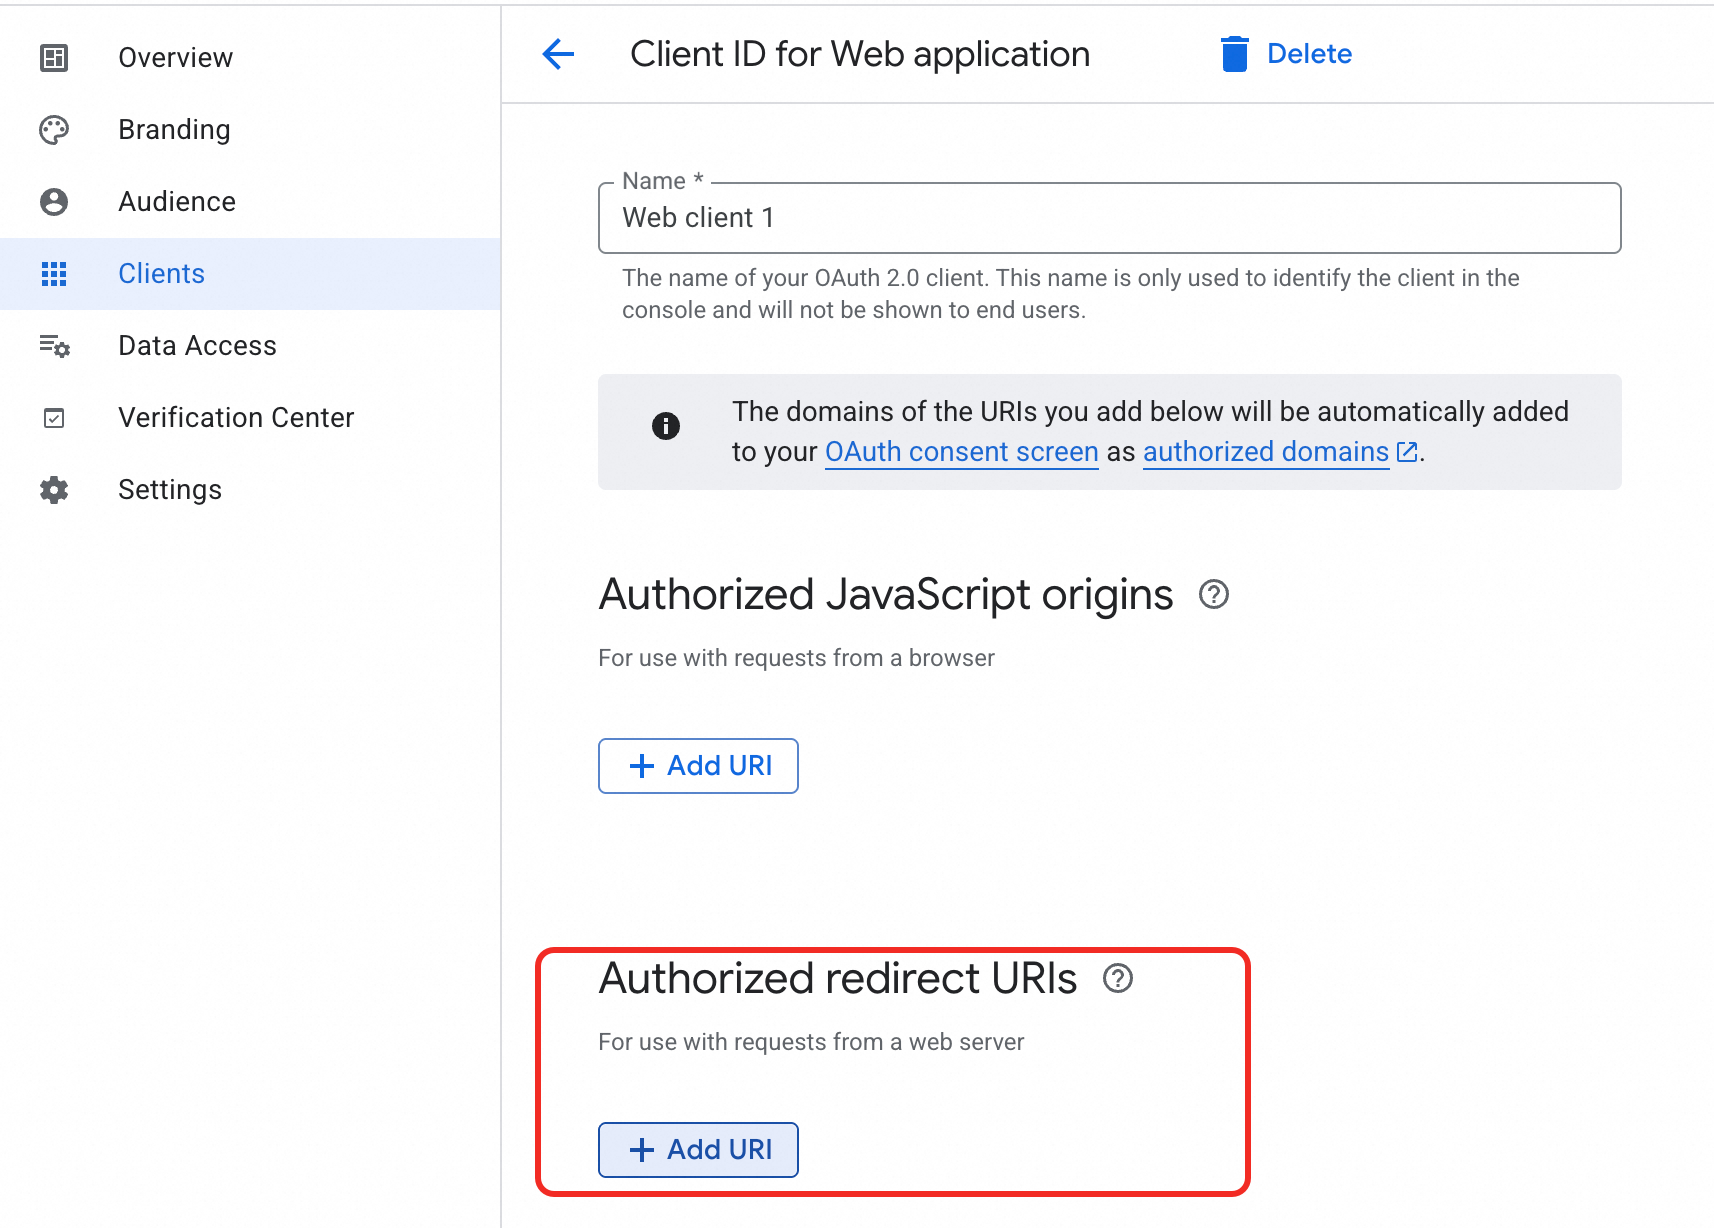
Step 3: Register the callback URL in Google
Return to the Google Identity Platform console.
Open the OAuth 2.0 client you created in Step 1 and add the callback URL from Step 2 to the Authorized redirect URIs list.
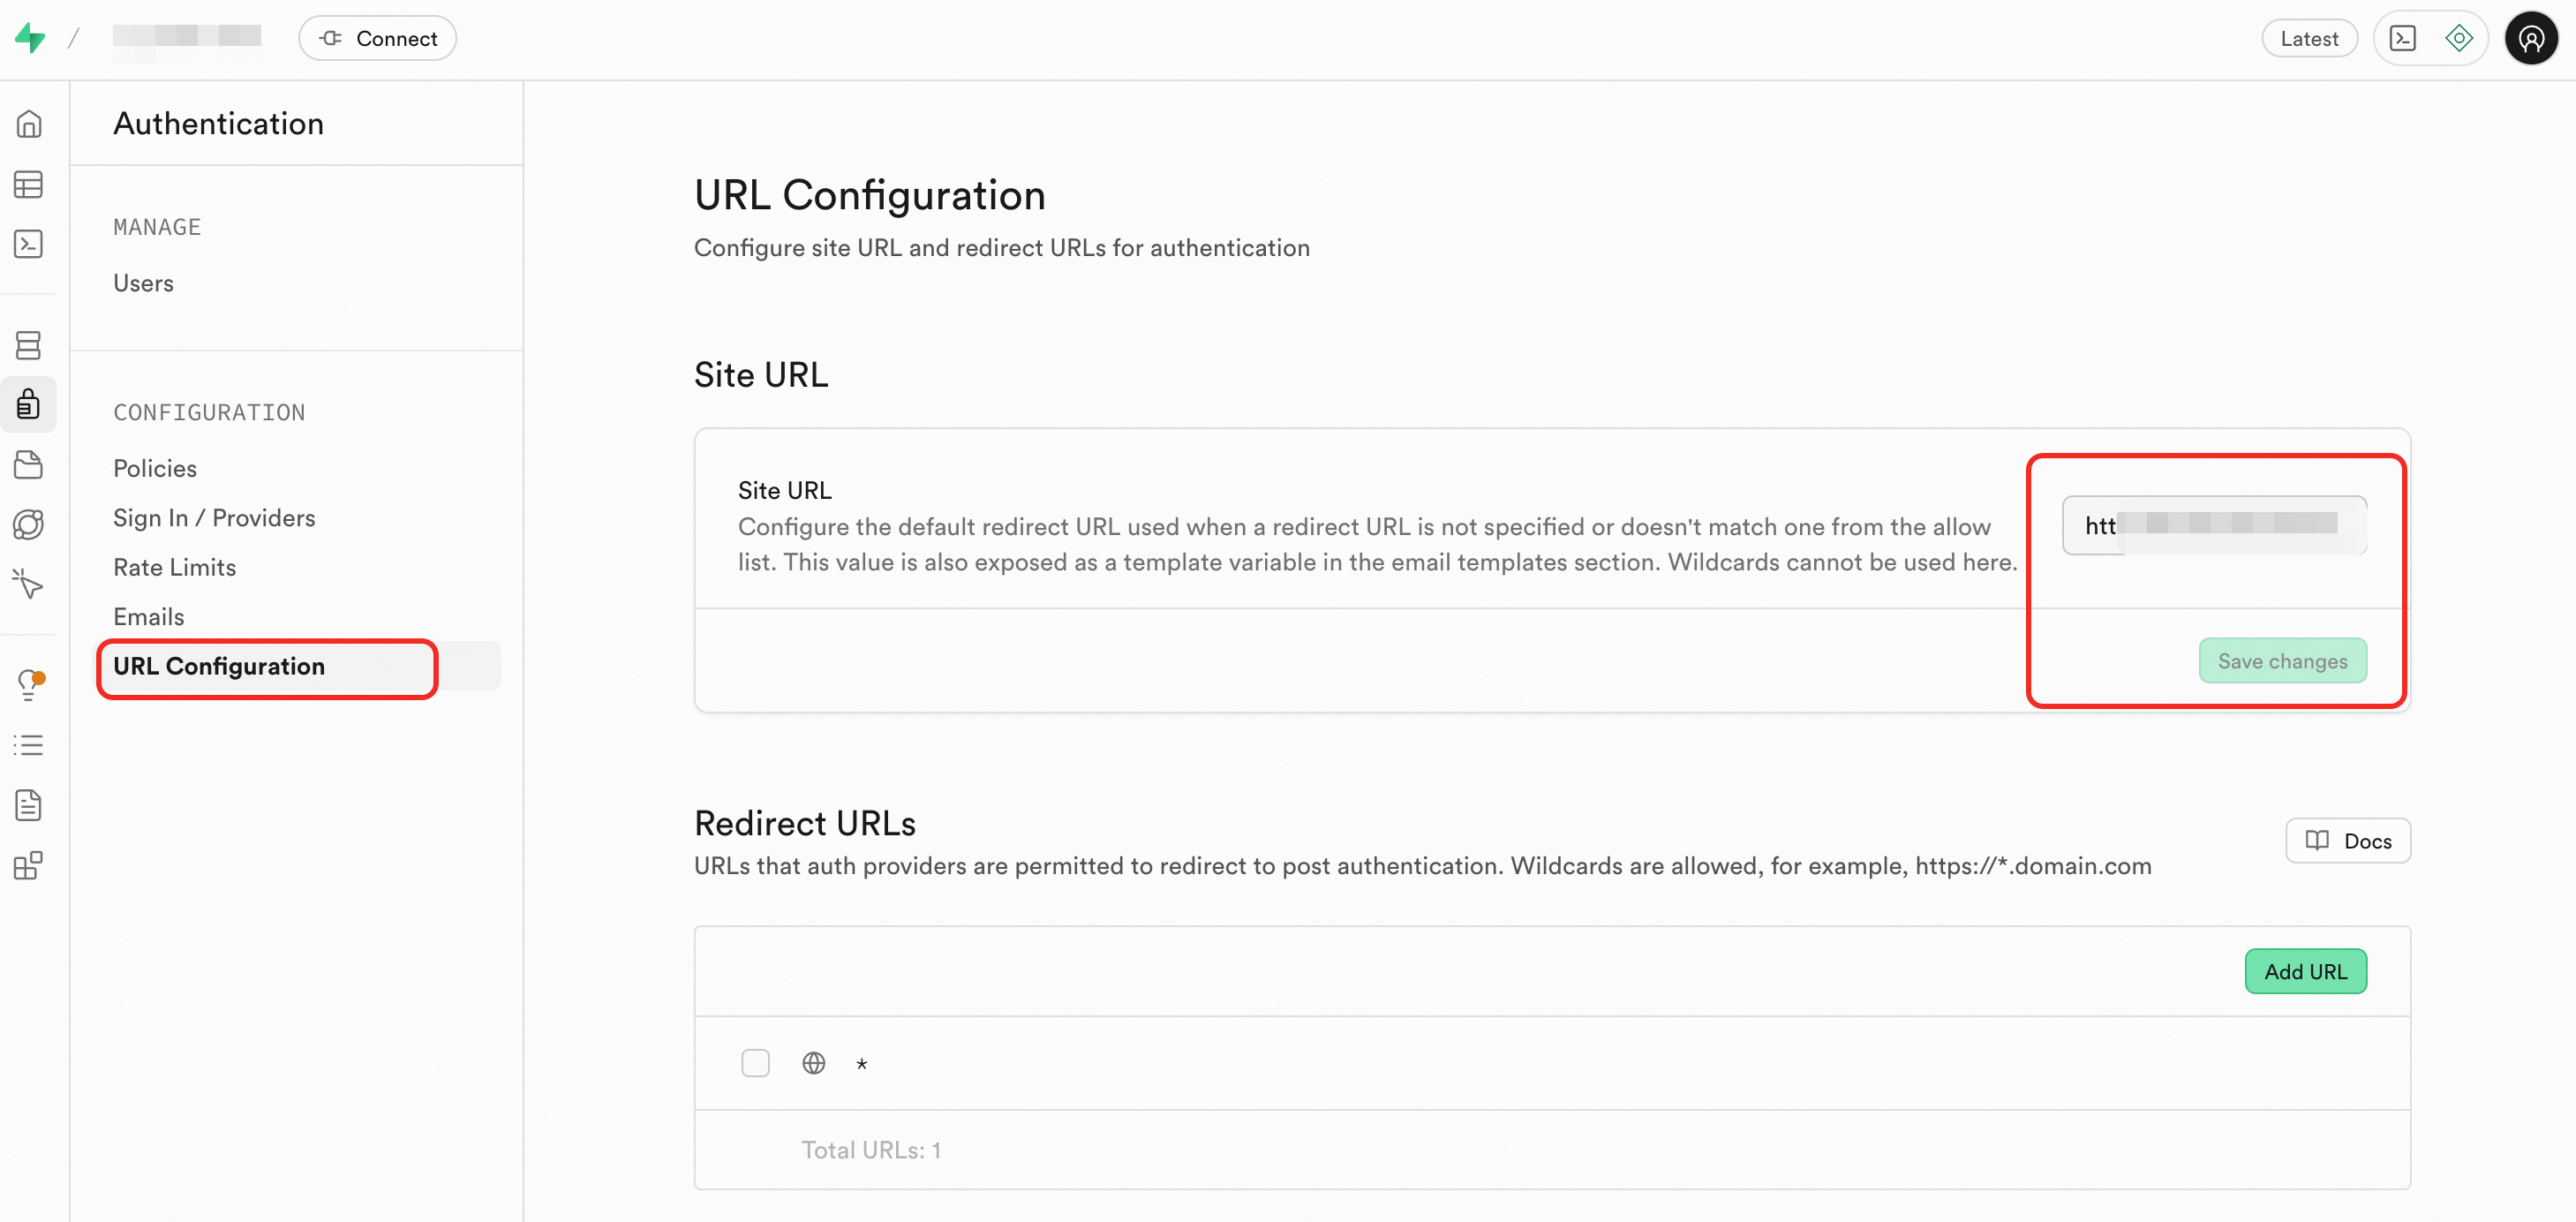
Step 4: Set the site URL
In the Supabase Dashboard, go to Authentication > URL Configuration.
Set Site URL to your application's homepage. After a successful sign-in, users are redirected here.
Trigger sign-in from your application
Once configured, use either of the following methods to start a Google sign-in flow.
Option 1: Direct URL redirect
Get your SUPABASE_PUBLIC_URL from the Supabase Dashboard: click Connect in the upper-left corner, then click App Frameworks.
http://<SUPABASE_PUBLIC_URL>/auth/v1/authorize?provider=googleOption 2: supabase-js
For installation and the full API reference, see the supabase-js documentation.
const { data, error } = await supabase.auth.signInWithOAuth({
  provider: 'google'
})
What's next
To configure other identity providers such as Alipay or WeChat, see the Supabase authentication documentation.