Mining viruses in cloud environments can interrupt your business, leak data, and propagate threats. You can use Security Center or manual mitigation policies, such as resetting passwords or keys and blocking IP addresses, to quickly mitigate damage and prevent reinfection.
Mining virus alerts
If you have enabled free security hardening for your instances, Security Center sends an alert by text message or email when a mining program is detected. You can go to Security Alerts to check for any mining program alerts.

If your server is shut down for the first time due to a mining virus, you can go to Security Control Events to unlock it.
After you unlock the server, you must promptly purge the mining program. If mining behavior is detected again, the server will be shut down and you will not be able to unlock it.
Emergency response and removal of mining viruses
Isolate the infected server
You can modify security group rules to restrict public network and Secure Shell Protocol (SSH) access to your ECS instance. This action isolates the instance.
Log on to the ECS console and go to the Security Groups page.
Find the security group of the target ECS instance and click its ID to go to the security group management page.
On the security group rules page, find all inbound rules that allow public network access, such as rules for Remote Desktop Protocol (RDP) and SSH ports. Change the authorization object to allow access only from specific IP addresses.
NoteModifying a security group rule affects all ECS instances that are attached to that security group. Ensure that you do not affect other instances by mistake.
Purge the malicious program
Mining programs are often difficult to purge. We recommend that you back up important data and then reinitialize the disk to ensure that the mining program is completely removed.
Security Center
Prerequisites
To use Security Center to handle mining virus threats, you must purchase Security Center and select the Anti-virus, Premium, Enterprise, or Ultimate Edition. You can also activate a 7-day free trial to obtain the security capabilities of these editions.
The Security Center client on the compromised server must be online. For more information, see Install the client and Troubleshoot an offline client.
Step 1: Immediate remediation
You can use the Security Alerts feature of Security Center to stop malicious processes and quarantine virus files. This action quickly blocks the mining program.
Log on to the Security Center console.
In the navigation pane on the left, select . In the upper-left corner of the console, select the region of the asset that you want to protect.
In the Actions column of the mining alert, click Details to view the alert details.
Use the basic information and event description in the Security Center console. The You can use these tools to find the location of the mining program and check for other alerts or suspicious files. You must determine whether the file that triggered the alert is a normal business file or a file run by an attacker. If the mining program is associated with other alert events, such as communication with a miner pool or access to malicious domain names, you must handle them at the same time.
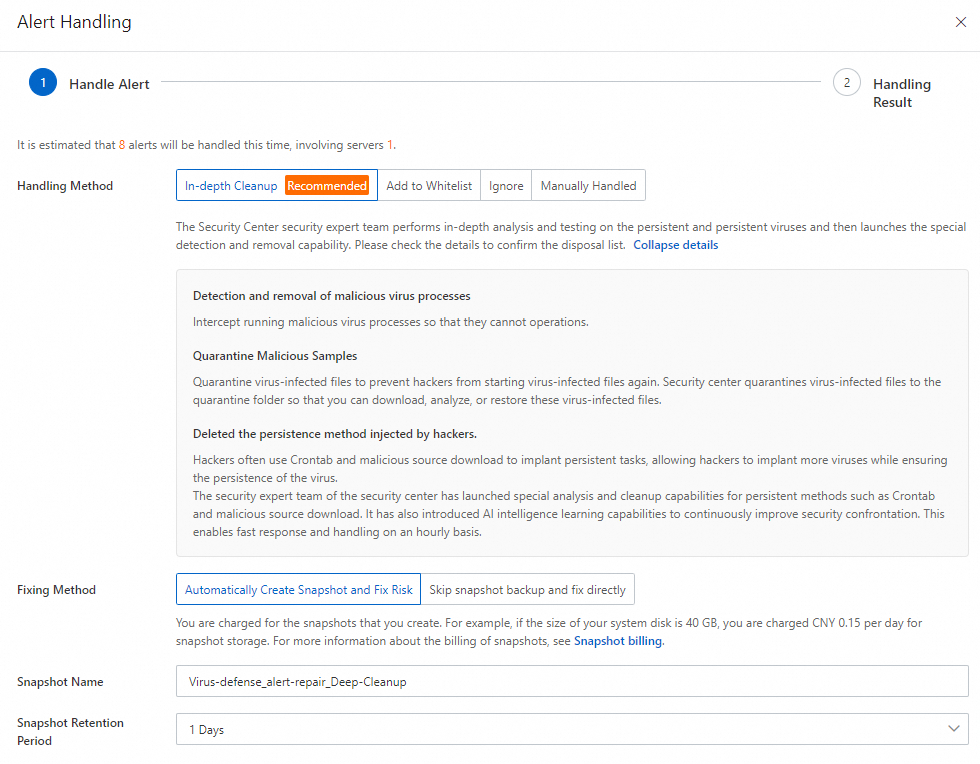
Click Alert Handling. In the Alert Handling dialog box, select Virus Scan from the Handling Method drop-down list and click Handle.
To process multiple alerts of the same type or triggered by the same rule at once, select Process Similar Alerts At The Same Time.
In the security alert list, click Block for other alerts that are related to the mining event, such as alerts about miner pool communication.
Security Center generates a policy to prevent the server from accessing the miner pool. This action gives you enough time to handle the security event. You can also manually add the miner pool IP address to a security group to block access. For more information about how to add a security group rule, see Add a security group rule.
In the security alert list, check for alerts about abnormal process behavior. Confirm whether any abnormal scheduled tasks exist and handle the corresponding alerts.
Step 2: Deep scan
You can use the Virus Scan feature of Security Center to scan your assets. This feature can scan for and clean up persistence mechanisms of malicious files, such as auto-start entries and scheduled tasks.
Log on to the Security Center console.
In the navigation pane on the left, choose . In the upper-left corner of the console, select the region where your asset is located.
On the Virus Scan page, click Scan Now or Scan again. On the Scan Settings page, configure the scan mode and scan scope, and then click OK.
Set Scan Mode to Quick Scan. For Scan Scope, select the server that was compromised by the mining program.
After the scan is complete, on the Virus Scan page, click Process in the Actions column of the target alert.
In the Process Alert panel, select Deep Scan and click Next.
The system starts to process the alert. After the alert is processed, you can view the result and the alert status.
Security detection
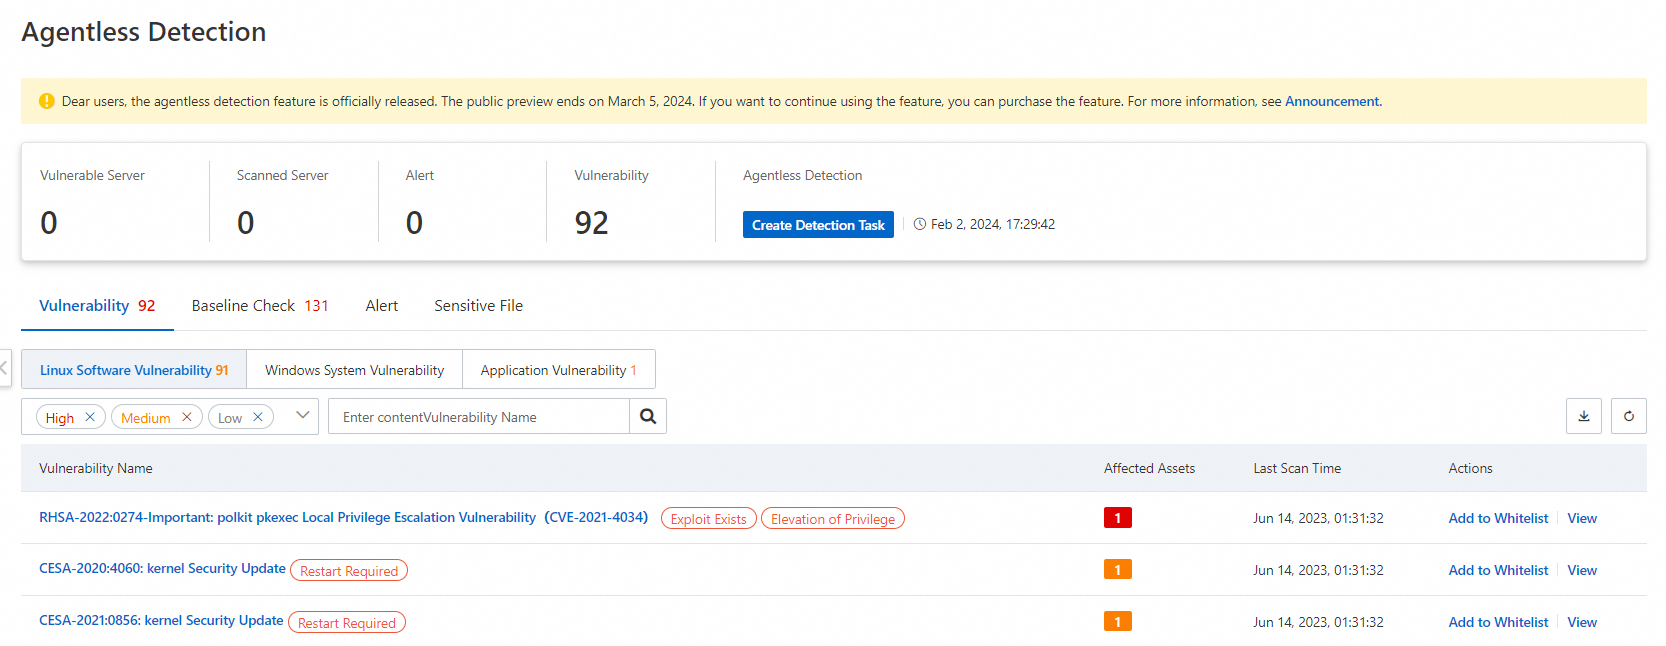
You can use the agentless detection feature of Security Center to perform a comprehensive security scan of the system and data disks of your ECS instance. This feature detects risks but does not fix them. You must handle the risks yourself based on the instructions on the risk details page. Agentless detection is a pay-as-you-go feature that you must enable. For more information, see Agentless detection.
Log on to the Security Center console.
In the navigation pane on the left, choose . In the upper-left corner of the console, select the region where your asset is located.
On the Agentless Detection page, in the Server Check panel, click Detect Now.
In the Detect Now panel, configure the settings as described in the following table and click OK.
Scan Scope: We recommend that you scan the data disk. A more complete data source provides better detection results for vulnerabilities and alerts.
Image Retention Duration:
The value can range from 1 to 365 days.
You are charged for creating images. The longer you retain the images, the higher the fees.
ImportantIf you select Retain Only At-risk Image, the system automatically deletes threat-free images after the scan is complete.
After the detection task is complete, you can view the results for detected vulnerability risks, baseline check items, security alerts, and sensitive files.
You must handle the risks promptly based on the instructions on the risk details page.
Manual cleanup
Before you perform any cleanup operations, you must create a snapshot to back up your server. This practice helps prevent data loss that may be caused by operational errors.
Linux
Block malicious network communication.
After you discover mining behavior on a host, you must first block the network communication of the mining trojan. A full response to the mining event takes a long time. Blocking communication helps control the impact immediately.
Run the following command to view the current system network connections.
netstat -antp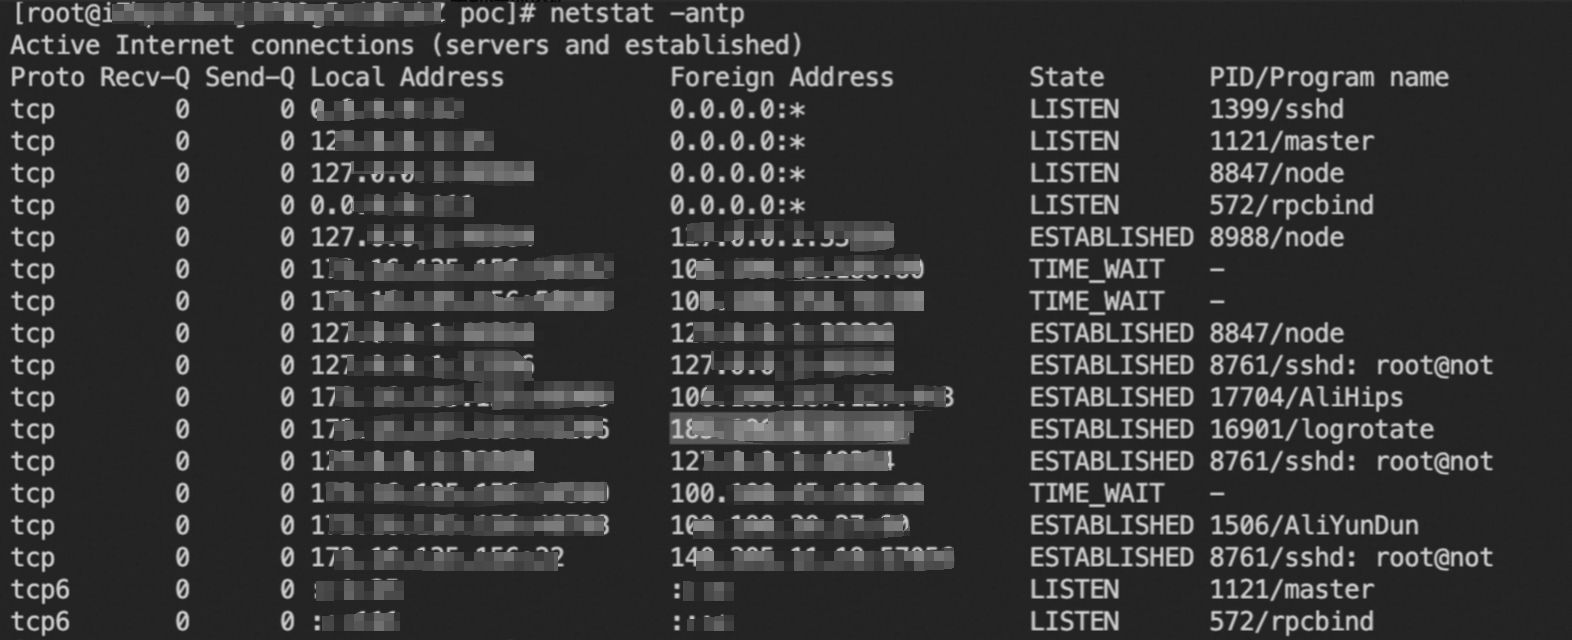
In the following commands, replace
c2_addresswith a suspicious remote address (Foreign Address) that is not used by your normal business. Then, run the commands to add firewall rules that block all network connections between the server and the suspicious address.iptables -A INPUT -s c2_address -j DROP iptables -A OUTPUT -d c2_address -j DROP
Delete the mining program and its related files
Mining programs are often difficult to purge. We recommend that you back up important data and then reinitialize the disk to ensure that the mining program is completely removed.
Mining processes usually consume high CPU resources. You can use the following commands to find suspicious mining processes.
Find processes that are consuming a large amount of the host's CPU resources.
top -c
ps -eo pid,ppid,cmd,%cpu --sort=-%cpu | more
Check for abnormal network connection behavior.
netstat -antp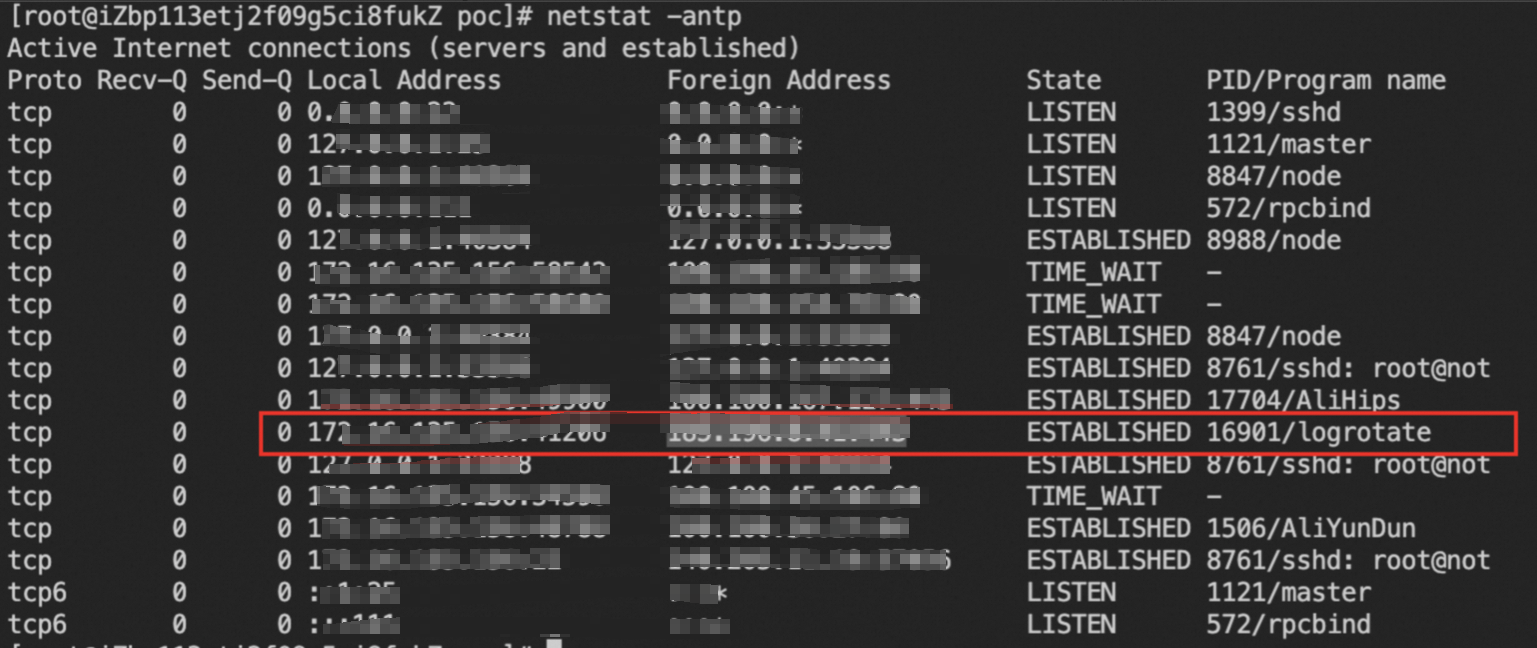
Obtain the file path of the suspicious process.
ls -al /proc/$PID/exeCalculate the MD5 hash of the process file and query the file information on the Alibaba Cloud Threat Intelligence platform.
md5sum /proc/$PID/exe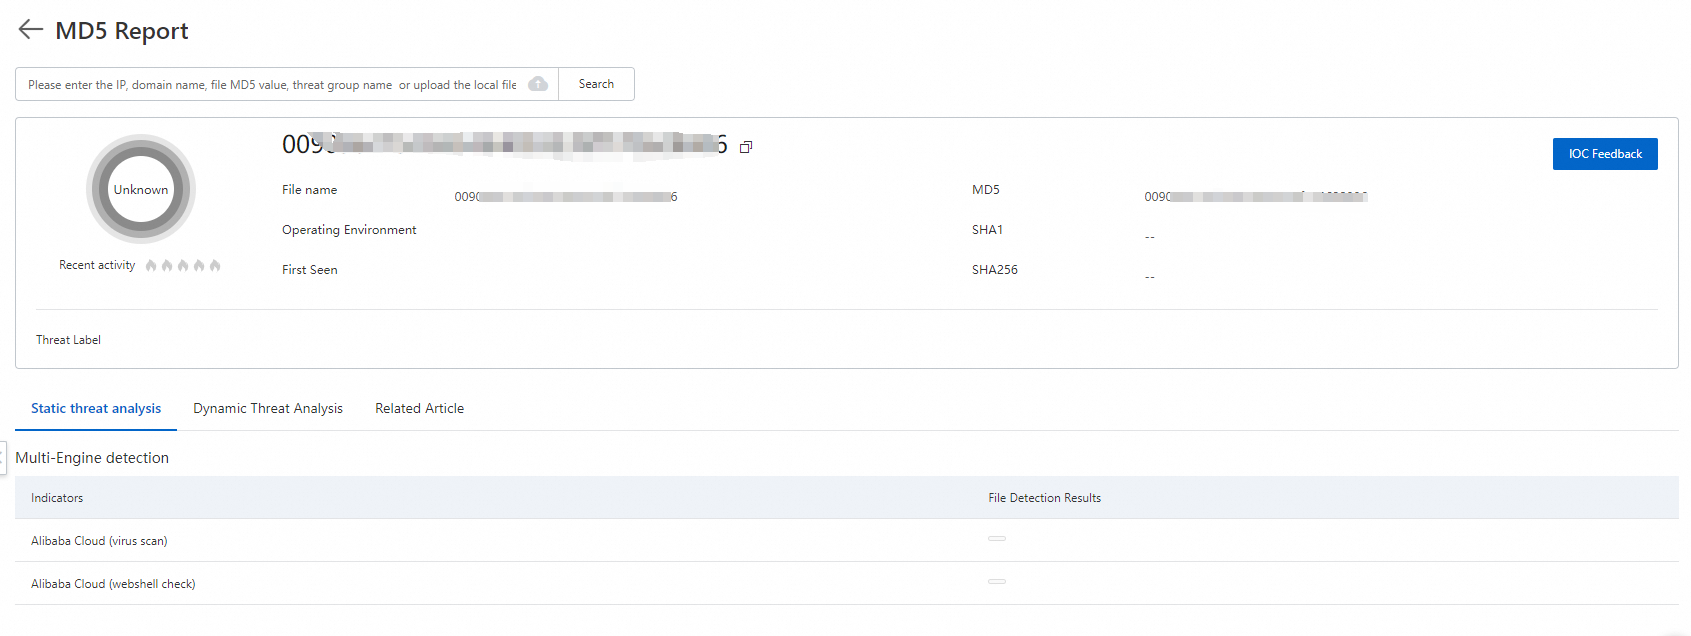
Run the following commands to stop the mining process and purge the mining file.
kill -9 $PID
# Delete the process path obtained from ls -al /proc/$PID/exe
rm /path/to/executable
Windows
In PowerShell, run the following command to find suspicious mining processes based on CPU usage.
 ps | sort -des cpu
 While(1) {ps | sort -des cpu | select -f 15 | ft -a; sleep 1; cls}
Run the following command to view the disk file and startup command parameters of the mining process.
wmic process where processid=xxx get processid,executablepath,commandline,name // xxx represents the process PIDEnd the mining process and purge the mining file.
Run the following command to check for suspicious network ports that are connected to the host.
netstat -ano | findstr xxx // xxx represents the suspicious network portRun the following command to check whether the hosts file on the server contains miner pool addresses from the mining program.
type C:\Windows\System32\drivers\etc\hostsRun the following command to check for scheduled tasks that are set by the mining program.
schtasks /query
Recommendations
After the cleanup is complete, we recommend that you perform the following operations to prevent future intrusions:
Reset passwords and keys: The passwords or keys for the instance may be compromised. You must promptly change all user passwords and Secure Shell Protocol (SSH) keys to prevent another intrusion. If you use passwords to log on, do not use weak passwords.
Fix vulnerabilities: You must fix known vulnerabilities. Regularly apply security patches to the operating system and applications, such as Redis and Jenkins.
Back up data: Regularly create snapshot backups of important data and system configurations. This practice allows for quick recovery if an incident occurs.
References
Best practices for preventing mining programs: The Cloud Firewall intrusion prevention system (IPS) module uses vulnerability intelligence and virtual patching to track and defend against network exploits from most mining worms. This feature blocks the virus from spreading.
FAQ
After writing persistence files, such as scheduled tasks and auto-start entries, some mining viruses set an unchangeable (immutable) attribute for these files to prevent them from being deleted.
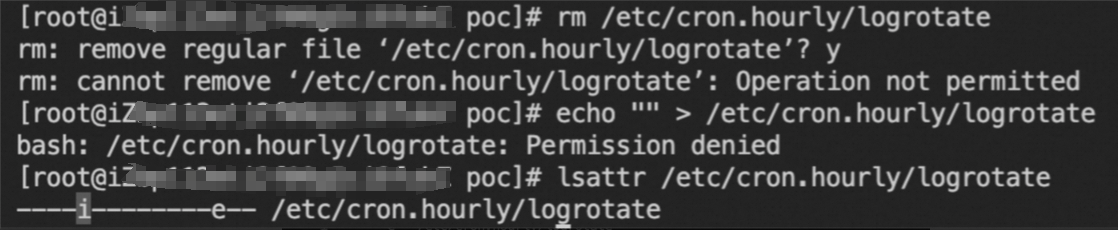
You can run the chattr -i [filename] command on the file to remove this attribute. Then, you can delete the file.