The increasing adoption of large language models (LLMs) has raised enterprise concerns about data security during inference tasks. This topic describes how to use an Alibaba Cloud heterogeneous confidential computing instance and the Confidential AI (CAI) solution to build a secure LLM inference environment.
Background
Alibaba Cloud gn8v-tee heterogeneous confidential computing instances integrate GPUs into a trusted execution environment (TEE) that is based on CPU Trust Domain Extension (TDX). This protects data during transmission between CPUs and GPUs and during computation within GPUs. You can use Alibaba Cloud Key Management Service (KMS) as the key storage backend and deploy a Trustee remote attestation service in an Container Service for Kubernetes (ACK) cluster. After you perform simple configurations, your inference service can seamlessly implement secure inference protection through confidential computing without requiring modifications. This solution helps you build a secure LLM inference environment on Alibaba Cloud to support your business.
Solution architecture
The following figure shows the overall architecture of the solution.

Procedure
Step 1: Prepare the encrypted model data
This step includes downloading, encrypting, and uploading the model. The entire process is time-consuming because the model files are large.
To try this solution, you can use the encrypted model file that we have prepared. If you use our encrypted model file, you can skip this step and go to Step 2: Set up the Trustee remote attestation service. Click the following link to obtain the encrypted model file information.
1. Download a model
Before deploying a model, you need to encrypt the model and upload it to cloud storage. The key for decrypting the model will be hosted by KMS, controlled by the remote attestation service. Perform model encryption operations in a local or trusted environment. This solution shows how to deploy Qwen2.5-3B-Instruct as an example.
If you already have a model, you can skip this section and proceed to 2. Encrypt the model.
Run the following command in the terminal use ModelScope tool to download Qwen2.5-3B-Instruct(requires Python 3.9 or higher).
pip3 install modelscope importlib-metadata
modelscope download --model Qwen/Qwen2.5-3B-Instruct
The command will download the model to ~/.cache/modelscope/hub/models/Qwen/Qwen2.5-3B-Instruct/.
2. Encrypt the model
The following two encryption methods are supported. This topic uses Gocryptfs as an example.
Gocryptfs: An encryption pattern based on AES-256-GCM that is compliant with the open source Gocryptfs standard.
Sam: An Alibaba Cloud trusted AI model encryption format. It protects model confidentiality and prevents license content from being tampered with or used illegally.
Use Gocryptfs to encrypt
Install the Gocryptfs tool (currently only supports Gocryptfs v2.4.0 version using default parameters). Choose one of the following installation methods:
Method 1: (Recommended) Install from yum source
If you use Alinux3 or AnolisOS 23 operating system, you can directly install gocryptfs using the yum source.
Alinux 3
sudo yum install gocryptfs -yAnolisOS 23
sudo yum install anolis-epao-release -y
sudo yum install gocryptfs -y
Method 2: Download precompiled binary directly
# Download precompiled Gocryptfs package
wget https://github.jobcher.com/gh/https://github.com/rfjakob/gocryptfs/releases/download/v2.4.0/gocryptfs_v2.4.0_linux-static_amd64.tar.gz

# Extract and install
tar xf gocryptfs_v2.4.0_linux-static_amd64.tar.gz
sudo install -m 0755 ./gocryptfs /usr/local/bin
Create a Gocryptfs key file as the key for model encryption. In subsequent steps, you will need to upload this key to Trustee.
In this solution,
alibaba@1688is the key for encryption, and will be stored in thecachefs-passwordfile. You can also customize the key. But in practice, use a randomly generated strong key instead.cat << EOF > ~/cachefs-password alibaba@1688 EOFUse the key to encrypt the model.
Configure the path of the plaintext model.
NoteConfigure the path of the plaintext model you just downloaded, or replace it with the path of your own model.
PLAINTEXT_MODEL_PATH=~/.cache/modelscope/hub/models/Qwen/Qwen2.5-3B-Instruct/Use Gocryptfs to encrypt the model directory tree.
After encryption, the model will be stored in encrypted form in the
./cipherdirectory.mkdir -p ~/mount cd ~/mount mkdir -p cipher plain # Install Gocryptfs runtime dependencies sudo yum install -y fuse # initialize gocryptfs cat ~/cachefs-password | gocryptfs -init cipher # mount to plain cat ~/cachefs-password | gocryptfs cipher plain # move AI model to ~/mount/plain cp -r ${PLAINTEXT_MODEL_PATH} ~/mount/plain
Use Sam to encrypt
Download the Sam encryption module RAI_SAM_SDK_2.1.0-20240731.tgz, and then run the following command to extract the package.
# Extract the Sam encryption module
tar xvf RAI_SAM_SDK_2.1.0-20240731.tgz
Use the Sam encryption module to encrypt the model.
# Navigate to the encryption directory of the Sam encryption module
cd RAI_SAM_SDK_2.1.0-20240731/tools

# Encrypt the model
./do_content_packager.sh <model_directory> <plaintext_key> <key_ID>
Where:
<model_directory>: The directory where the model to be encrypted is located. You can use a relative or absolute path, such as
~/.cache/modelscope/hub/models/Qwen/Qwen2.5-3B-Instruct/.<plaintext_key>: A custom encryption key with a length of 4 to 128 bytes, such as
alibaba@1688. The plaintext key is the model decryption key to be uploaded to Trustee.<key_ID>: A custom key identifier with a length of 8 to 48 bytes, such as
LD_Demo_0001.
After encryption, the model will be stored in encrypted form in the
<key_ID>directory of the current path.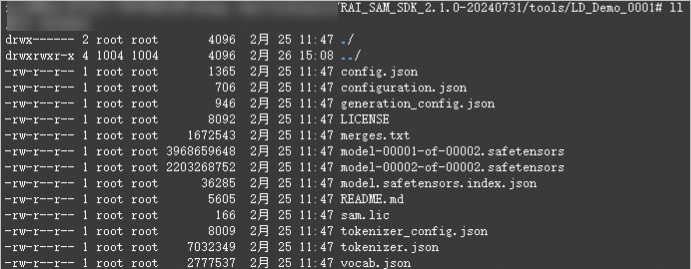
3. Upload the model
Prepare an OSS Bucket in the same region where you will deploy the heterogeneous instance. Upload the encrypted model to Alibaba Cloud OSS. This lets you pull and deploy the model from the heterogeneous instance later.
Take OSS as an example. You can create a bucket and a directory named qwen-encrypted, such as oss://examplebucket/qwen-encrypted/. For more information, see Quick Start for the console. Because the model file is large, we recommend using ossbrowser to upload the encrypted model to this directory.
Step 2: Set up the Trustee remote attestation service
The remote attestation service is a user-managed verification service that is responsible for verifying the runtime environment of models and inference services. The model decryption key is injected to decrypt and mount the model only after the service confirms that the heterogeneous model deployment environment is trustworthy and meets the expected conditions.
You can use Alibaba Cloud ACK Serverless to deploy a remote attestation service that verifies the model deployment and inference environments. You can also use Alibaba Cloud KMS to provide professional-grade security for the model decryption key. The procedure is as follows:
The ACK cluster does not need to be in the same region as the destination region for the heterogeneous deployment service.
The Alibaba Cloud KMS instance must be in the same region as the ACK cluster where the Alibaba Cloud Trustee remote attestation service will be deployed.
Before you create the KMS instance and the ACK cluster, create a virtual private cloud (VPC) and two vSwitches. For more information, see Create and manage a VPC.
1. Create an Alibaba Cloud KMS instance as the key storage backend
Go to the KMS console, choose in the left-side navigation pane. Then, create and start an instance on the Software Key Management tab. When starting the instance, select the same VPC as the ACK cluster. For more information, see Purchase and enable a KMS instance.
Wait for about 10 minutes for the instance to start.
After the instance is started, choose in the left-side navigation pane. Then, create a customer master key for the instance on the Keys page. For more information, see Step 1: Create a software-protected key.
Choose in the left-side navigation pane. Then, create an application access point (AAP) for the instance on the AAPs page. Set Scope to the created KMS instance. For more information, see Mode 1: Quick creation.
After the AAP is created, your browser automatically downloads a ClientKey***.zip file. This zip file contains the following files after extraction:
ClientKeyContent: The default file name is
clientKey_****.json.ClientKeyPassword: The default file name is
clientKey_****_Password.txt.
Go to , click the KMS instance name. Then, in the Basic Information section, click Download next to Instance CA Certificate to export the public key certificate file
PrivateKmsCA_***.pemof the KMS instance.
2. Create an ACK service cluster and install the csi-provisioner component
Go to the Create Cluster page to create an ACK Serverless cluster. Take note of the following parameters. For more parameter settings, see Create an ACK Serverless cluster.
Cluster Configurations: Configure the following parameters and click Next: Component Configurations.
Key item
Description
VPC
Select Use Existing and select Configure SNAT For VPC. Otherwise, you cannot pull the Trustee image.
vSwitch
Make sure that at least two vSwitches are created in the existing VPC. Otherwise, you cannot expose the public ALB.
Component Configurations: Configure the following parameters and click Next: Confirm.
Key item
Description
Service Discovery
Select CoreNDS.
Ingress
Select ALB Ingress. For Gateway Source, select New and select two vSwitches.
Confirm: Confirm the configuration information and terms of service, and click Create Cluster.
After the cluster is created, install the csi-provisioner (Managed) component. For more information, see Manage components.
3. Deploy the Trustee remote attestation service in the ACK cluster
First, connect to the cluster over the Internet or an internal network. For more information, see Connect to a cluster.
Upload the downloaded client key content (
clientKey_****.json), key password (clientKey_****_Password.txt), and CA certificate (PrivateKmsCA_***.pem) to the environment connected to the ACK Serverless cluster, and run the following command to deploy Trustee using Alibaba Cloud KMS as the key storage backend.# Install the plugin helm plugin install https://github.com/AliyunContainerService/helm-acr helm repo add trustee acr://trustee-chart.cn-hangzhou.cr.aliyuncs.com/trustee/trustee helm repo update export DEPLOY_RELEASE_NAME=trustee export DEPLOY_NAMESPACE=default export TRUSTEE_CHART_VERSION=1.0.0 # Set the region information of the ACK cluster, such as cn-hangzhou export REGION_ID=cn-hangzhou # KMS instance information exported earlier # Replace with your KMS instance ID export KMS_INSTANCE_ID=kst-hzz66a0*******e16pckc # Replace with the path to your KMS instance application identity secret export KMS_CLIENT_KEY_FILE=/path/to/clientKey_KAAP.***.json # Replace with the path to your KMS instance secret security token export KMS_PASSWORD_FILE=/path/to/clientKey_KAAP.***_Password.txt # Replace with the path to your KMS instance CA certificate export KMS_CERT_FILE=/path/to/PrivateKmsCA_kst-***.pem helm install ${DEPLOY_RELEASE_NAME} trustee/trustee \ --version ${TRUSTEE_CHART_VERSION} \ --set regionId=${REGION_ID} \ --set kbs.aliyunKms.enabled=true \ --set kbs.aliyunKms.kmsIntanceId=${KMS_INSTANCE_ID} \ --set-file kbs.aliyunKms.clientKey=${KMS_CLIENT_KEY_FILE} \ --set-file kbs.aliyunKms.password=${KMS_PASSWORD_FILE} \ --set-file kbs.aliyunKms.certPem=${KMS_CERT_FILE} \ --namespace ${DEPLOY_NAMESPACE}NoteThe first command (
helm plugin install...) may take a long time to execute. If the installation fails, you can first uninstall the plugin by runninghelm plugin uninstall cm-push, and then run the plugin installation command again.Sample output:
NAME: trustee
LAST DEPLOYED: Tue Feb 25 18:55:33 2025
NAMESPACE: default
STATUS: deployed
REVISION: 1
TEST SUITE: None
Run the following command in the environment connected to the ACK Serverless cluster to obtain the access address of Trustee.
export TRUSTEE_URL=http://$(kubectl get AlbConfig alb -o jsonpath='{.status.loadBalancer.dnsname}')/${DEPLOY_RELEASE_NAME}
echo ${TRUSTEE_URL}
Sample output:
http://alb-ppams74szbwg2f****.cn-shanghai.alb.aliyuncsslb.com/trustee.Run the following command in the environment connected to the ACK Serverless cluster to test the connectivity of the Trustee service.
cat << EOF | curl -k -X POST ${TRUSTEE_URL}/kbs/v0/auth -H 'Content-Type: application/json' -d @-
{
    "version":"0.1.0",
    "tee": "tdx",
    "extra-params": "foo"
}
EOF
If Trustee is running normally, the expected output is:
{"nonce":"PIDUjUxQdBMIXz***********IEysXFfUKgSwk=","extra-params":""}
4. Create a secret to store the model decryption key
The model decryption key managed by Trustee is stored in KMS. The key can only be accessed after the remote attestation service verifies the target environment.
Go to the Key Management Service console. In the navigation pane on the left, choose . On the Generic Secrets tab, click Create Generic Secret. Note the following key configurations:
Secret Name: Enter a custom name for the secret. This name is used as an index for the key. For example,
model-decryption-key.Set Secret Value: Enter the key that was used to encrypt the model. For example,
0Bn4Q1wwY9fN3P. Use your actual key.Encryption CMK: Select the master key that you created in the previous step.
Step 3: Create a heterogeneous confidential computing instance
The steps to create an instance with heterogeneous confidential computing features in the console are similar to the steps for creating a regular instance, but you must pay attention to some specific options. The following steps describe how to use an Alibaba Cloud Marketplace image that contains a heterogeneous confidential computing environment and a CAI environment to create a heterogeneous confidential computing instance. For more information about the heterogeneous confidential computing environment, see Build a heterogeneous confidential computing environment.
Go to the instance buy page.
Select the Custom Launch tab.
Select the billing method, region, instance type, image, and other configurations.
The following table describes the configuration items.
Configuration item
Description
Instance Family
You must select one of the following two instance types from the gn8v-tee instance family:
ecs.gn8v-tee.4xlarge
ecs.gn8v-tee.6xlarge
Image
Click the Marketplace Images tab, enter
Confidential AIto search, and select theAlibaba Cloud Linux 3.2104 LTS 64-bit Single-card Confidential AIimage.NoteFor more information about this image, see Alibaba Cloud Linux 3.2104 LTS 64-bit Single-card Confidential AI Image. You can create the heterogeneous confidential computing instance on the image product page.
System Disk
We recommend a system disk capacity of at least 1 TiB. The specific size should be reasonably estimated based on the size of the model file you need to run. Generally, we recommend a capacity greater than twice the model size. Set the capacity as needed.
Before you create the instance, review the overall configuration on the right side of the page. Configure options, such as the usage duration, to ensure that they meet your requirements.
Read and select the checkbox to agree to the ECS Terms of Service and other service agreements. If you have already agreed, you do not need to perform this step again. Follow the prompts on the page. Then, click Create Order.
Wait for the instance to be created. You can go to the instance list page in the console to view the instance status. When the instance status changes to Running, the instance is created.
Step 4: Configure access permissions for the heterogeneous instance to OSS and Trustee
1. Configure access permissions to OSS
During deployment, the instance needs to access the OSS bucket that stores the model ciphertext and access Trustee to obtain the model decryption key. Therefore, you must configure access permissions for the instance to the OSS and Trustee services.
Log on to the OSS console.
Click Buckets, and then click the target bucket name.
In the navigation pane on the left, choose .
On the Bucket Policy tab, click Authorize. In the panel that appears, grant the
Bucketpermission to the public IP address of the heterogeneous confidential computing instance.Click OK.
2. Configure access permissions to Trustee
Go to the Application Load Balancer (ALB) console, select Access Control on the left. Then click Create ACL, and add the IP addresses or CIDR blocks that need to access Trustee as IP entries. For more information, see Access control.
You must add the following addresses or address ranges:
The public IP address of the VPC that is bound during the heterogeneous service deployment.
The egress IP address of the inference client.
Run the following command to obtain the ID of the ALB instance that is used by the Trustee instance on the cluster.
kubectl get ing --namespace ${DEPLOY_NAMESPACE} kbs-ingress -o jsonpath='{.status.loadBalancer.ingress[0].hostname}' | cut -d'.' -f1 | sed 's/[^a-zA-Z0-9-]//g'The expected output is as follows:
alb-llcdzbw0qivhk0****In the navigation pane on the left of the ALB console, choose . In the region where the cluster is located, search for the ALB instance that you obtained in the previous step and click the instance ID to go to the instance details page. At the bottom of the page, in the Instance Information area, click Disable Configuration Read-only Mode.
Switch to the Listener tab, click Enable in the Access Control column of the target listener instance, and configure the whitelist with the access control policy group that you created in the previous step.
Step 5: Deploy the vLLM large language model inference service in the heterogeneous confidential computing instance
You can deploy the vLLM large language model inference service in the heterogeneous confidential computing instance using either docker or docker compose. The procedure is as follows:
1. Prepare the configuration file
Remotely connect to the heterogeneous instance. For more information, see Log on to a Linux instance using Workbench.
Run the following command to open the
~/cai.envconfiguration file.vi ~/cai.envPress the
ikey to enter insert mode and paste the prepared configuration information into the file.# Configurations for model decryption TRUSTEE_URL="http://alb-xxxxxxxxx.cn-beijing.alb.aliyuncsslb.com/xxxx/" # URL of the Trustee service MODEL_KEY_ID="kbs:///default/aliyun/model-decryption-key" # The resource ID of the model decryption key configured on Trustee. For example, the ID for the secret named model-decryption-key is kbs:///default/aliyun/model-decryption-key # Configurations for encrypted model distribution MODEL_OSS_BUCKET_PATH="<bucket-name>:<model-path>" # The path of the model ciphertext stored in Alibaba Cloud OSS. For example, conf-ai:/qwen3-32b-gocryptfs/ MODEL_OSS_ENDPOINT="https://oss-cn-beijing-internal.aliyuncs.com" # The OSS URL where the model ciphertext is stored # MODEL_OSS_ACCESS_KEY_ID="" # The AccessKey ID used to access the OSS bucket. # MODEL_OSS_SECRET_ACCESS_KEY="" # The AccessKey secret used to access the OSS bucket. # MODEL_OSS_SESSION_TOKEN="" # The session token used to access the OSS bucket. This is required only when you use STS credentials to access OSS. MODEL_ENCRYPTION_METHOD="gocryptfs" # The encryption method used. Valid values: "gocryptfs" and "sam". Default value: "gocryptfs". MODEL_MOUNT_POINT=/tmp/model # The mount point for the decrypted model plaintext. The model inference service can load the model from this path. # Configurations for large model service communication encryption MODEL_SERVICE_PORT=8080 # The TCP port used by the service. Communication on this port is transparently encrypted. # Configurations for P2P model distribution acceleration. You can ignore this by default. TRUSTEE_POLICY="default" # MODEL_SHARING_PEER="172.30.24.146 172.30.24.144"Enter
:wqand pressEnterto save the file and exit the editor.
2. Deploy the inference service
Deploy the inference service using docker
Use the configuration file to start the CAI service
You must use the file that you configured in the previous step to start the CAI service, which is used to decrypt the encrypted model. This mounts the decrypted plaintext model data to the
/tmp/modelpath, which is specified byMODEL_MOUNT_POINTin the host environment. Your inference service program, such as vLLM, can load the model from this path.Run the following command to start the CAI service.
cd ~
docker compose -f /opt/alibaba/cai-docker/docker-compose.yml --env-file ./cai.env up -d --wait
The following sample output indicates that the CAI service has started successfully.
[+] Running 5/5
 ✔ Container cai-docker-oss-1                    Healthy                                                                                                                                                                     44.7s
 ✔ Container cai-docker-attestation-agent-1      Healthy                                                                                                                                                                     44.7s
 ✔ Container cai-docker-tng-1                    Healthy                                                                                                                                                                     44.7s
 ✔ Container cai-docker-confidential-data-hub-1  Healthy                                                                                                                                                                     44.7s
 ✔ Container cai-docker-cachefs-1                Healthy
View the decrypted model file
To view the decrypted model file, you can run the following command.
ls -la -R /tmp/modelThe following sample output indicates that the model file was decrypted successfully.
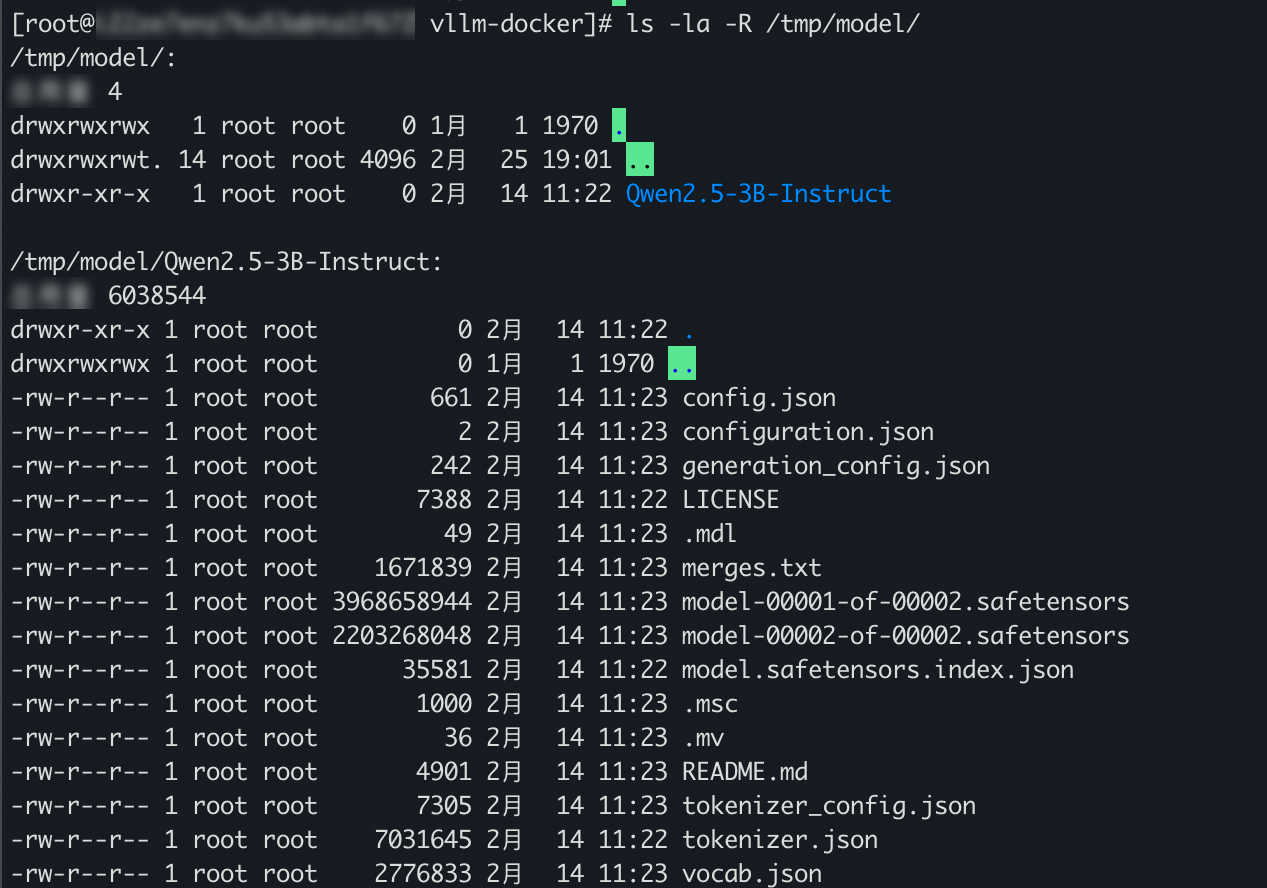
Run the following command to start the vLLM inference service.
docker run --rm \
    --net host \
    -v /tmp/model:/tmp/model \
    --gpus all \
    egs-registry.cn-hangzhou.cr.aliyuncs.com/egs/vllm:0.8.5-pytorch2.6-cu124-20250429 \
python3 -m vllm.entrypoints.openai.api_server --model=/tmp/model --trust-remote-code --port 8080 --served-model-name Qwen3-32B
The following sample output indicates that the inference service has started successfully.
Loading safetensors checkpoint shards:   0% Completed | 0/2 [00:00<?, ?it/s]
Loading safetensors checkpoint shards:  50% Completed | 1/2 [00:01<00:01,  1.07s/it]
Loading safetensors checkpoint shards: 100% Completed | 2/2 [00:01<00:00,  1.21it/s]
Loading safetensors checkpoint shards: 100% Completed | 2/2 [00:01<00:00,  1.16it/s]

INFO 03-04 07:49:06 model_runner.py:732] Loading model weights took 5.7915 GB
INFO 03-04 07:49:08 gpu_executor.py:102] # GPU blocks: 139032, # CPU blocks: 7281
INFO 03-04 07:49:08 model_runner.py:1024] Capturing the model for CUDA graphs. This may lead to unexpected consequences if the model is not static. To run the model in eager mode, set 'enforce_eager=True' or use '--enforce-eager' in the CLI.
INFO 03-04 07:49:08 model_runner.py:1028] CUDA graphs can take additional 1~3 GiB memory per GPU. If you are running out of memory, consider decreasing `gpu_memory_utilization` or enforcing eager mode. You can also reduce the `max_num_seqs` as needed to decrease memory usage.
INFO 03-04 07:49:18 model_runner.py:1225] Graph capturing finished in 9 secs.
WARNING 03-04 07:49:18 serving_embedding.py:171] embedding_mode is False. Embedding API will not work.
INFO 03-04 07:49:18 launcher.py:14] Available routes are:
INFO 03-04 07:49:18 launcher.py:22] Route: /openapi.json, Methods: HEAD, GET
INFO 03-04 07:49:18 launcher.py:22] Route: /docs, Methods: HEAD, GET
INFO 03-04 07:49:18 launcher.py:22] Route: /docs/oauth2-redirect, Methods: HEAD, GET
INFO 03-04 07:49:18 launcher.py:22] Route: /redoc, Methods: HEAD, GET
INFO 03-04 07:49:18 launcher.py:22] Route: /health, Methods: GET
INFO 03-04 07:49:18 launcher.py:22] Route: /tokenize, Methods: POST
INFO 03-04 07:49:18 launcher.py:22] Route: /detokenize, Methods: POST
INFO 03-04 07:49:18 launcher.py:22] Route: /v1/models, Methods: GET
INFO 03-04 07:49:18 launcher.py:22] Route: /version, Methods: GET
INFO 03-04 07:49:18 launcher.py:22] Route: /v1/chat/completions, Methods: POST
INFO 03-04 07:49:18 launcher.py:22] Route: /v1/completions, Methods: POST
INFO 03-04 07:49:18 launcher.py:22] Route: /v1/embeddings, Methods: POST
INFO:     Started server process [1]
INFO:     Waiting for application startup.
INFO:     Application startup complete.
INFO:     Uvicorn running on http://0.0.0.0:8080 (Press CTRL+C to quit)
Deploy the inference service using docker compose
Prepare the docker-compose.yml file.
Run the following command to open the docker-compose.yml file.
vi ~/docker-compose.ymlPress the
ikey to enter insert mode and paste the following content into the docker-compose.yml file.include the following: - path: /opt/alibaba/cai-docker/docker-compose.yml env_file: ./cai.env services: inference: image: egslingjun-registry.cn-wulanchabu.cr.aliyuncs.com/egslingjun/llm-inference:vllm0.5.4-deepgpu-llm24.7-pytorch2.4.0-cuda12.4-ubuntu22.04 volumes: - /tmp/model:/tmp/model:shared deploy: resources: reservations: devices: - driver: nvidia count: all capabilities: [gpu] network_mode: host init: true command: "python3 -m vllm.entrypoints.openai.api_server --model=/tmp/model/ --trust-remote-code --port 8080" depends_on: cachefs: condition: service_healthy restart: truePress
:wqand then pressEnterto save the file and exit the editor.ImportantIf you plan to modify the docker-compose.yml file to deploy other workloads that are described in this topic, you must make the following adjustments:
Use the
includestatement to import the CAI docker-compose.yml file that is pre-installed in the image, and useenv_fileto specify the path of the CAI configuration file.You must add a
depends_oncondition for the vLLM service container to ensure that it starts after the cachefs container.The decrypted model directory is mounted to the path that is specified by
MODEL_MOUNT_POINTin the host environment. Therefore, you must add a corresponding volumes entry for the vLLM service container to share the model directory with the inference service container.
Run the vLLM inference service
Run the following command to run the vLLM inference service.
docker compose up -dThe following sample output indicates that the inference service has started successfully.
[+] Running 6/6
 ✔ Container root-attestation-agent-1      Healthy                                                                                                                                                                            3.6s
 ✔ Container root-oss-1                    Healthy                                                                                                                                                                           10.2s
 ✔ Container root-tng-1                    Healthy                                                                                                                                                                           44.2s
 ✔ Container root-confidential-data-hub-1  Healthy                                                                                                                                                                           34.2s
 ✔ Container root-cachefs-1                Healthy                                                                                                                                                                           54.7s
 ✔ Container root-inference-1              Started
Step 6: Access the inference service in the heterogeneous confidential computing instance
To access the inference service in the confidential computing instance, you must prepare a client environment and install the Trusted Network Gateway client. The following steps describe how to use a regular ECS instance as a client to access the vLLM inference service that is deployed in the heterogeneous instance.
1. Configure access permissions for the client environment to the heterogeneous confidential computing instance and Trustee
In this topic, the client environment accesses the inference service that is deployed in the heterogeneous confidential computing instance through its public IP address. Therefore, you must add a rule to the security group of the heterogeneous confidential computing instance to allow access from the client environment. In addition, during the process of establishing a secure channel with the server, Trustee is required for remote attestation of the heterogeneous confidential computing instance. Therefore, you must also add the public IP address of the client environment to the access control list of Trustee. The procedure is as follows.
Add a rule to the security group of the heterogeneous confidential computing instance to allow access from the client. For more information, see Manage security group rules.
Add the public IP address of the client environment to the access control of Trustee.
You have already created an access control policy group and added it to the whitelist in Step 4: Configure access permissions for the heterogeneous instance to OSS and Trustee. Therefore, you do not need to create a new one. You can add the public IP address of the client to the existing access control policy group.
2. Deploy the Trusted Network Gateway client on the client instance
Trusted Network Gateway (TNG) is a network component that is designed for confidential computing scenarios. It can act as a daemon process that is responsible for establishing secure communication channels and transparently encrypting and decrypting network traffic to and from confidential instances to achieve end-to-end data security. It also lets you flexibly control the traffic encryption and decryption process based on your needs without modifying existing applications.
Deploy the Trusted Network Gateway client.
Deploy using docker
Install Docker on the client instance. For more information, see Install and use Docker and Docker Compose.
Run the following command to deploy the Trusted Network Gateway client using Docker.
ImportantYou must modify the value of the
as_addrfield to${trsutee_url}/as/based on the Trustee service that you previously deployed.docker run --rm \ --network=host \ confidential-ai-registry.cn-shanghai.cr.aliyuncs.com/product/tng:2.2.1 \ tng launch --config-content ' { "add_ingress": [ { "http_proxy": { "proxy_listen": { "host": "127.0.0.1", "port": 41000 } }, "verify": { "as_addr": "http://alb-xxxxxxxxxxxxxxxxxx.cn-shanghai.alb.aliyuncsslb.com/cai-test/as/", "policy_ids": [ "default" ] } } ] } '
Deploy using a binary file
Visit TNG · GitHub to obtain the download address of the binary installation package that matches the client instance architecture.
Run the following command to download the Trusted Network Gateway client binary file. The following example uses
tng-v2.2.1.x86_64-unknown-linux-gnu.tar.gz. Replace it with the actual filename.wget https://github.com/inclavare-containers/TNG/releases/download/v2.2.1/tng-v2.2.1.x86_64-unknown-linux-gnu.tar.gzRun the following command to decompress the downloaded binary compressed file and grant executable permissions to the file.
tar -zxvf tng-v2.2.1.x86_64-unknown-linux-gnu.tar.gz
chmod +x tng
Run the following command to run the Trusted Network Gateway client.
ImportantYou must modify the value of the
as_addrfield to${trsutee_url}/as/based on the Trustee service that you previously deployed../tng launch --config-content ' { "add_ingress": [ { "http_proxy": { "proxy_listen": { "host": "127.0.0.1", "port": 41000 } }, "verify": { "as_addr": "http://alb-xxxxxxxxxxxxxxxxxx.cn-shanghai.alb.aliyuncsslb.com/cai-test/as/", "policy_ids": [ "default" ] } } ] } '
3. Configure the HTTP proxy service for processes on the client instance
After the deployment is successful, the Trusted Network Gateway client runs in the foreground and creates an HTTP proxy service that is based on the HTTP CONNECT protocol on 127.0.0.1:41000. When you connect an application to this proxy, the traffic is encrypted by the Trusted Network Gateway client and sent to the vLLM service through a trusted channel.
You can configure the HTTP proxy service for processes on the client instance in the following two ways.
Configure the proxy by protocol type
export http_proxy=http://127.0.0.1:41000
export https_proxy=http://127.0.0.1:41000
export ftp_proxy=http://127.0.0.1:41000
export rsync_proxy=http://127.0.0.1:41000
Configure the proxy for all protocols
export all_proxy=http://127.0.0.1:410004. Access the inference service from the client instance
You can access the inference service in the heterogeneous confidential computing instance by running the curl command in the client environment.
Open a new terminal window for the client instance.
Run the following command to access the inference service.
NoteYou must replace
<heterogeneous_confidential_computing_instance_public_IP>in the following command with the public IP address of the heterogeneous confidential computing instance that you created in Step 3: Create a heterogeneous confidential computing instance.The following command sets the
all_proxy='http://127.0.0.1:41000/'environment variable before thecurlcommand is run. This ensures that requests sent by thecurlcommand are encrypted by the Trusted Network Gateway client and sent through a secure channel.
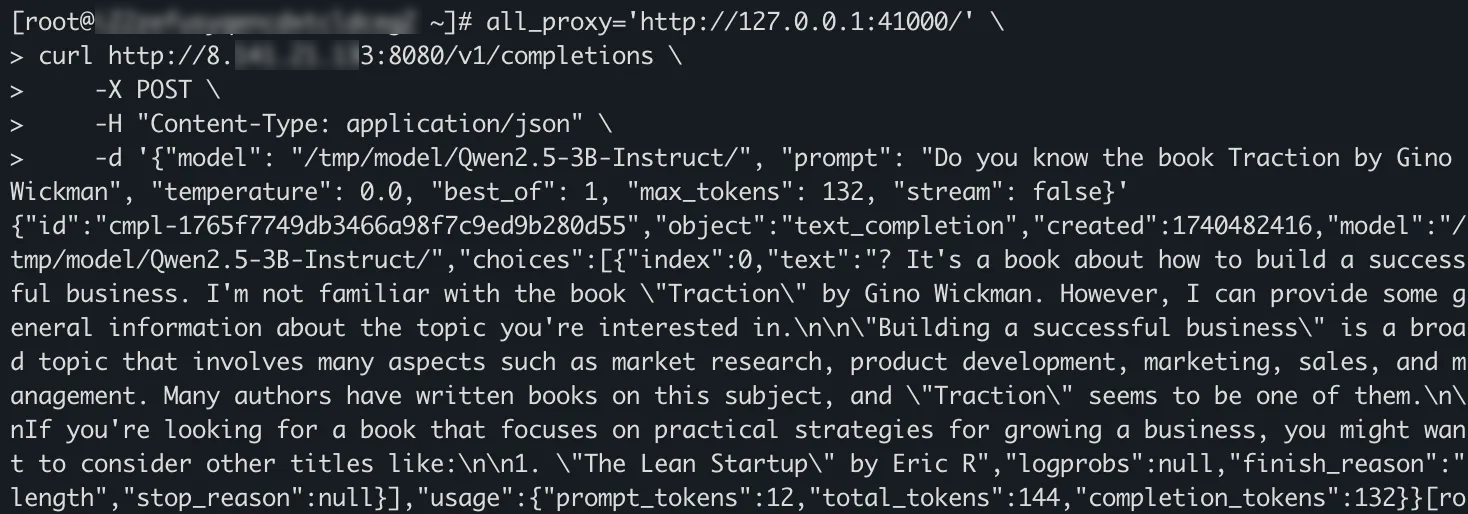
env all_proxy='http://127.0.0.1:41000/' \
    curl http://<heterogeneous_confidential_computing_instance_public_IP>:8080/v1/completions \
        -X POST \
        -H "Content-Type: application/json" \
        -d '{"model": "Qwen3-32B", "prompt": "Do you know the book Traction by Gino Wickman", "temperature": 0.0, "best_of": 1, "max_tokens": 132, "stream": false}'
The following sample output indicates that the request sent by the client using the curl command is encrypted by the Trusted Network Gateway client and then sent through a secure channel. The large language model service that is deployed in the heterogeneous instance is successfully accessed.
FAQ
The cai-docker-oss container fails to start during CAI service startup.
Symptom: The cai-docker-oss container fails to start when the CAI service starts.

Cause: This issue usually occurs because the heterogeneous instance cannot access the OSS bucket where the model ciphertext is stored.
Solution: Check whether the OSS access control policy is configured correctly.
When you start the CAI service, the cai-docker-confidential-data-hub container fails to start.
Symptom: The cai-docker-confidential-data-hub container fails to start when the CAI service starts.

Cause: This error indicates a problem with obtaining the model decryption key. This issue usually occurs because the heterogeneous instance cannot access the Trustee instance, or the configured key does not exist.
Solution: You can perform the following steps to troubleshoot the issue.
Check whether the key ID that you configured in
cai.envis correct, and then redeploy the service.Check whether the URL of the Trustee instance in
cai.envis configured correctly.Check whether the access control policy of the Trustee instance is configured correctly.
The cai-docker-tng container fails to start when the CAI service is started.
The cai-docker-cachefs container failed to start during the startup of the CAI service.
Symptom: The cai-docker-cachefs container fails to start when the CAI service starts.

Cause: This issue usually occurs because the model decryption failed.
Solution: You can perform the following steps to troubleshoot the issue.
Check whether the correct password credential has been uploaded to the KMS backend of Trustee.
Check whether the value of the
MODEL_ENCRYPTION_METHODfield that is configured incai.envmatches the encryption method that was used to encrypt the model.
How do I use the tool to collect error information after the CAI service fails to start?
References
For more information about how to build a heterogeneous confidential computing environment, see Build a heterogeneous confidential computing environment.