When you run microservices across multiple Kubernetes clusters, you need a way to distribute workloads without manually deploying each service version to each cluster. Alibaba Cloud Service Mesh (ASM) integrates with Karmada (Kubernetes Armada) to solve this. Karmada provides ready-to-use automation for multi-cluster application management with key features such as centralized multi-cloud management, high availability, fault recovery, and traffic scheduling. ASM provides unified cross-cluster traffic management through an Istio-based service mesh.
This guide deploys the Bookinfo sample application across two clusters using Karmada propagation policies, then routes traffic through an ASM ingress gateway.
Karmada architecture
Karmada extends Kubernetes with a federated control plane that schedules workloads across multiple clusters. Because it uses Kubernetes-native APIs for resource definitions, existing tools and workflows remain compatible.
Two design choices make Karmada flexible:
Separate scheduling from workloads. A standalone Propagation (placement) Policy API defines placement rules. A single policy can target multiple workloads (1:n mapping), so scheduling constraints are defined once rather than per workload.
Default policies for simple cases. When no custom policy is needed, workloads use standard Kubernetes APIs directly.
Cluster modes
Karmada manages member clusters in two modes. The difference is how manifests reach each cluster.
| Mode | How it works | Best for |
|---|---|---|
| Push | The Karmada control plane connects directly to the member cluster's kube-apiserver to deploy manifests and monitor status. | Clusters with direct network access from the control plane |
| Pull | A karmada-agent runs inside each member cluster and pulls manifests from the Karmada control plane. The control plane never accesses the member cluster directly. | Clusters behind firewalls or in different networks |
In Pull mode, each karmada-agent handles three tasks:
Registers its cluster with Karmada by creating a
ClusterobjectReports cluster status back to the Karmada control plane by updating the
ClusterobjectWatches for manifests in the Karmada execution space (namespace
karmada-es-<cluster name>) and deploys them locally
Control plane components
The Karmada control plane consists of three components, backed by ETCD (an open source distributed key-value store) as the data store:
| Component | Role |
|---|---|
| Karmada API Server | REST endpoint through which all other components communicate |
| Karmada Controller Manager | Reconciles API objects created through the Karmada API Server |
| Karmada Scheduler | Assigns workloads to clusters based on propagation policies |

Prerequisites
Before you begin, ensure that you have:
Two Container Service for Kubernetes (ACK) clusters (
member1andmember2) in the same virtual private cloud (VPC). See Create an ACK managed clusterAn ASM instance (
mesh1) with a sidecar proxy injection policy configured in thedefaultnamespace. See Create an ASM instance and Configure sidecar proxy injection policiesA Karmada primary cluster (
karmada-master) with both ACK clusters registered as member clusters. See Karmada Installation OverviewBoth ACK clusters added to the ASM instance, with a serverless ingress gateway created. See the "Add the clusters to the ASM instance and create a serverless ingress gateway" section in Use an ASM serverless gateway to act as a single entry point for access to multiple clusters
This guide uses two clusters in the same VPC. For clusters in different VPCs, configure cross-VPC communication before proceeding. When creating clusters, use advanced security groups.
Set up environment variables
Define the following variables to simplify the kubectl commands in this guide. Replace the placeholder values with the paths to your actual kubeconfig files.
# Karmada primary cluster kubeconfig (default path shown)
export KARMADA_CONFIG=/etc/karmada/karmada-apiserver.config

# Member cluster kubeconfig files
export MEMBER1_CONFIG=<path-to-member1-kubeconfig>
export MEMBER2_CONFIG=<path-to-member2-kubeconfig>
Step 1: Deploy applications across clusters with Karmada
This step uses the Bookinfo sample application to demonstrate Karmada-based multi-cluster deployment. Instead of manually deploying specific service versions to each cluster, propagation policies automate the placement.
Create the application manifests
Create a file named
bookinfo-karmada.yamlwith the Bookinfo Deployments, Services, and ServiceAccounts:Deploy the application to the Karmada primary cluster:
kubectl --kubeconfig ${KARMADA_CONFIG} apply -f bookinfo-karmada.yaml
Define propagation policies
Propagation policies control which workloads run on which clusters. Each policy's .spec.placement.clusterAffinity field specifies the target clusters.
The four placement fields are:
| Field | Description |
|---|---|
ClusterNames | Explicitly lists clusters to receive the workload |
ExcludeClusters | Explicitly lists clusters to exclude |
LabelSelector | Selects clusters by Kubernetes labels |
FieldSelector | Selects clusters by field values |
Create a file named
propagation.yamlwith the following propagation policies: These policies distribute the Bookinfo services as follows: For more details about placement fields, see Resource Propagating in the Karmada documentation.Cluster Workloads member1productpage-v1,reviews-v1,reviews-v2,reviews-v3member2details-v1,ratings-v1,reviews-v1,reviews-v2,reviews-v3Both All four Services (productpage, details, reviews, ratings) apiVersion: policy.karmada.io/v1alpha1 kind: PropagationPolicy metadata: name: service-propagation spec: resourceSelectors: - apiVersion: v1 kind: Service name: productpage - apiVersion: v1 kind: Service name: details - apiVersion: v1 kind: Service name: reviews - apiVersion: v1 kind: Service name: ratings placement: clusterAffinity: clusterNames: - member1 - member2 --- apiVersion: policy.karmada.io/v1alpha1 kind: PropagationPolicy metadata: name: produtpage-propagation spec: resourceSelectors: - apiVersion: apps/v1 kind: Deployment name: productpage-v1 - apiVersion: v1 kind: ServiceAccount name: bookinfo-productpage placement: clusterAffinity: clusterNames: - member1 --- apiVersion: policy.karmada.io/v1alpha1 kind: PropagationPolicy metadata: name: details-propagation spec: resourceSelectors: - apiVersion: apps/v1 kind: Deployment name: details-v1 - apiVersion: v1 kind: ServiceAccount name: bookinfo-details placement: clusterAffinity: clusterNames: - member2 --- apiVersion: policy.karmada.io/v1alpha1 kind: PropagationPolicy metadata: name: reviews-propagation spec: resourceSelectors: - apiVersion: apps/v1 kind: Deployment name: reviews-v1 - apiVersion: apps/v1 kind: Deployment name: reviews-v2 - apiVersion: apps/v1 kind: Deployment name: reviews-v3 - apiVersion: v1 kind: ServiceAccount name: bookinfo-reviews placement: clusterAffinity: clusterNames: - member1 - member2 --- apiVersion: policy.karmada.io/v1alpha1 kind: PropagationPolicy metadata: name: ratings-propagation spec: resourceSelectors: - apiVersion: apps/v1 kind: Deployment name: ratings-v1 - apiVersion: v1 kind: ServiceAccount name: bookinfo-ratings placement: clusterAffinity: exclude: - member1Apply the propagation policies:
kubectl --kubeconfig ${KARMADA_CONFIG} apply -f propagation.yaml
Verify the deployment
Check the Deployments on each member cluster to confirm the propagation policies took effect. On
member1: Expected output: Onmember2: Expected output: Confirm thatproductpage-v1appears only onmember1,details-v1andratings-v1appear only onmember2, and all threereviewsversions appear on both clusters.kubectl --kubeconfig ${MEMBER1_CONFIG} get deploymentNAME READY UP-TO-DATE AVAILABLE AGE productpage-v1 1/1 1 1 12m reviews-v1 1/1 1 1 12m reviews-v2 1/1 1 1 12m reviews-v3 1/1 1 1 12mkubectl --kubeconfig ${MEMBER2_CONFIG} get deploymentNAME READY UP-TO-DATE AVAILABLE AGE details-v1 1/1 1 1 16m ratings-v1 1/1 1 1 16m reviews-v1 1/1 1 1 16m reviews-v2 1/1 1 1 16m reviews-v3 1/1 1 1 16m
Step 2: Route traffic through the ASM ingress gateway
Create an Istio VirtualService and Gateway in ASM to route external traffic to the Bookinfo application through the ingress gateway.
In the
defaultnamespace, create a VirtualService namedbookinfo. For more information, see Manage virtual services.apiVersion: networking.istio.io/v1alpha3 kind: VirtualService metadata: name: bookinfo spec: hosts: - "*" gateways: - bookinfo-gateway http: - match: - uri: exact: /productpage - uri: prefix: /static - uri: exact: /login - uri: exact: /logout - uri: prefix: /api/v1/products route: - destination: host: productpage port: number: 9080In the
defaultnamespace, create a Gateway namedbookinfo-gateway. For more information, see Manage Istio gateways.apiVersion: networking.istio.io/v1alpha3 kind: Gateway metadata: name: bookinfo-gateway spec: selector: istio: ingressgateway servers: - port: number: 80 name: http protocol: HTTP hosts: - "*"
Step 3: Verify cross-cluster traffic routing
Check pod status
Verify that the sidecar proxy has been injected and all pods are running on both clusters: On
member1: Each pod should show2/2in the READY column, indicating the sidecar proxy is running alongside the application container. Onmember2:kubectl --kubeconfig ${MEMBER1_CONFIG} get podskubectl --kubeconfig ${MEMBER2_CONFIG} get pods
Test traffic distribution in the browser
Get the IP address of the serverless ingress gateway. For detailed steps, see step 1 of "Step 3" in Use Istio resources to route traffic to different versions of a service.
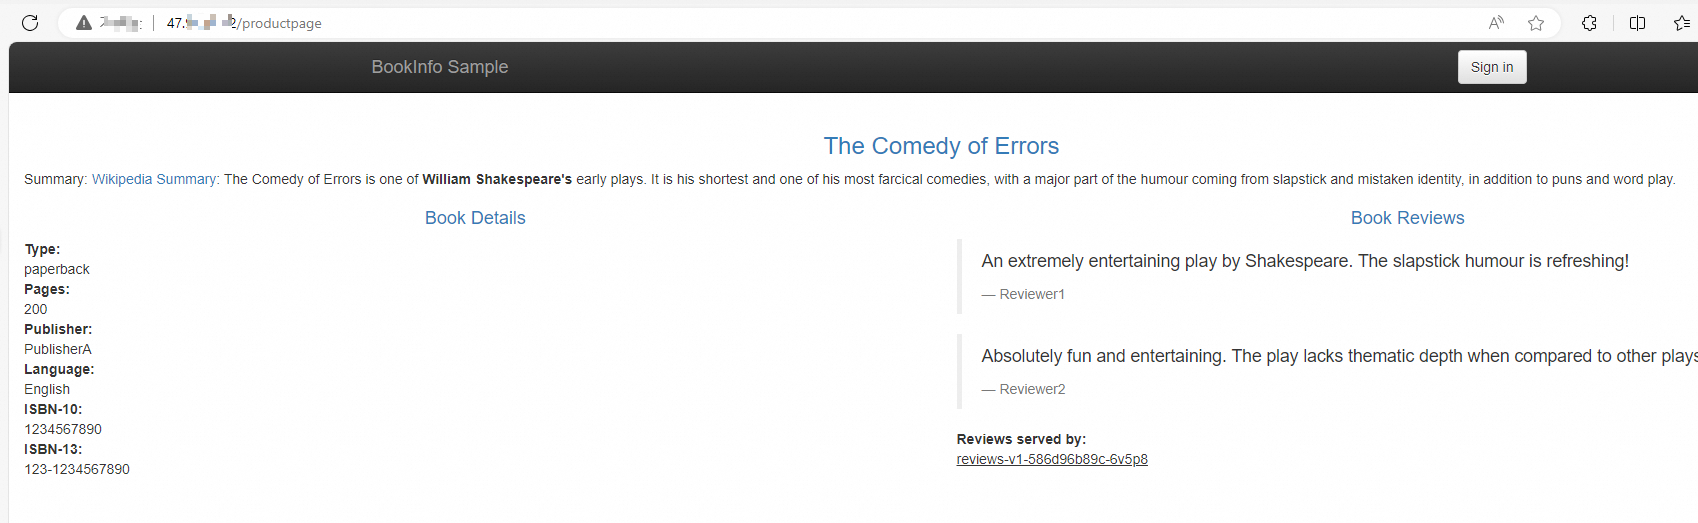
Open
http://<ingress-gateway-ip>/productpagein a browser and refresh several times. The reviews section cycles through three versions in roughly equal proportion (1:1:1 ratio): Seeing all three versions confirms that ASM routes traffic across both clusters. Thereviews-v3Deployment functions correctly even though it runs in a different cluster fromproductpage.reviews-v1 -- No stars (ratings not called)
reviews-v2 -- Black stars
reviews-v3 -- Red stars