To synchronize data from Salesforce to Quick Audience in non-real time, you must perform the initial configuration in Salesforce Platform and Quick Audience.
Add a QA linker to Salesforce
You must add a QA connector in Salesforce before you can configure connectivity in Quick Audience.
Procedure:
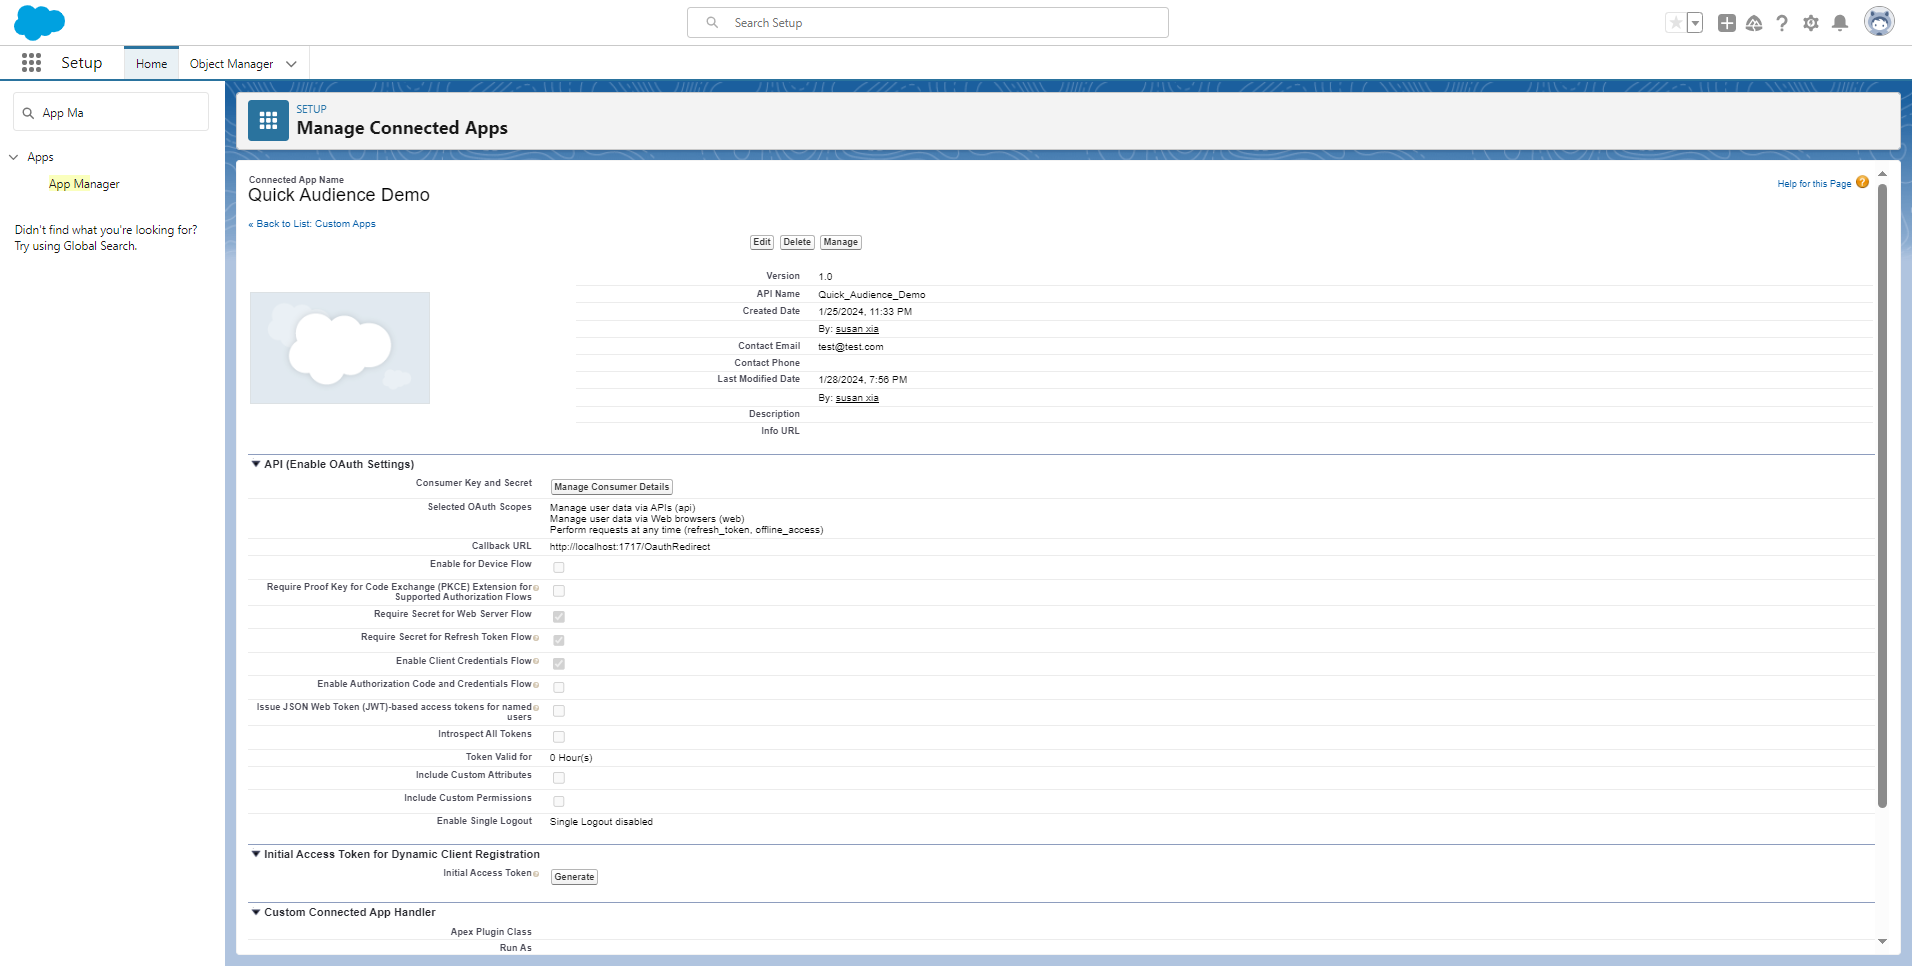
1. Configure Connected APP under Setup>App Manager>New Connected App
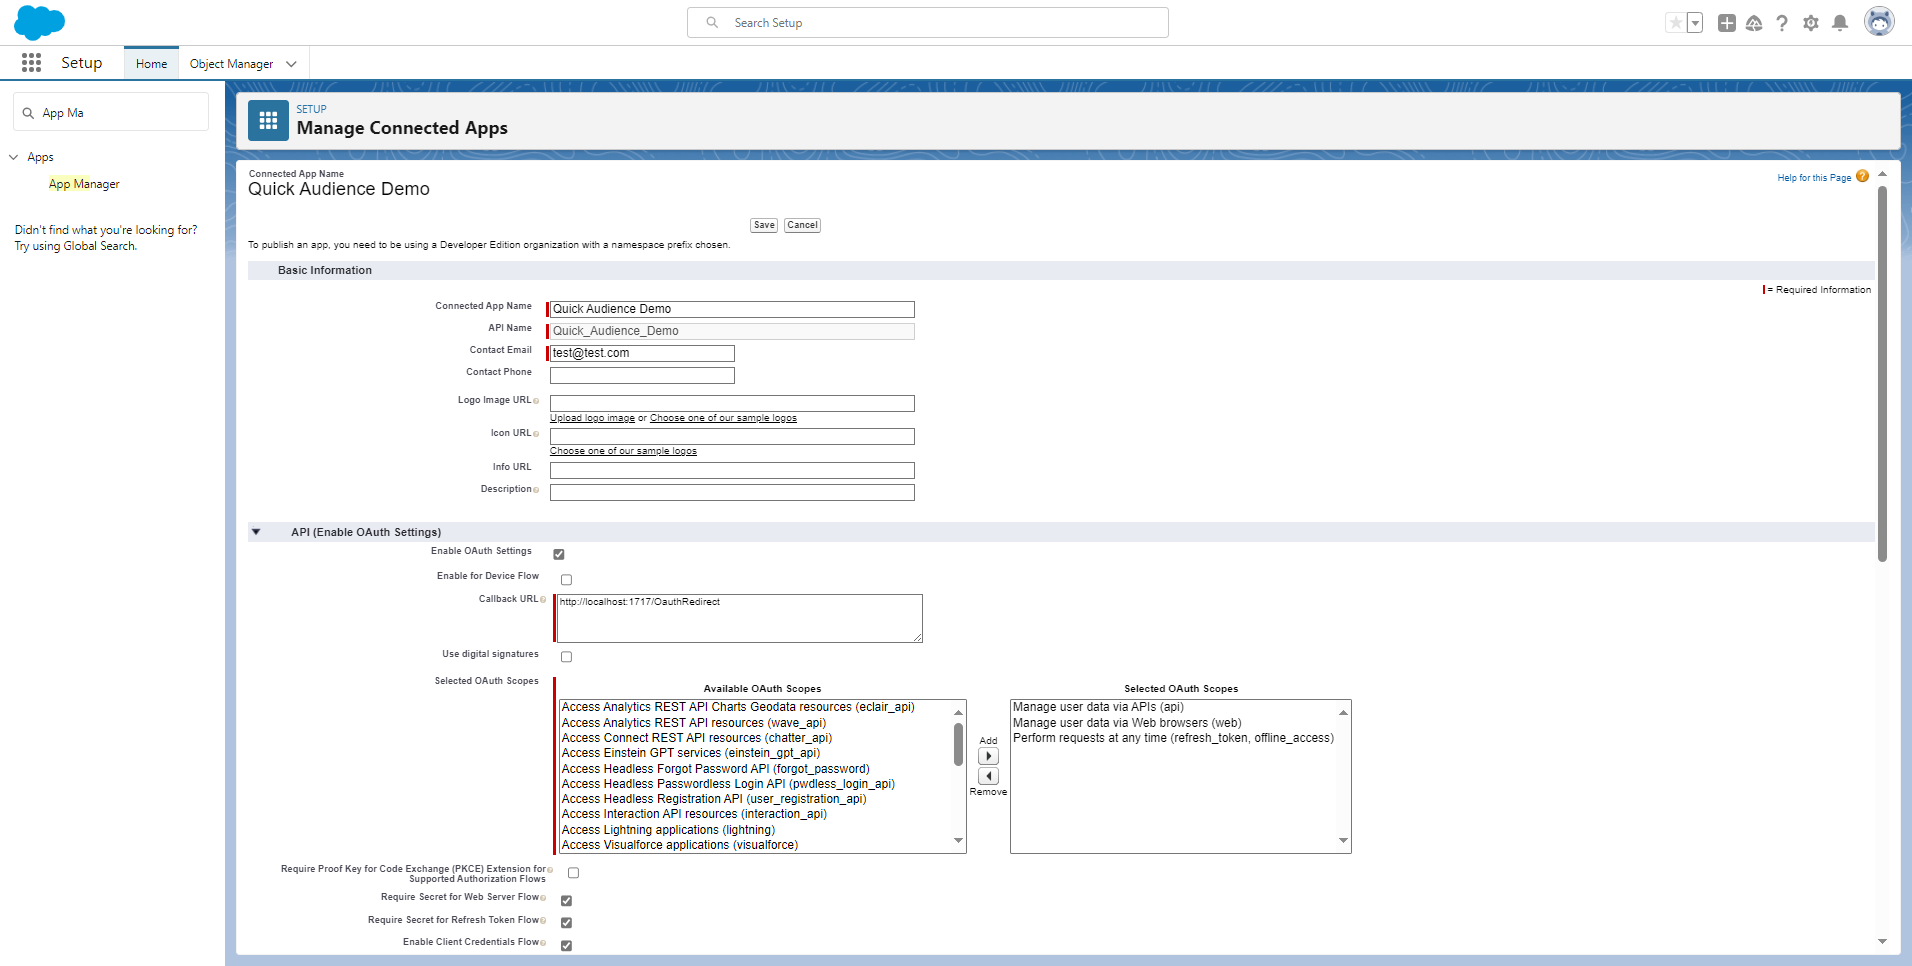
Item | Example value |
Name/API Name | Because it is a connection used by QA, you can take a name associated with it, such as Quick Audience. |
We recommend that you enter the email address of the administrator who configured the Connected App. It will be used to accept the related configuration email | |
Callback Url | The URL used to exchange tokens. You can enter http://localhost:1717 /OauthRedirect. |
Select OAuth Scopes | QA is required to make the most accurate selection through debugging, but selecting three of the above pictures can basically manipulate the data.
|
2. Under Setup > Users > New User, perform relevant configuration of QA application
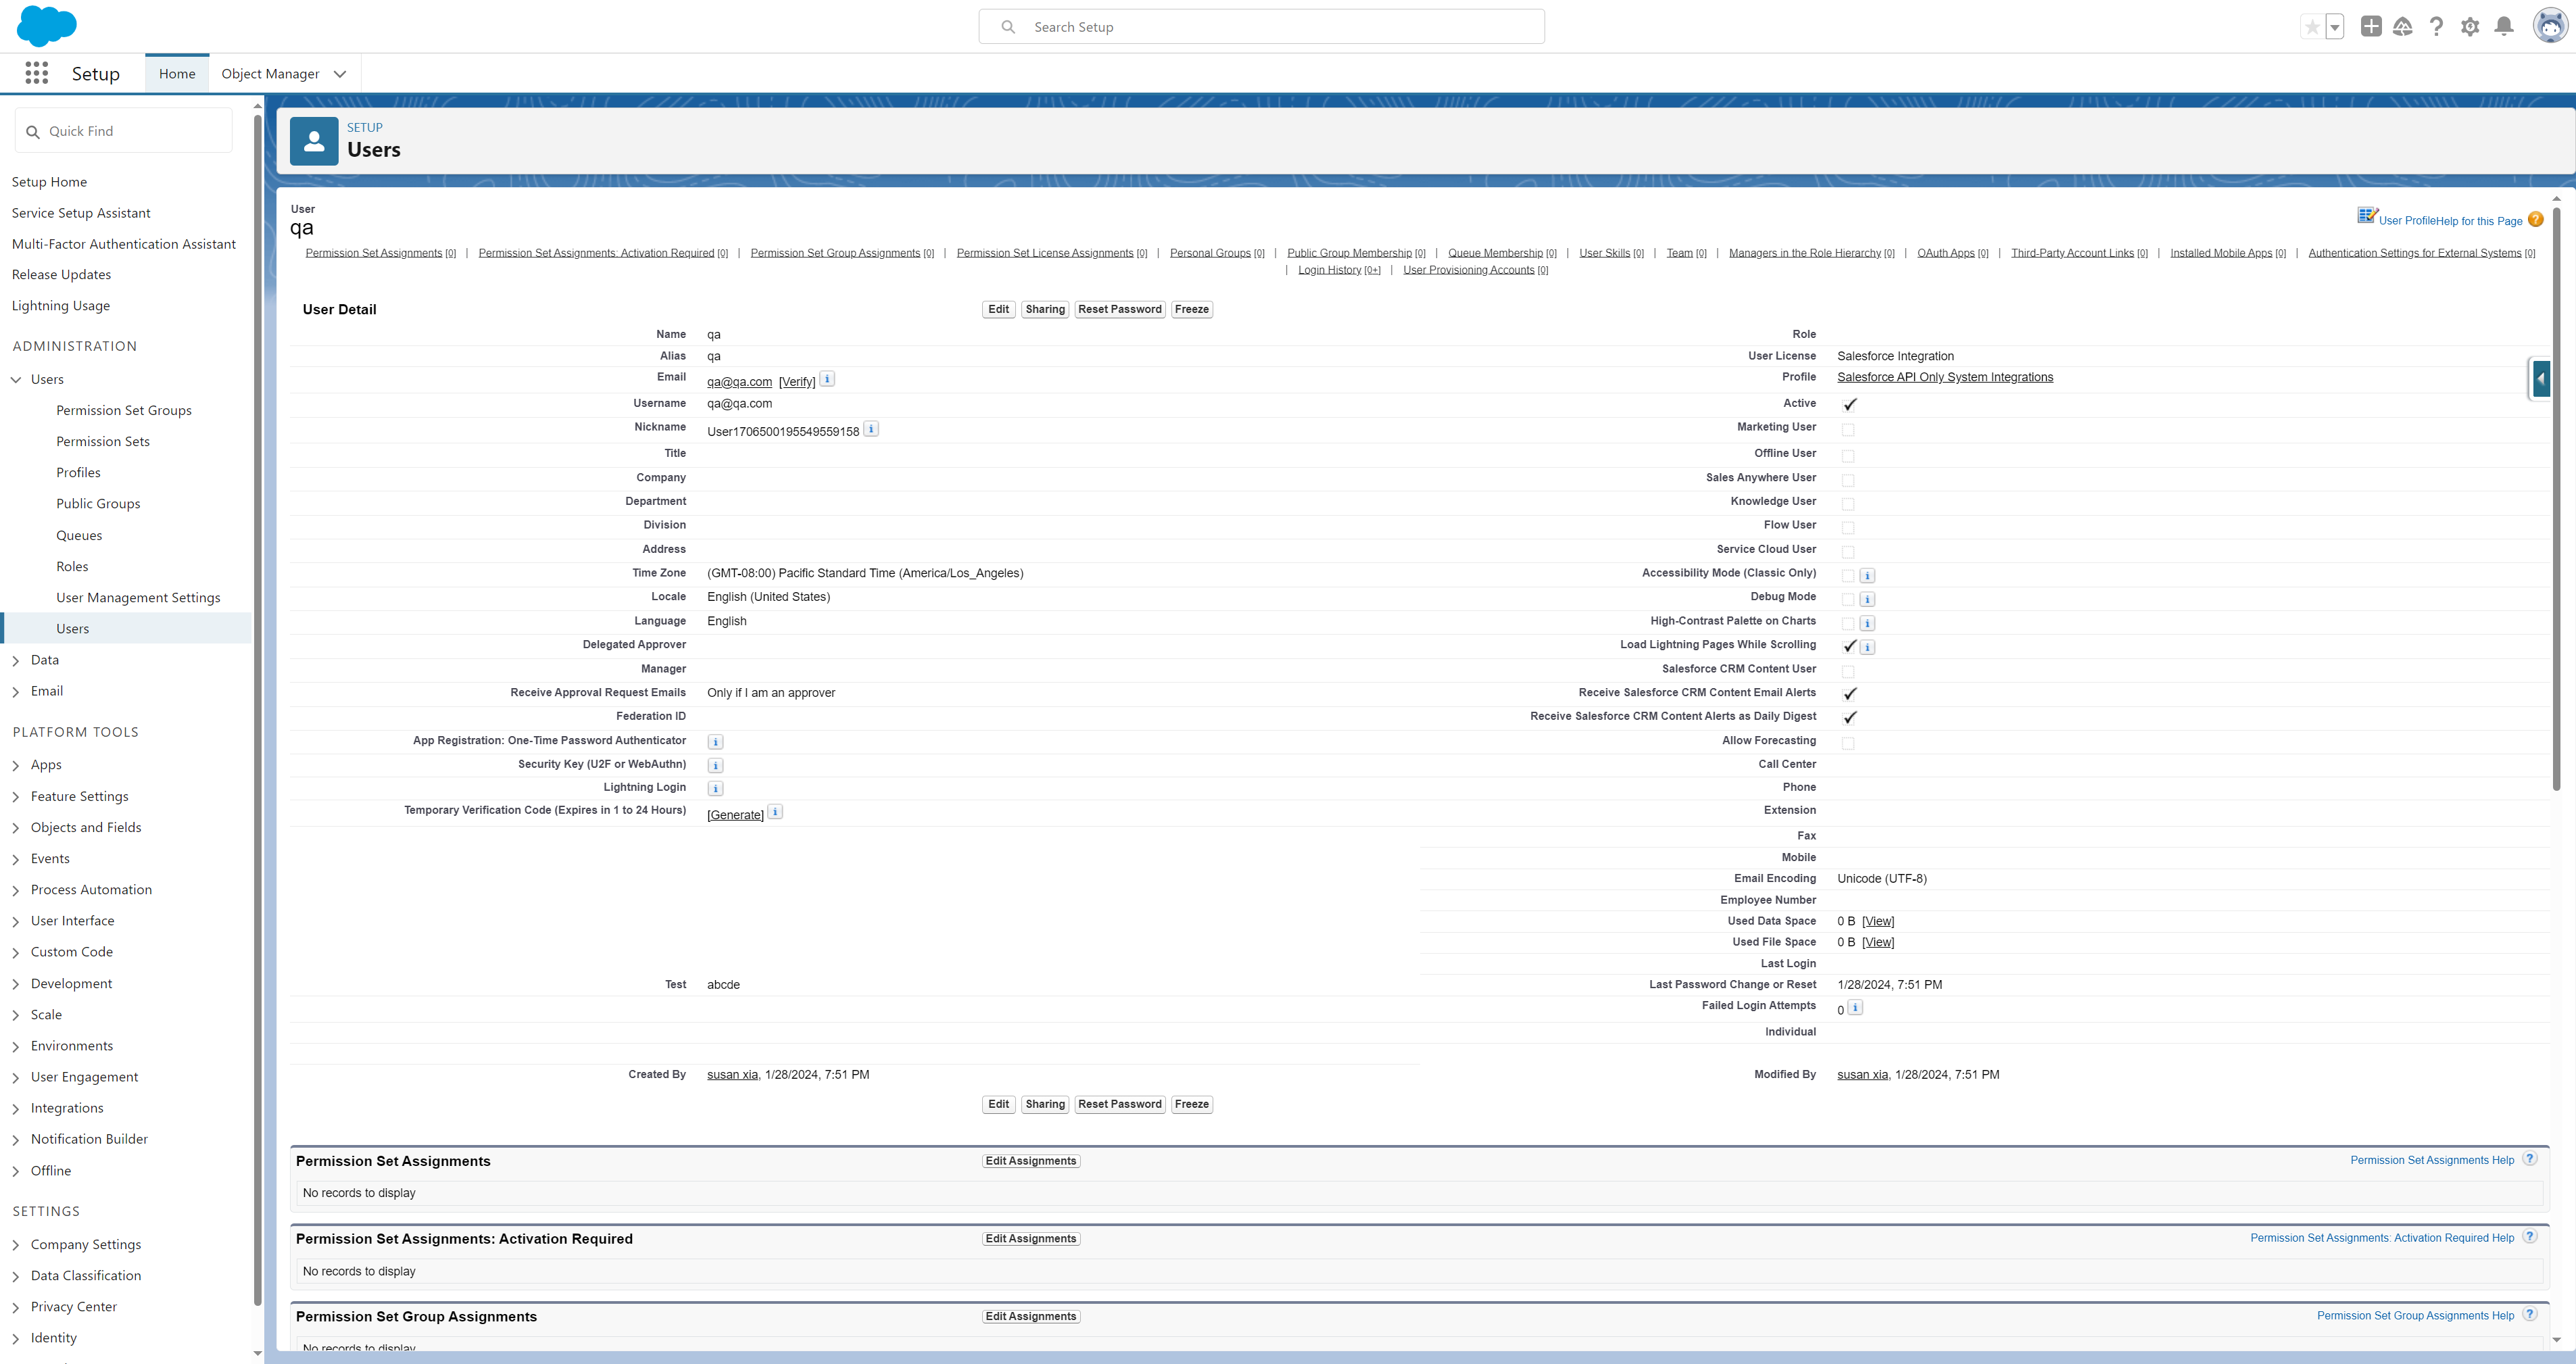
Item | Example value |
First Name/Last Name/Alias | Configure the Integration User. This name will appear on some CRM Records. Therefore, you can take an appropriate name, such as Quick Audience. |
User License | Salesforce Integration |
Profile | Salesforce API Only System Integrations |
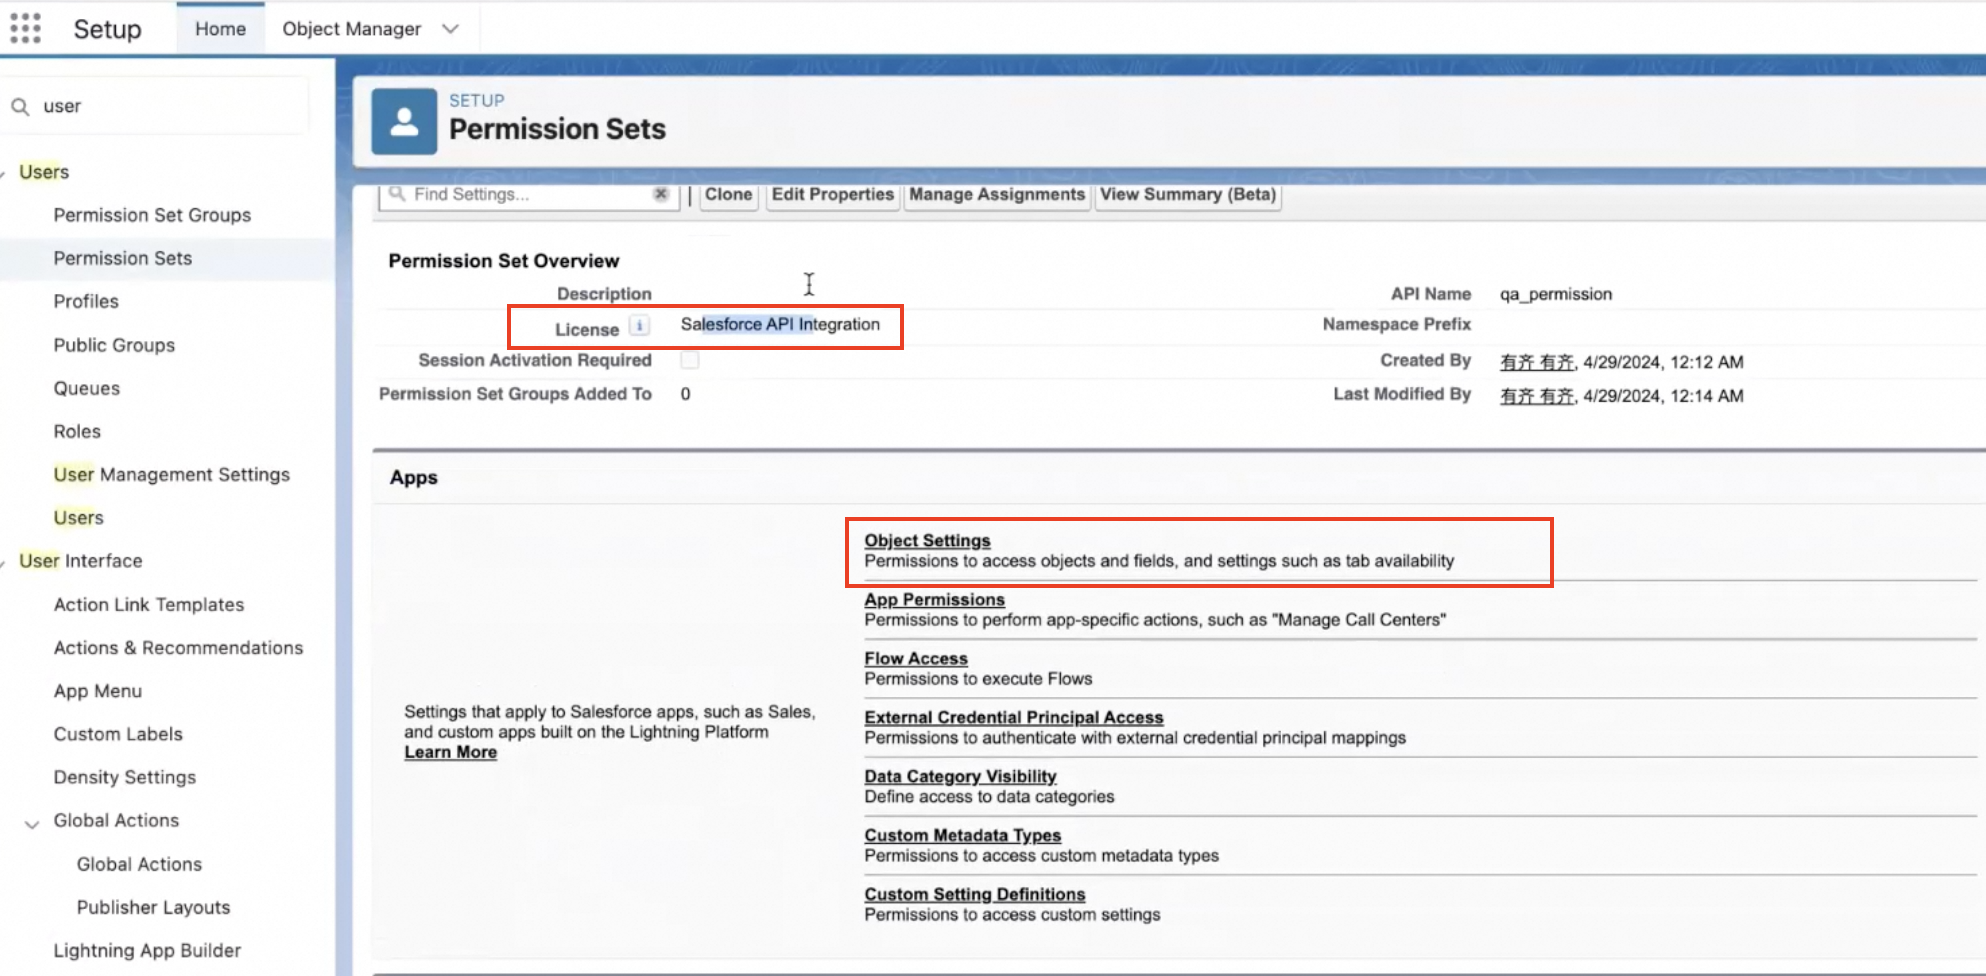
Permission Set Assignment | Assign the corresponding PermissionSet according to the actual requirements (you must have permission to pull the data table) |
Note that before you Permission Set Assignment, you need to create a new app and object in the Permission Set. To create a new app and object, perform the following steps:
1. A new Permission Set in Create Setup > Users > Permission Sets. Select None in the License section to complete the Assigned Connected App creation 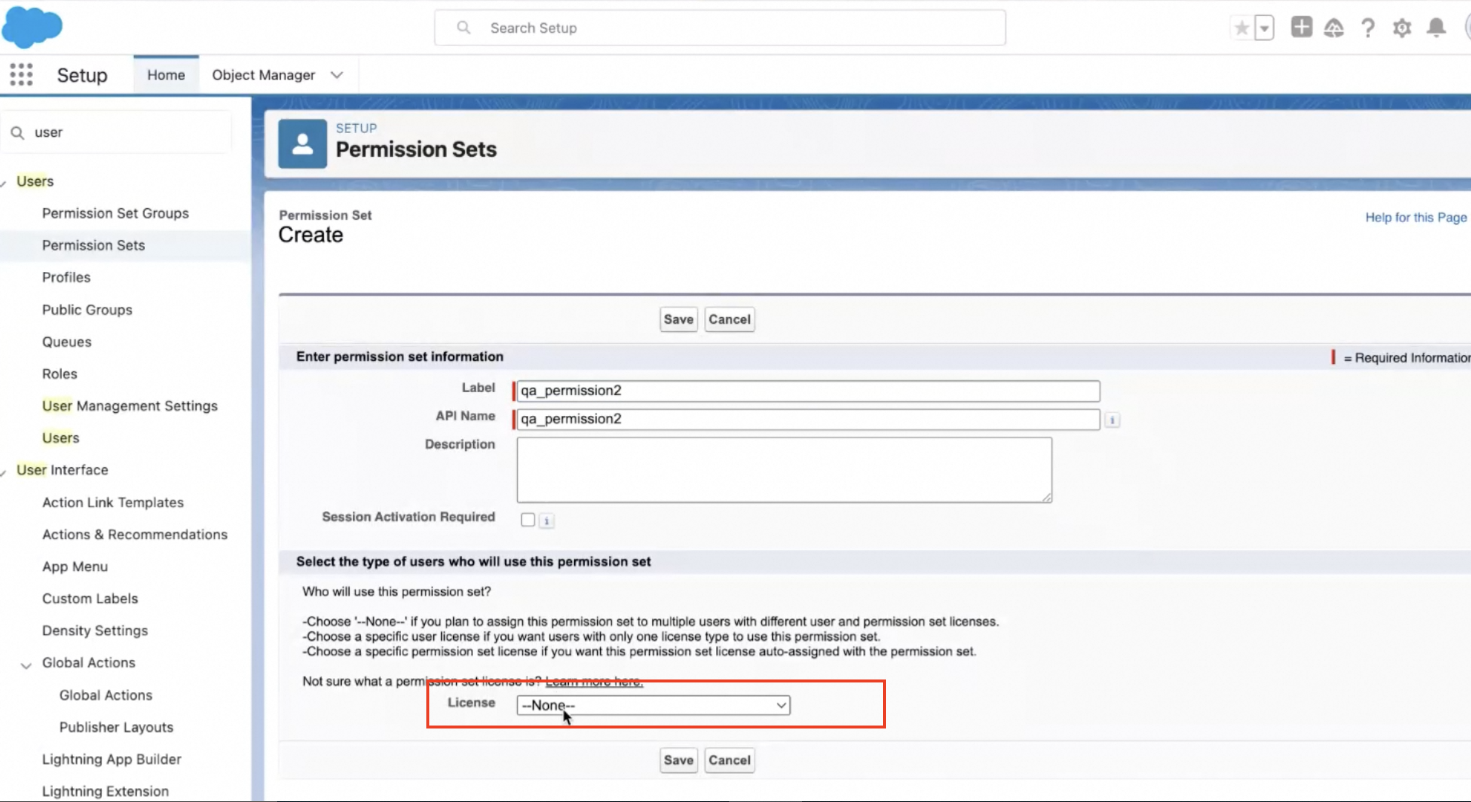
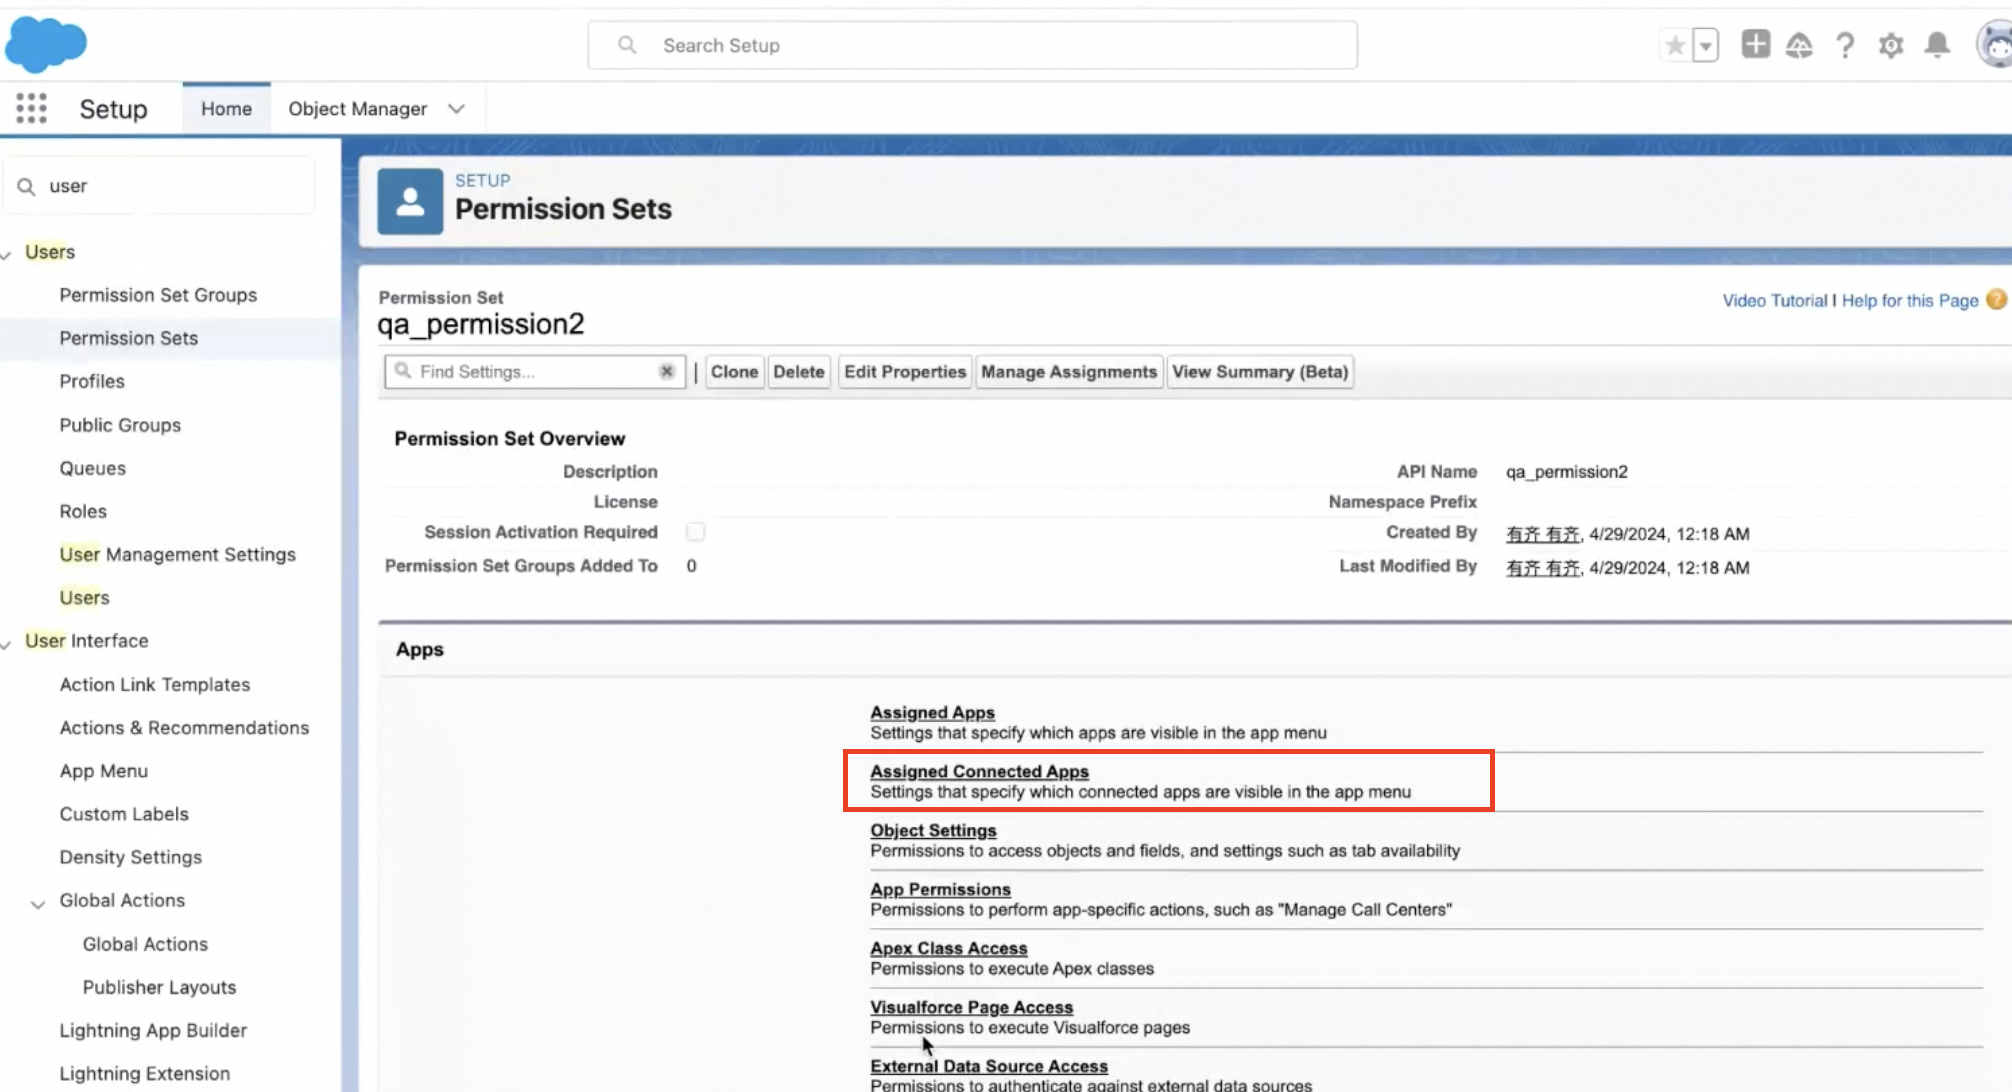
2. A new Permission Set in Create Setup > Users > Permission Sets. Select Salesforce Integration under License to complete the new Object Setting
3. Under Setup > App Manager > QA connected app > Manage > Edit Policy, configure the QA application.
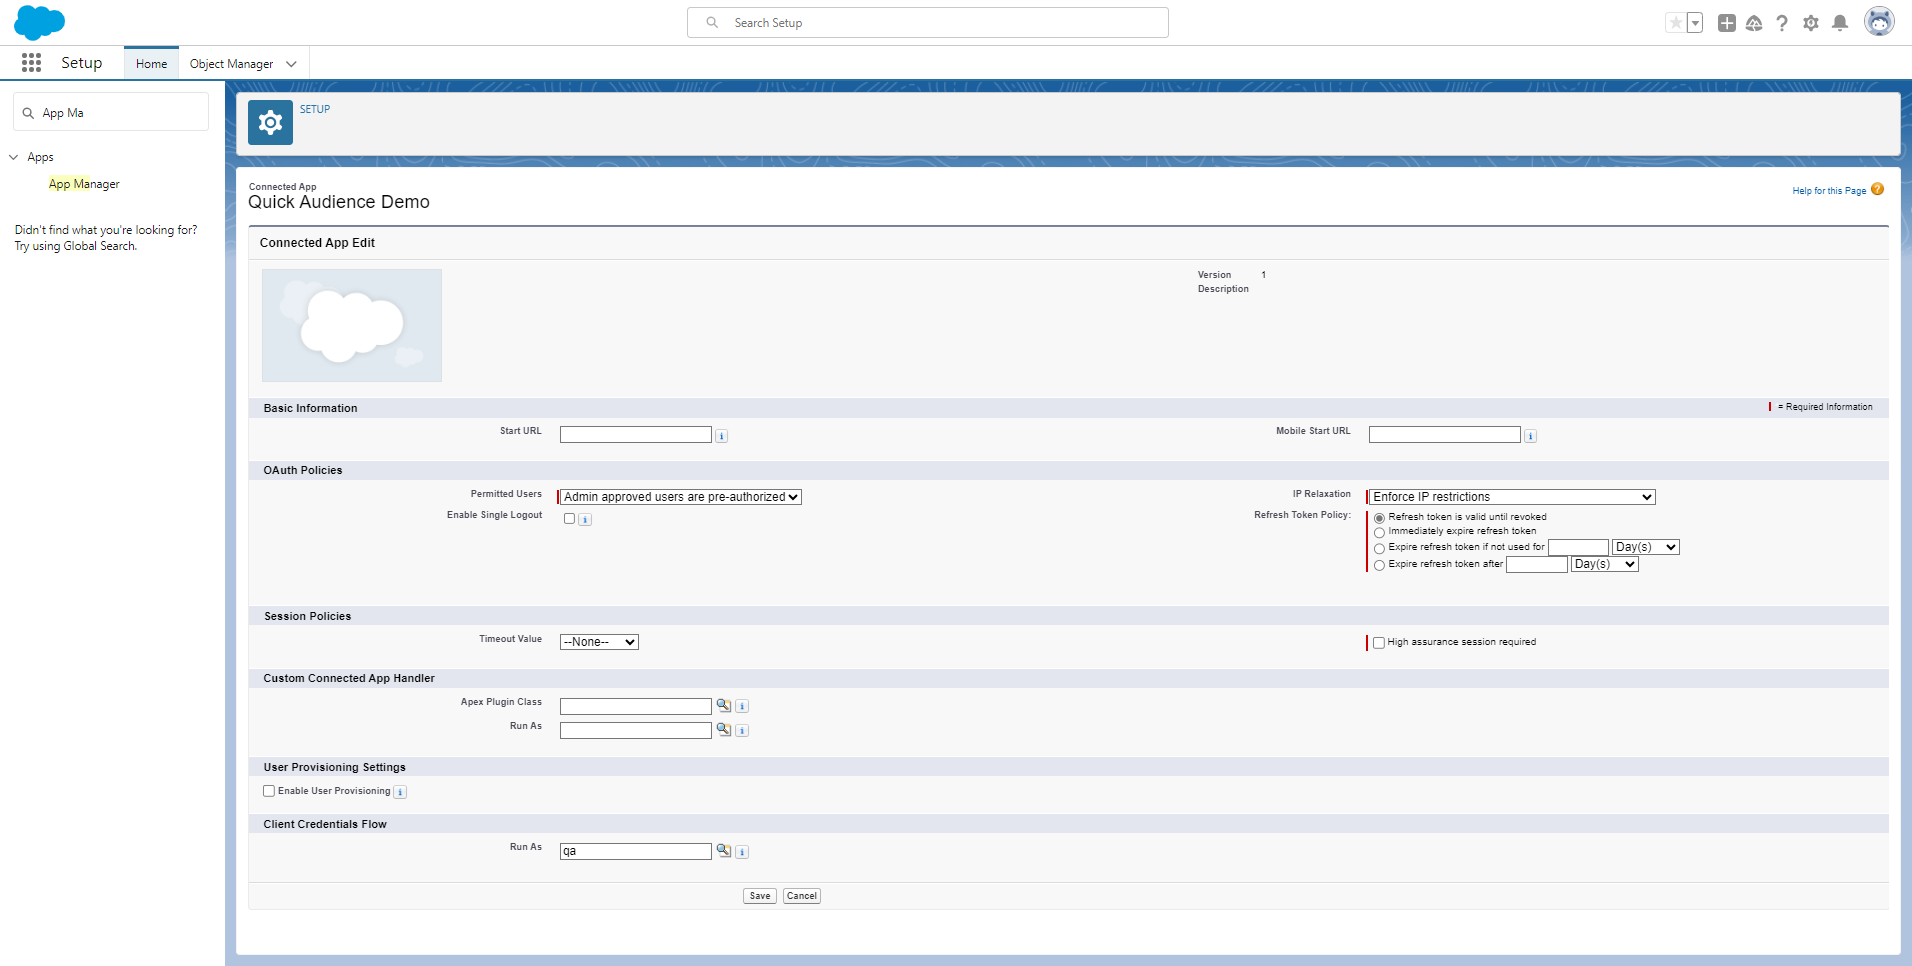
Item | Example value |
Permitted Users | Admin approved mode |
Client Credentials Flow | Select the Integration User created above for Run As |
2. Quick Audience data source configuration: Add a Salesforce data source
Procedure:
1. In the left-side navigation pane, choose Data Sources> Data Sources. On the Data Sources page, click Add Data Source to add a Salesforce data source.
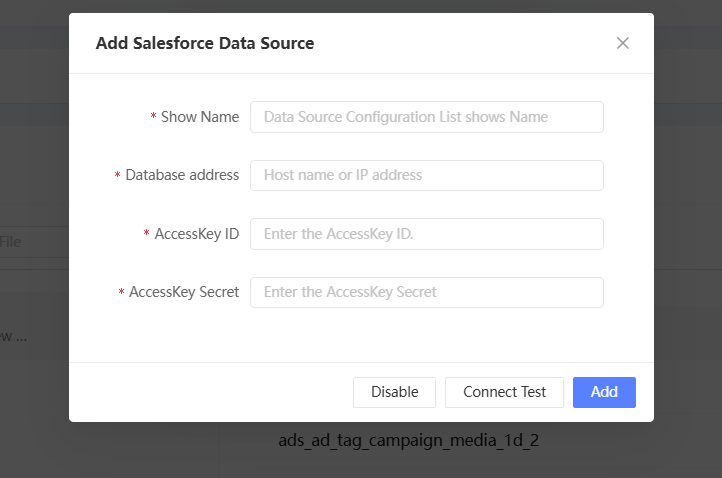
Item | Example value |
Name | Enter the display name of the Salesforce data source. |
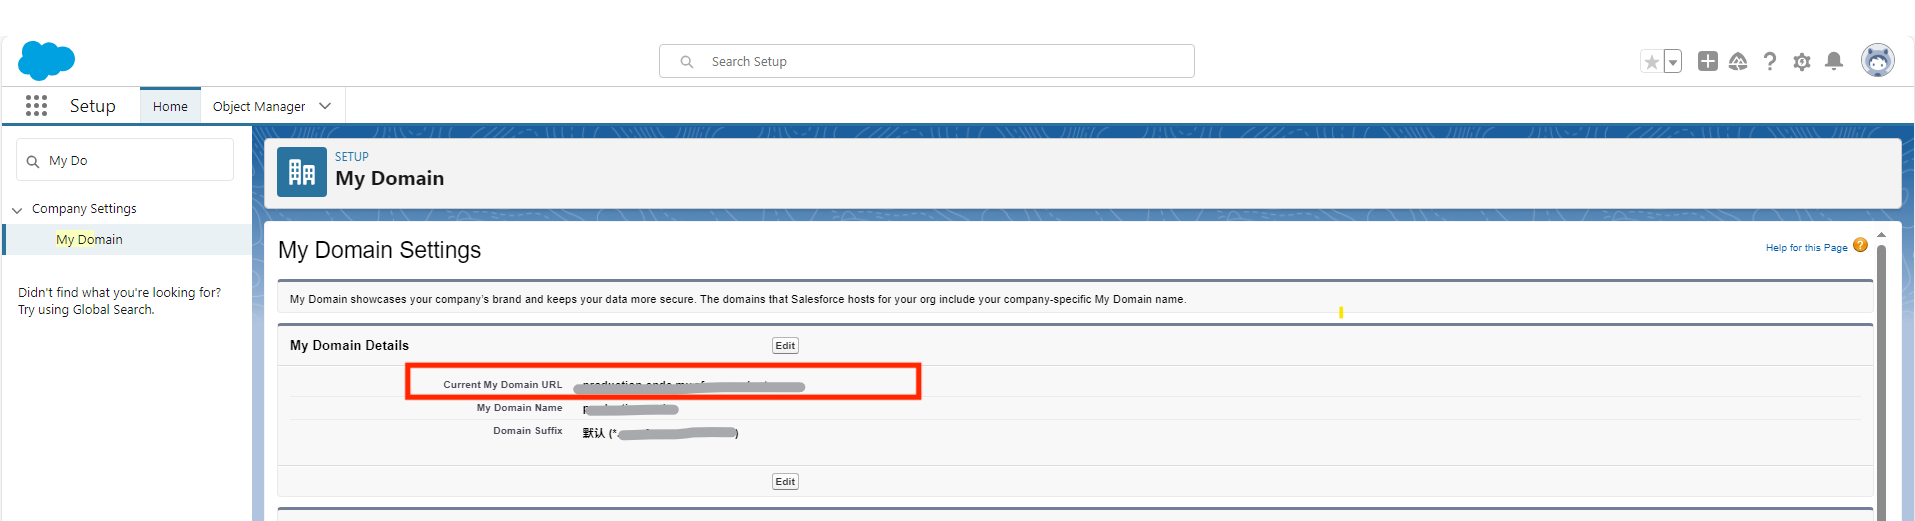
Database Address | Enter the database address, under Setup > My Domain > My Domain Details, find the URL, and enter: https://+ URL address in QA
|
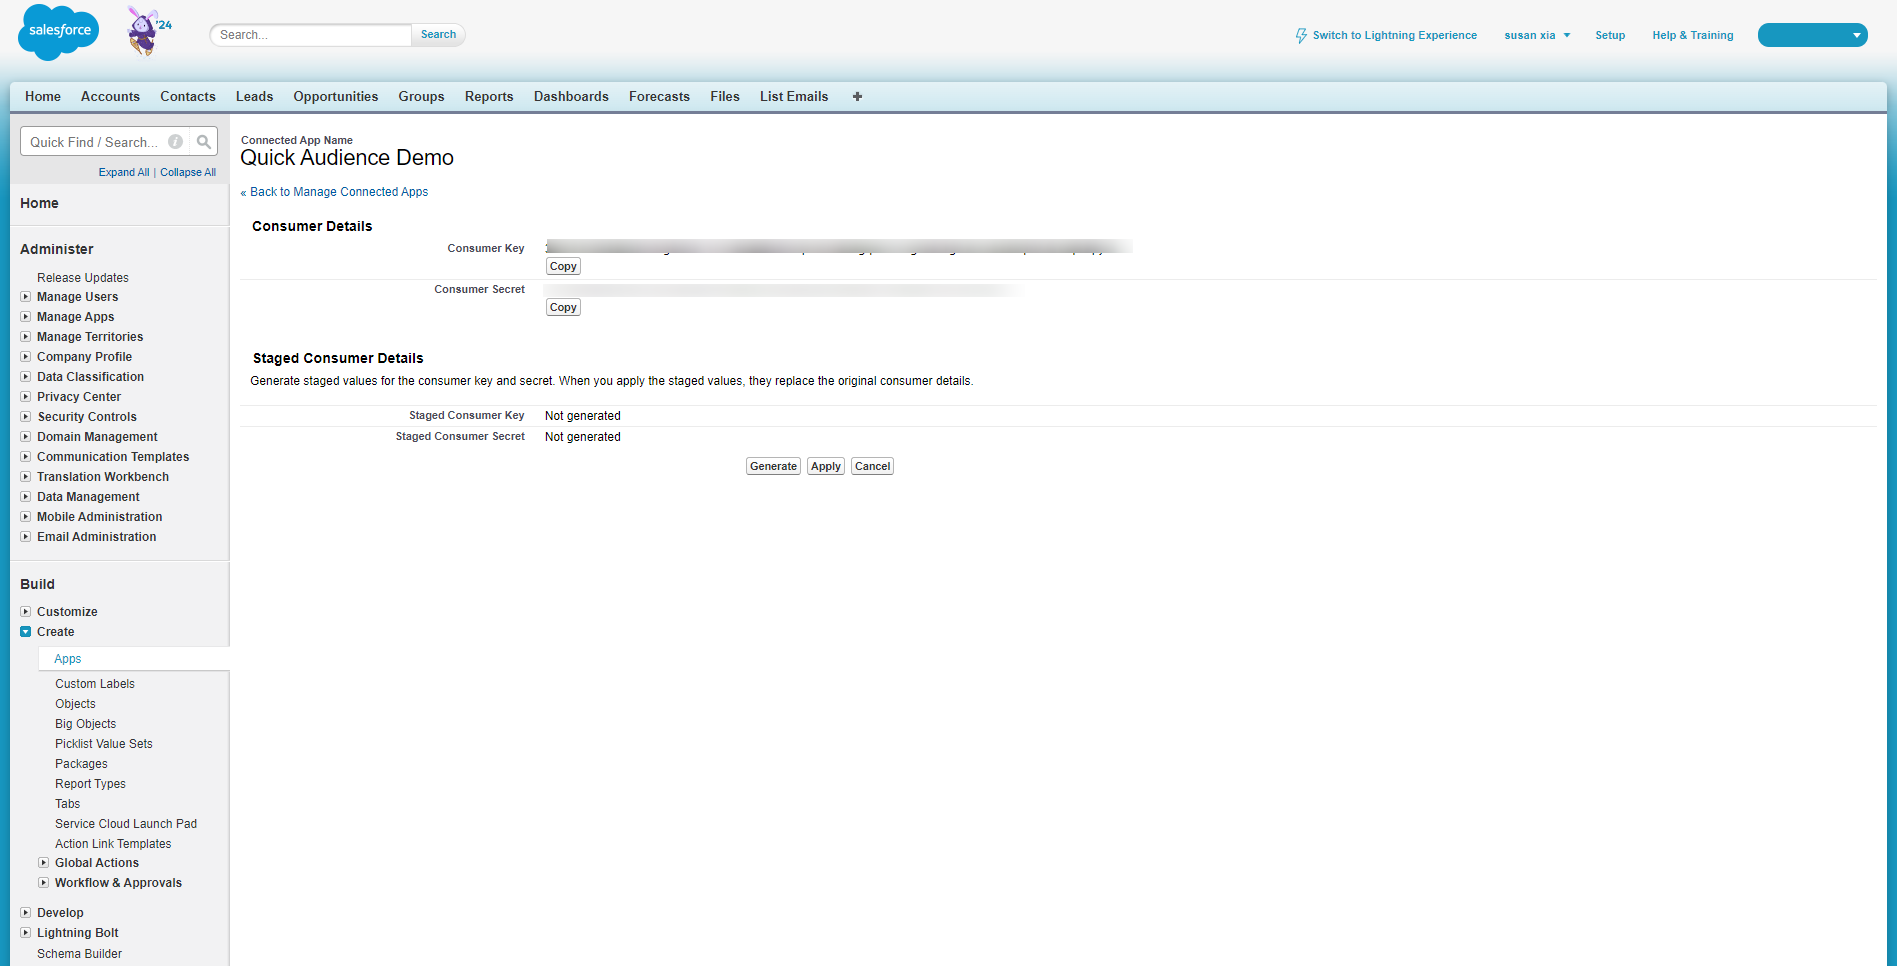
AccessKey ID | In Salesforce, under Setup, get the Consumer Key and Secret. Under Setup > App Manager > QA connected app > View, follow these steps to get it: 1.Consumer Key and Secret: Click to Manage Consumer Detals
2. Receive the email verification code and view the Consumer Key and Consumer Secret of the Connected App.
and enter the consumer key in the AccessKey ID. |
AccessKey Secret | In the Salesforce Setup console, obtain the Consumer Key and Secret of Quick Audience in the Connected App. Enter the consumer key in the AccessKey secret. |
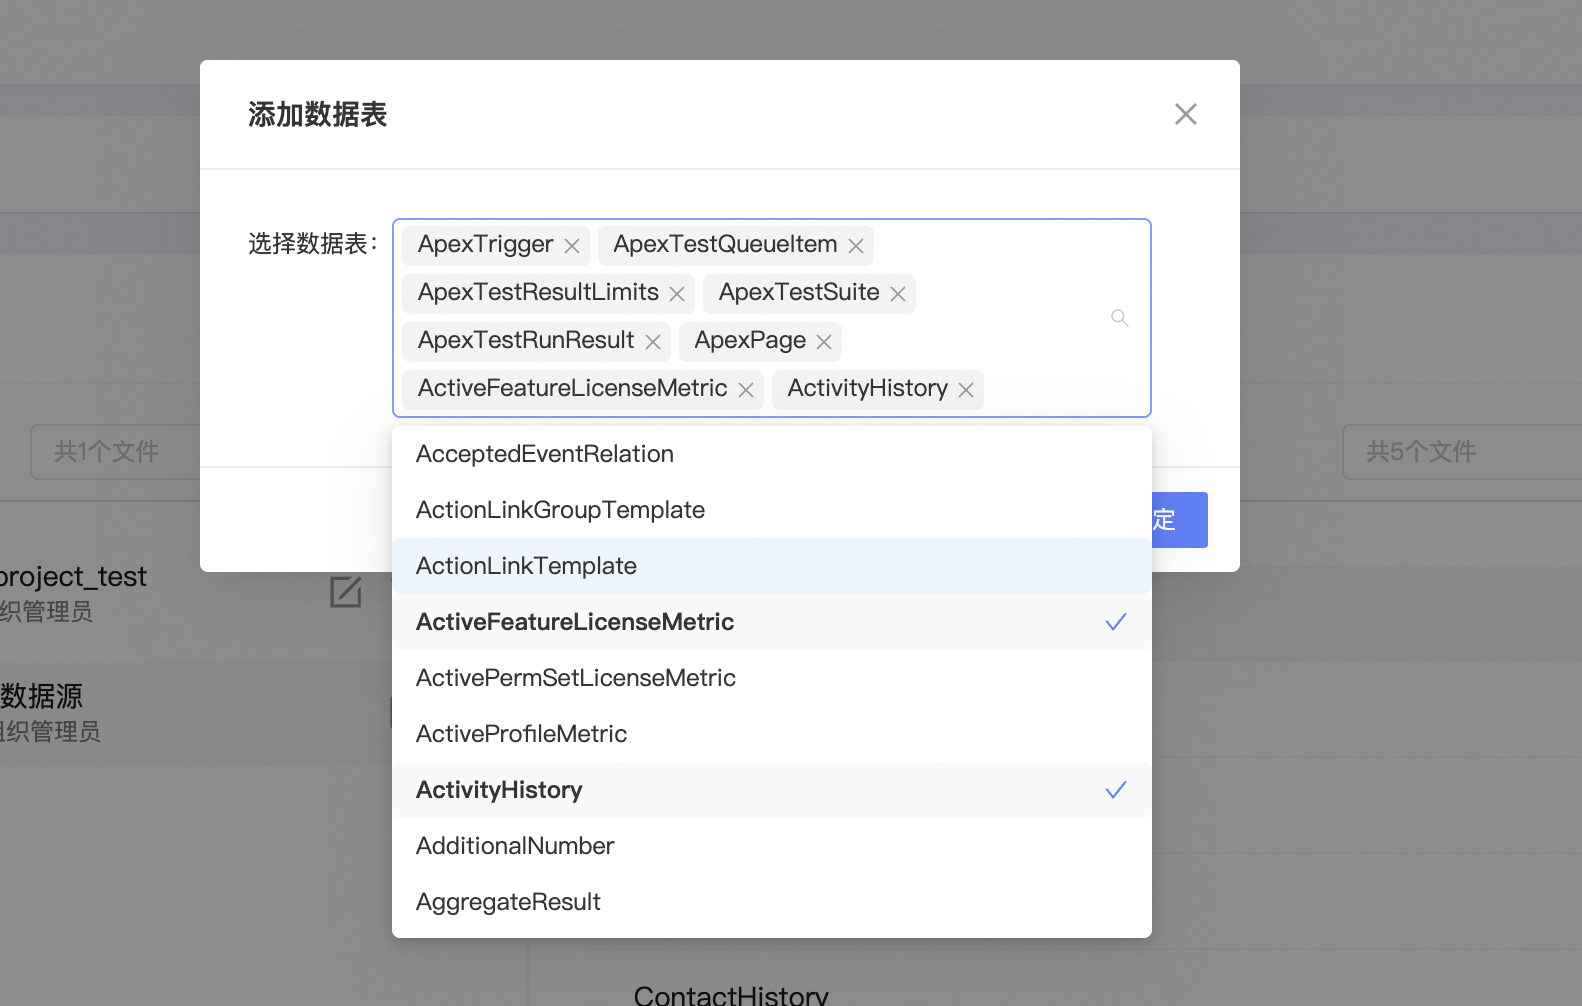
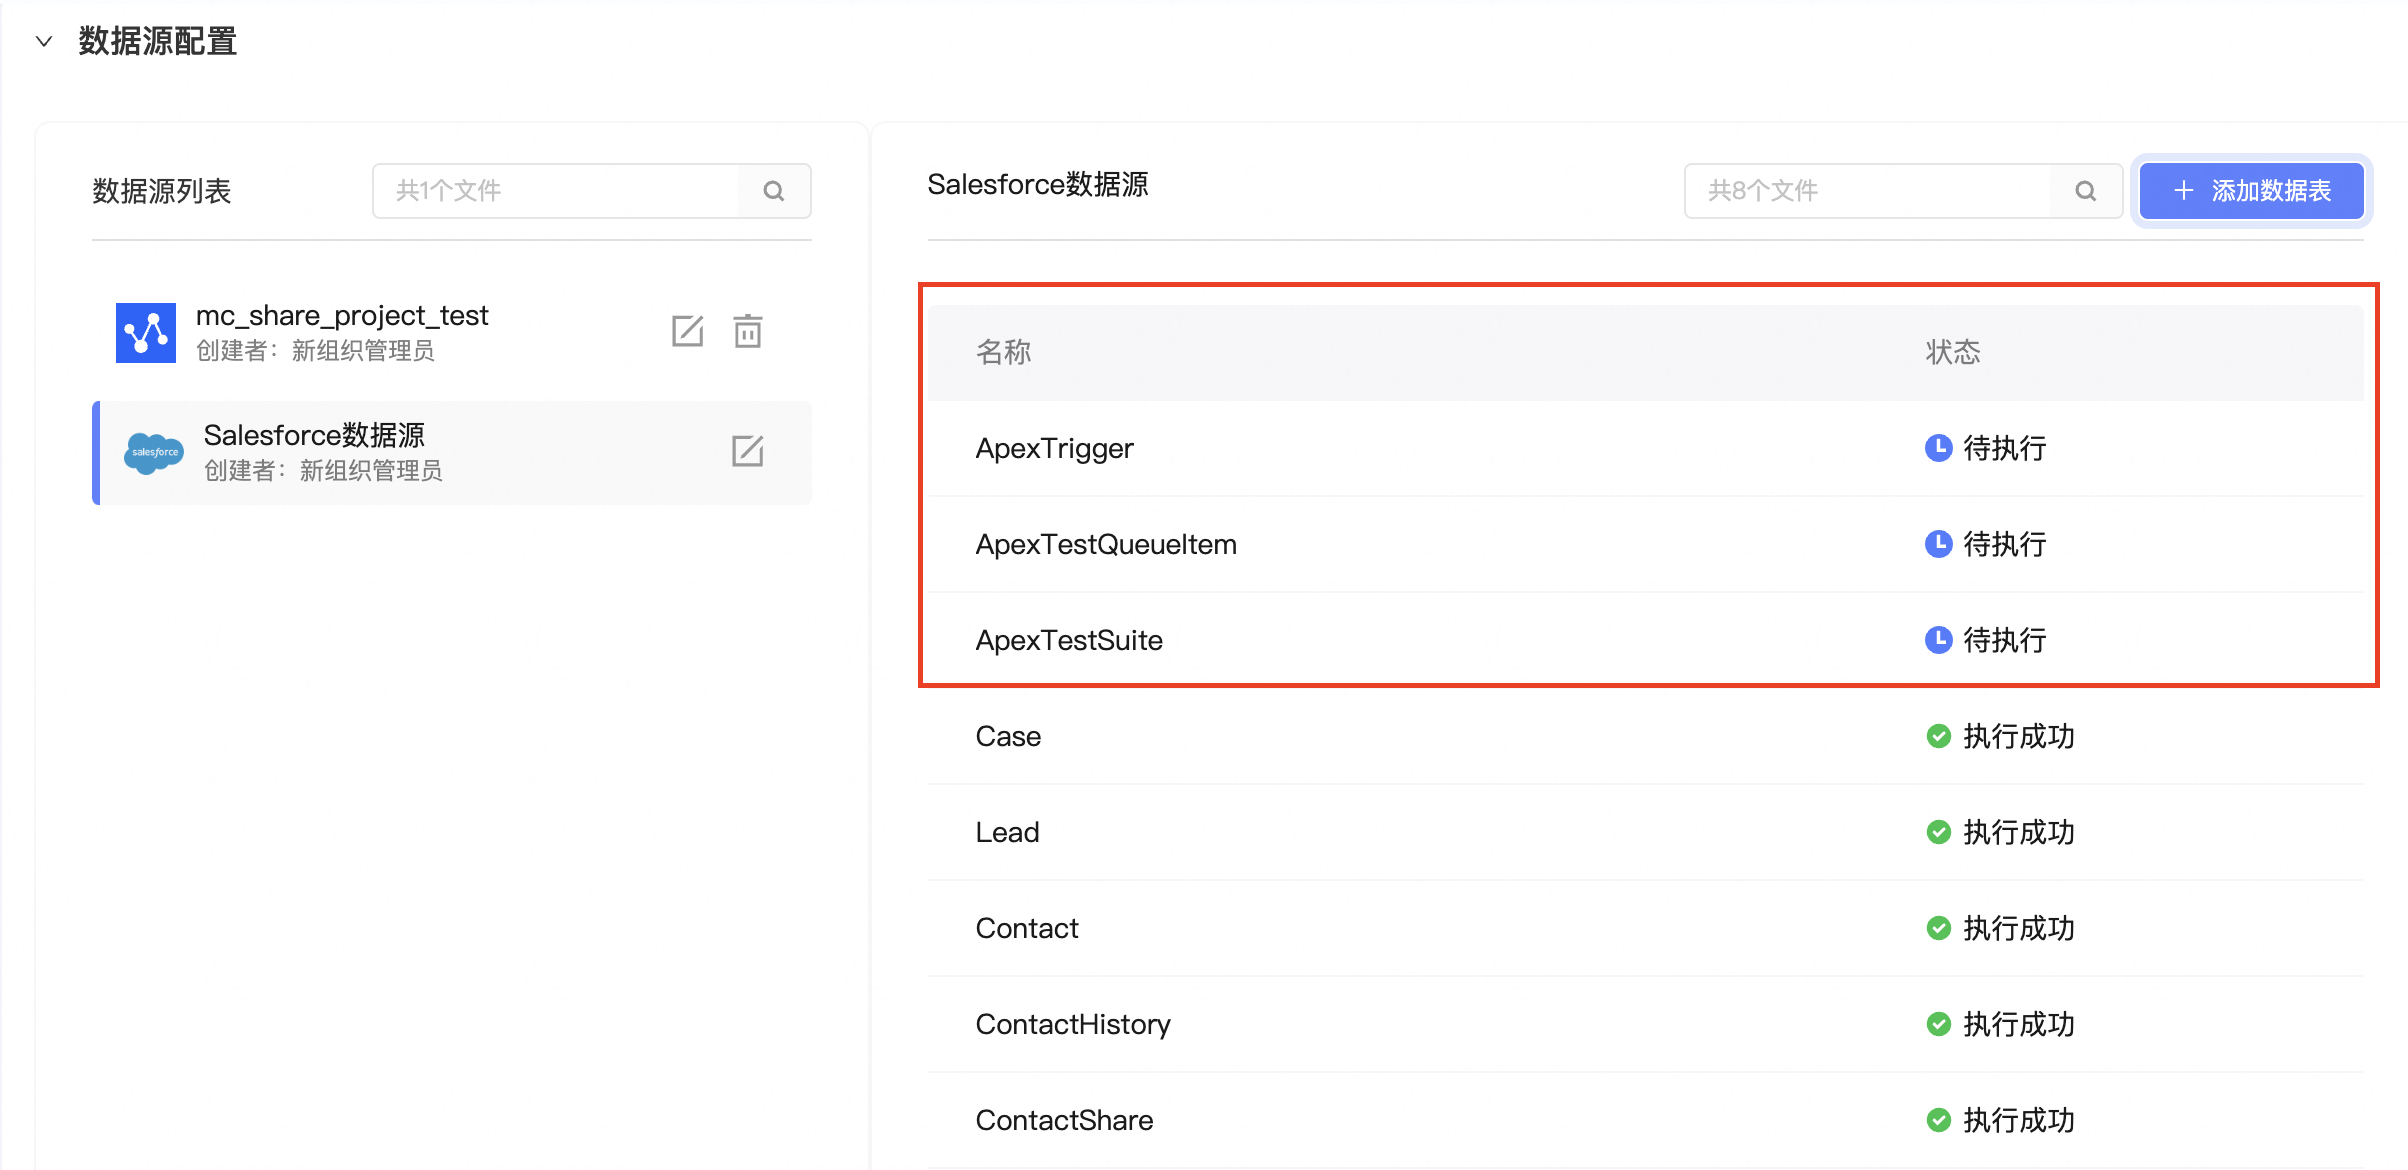
2. After adding the Salesforce data source, click Add Data Table to complete the synchronization of the data table. 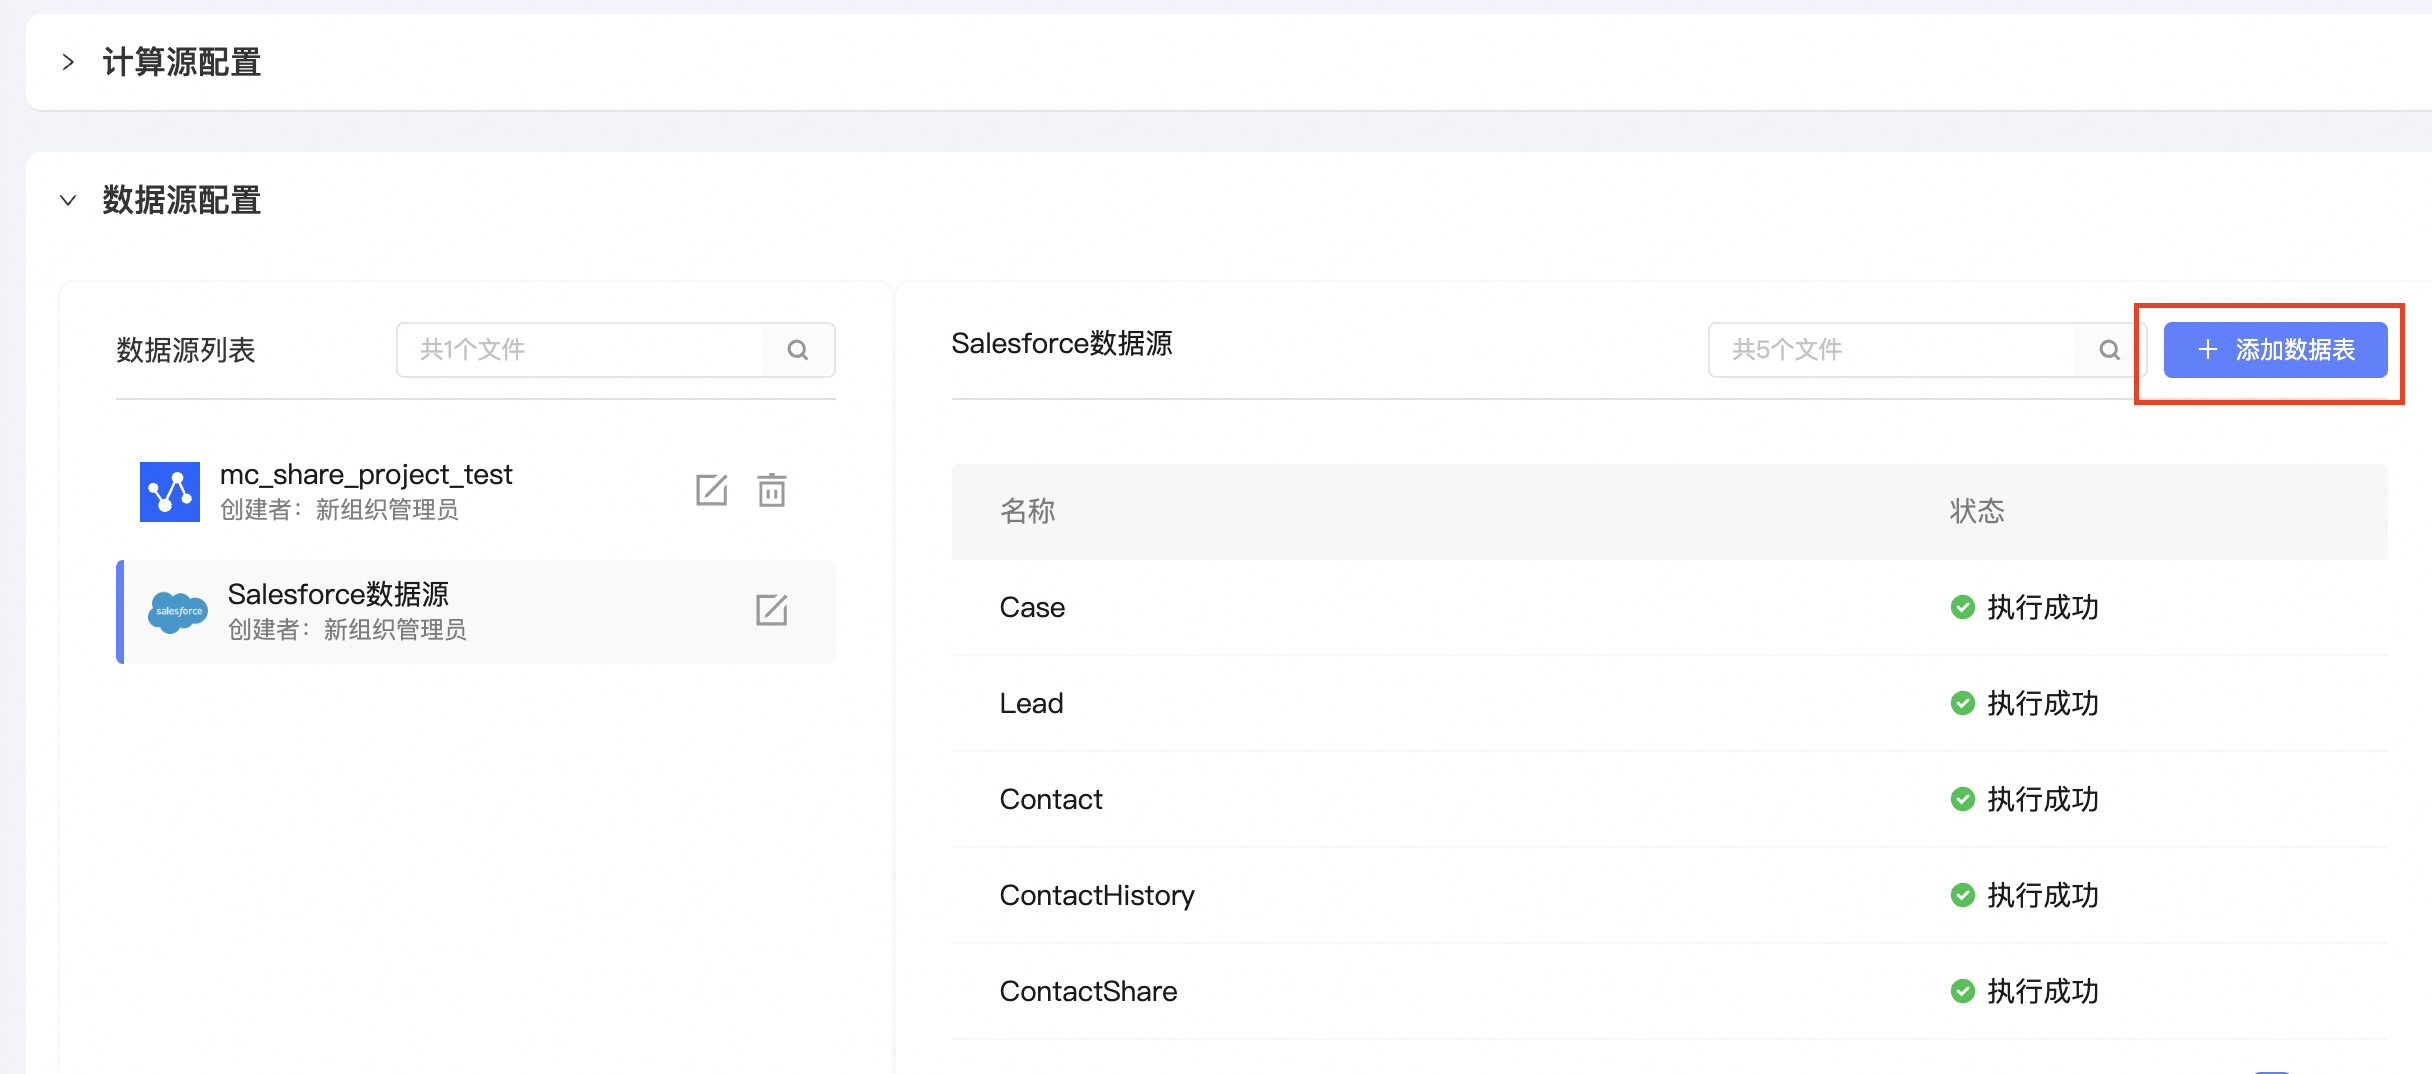
You can select multiple data tables to be added to QuickAudience and click OK.
After the data table is added, the data table starts to be synchronized automatically, that is, the overall configuration of the Salesforce data source is completed.
For the added Salesforce data table, you need to complete the following steps to use all kinds of data from Salesforce on demand in each application module of QA. 1. Add and manage user IDs supported by Quick Audience. For more information, see ID Type Management. 2. Set the basic logic of ID participation ID Mapping, and complete Table Structure Configuration and Scheduling Task.