Data Transmission Service (DTS) provides the object name mapping feature. You can use this feature to change the names of one or more objects that are migrated to the destination instance. This topic describes how to use the object name mapping feature when you configure a data migration task.
Limits
- You can use the object name mapping feature only when a data migration task is configured and the current step is Configure Migration Types and Objects.
Note Do not use the object name mapping feature after a data migration task is started. Otherwise, data may fail to be migrated.
- MongoDB supports only database name mapping and table name mapping.
Configure name mapping for a single database, table, and column
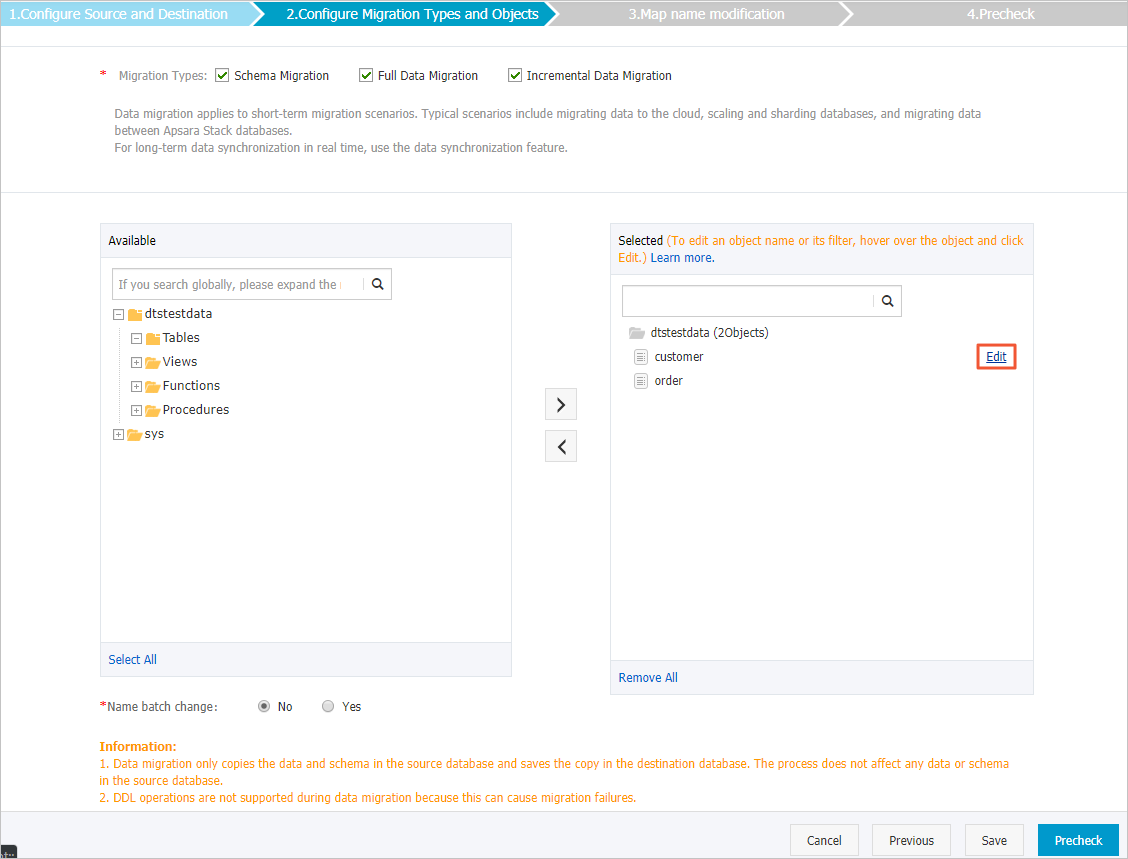
- In the Configure Migration Types and Objects step, move the required objects to the Selected section, move the pointer over a database or table, and then click Edit.
Important You can use the object name mapping feature only on objects that are supported by DTS.
- In the dialog box that appears, specify a name for the object in the destination instance.
Note
- If the source and destination databases are user-created MySQL databases, ApsaraDB RDS for MySQL, or Apsara PolarDB for MySQL, you can specify the data definition language (DDL) and data manipulation language (DML) statements that you want to migrate.
- If different statements are selected for database name mapping and table name mapping, the statements that are selected for table name mapping prevail.
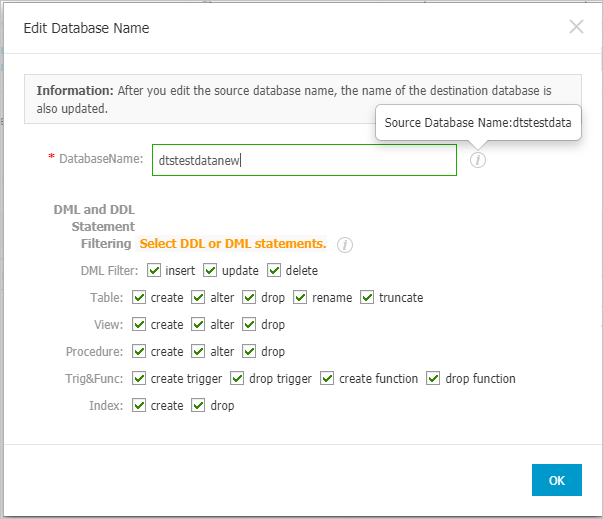
- Database name mapping
In the Edit Database Name dialog box, enter the database name that you want to use in the destination instance.
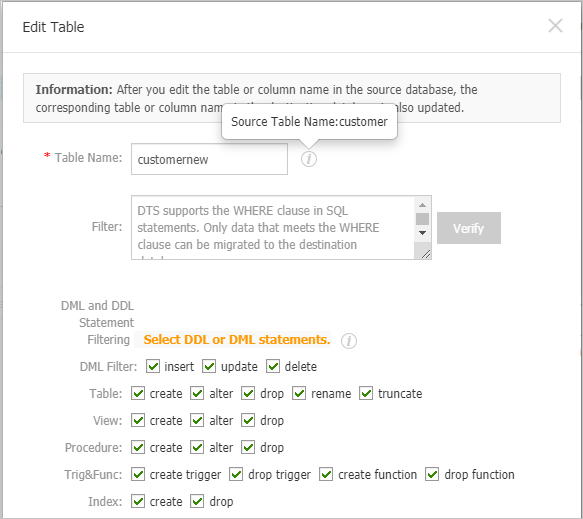
- Table name mapping
In the Edit Table dialog box, enter the table name that you want to use in the destination instance.
- Column name mapping
In the Edit Table dialog box, enter a new name for each column.
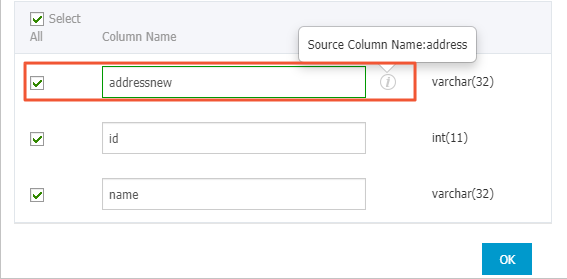 Note In this step, you can clear the columns that do not need to be migrated.
- Click OK.
- Configure other parameters that are required for the data migration task.
Configure name mapping for multiple tables and columns at a time
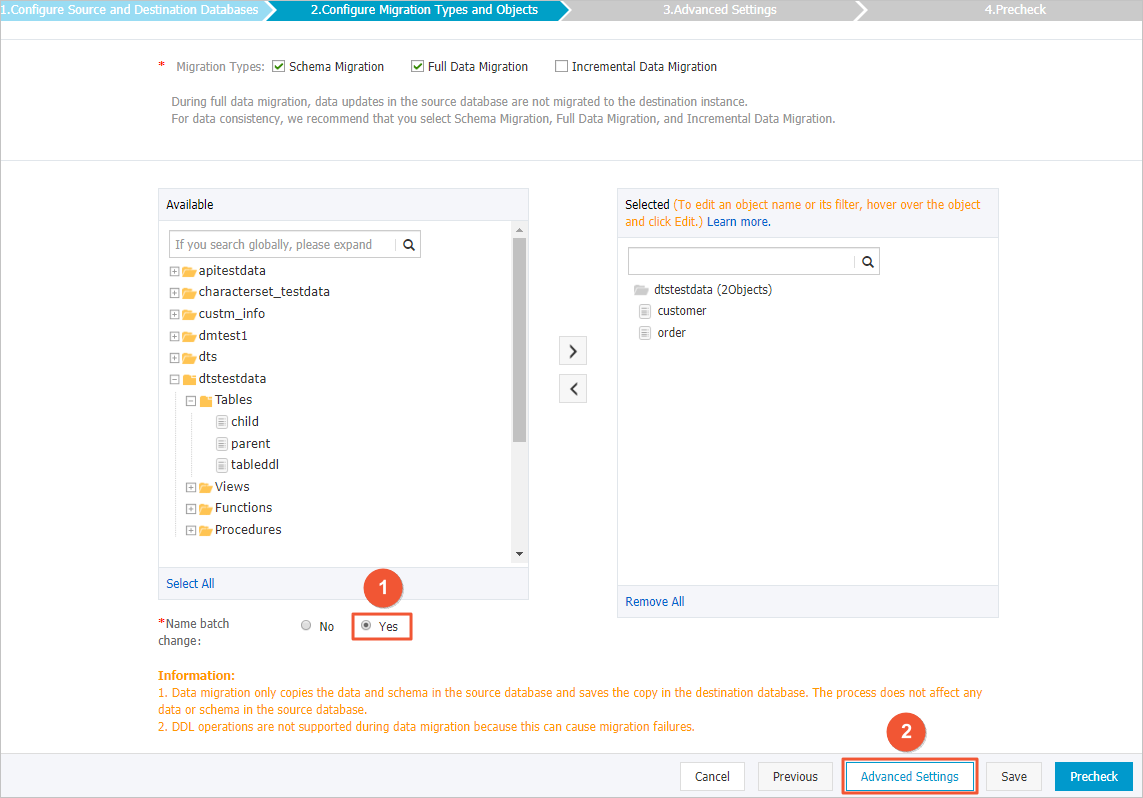
- In the Configure Migration Types and Objects step, move the required objects to the Selected section.
Important If the last selected object is a database, you cannot configure name mapping for tables or columns by specifying the Name batch change parameter.
- In the lower part of the page, set the Name batch change parameter to Yes, and then click Advanced Settings.
- In the Advanced Settings step, configure name mapping for tables and columns based on your needs.
- Select a range. In this example, select Section.
Important If you select Section, you can search for specific databases and tables by entering their names.
- Select a rule from the drop-down list and configure the rule.
- Click Add Modification Rules.
Important You can repeat steps i and ii to configure different rules for different tables.
- Click Preview to check whether the rules meet your expectations.
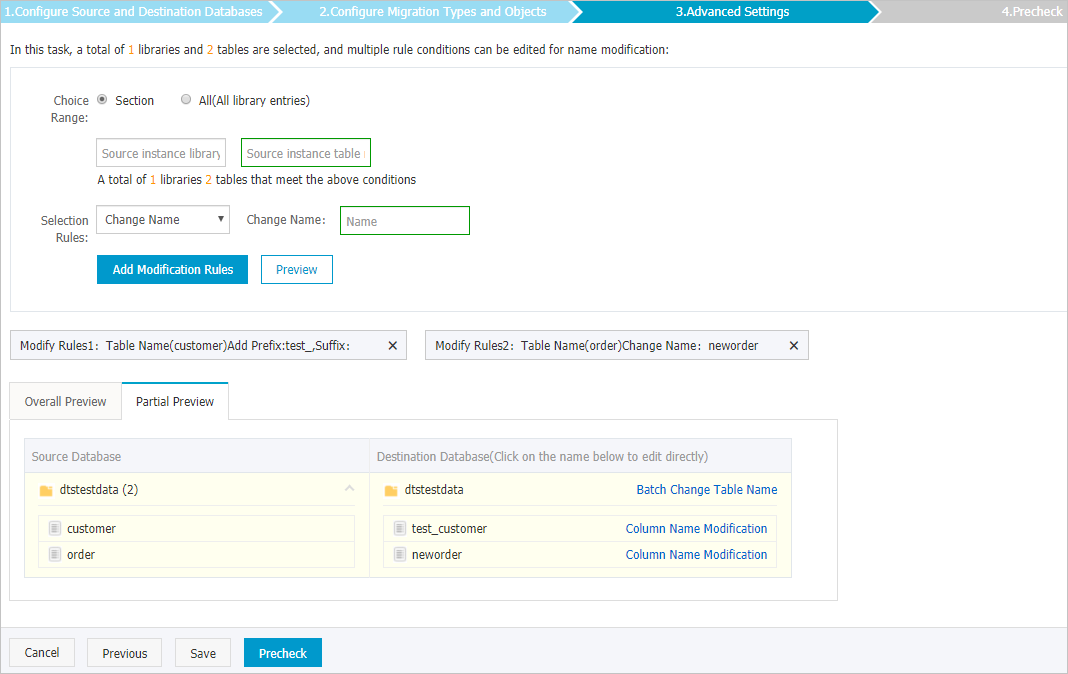
- On the Partial Preview tab, click the
 icon next to the database name in the Destination Database section, and then click Column Name Modification.
 - Configure mapping rules for column names, and then click OK.
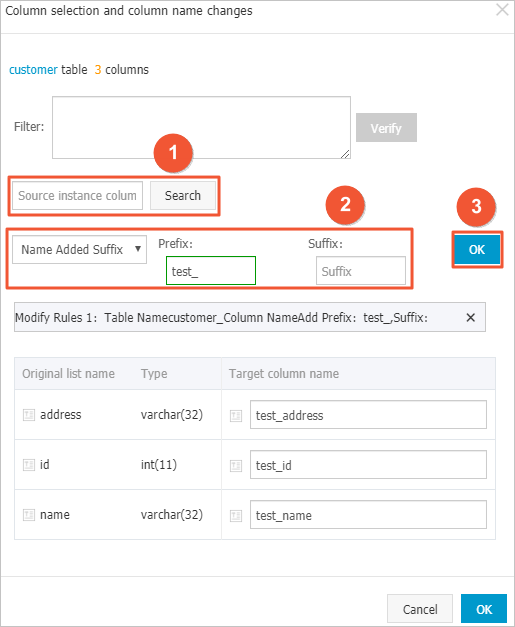 Important
- By default, a mapping rule applies to all column names. You can search for a specific column name and modify the mapping rule. To do this, you can enter the column name in the search box, and then click Search.
- In the dialog box, you can specify conditions to filter data. For more information, see Use conditions to filter data.
- Click OK.
- Select a range. In this example, select Section.
- Click Precheck.
- Configure other parameters that are required for the data migration task.