Abstract
If you have your own recommendation, search, or advertising engine service and do not want to migrate your services to PAI-Rec for the time being, but want to use the A/B testing system of PAI-Rec, you can integrate the A/B testing system with your system. This topic describes the A/B testing configurations, calling of SDKs, and setting and computing of metrics. Alibaba Cloud provides Python and Java SDKs for you to integrate the A/B testing system with your system.
1. Configure resources
1.1. Log on to the PAI-Rec console
In the PAI-Rec console, click Full-link Service in the left-side navigation pane. In the Service Initialization wizard that appears, configure workspaces.
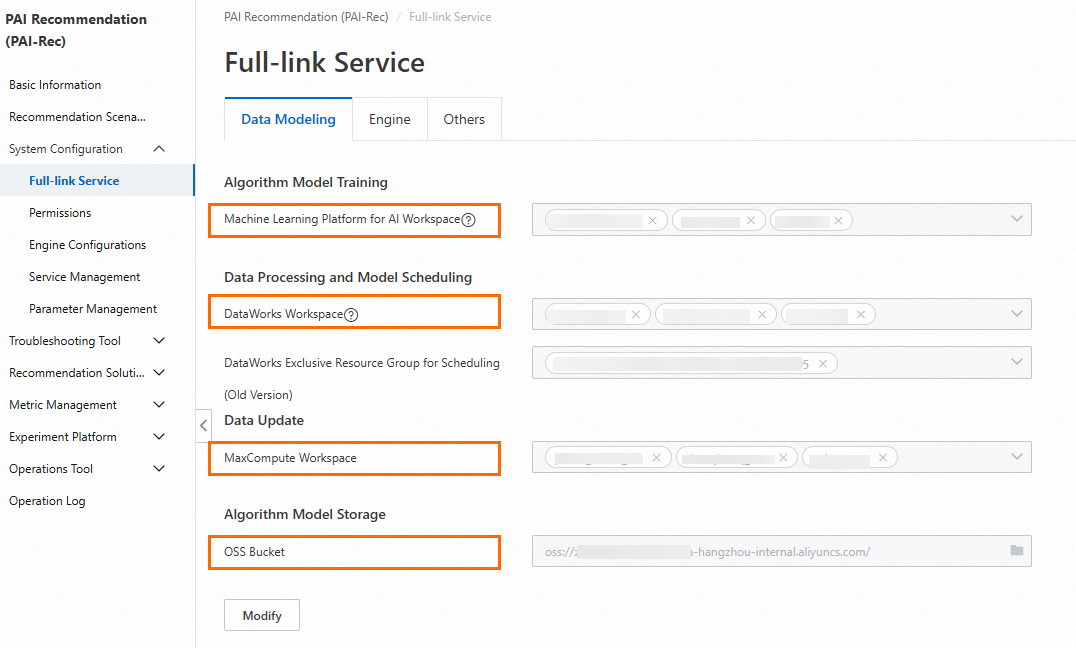
Configuration description:
You can query workspaces created for Platform for AI (PAI), DataWorks, and MaxCompute on their consoles. To log on to the PAI, DataWorks, and MaxCompute consoles, visit the Alibaba Cloud official website, search the corresponding cloud product in the Products search bar, and then click the product name to enter the homepage of the product. On the homepage, click Console.
You must create an Object Storage Service (OSS) bucket first in the OSS console before you can configure it in the PAI-Rec console.
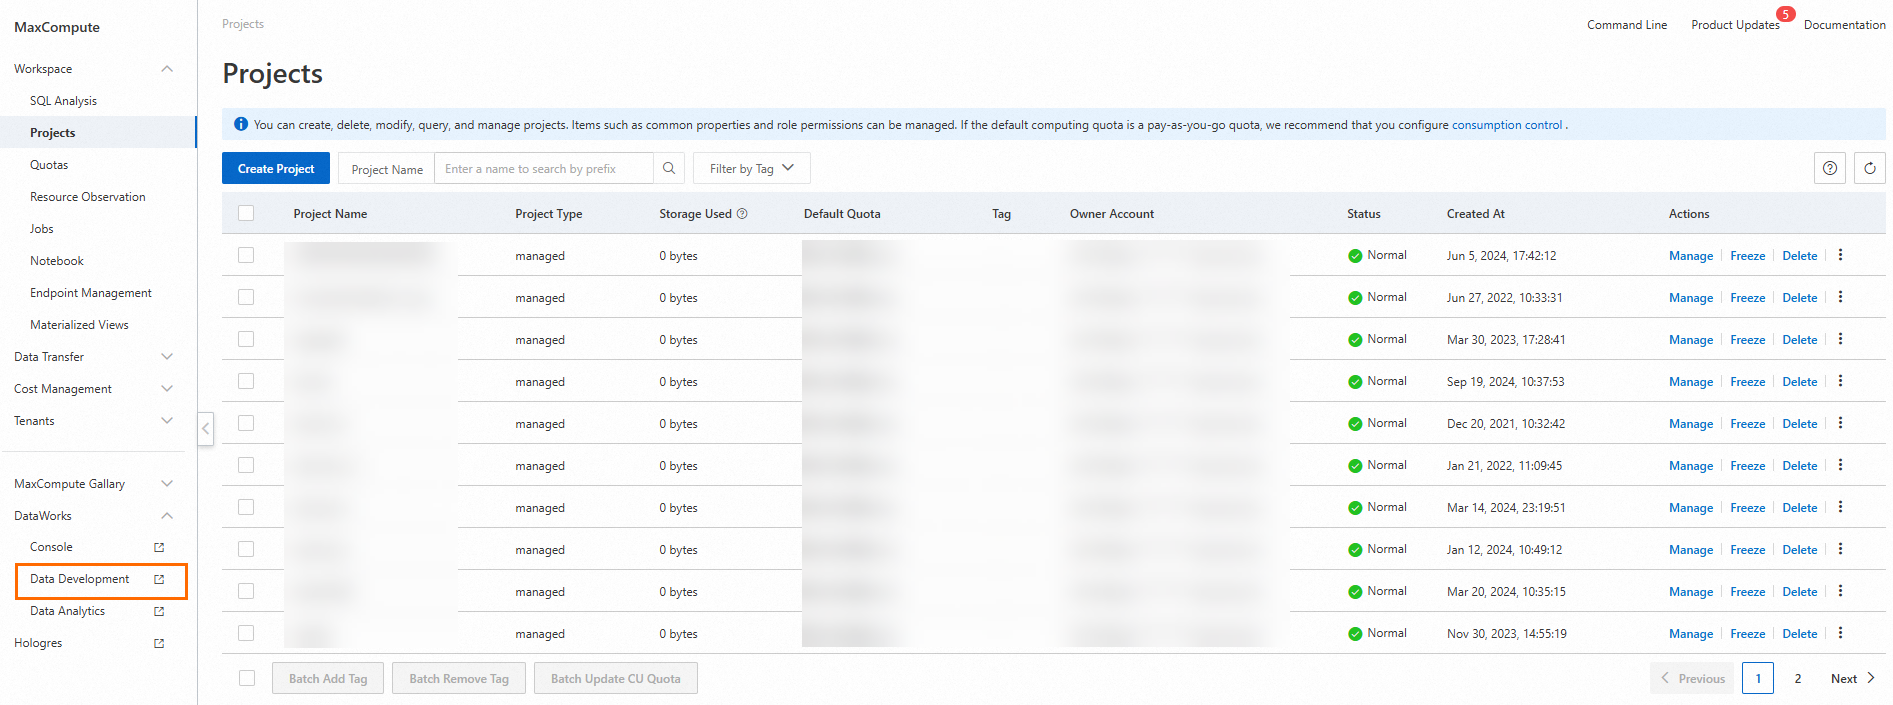
1.2. Access MaxCompute
On the Projects page, search for the project that you want to use.

Note: If no project is found, select an appropriate region and then search for the project.
In the Actions column of the desired project, click Manage. On the page that appears, grant direct access and write permissions on the MaxCompute project to PAI-Rec.
For more information, see Service initialization.

2. Create a scenario
Configuration description
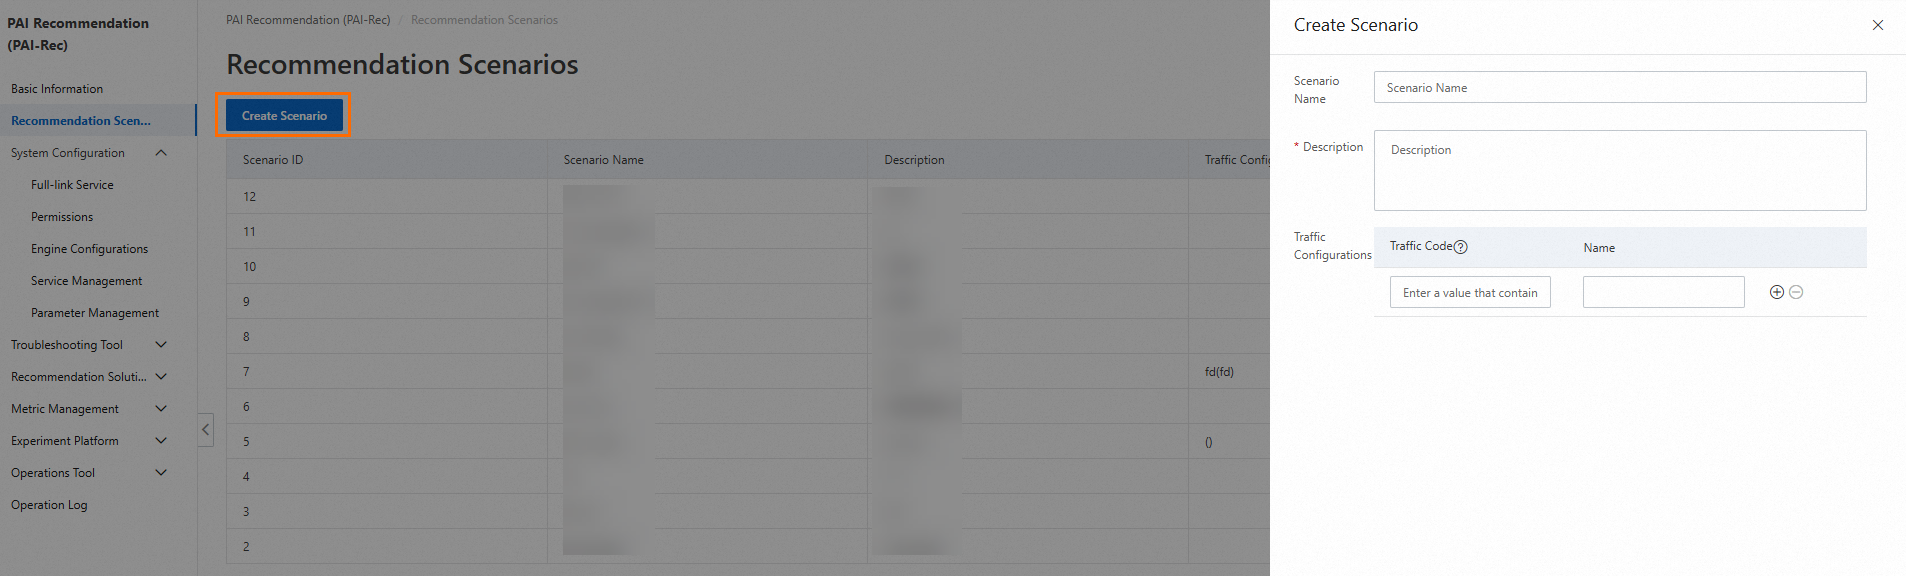
Scenario Name: the name of the recommendation scenario. We recommend that you use a name that can indicate the page location of the recommendation scenario.
Description: the supplementary description of the recommendation scenario.
Traffic Configurations:
Intended users: users who do not fully use PAI-Rec.
Scenario: If you have a self-managed recommendation system, you may first switch 10% to 20% recommendation traffic of the scenario you created to the PAI-Rec system. When the PAI-Rec system achieves the desired recommendation results, you may gradually switch more traffic to the PAI-Rec system.
Configuration method:
If you have a self-managed recommendation system or use a third-party recommendation platform, you can use custom traffic codes to identify your recommendation traffic for subsequent comparative analysis with the recommendation traffic of the PAI-Rec platform.
You need to set event tracking to collect logs and record user behaviors in the exp_id field. The event tracking requirements are consistent with those of PAI-Rec.
3. Configure A/B testing
Overview: The PAI team of Alibaba Cloud designs labs, experiment layers, experiment groups, and experiments based on common A/B testing schemes in the industry. A lab contains experiment layers, an experiment layer contains experiment groups, and an experiment group contains experiments. For more information, see Terms.
Note: Before you start A/B testing, you must confirm the changes to be tested with the relevant product manager or project manager.
The following section describes the configurations of A/B testing:
3.1. Create a lab
Select a runtime environment and recommendation scenario.
Click the Create Lab button.
On the Create Lab panel, configure parameters.
Configuration description:
Lab Type
Base Lab: A base lab is required, whereas non-base labs are optional.
Non-base Lab: Traffic is preferentially matched with and routed to non-base labs. If the model of the base lab is simple but the model of non-base labs is complex, you can create two labs. The base lab can also be implemented by using popular and random fallback logic.
Bucketing Method
Hashed UID-based Bucketing: Bucketing is performed based on the hash values of UIDs.
UID-based Bucketing: Bucketing is performed based on the last digits of UIDs.
Condition-based Bucketing: Bucketing is performed based on a key-value expression, such as gender=man.
Buckets: the number of buckets in this lab. The value is 100 in this example.
Traffic Allocation: the numbers of the buckets allocated to this lab, which can be set to 0-99.
Layering: the experiment layer. In most cases, the following layers are configured: recall, filter, coarse_rank, and rank.
Test Users: The traffic of test users can be directly routed to this lab without matching.
Manually Enter: You can enter multiple user IDs and separate them with commas (,).
User Group ID: Select a user group that is created on the User Group Management page.
3.2. Create an experiment group
You can create multiple experiment groups for each experiment layer, and create multiple experiments for each experiment group.
If multiple algorithm engineers need to perform recall or ranking experiments, you can create multiple experiment groups to separate these experiments.
Configuration description:
A/A Test Group:
In A/B testing, uneven sampling may occur, and therefore the test results may be biased. In order to ensure that the changes in the experiment data are only caused by the experiment itself, four or five buckets can be selected for the experiment at one time. Take two buckets from them, create no policy for them, and perform a dry run for them to monitor key metrics. Take two test groups whose data are most similar for testing. You can create the A/A test group based on your business requirements.
Configuration description:
Filter By: Filter users further after test users are selected. You can select new and existing users for testing. This helps obtain comprehensive test results.
Test Users
Manually Enter: The users you specify in this parameter can first perform experiments by using the created lab. After users provide experiment results and feedback, you can improve the experiments.
User Group ID: You can create multiple user groups for different experiments. This way, the traffic of these user groups can be routed to specified experiments, which helps achieve the testing objective.
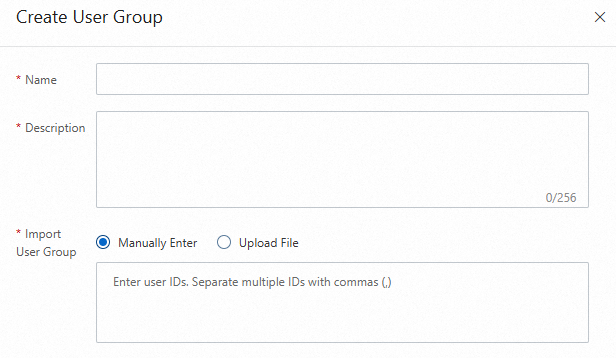
If no option is displayed, create a user group in the User Group Management page under Experiment Platform.
You can manually enter user IDs or import them by uploading an Excel file. After the user group is created, you can select it when you create an experiment group.
3.3. Create an experiment
Configuration description:
Traffic Allocation: You can set different traffic allocation policies for different scenarios.
If you do not want to affect user experience during user interface testing or content testing, you can distribute traffic evenly. This way, you can quickly obtain the experiment result.
For experiments with high uncertainty such as testing on new service launch, you can distribute a small number of traffic to the latest version of the service. This helps reduce effects on user experience to the largest extent. In addition, you can obtain the experiment result within the allowed period.
For experiments in which you want to obtain the optimal result, such as a marketing activity, you can distribute a large number of traffic to the experiment group and reserve a small number of traffic for the control group to evaluate the return on investment (ROI).
Configure the experiment according to the prompts.
Click Create Experiment. By default, a baseline experiment is first created.
Baseline Experiment: A group of users is randomly assigned to the experiment group or the control group. The baseline experiment serves as the control group. After the configuration is complete, click Save.
Normal Experiment: A group of users is randomly assigned to the experiment group or the control group. The normal experiment serves as the control group and its configuration is consistent with that of the baseline experiment. After the configuration is complete, click Save.
4. Calling of SDKs and data tracking
4.1. Call the Python SDK
4.1.1. Prepare a Python environment
You must prepare a Python environment and install PyCharm. For more information, see Install PyCharm and Python.
Open the command prompt window and run the following command to install the required module package:
pip install https://aliyun-pairec-config-sdk.oss-cn-hangzhou.aliyuncs.com/python/aliyun_pairec_config_python_sdk-1.0.0-py2.py3-none-any.whlNote:
Because the required module package is not open source, modules installed in PyCharm cannot meet expectations and may conflict with the required module package and cause errors.
If pip needs to be updated, update it first and then install modules.
A timeout error occurred due to a poor network. Run the preceding command again.
4.1.2. Open PyCharm
Create a Python program that runs the Python SDK.
Obtain the AccessKey ID and AccessKey secret according to the related steps in Service initialization.
To ensure the confidentiality of your data, we recommend that you add your account name and password to the environment variables. If you want to use them, you can use the corresponding Python function to read them.
# Create the following two variables to store the account ID and password.
ALIBABA_CLOUD_ACCESS_KEY_ID
ALIBABA_CLOUD_ACCESS_KEY_SECRET
Copy the following code to the Python program and replace the content as prompted.
from alibabacloud_tea_openapi.models import Config
from api.api_scene import SceneApiService
from api.api_experiment_room import ExperimentRoomApiService
from api.api_layer import api_layer
from api.api_experiment_group import ExperimentGroupApiService
from api.api_experiment import ExperimentApiService
from client.client import ExperimentClient
from model.experiment import ExperimentContext
from api.api_crowd import CrowdApiService
from alibabacloud_pairecservice20221213.client import Client
from common.constants import ENVIRONMENT_PRODUCT_CONFIG_CENTER
from common.constants import ENVIRONMENT_PREPUB_CONFIG_CENTER
from common.constants import ENVIRONMENT_DAILY_CONFIG_CENTER
import os

# Set the related information.
instance_id = "Instance ID" # Enter the instance ID.
region = "Region" # Enter the region ID.
access_id = os.environ['ALIBABA_CLOUD_ACCESS_KEY_ID']
access_key = os.environ['ALIBABA_CLOUD_ACCESS_KEY_SECRET']

if __name__ == '__main__':
 # Valid environments: ENVIRONMENT_PRODUCT_CONFIG_CENTER, ENVIRONMENT_PREPUB_CONFIG_CENTER, and ENVIRONMENT_DAILY_CONFIG_CENTER
 experiment = ExperimentClient(instance_id=instance_id, region=region,access_key_id=access_id,access_key_secret=access_key,environment=ENVIRONMENT_PRODUCT_CONFIG_CENTER)

 # Construct a request context, in which the filter_params parameter can be left empty.
 experiment_context = ExperimentContext(request_id="Request ID",uid="User ID",filter_params={})
 # Obtain the matching result of the experiment. You must specify the scenario name and context.

 experiment_result = experiment.match_experiment("Scenario name", experiment_context)

 # Print the matching result.
 print('info', experiment_result.info())

 # Print the matched exp_id.
 print('exp_id', experiment_result.get_exp_id())

 # Obtain the parameters configured in the experiment.
 print(experiment_result.get_experiment_params())
 print(experiment_result.get_experiment_params().get('url', 'not exist'))
print(experiment_result.get_experiment_params().get('token', 'not exist'))Error occurred when you configure environment variables:
If the environment variable that you access does not exist, a KeyError exception occurs. In this case, you can right-click in the blank space of the code of the running instance to check whether the system variables are loaded in the run configuration. If not, restart the Python project.
Replace the user information. Some code requires comment.
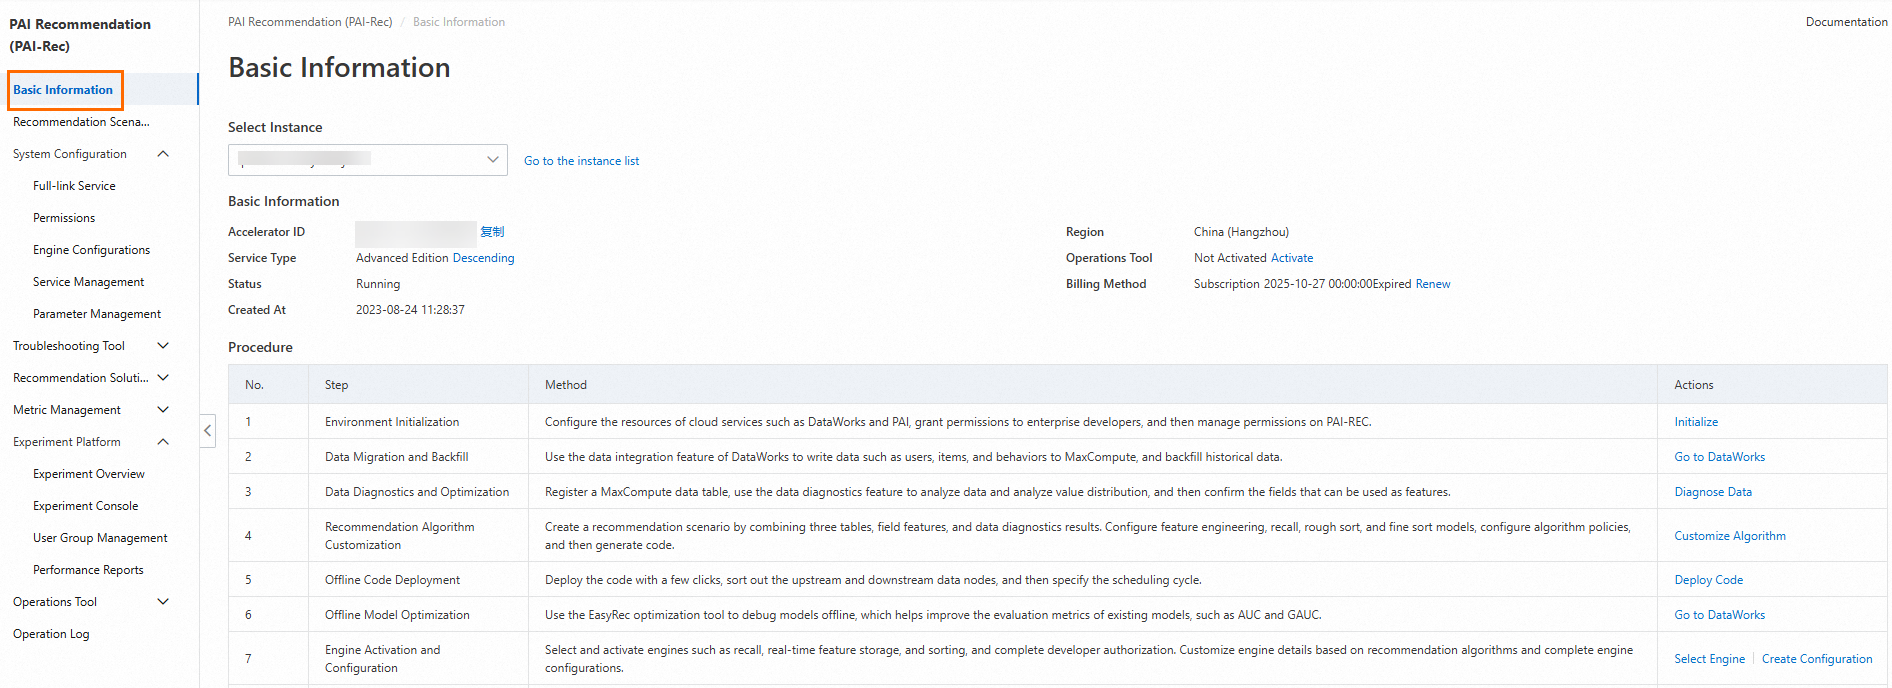
On the Basic Information page in the PAI-Rec console, you can see the information such as the instance ID and region.
request_id & uid: request_id indicates the request ID. You can use custom logic, such as auto-increment IDs and universally unique identifiers (UUIDs), to generate a request ID.
On the Recommendation Scenarios page, you can see the name of the scenario to be used.

Run the replaced Python program to obtain the URL and token.
4.2. Call the Java SDK
package com.aliyun.openservices.pairec;

import com.aliyun.openservices.pairec.api.ApiClient;
import com.aliyun.openservices.pairec.api.Configuration;
import com.aliyun.openservices.pairec.common.Constants;
import com.aliyun.openservices.pairec.model.ExperimentContext;
import com.aliyun.openservices.pairec.model.ExperimentResult;

public class ExperimentTest {
 static ExperimentClient experimentClient;
 public static void main(String[] args) throws Exception {
 String regionId = "Region ID";
 String instanceId = System.getenv("Instance ID"); // pai-rec instance id
 String accessId = System.getenv("ALIBABA_CLOUD_ACCESS_KEY_ID"); // aliyun accessKeyId
 String accessKey = System.getenv("ALIBABA_CLOUD_ACCESS_KEY_SECRET"); // aliyun accessKeySecret
 Configuration configuration = new Configuration(regionId, accessId, accessKey, instanceId);
 // set experiment environment
 configuration.setEnvironment(Constants.Environment_Product_Desc);
 ApiClient apiClient = new ApiClient(configuration);

 experimentClient = new ExperimentClient(apiClient);
 // init client
 experimentClient.init();
 // set expeirment context
 ExperimentContext experimentContext = new ExperimentContext();
 experimentContext.setUid("User ID");
 experimentContext.setRequestId("Request ID");

 // match experiment, use scence and experimentContext
 ExperimentResult experimentResult = experimentClient.matchExperiment("Scenario name", experimentContext);

 // exp id
 System.out.println(experimentResult.getExpId());
 // exp log info
 System.out.println(experimentResult.info());

 // get experiment param value
 System.out.println(experimentResult.getExperimentParams().getString("rank_version", "not exist"));
 System.out.println(experimentResult.getExperimentParams().getString("version", "not exist"));
 System.out.println(experimentResult.getExperimentParams().getString("recall", "not exist"));
 System.out.println(experimentResult.getExperimentParams().getDouble("recall_d", 0.0));

 // get experiment param value by pecific layer name
 // Obtain the values of parameters configured in the experiment based on the name of a specific experiment layer.
 System.out.println(experimentResult.getLayerParams("recall").getString("rank_version", "not exist"));
 System.out.println(experimentResult.getLayerParams("rank").getString("version", "not exist"));


 }
}
5. Design experiment metrics
Data analysts are responsible for designing key metrics, such as the click-through rate (CTR) and conversion rate (CVR), to be observed in the experiment.
5.1. Enter the Data Registration module of Metric Management
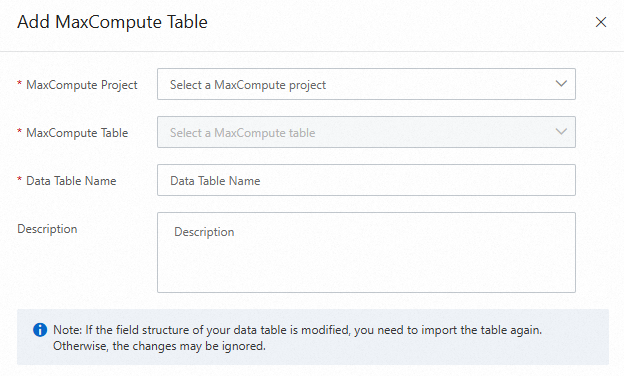
Associate a MaxCompute table with the A/B testing instance. In the Data Table Name parameter, you can enter a custom name that indicates the related business.
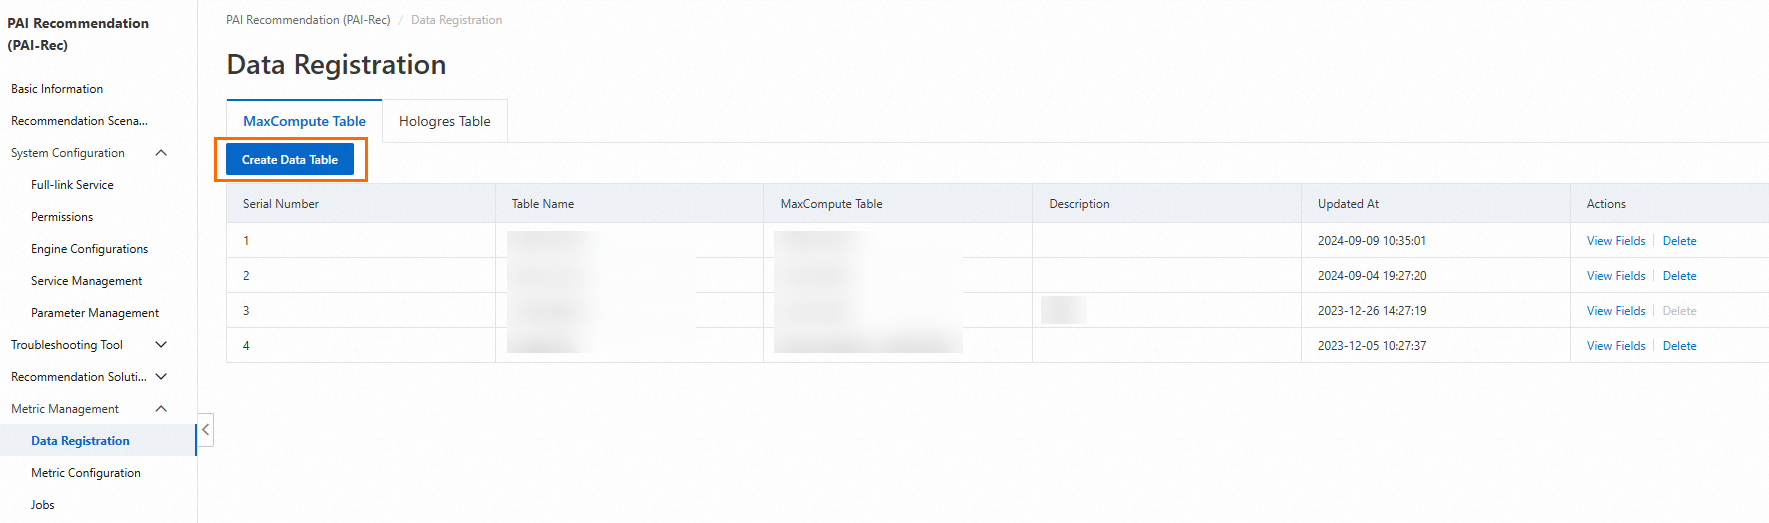
Select a table that contains required fields. For more information, see Data registration and field configuration.
If you do not have a MaxCompute data table that contains all required fields, you need to create a new data table. The following figure shows the configurations when you create a data table.
The registered data table automatically appears in the data table list. You can click View Fields in the Actions column to view the fields in the data table and check or edit the fields and related information.
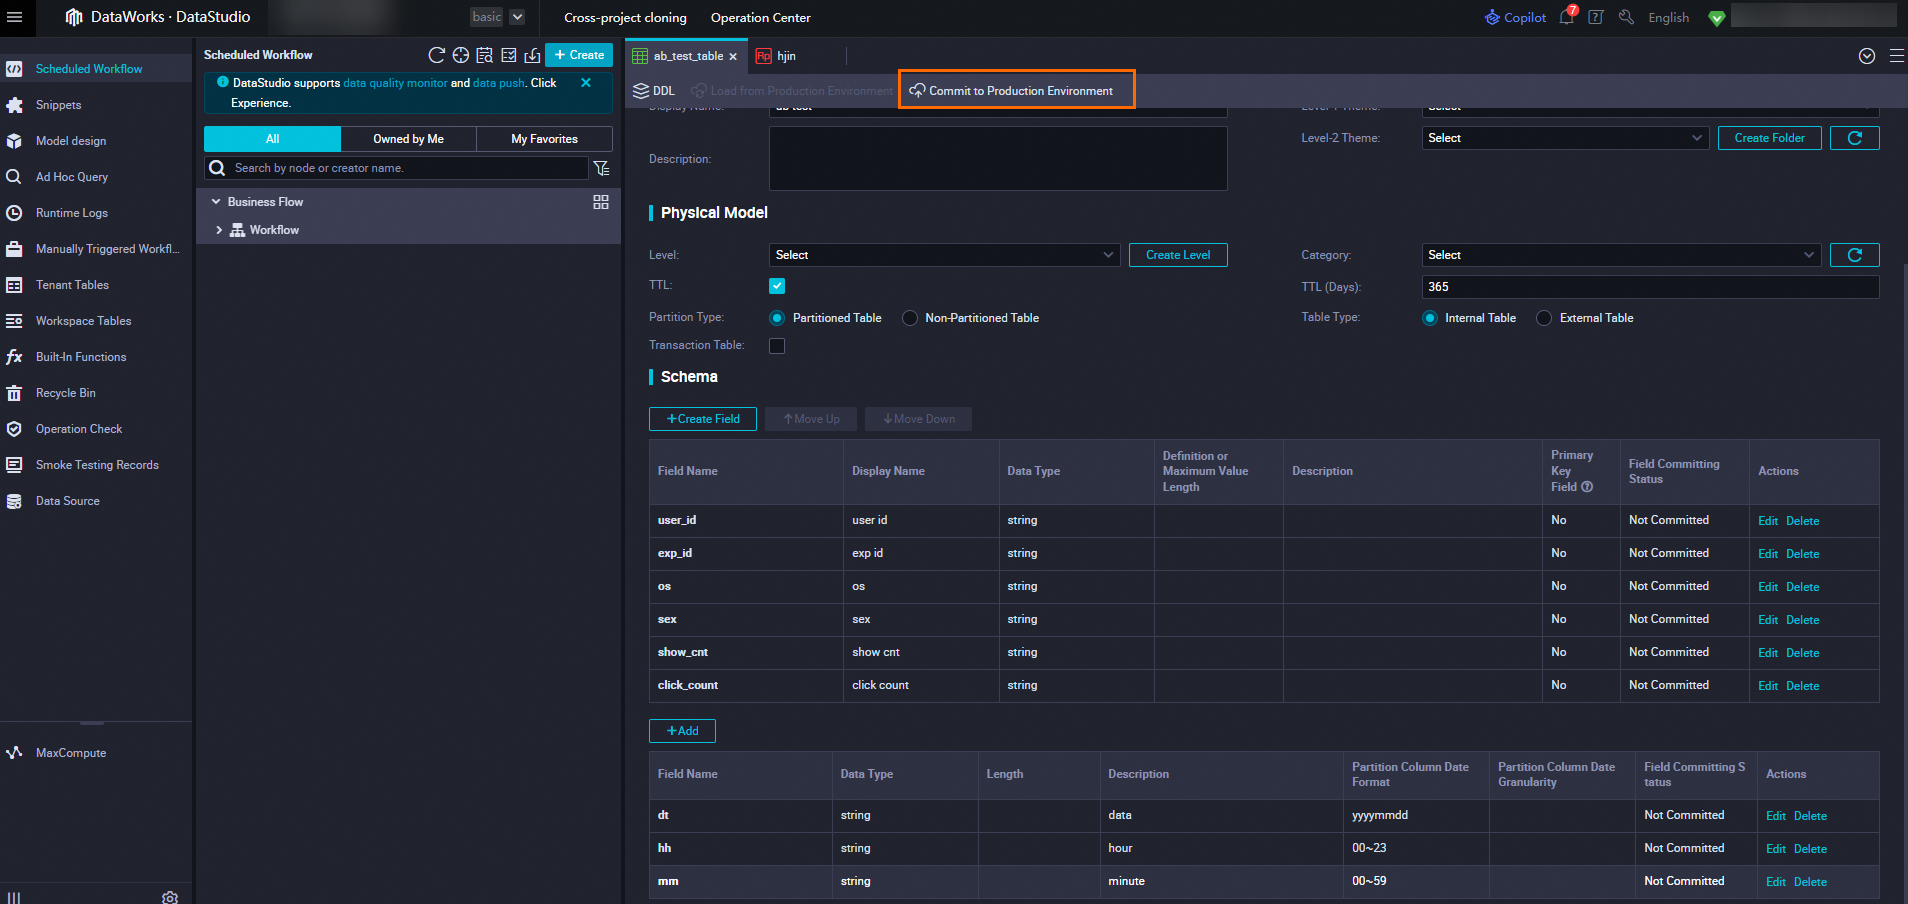
5.1.1. Cases in which no required fields are included in the MaxCompute table
You must log on to the MaxCompute console to create a data table that meets requirements.
In DataWorks, create a source table for A/B testing experiment reports in MaxCompute.

5.2. Configure experiment metrics
In A/B testing, the experiment effect is measured by experiment metrics.
Experiment metrics can be divided into the following two categories:
Ratio-based metrics and per-user metrics
Ratio-based metrics include click conversion rate, next-day retention rate, CRT, and CVR.
Per-user metrics include average clicks per user and average order value (AOV).
Key metrics and must-see metrics
Key metrics are also known as key performance indicators (KPIs).
Must-see metrics refer to metrics that must be observed during a test. The capability to be tested does not directly affect these metrics. In addition, the capability to be tested cannot affect these metrics adversely.
In addition to the above metrics, absolute metrics may be occasionally compared. It is only meaningful to compare these absolute metrics if the number of users in the test groups is the same.
Absolute metrics
Total number of users who clicked items
Total order amount
5.2.1. Metrics
On the Metric Configurations page, click Metrics. On the Metrics tab, set the Recommendation Scenario and Metric Timeliness parameters.
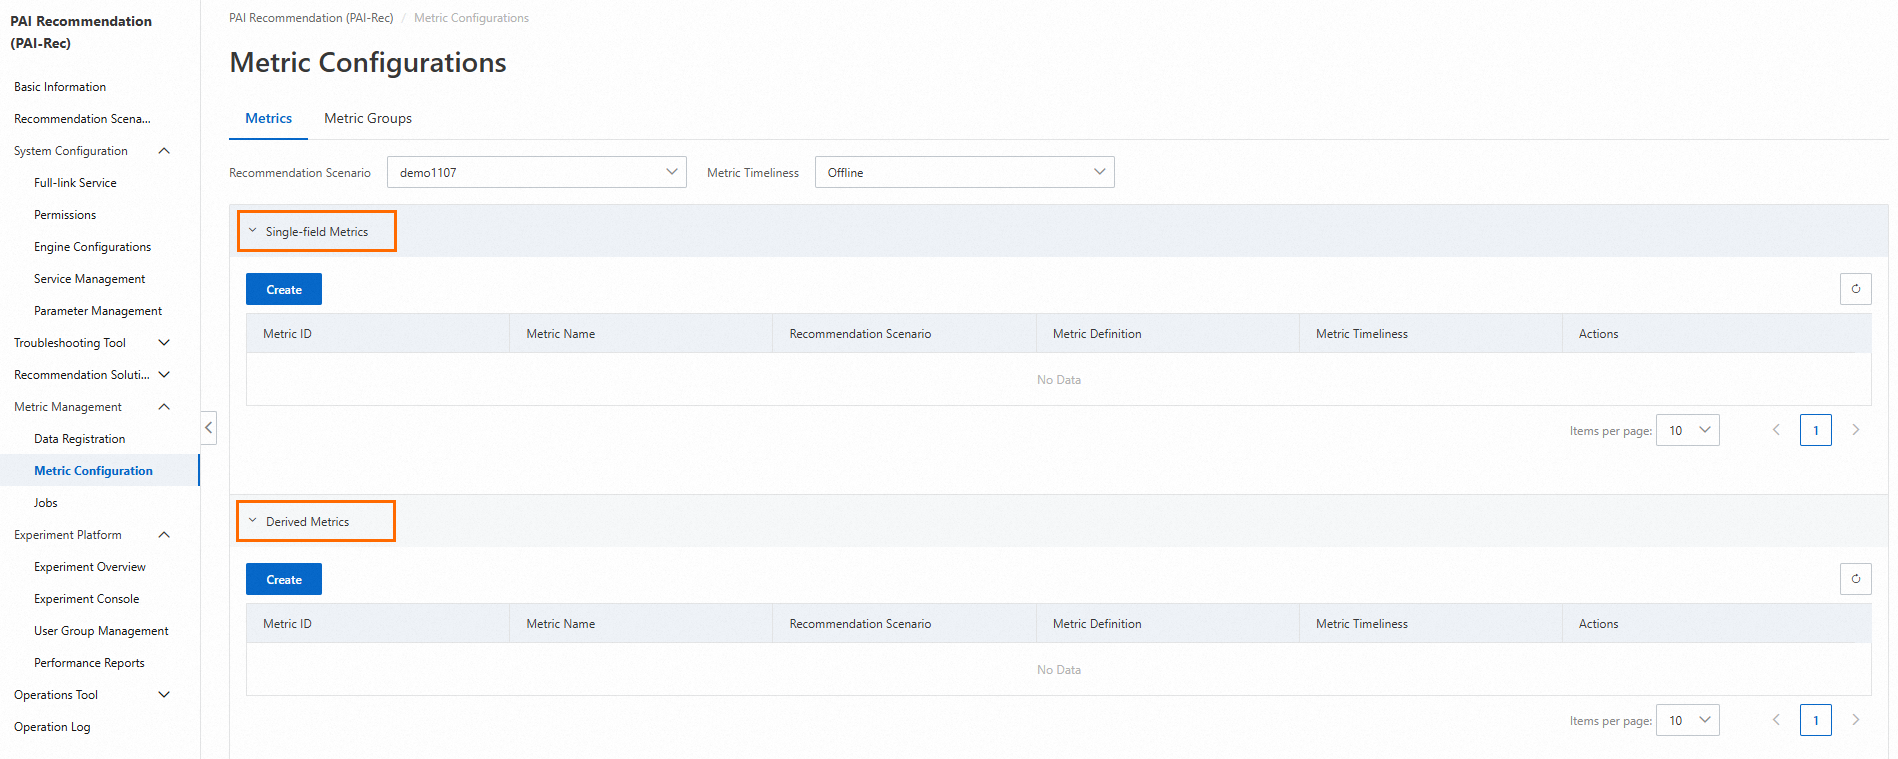
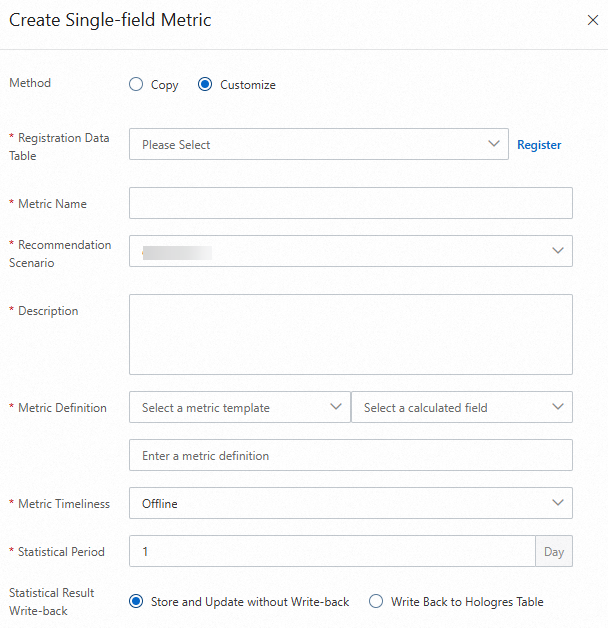
5.2.1.1. Single-dimension metrics
Single-dimension metrics refer to basic metrics that are generated based on aggregation logic such as counting, unique counting, summation, and average. For example, the number of app opens is a single-dimension metric.
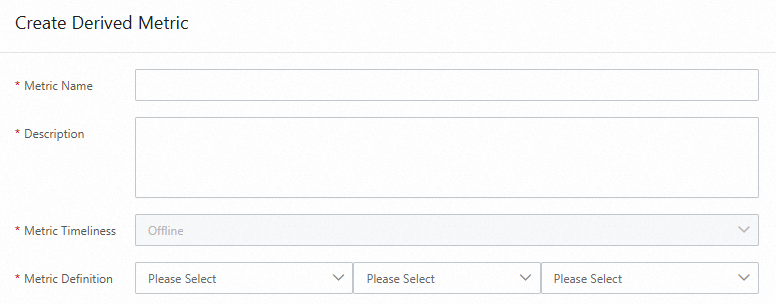
For example, you want to obtain the CTR of a website.
You must add the daily clicks and daily visits to the single-dimension metrics. Then you can calculate the CTR by using the following formula in the derived metric section: CTR = Daily clicks/Daily visits.
Configuration description:
In the Metric Definition parameter, the value Page Views indicates the visits of a page. The value Unique Visitors indicates the visits of users to a page. When Unique Visitors are counted, the count is increased only when a user visits the page for the first time.
After you select a field, the corresponding field calculation command is generated.
5.2.1.2. Derived metrics
Performs calculations for multiple single-dimension metrics, such as proportion calculation.
5.2.2. Metric groups
You can select multiple metrics in a selected scenario as a metric group and calculate metrics based on metric groups.
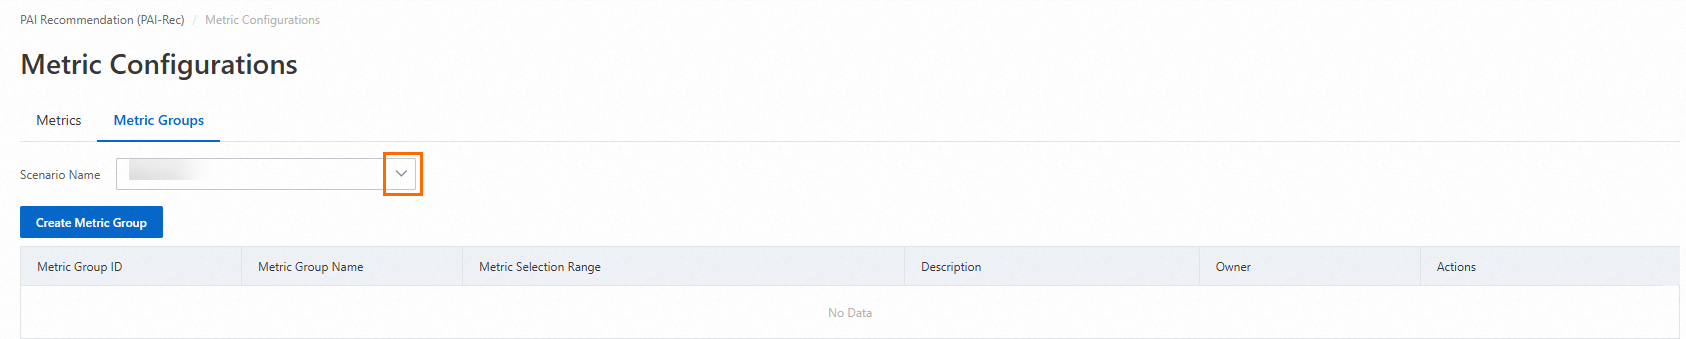
Configure the required parameters for the metric group to be created and set the Metric Selection parameter.
On the Metric Groups tab, find the desired metric group and click Calculate in the Actions column.

6. Calculate metrics and generate reports
6.1. Calculate metrics
On the Metric Groups tab of the Metric Configurations page, click Calculate in the Actions column of the desired metric group. On the panel that appears, select the metrics you want to calculate.
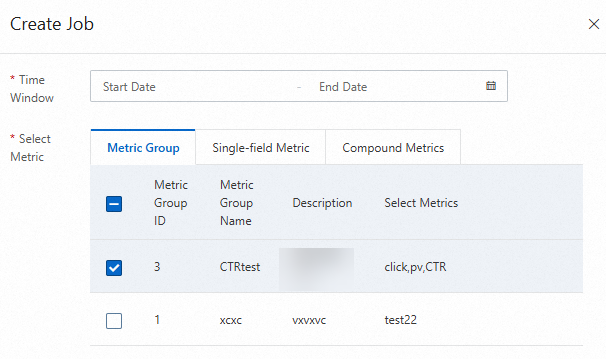
After you create a calculation job, you can view the progress of the job on the Jobs page.
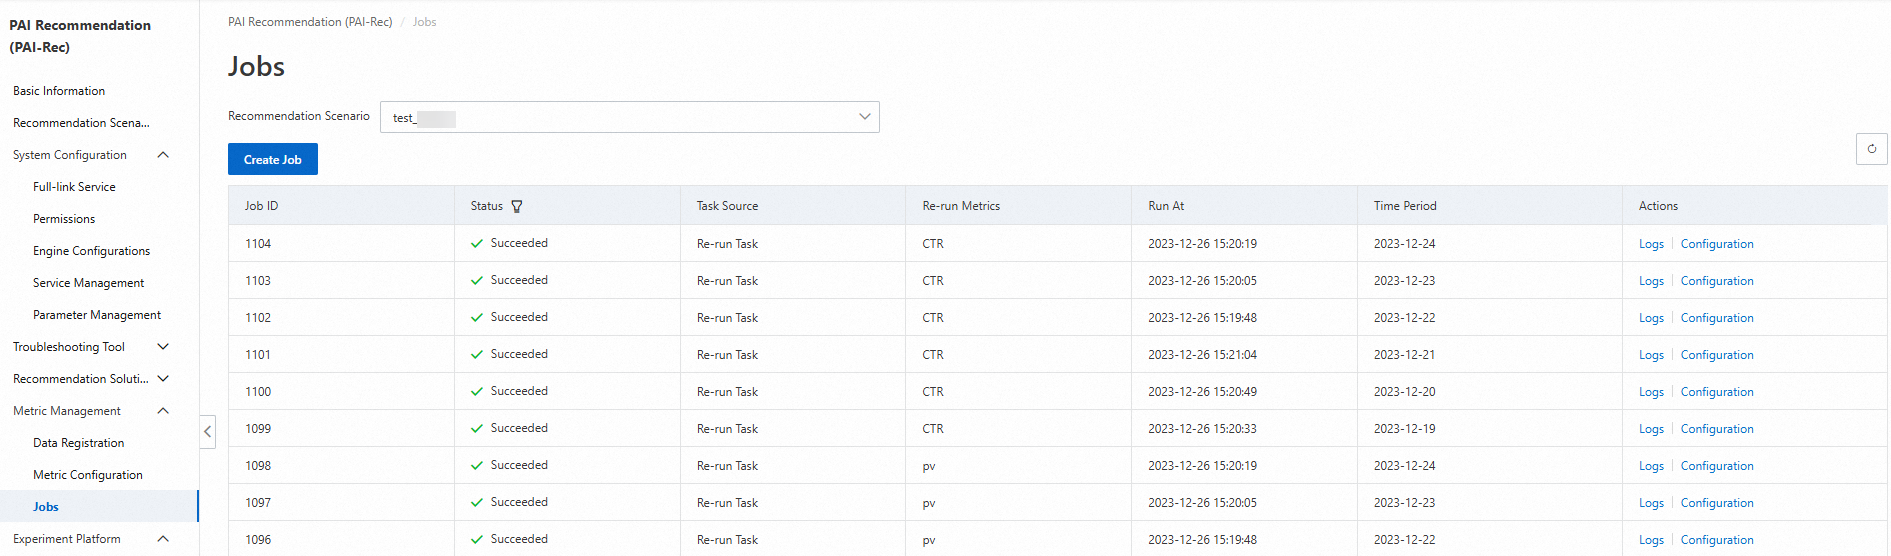
After all calculation jobs are complete, the status becomes Succeeded.
6.2. Generate reports
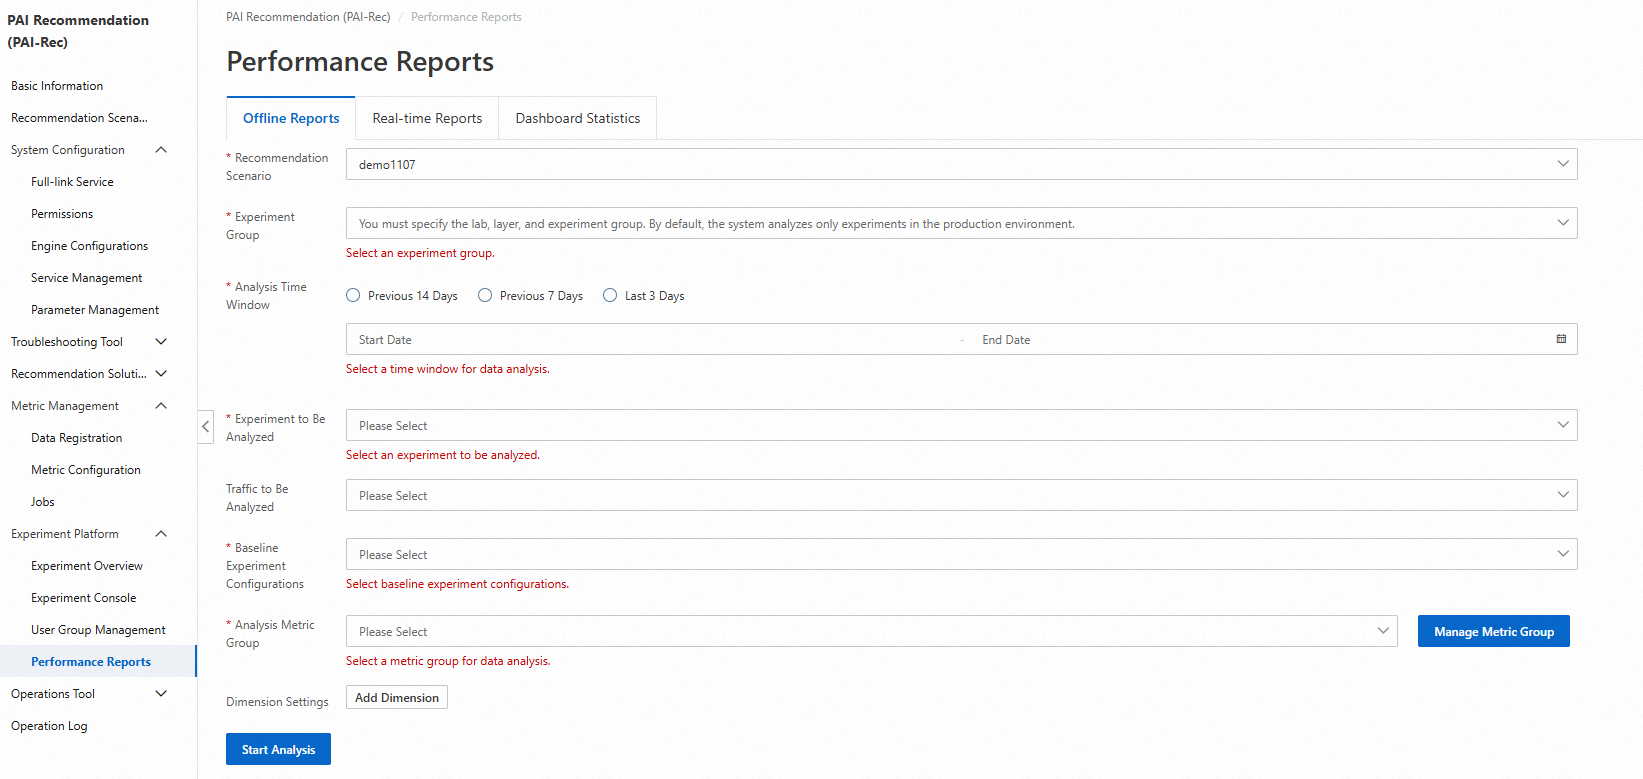
On the Performance Reports page under Experiment Platform, configure parameters and click Start Analysis.
In the Detail Data section, you can view the difference between the baseline experiment and the normal experiment. In the Trend Analysis section, you can select different experiment metrics to view the experiment results.