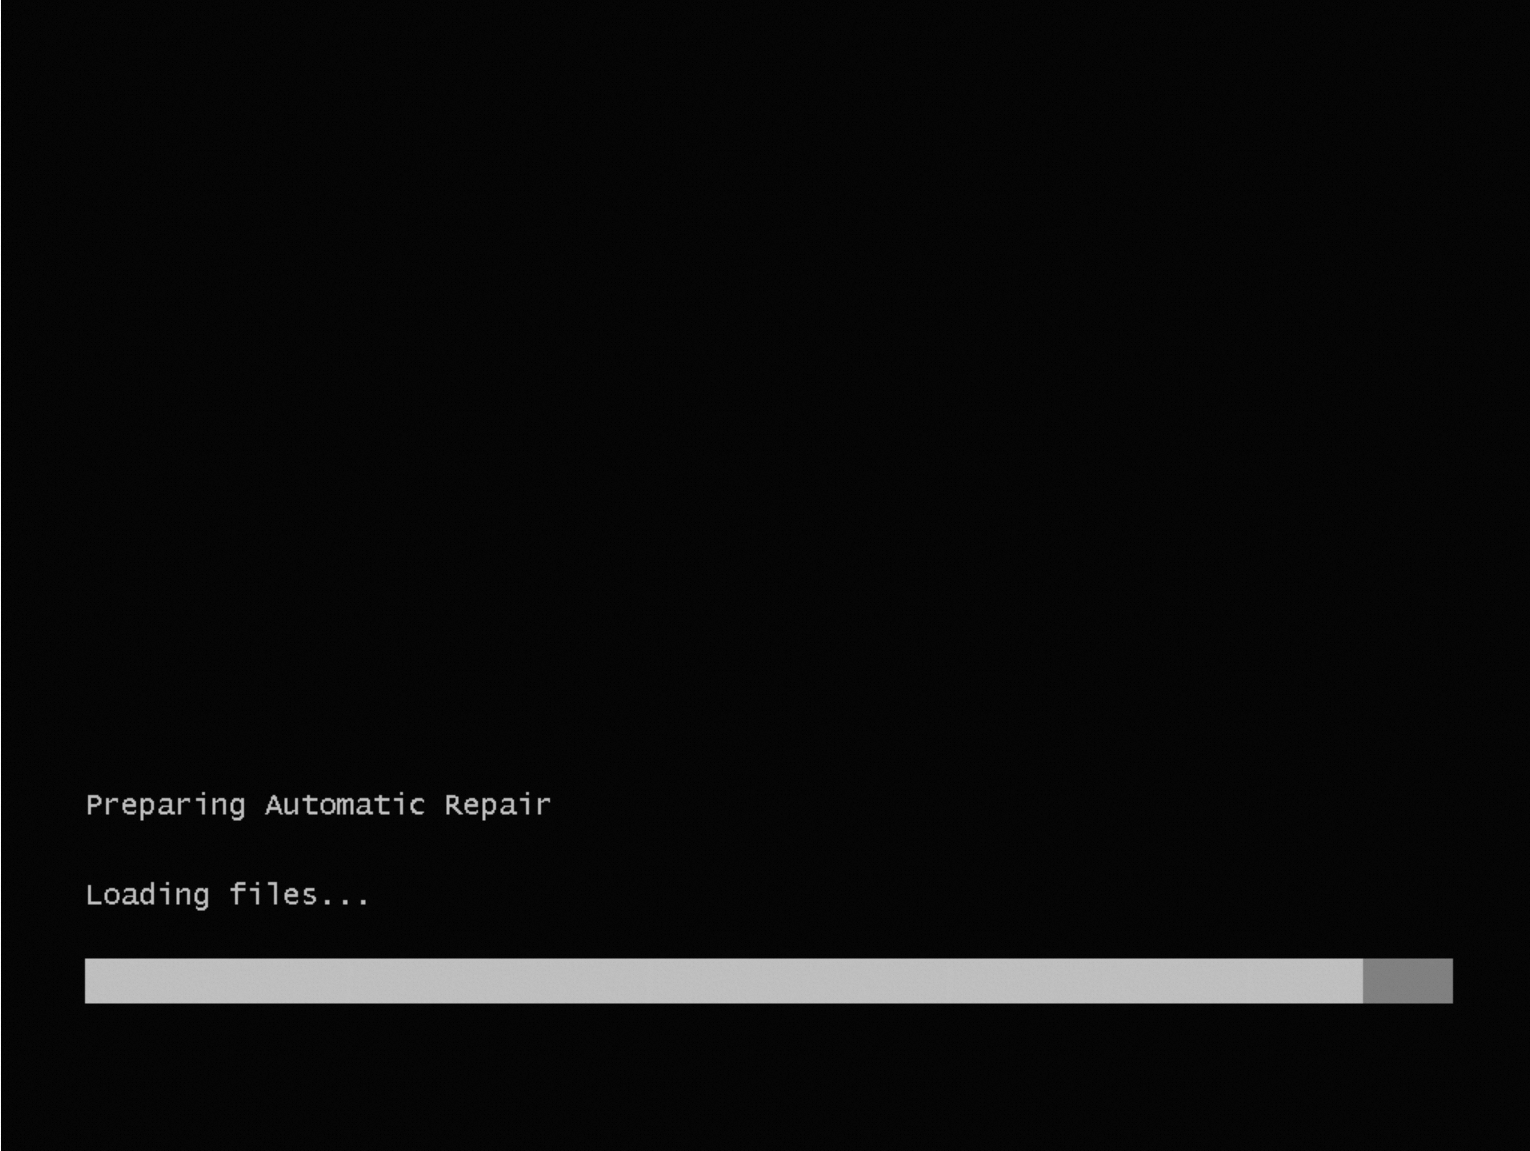
This topic describes the causes of and solutions to the issue that the Windows operating system of an Elastic Compute Service (ECS) instance enters the Repair mode and the "Preparing Automatic Repair" message appears when the instance is restarted.
Problem description
When a Windows ECS instance is started, the operating system fails to load and enters the Repair mode. In addition, the "Preparing Automatic Repair" message appears.
Causes
The preceding issue may occur due to several reasons. You can use the instance health diagnostics feature to identify the cause and select the corresponding solution. The following table describes the possible causes and the corresponding solutions.
Cause | Solution |
The Windows partition of the instance does not exist or some files of the Windows partition are missing. | In most cases, the issue occurs if the instance is created from a custom image and cannot be started due to an image issue. In this case, you must create an issue-free image and use the image to replace the operating system of the instance. For more information, see Create Windows image files and Replace the operating system of an instance. |
The file system type of the Windows partition of the instance is not New Technology File System (NTFS). | |
The disk space allocated to the Windows partition of the instance is less than 20 GB. | Extend the disk on which the Windows partition resides. For more information, see Extend the partitions and file systems of disks on Windows instances. |
The Windows partition of the instance is in the read-only state. | |
The Windows partition of the instance is hidden. | |
A critical registry file of the instance does not exist. | |
A critical registry file of the instance is corrupted. | |
The Boot Configuration Data (BCD) file of the instance does not exist. | |
The content in the BCD file of the instance is corrupted. | |
The Windows Boot Manager (BootMgr) file of the instance does not exist. | |
The content in the BootMgr file of the instance is corrupted. | |
The boot device or disk specified in the BootMgr configurations of the instance does not exist. | |
The operating system bootloader of the instance does not exist. |
Clear the read-only attribute for the Windows partition
Clear the read-only attribute for the Windows partition of the faulty instance to which a repair disk is attached. Perform the following steps:
Connect to the faulty instance.
On the Diagnostic Result page, click VNC Connection. Then, enter the Administrator username and password provided in the diagnostic report to log on to the ECS instance to which a repair disk is attached. For more information, see Connect to an instance by using VNC.
Clear the read-only attribute for the Windows partition.
Use one of the following methods based on your business requirements.
Use the DiskPart utility
In the following example, the drive letter of the Windows partition is D. Perform the following steps:
Open the
DiskPartwindow.Enter
diskpartin the search box in the lower-left corner of the desktop and press the Enter key, or enterWindows PowerShellin the search box and press the Enter key to enter PowerShell and then run thediskpartcommand.Select the volume that you want to manage.
select volume DClear the read-only attribute for the volume.
attribute volume clear readonly
Run a PowerShell command
In the following example, the serial number of the disk on which the faulty operating system resides is 1 and the serial number of the system partition is 1.
Set-Partition -DiskNumber 1 -PartitionNumber 1 -IsReadOnly $falseOn the Instance page, move the pointer over the Repairing state that corresponds to the instance and click Detach Repair Disk.
Restart the instance to allow the preceding configurations to take effect.
For more information, see Restart an instance.
Connect to the ECS instance. If you can connect to the ECS instance as expected, the preceding issue is resolved.
For more information, see Connect to a Windows instance by using a password or key.
Clear the hidden attribute for the Windows partition
Clear the hidden attribute for the Windows partition of the faulty instance to which a repair disk is attached. Perform the following steps:
Connect to the faulty instance.
On the Diagnostic Result page, click VNC Connection. Then, enter the Administrator username and password provided in the diagnostic report to log on to the ECS instance to which a repair disk is attached. For more information, see Connect to an instance by using VNC.
Clear the hidden attribute for the Windows partition. In the following example, the drive letter of the faulty system disk is D and the serial number of the hidden partition is 1.
Use one of the following methods based on your business requirements.
Use the DiskPart utility
Open the
DiskPartwindow.Enter
diskpartin the search box in the lower-left corner of the desktop and press the Enter key, or enterWindows PowerShellin the search box and press the Enter key to enter PowerShell and then run thediskpartcommand.Select the disk that you want to manage.
select disk DSelect the hidden partition.
select partition 1Clear the hidden attribute for the partition.
attribute volume clear hidden
Run a PowerShell command
Run the following command in PowerShell:
Set-Partition -DiskNumber D -PartitionNumber 1 -IsHidden $falseOn the Instance page, move the pointer over the Repairing state that corresponds to the instance and click Detach Repair Disk.
Restart the instance to allow the preceding configurations to take effect.
For more information, see Restart an instance.
Connect to the ECS instance. If you can connect to the ECS instance as expected, the preceding issue is resolved.
For more information, see Connect to a Windows instance by using a password or key.
Repair a corrupted registry file
Solution 1: Repair a corrupted registry file in Repair mode
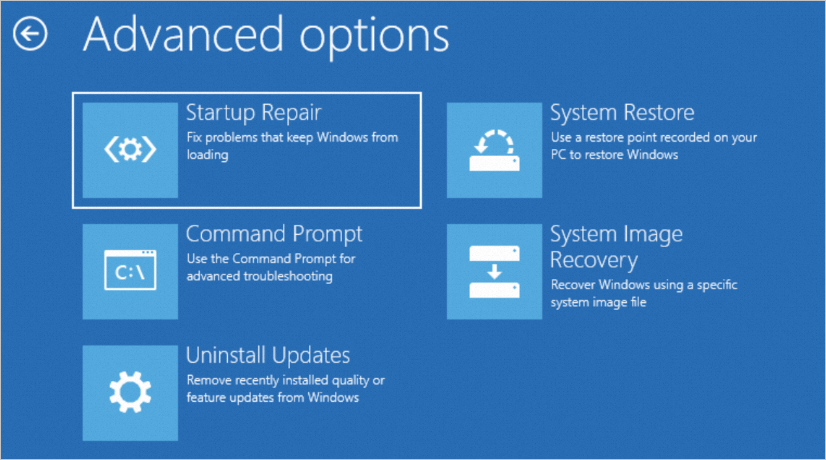
In Repair mode, click Startup Repair to repair the startup failure.
Use one of the following repair methods based on whether a backup of the corrupted registry file exists:
If a backup of the corrupted registry file exists, use the backup to replace the corrupted registry file.
NoteIn most cases, registry files are backed up in the
C:\Windows\System32\config\regbackdirectory.If no backup is available for the corrupted registry file, run one of the following commands based on your business requirements:
dism /Image:D: /Cleanup-image /Restorehealthsfc /scannow /offbootdir=D:\ /offwindir=D:\Windows /offlogfile=C:\sfclog.txt
Connect to the ECS instance. If you can connect to the ECS instance as expected, the preceding issue is resolved.
For more information, see Connect to a Windows instance by using a password or key.
Solution 2: Repair a corrupted registry file when you repair the instance
Repair a corrupted registry file on the faulty instance to which a repair disk is attached. In the following example, the drive letter of the repair disk is D. Perform the following steps:
Connect to the faulty instance.
On the Diagnostic Result page, click VNC Connection. Then, enter the Administrator username and password provided in the diagnostic report to log on to the ECS instance to which a repair disk is attached. For more information, see Connect to an instance by using VNC.
Repair the corrupted registry file.
Use one of the following repair methods based on whether a backup of the corrupted registry file exists:
If a backup of the corrupted registry file exists, use the backup to replace the corrupted registry file.
NoteIn most cases, registry files are backed up in the
D:\Windows\System32\config\regbackdirectory.If no backup is available for the corrupted registry file, run one of the following commands based on your business requirements:
dism /Image:D: /Cleanup-image /Restorehealthsfc /scannow /offbootdir=D:\ /offwindir=D:\Windows /offlogfile=C:\sfclog.txt
Connect to the ECS instance. If you can connect to the ECS instance as expected, the preceding issue is resolved.
For more information, see Connect to a Windows instance by using a password or key.
Configure the boot mode of the Windows operating system
If the operating system startup failure is caused by an exception in the boot settings, reconfigure the boot mode of the faulty instance after you attach a repair disk to the instance.
Connect to the faulty instance.
On the Diagnostic Result page, click VNC Connection. Then, enter the Administrator username and password provided in the diagnostic report to log on to the ECS instance to which a repair disk is attached. For more information, see Connect to an instance by using VNC.
Run Command Prompt as an administrator.
Run a command to reconfigure the boot mode by using the BCDboot tool.
The command varies based on the boot mode. In the following example, the drive letter of the system partition is S, and the drive letter of the Windows partition is C.
Unified Extensible Firmware Interface (UEFI) boot mode:
bcdboot C:\Windows /s S:BIOS boot mode:
bcdboot C:\Windows /s S: /f UEFINoteIf a Windows operating system is available on the D disk of the ECS instance in addition to the C disk, run one of the following commands to configure the boot mode of the Windows operating system on the D disk:
UEFI boot mode:
bcdboot D:\Windows /s S: /d /p /addlastBIOS boot mode:
bcdboot D:\Windows /s S: /d /p /addlast /f UEFI
Run one of the following commands to check the boot mode:
UEFI boot mode:
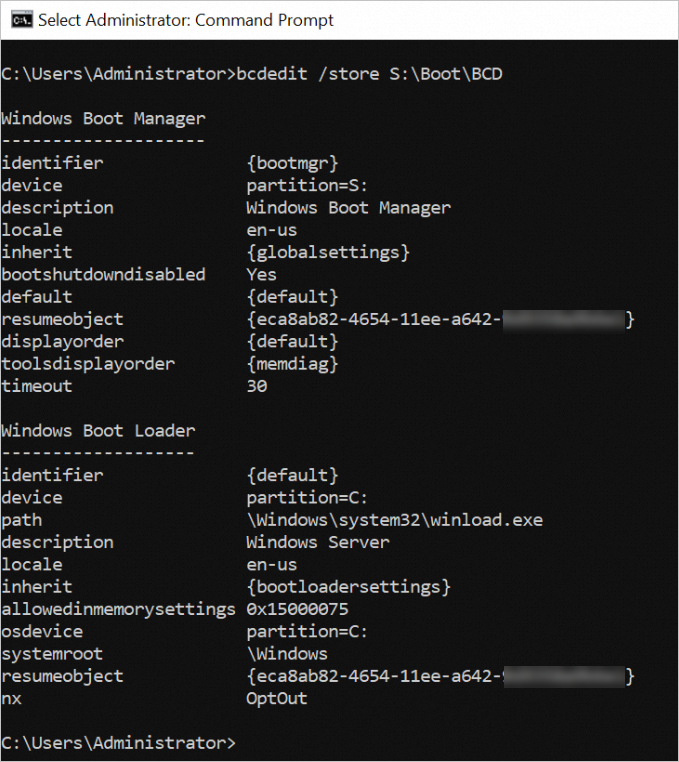
bcdedit /store S:\Boot\BCDBIOS boot mode:
bcdedit /store S:\EFI\Microsoft\Boot\BCDIf the system returns the sample boot settings as shown in the following figure, the boot mode is configured.
On the Instance page, move the pointer over the Repairing state that corresponds to the instance and click Detach Repair Disk.
Start the ECS instance.
For more information, see Start an instance.