This topic describes how to get started with the production studio console for live streaming.
Prerequisites
Before you can use the production studio console, you must meet the following prerequisites:
You have activated the production studio service. For more information, see Activate the service.
You have added the accelerated domain names. For more information, see Add an accelerated domain name.
Background information
If this is your first time using a production studio, this topic guides you through the process, from creating a production studio to performing real-time production.
This topic describes how to get started with a production studio in the console. For information about how to use a production studio by calling API operations, see Demo for general mode.
Production studio workflow
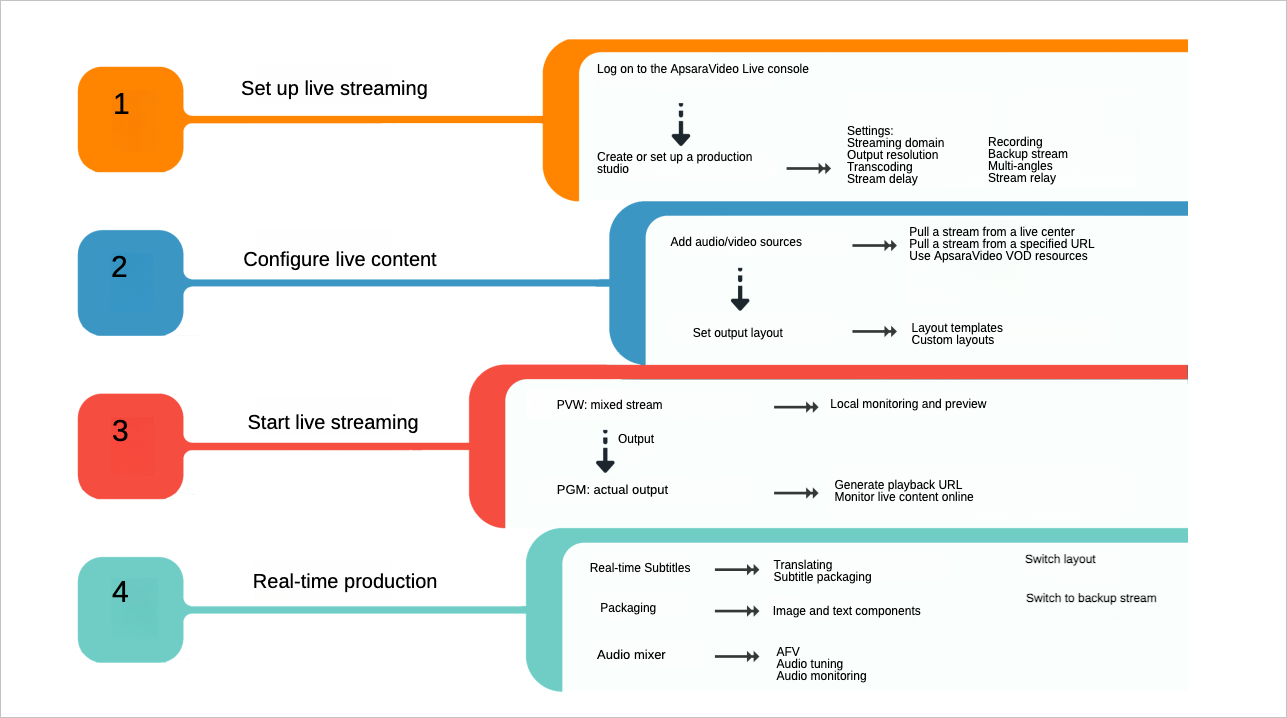
As shown in the figure, the complete workflow of using a production studio includes the following stages:
Live stream settings: Use the production studio console to configure features such as the streaming domain name, output definition, transcoding, and recording.
Live stream configuration: Add audio and video sources and set the output screen layout.
Start live streaming: When the stream starts, the mixed stream is output to the Preview (PVW) area. The Program (PGM) area is used to output the final live stream.
Real-time production: During production, use features such as real-time captions, graphic overlays, and the audio mixer to adjust the live content and program effects.
Quick start guide
Open the production studio.
Log on to the ApsaraVideo Live console. In the navigation pane, choose Production Studios. Find the production studio that you want to open and click Open in the Actions column.
Configure the production studio.
When you open a production studio instance for the first time, the settings panel appears automatically. To open the panel later, click Live Stream Settings in the upper-right corner. For more information, see Configure a production studio instance.
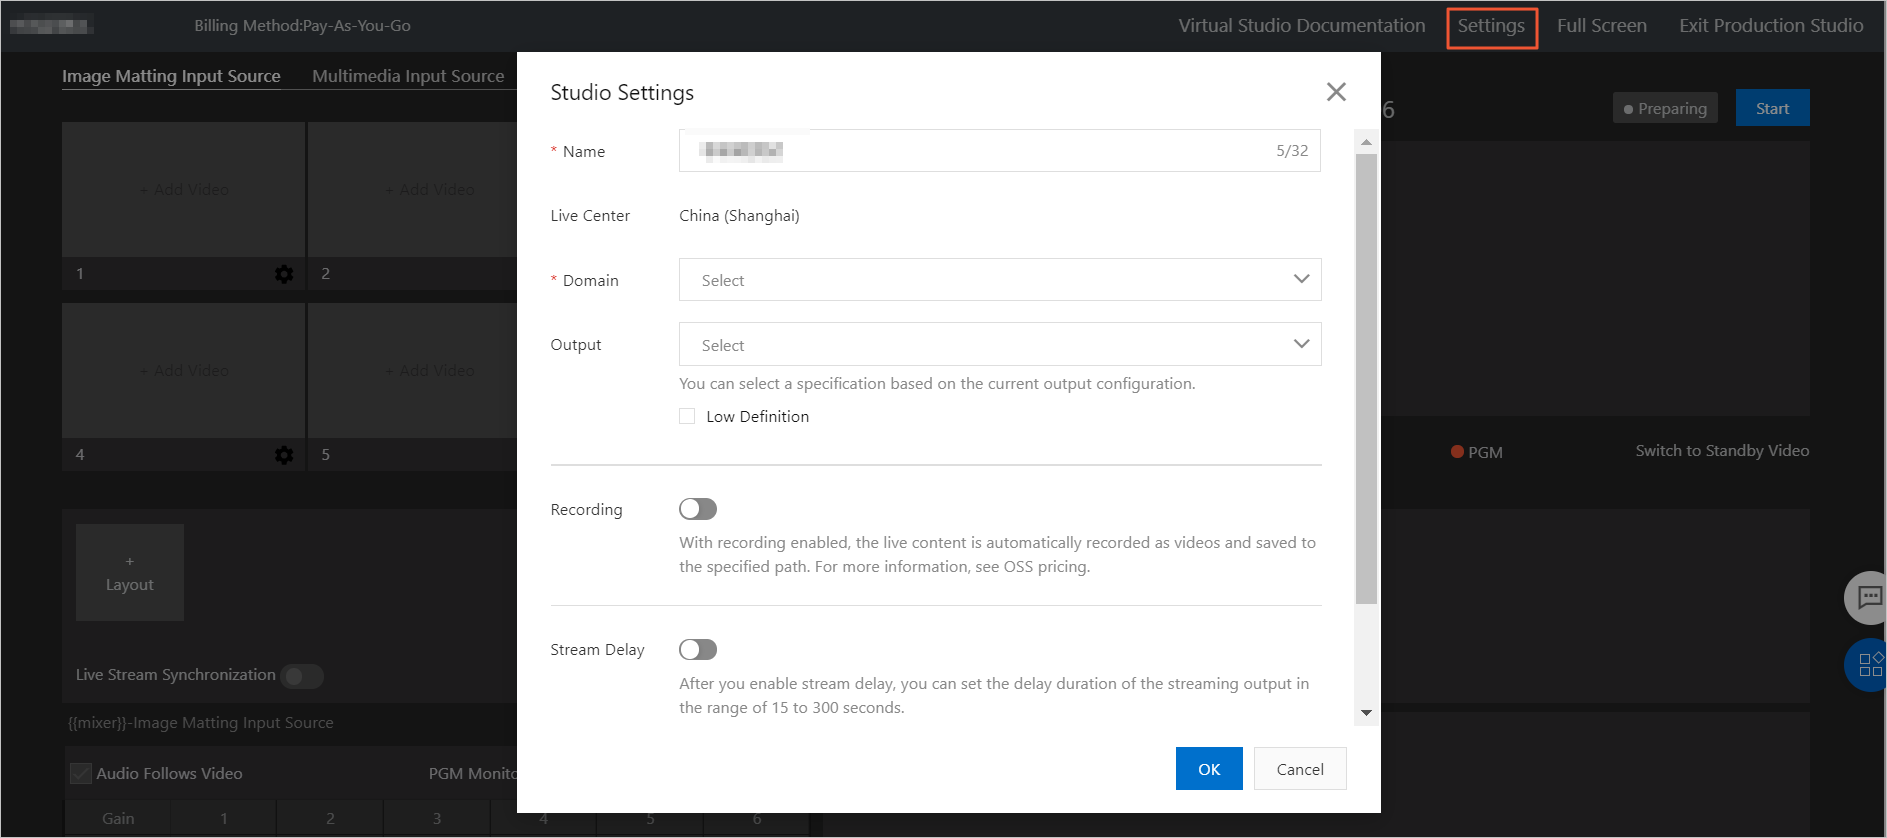 Note
NoteEach account can create a maximum of 50 Cloud Director instances concurrently. To increase this quota for Cloud Director instances, you can submit a ticket. For more information, see Contact Us.
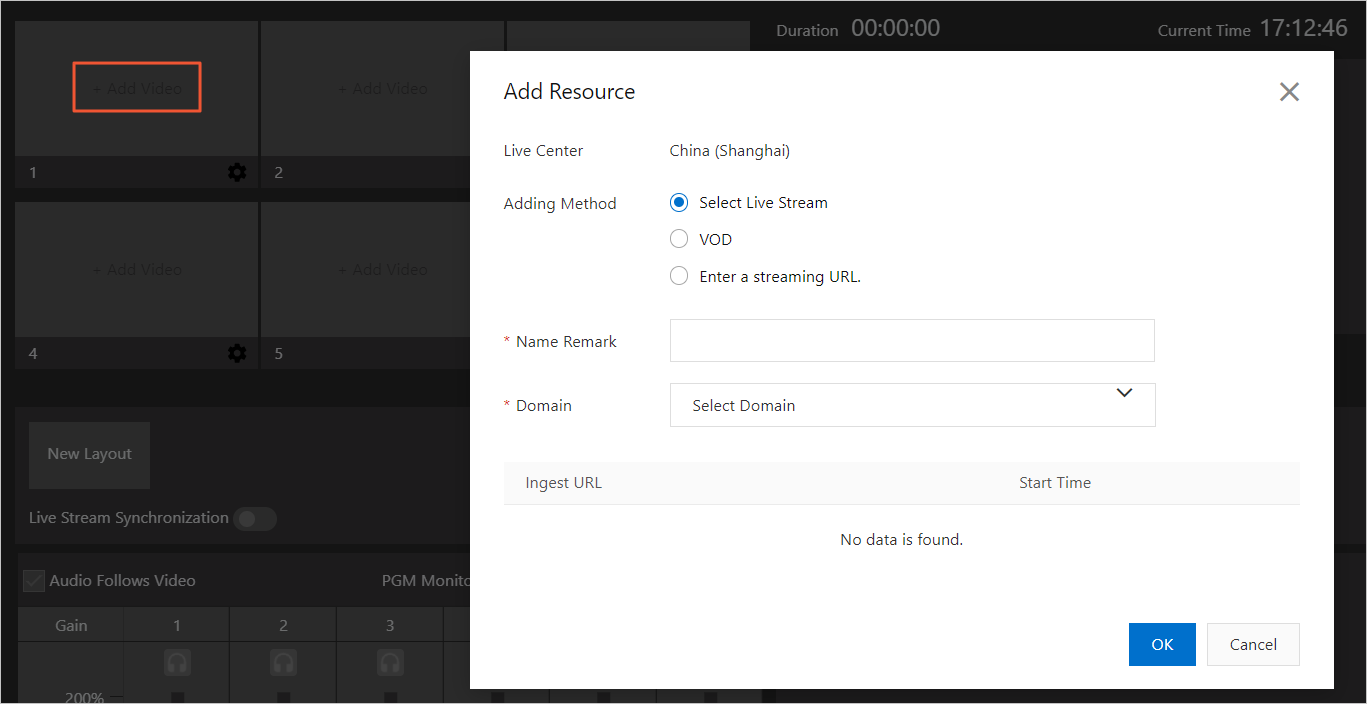
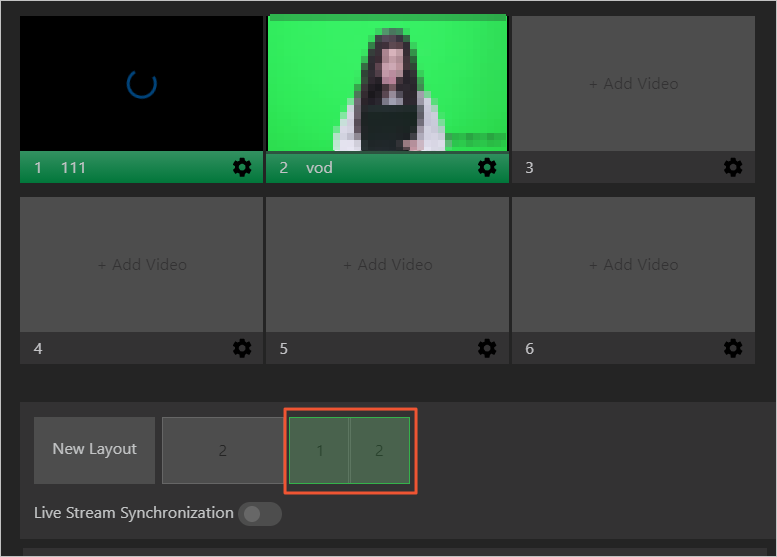
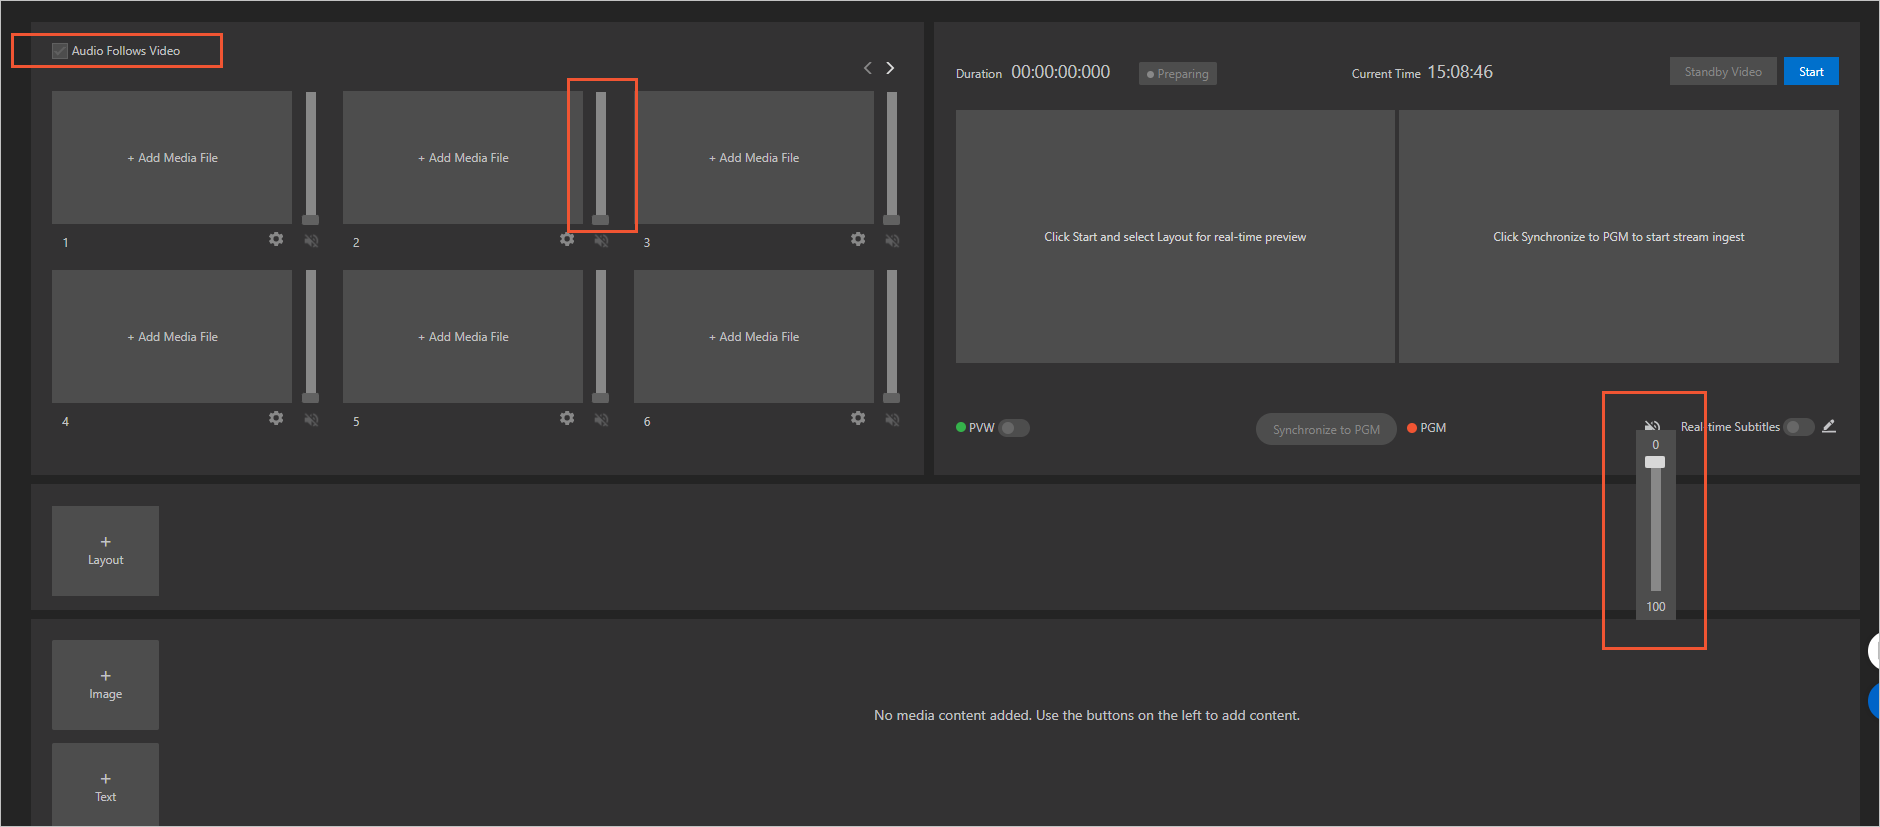
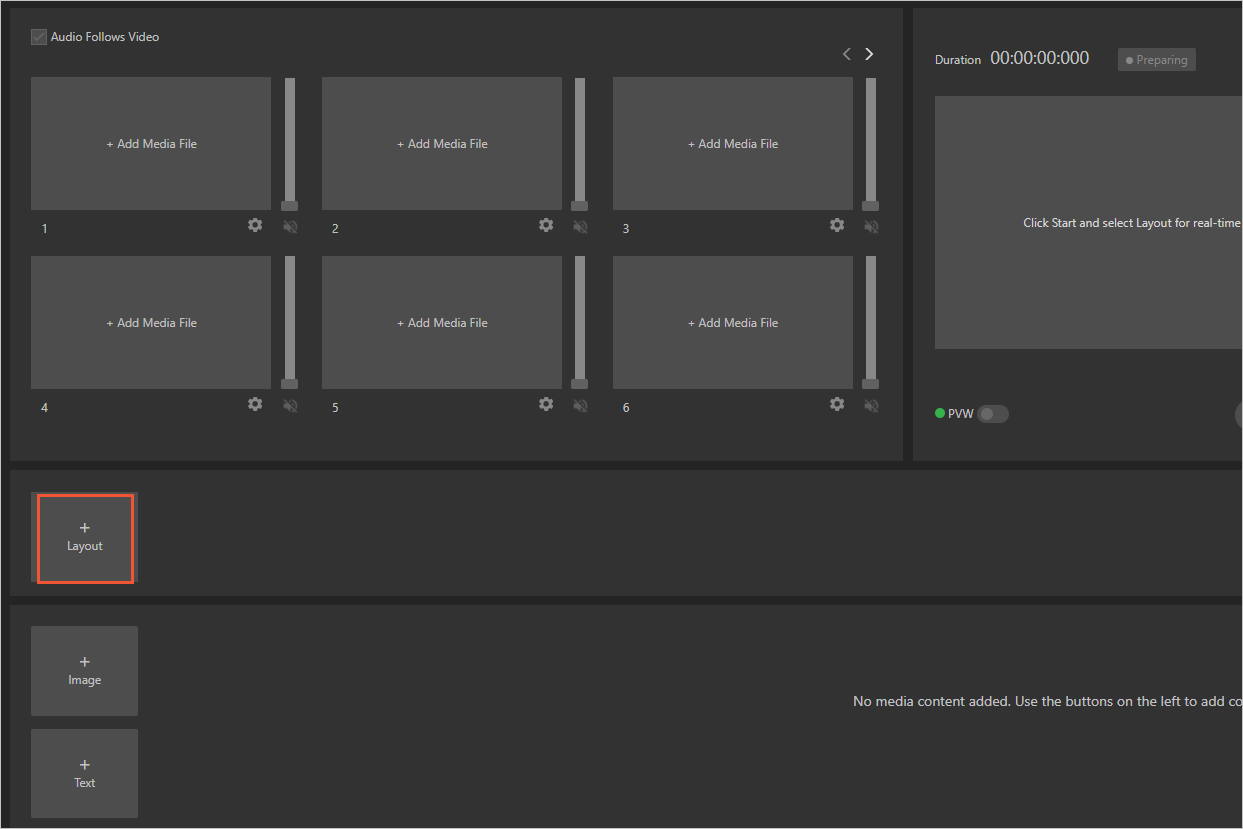
Add video sources.
Click + Add Media File to open the Add Resource panel. Add live or video-on-demand (VOD) videos as your video sources. For more information, see Add video sources.
Set the output layout.
Click Add Layout and select a layout type for the output screen. For more information, see Custom layouts.
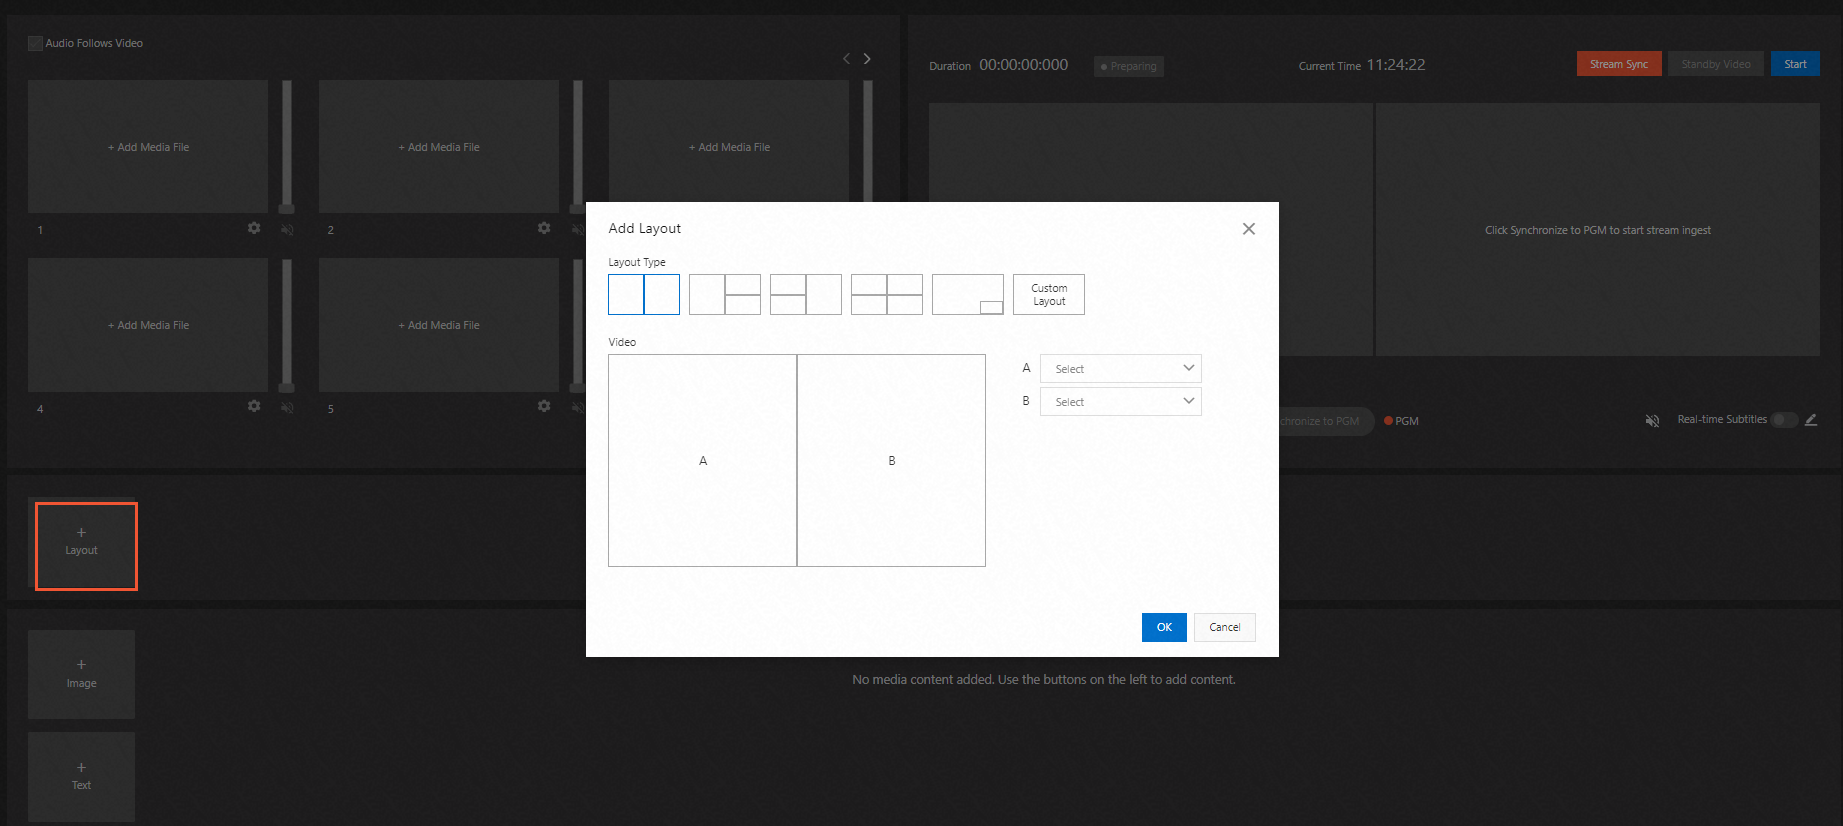
After you add a layout, click the layout that you want to use. The selected layout is highlighted in green.
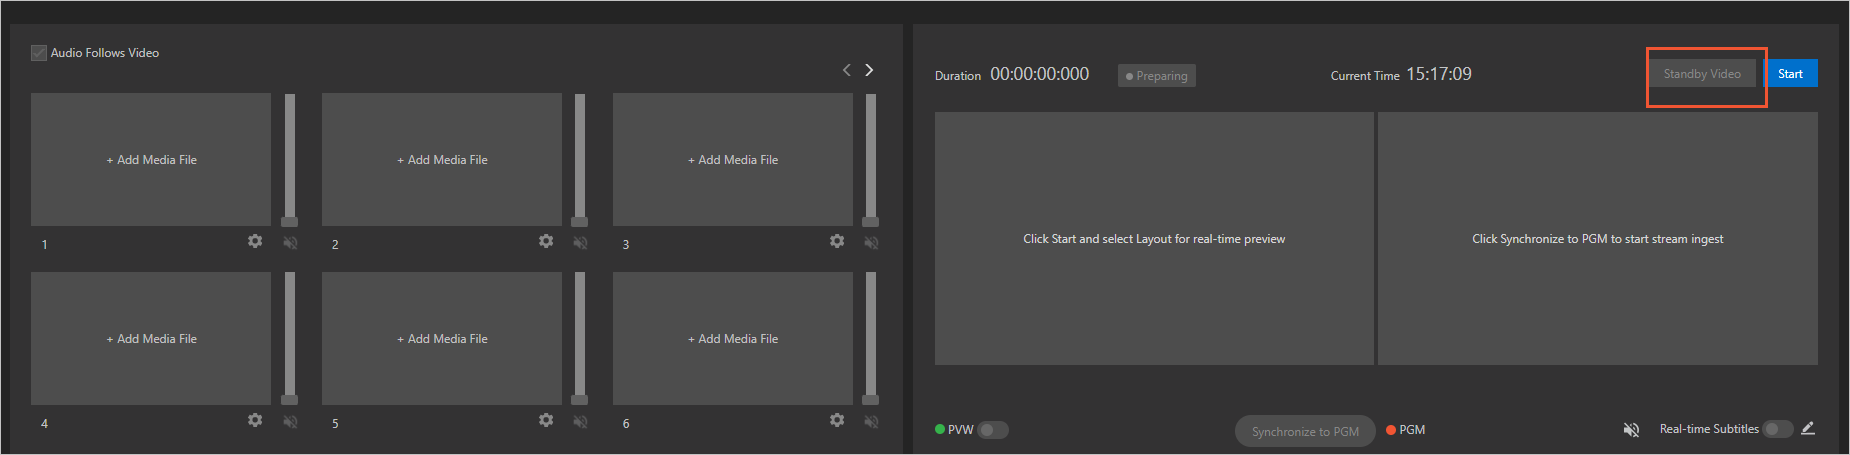
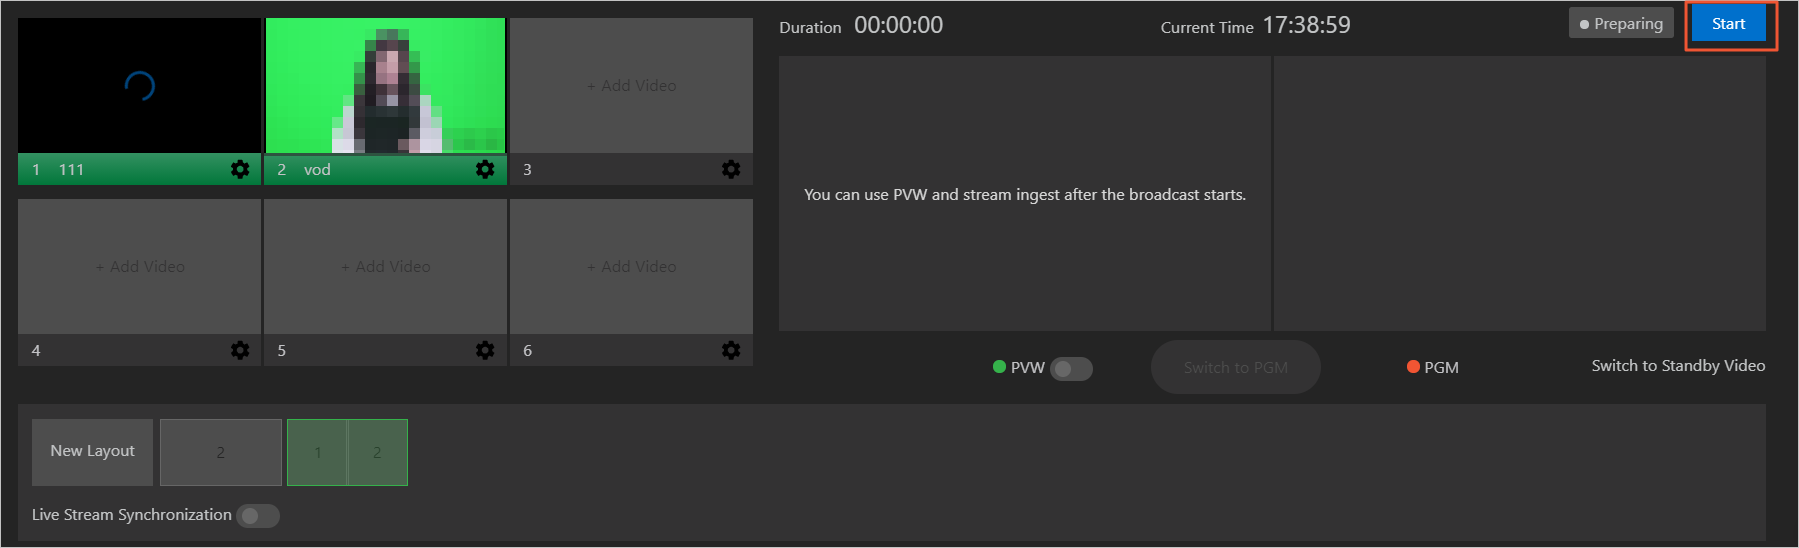
Start production.
Click Start. The mixed stream of the video sources is displayed in the Preview (PVW) area.
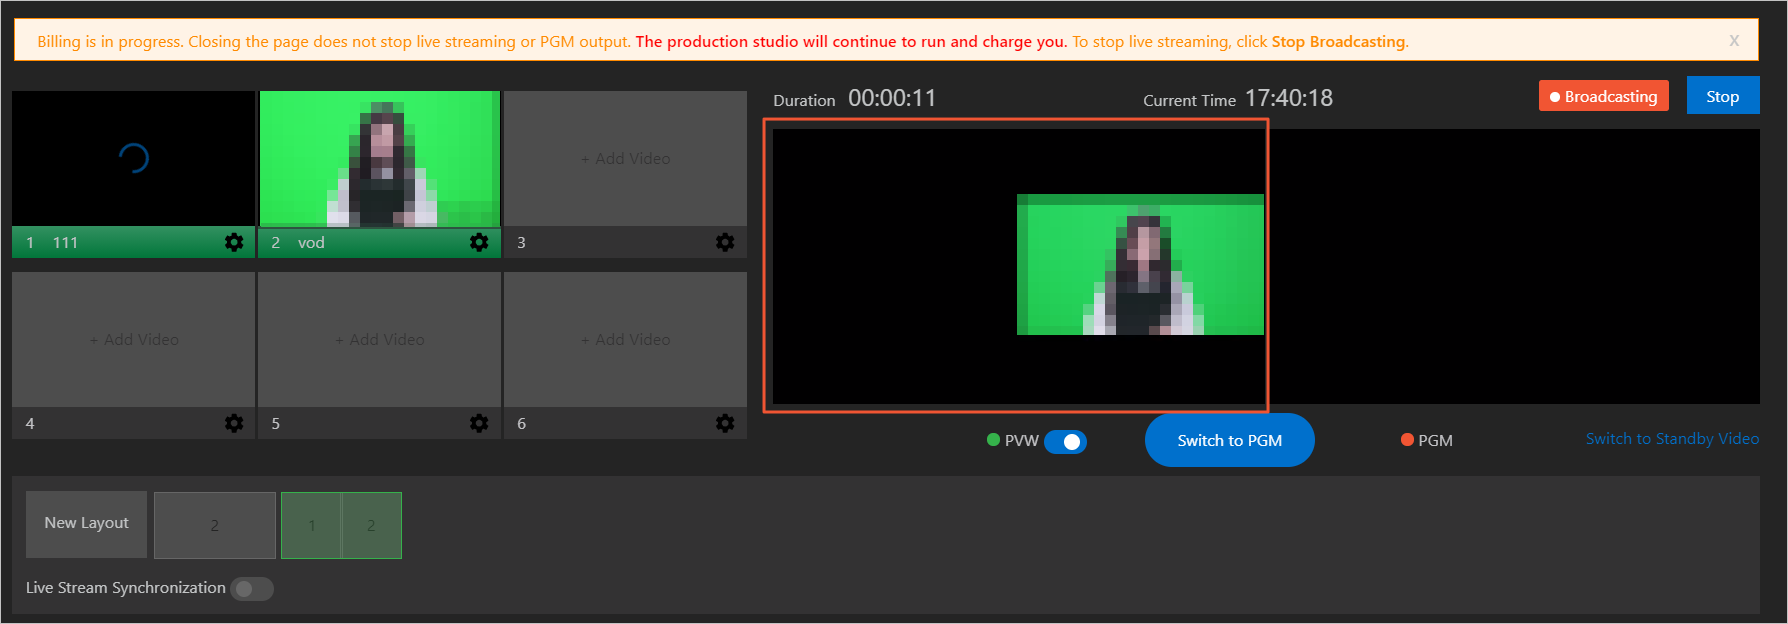
ImportantBilling starts after you click Start Live Streaming in the upper-right corner. Closing the web page does not stop the live stream or the Program (PGM) output. The production studio continues to run and incur charges. To stop the service, you must click Stop.
 Note
NoteThe Preview (PVW) window is for operators to test the output. This stream is not visible to viewers. After previewing, click Synchronize to PGM to make the stream live for your audience.
Sync to PGM.
Click Synchronize to PGM to send the final live stream to your end users.
During the live stream, use the features in the following table to edit and adjust the content and effects in real time.
Feature
Reference Diagram
Adjust the program volume. For instructions, see Audio mixer.
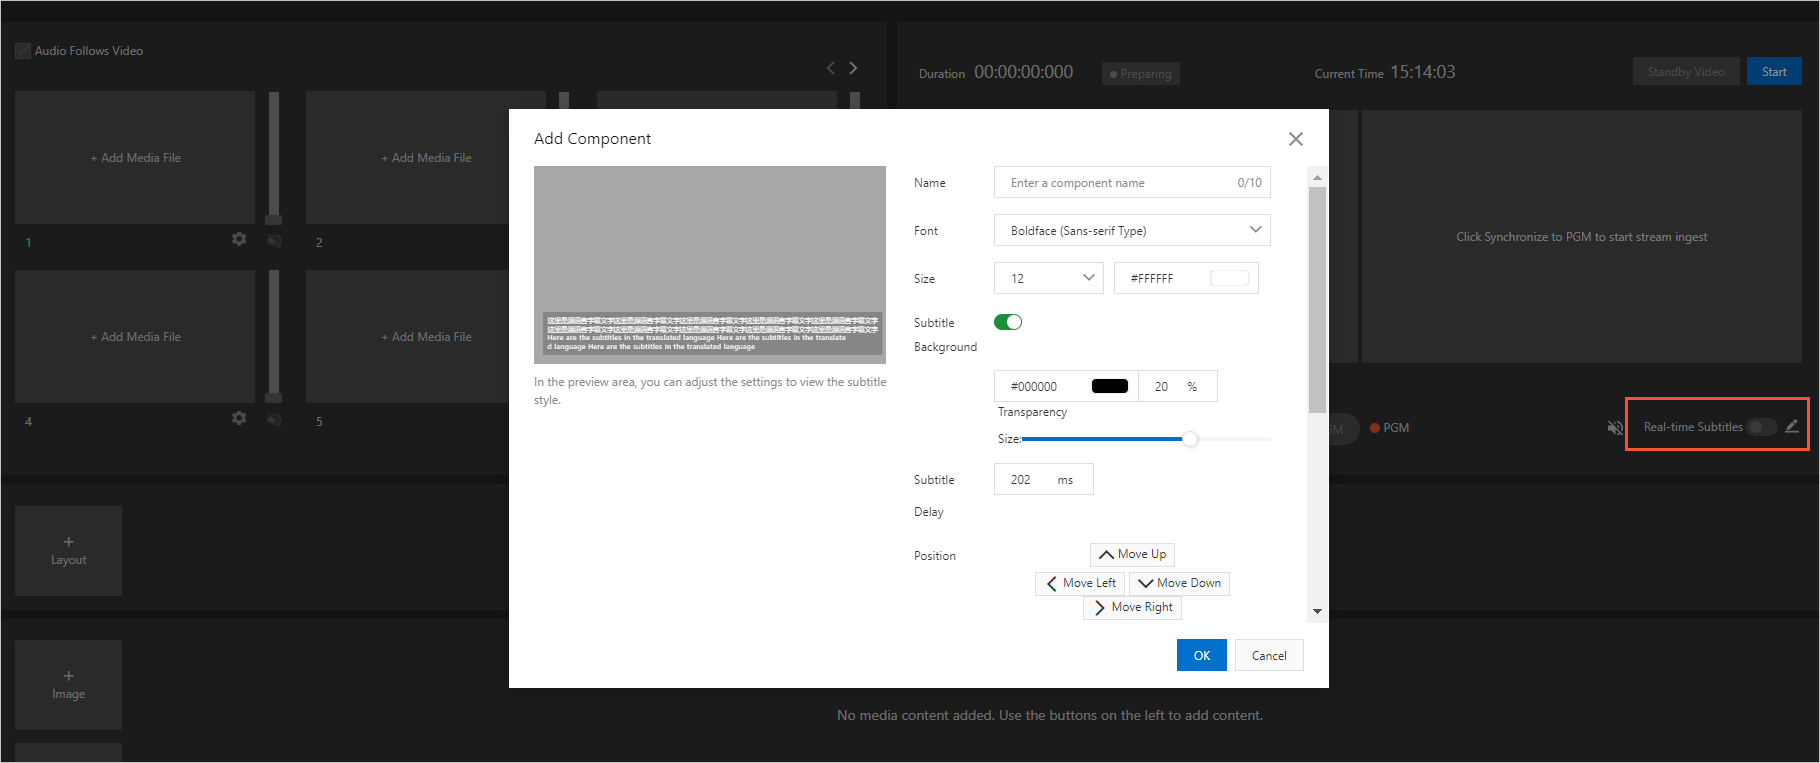
Set caption styles and enable bilingual translation. For instructions, see Use components.
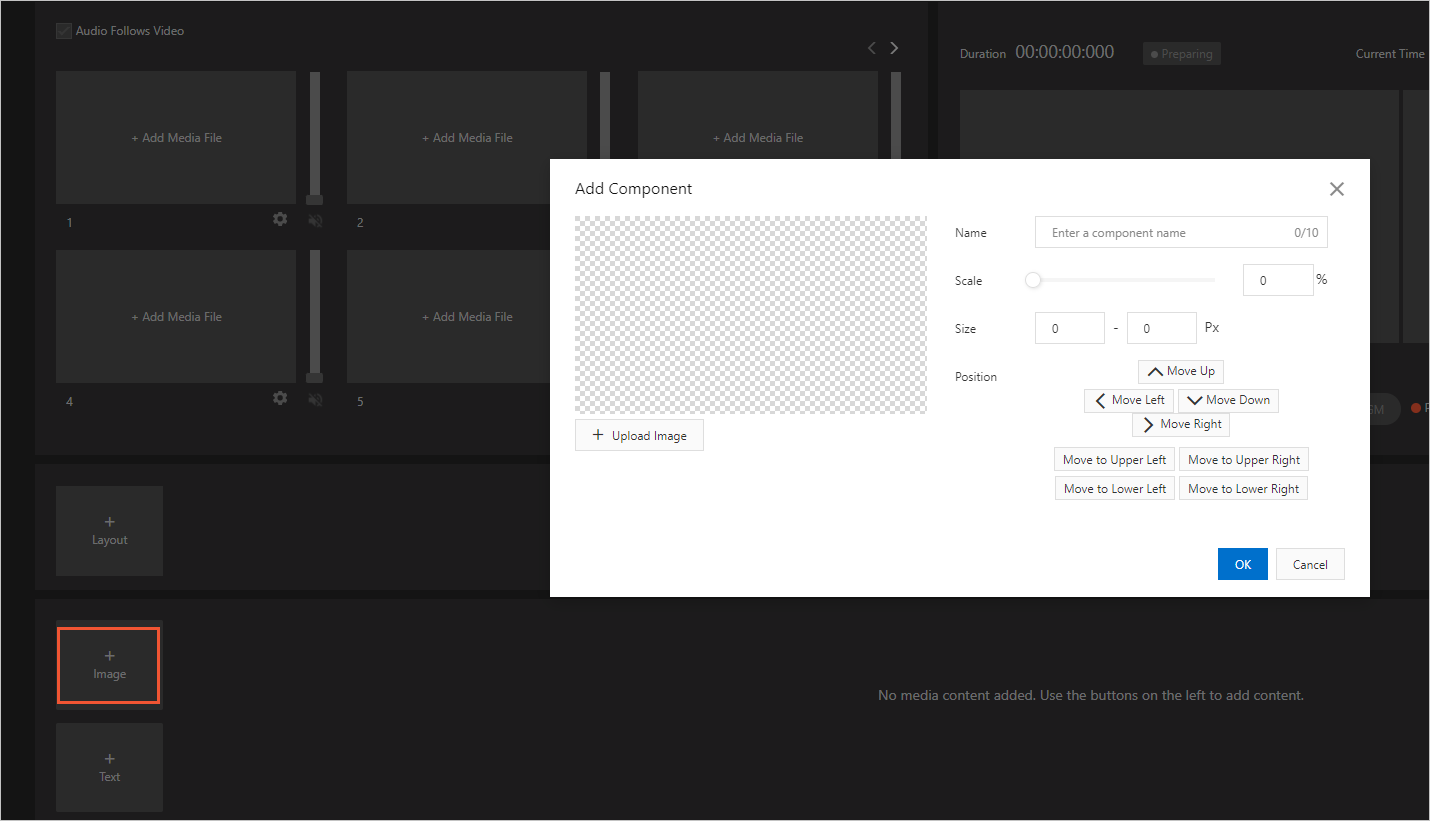
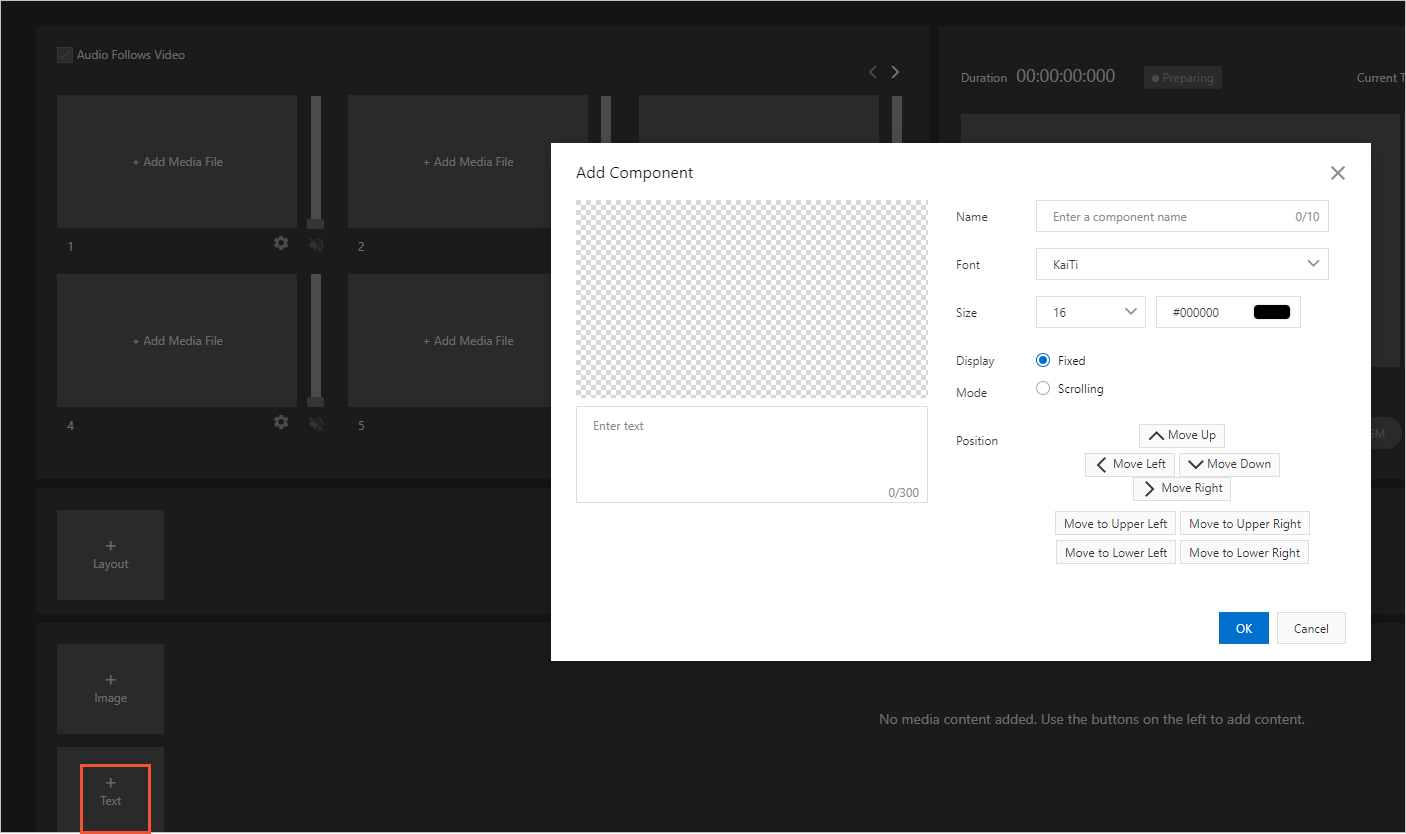
Insert effects such as watermarks, logos, banners, and real-time captions into the live stream. For instructions, see Set graphic components.
Change the video stream layout. You can create up to 20 layouts. For instructions, see Switch layouts.
If an issue occurs with the live stream, switch to the standby video in real time to ensure a smooth broadcast. For instructions, see Switch to standby video.