This topic describes how to integrate API Gateway with a continuous integration and continuous delivery (CI/CD) process based on Swagger. You can implement automatic API creation and updates by using the ImportSwagger operation provided by API Gateway.
1. Overview
API Gateway provides a complete set of OpenAPI operations for you to manage APIs that are hosted in API Gateway. In essence, the integration between API Gateway and a CI/CD process is to encapsulate and integrate the management operations provided by API Gateway.
The following process shows a general CI/CD process integrated with API Gateway:
Step 1: Obtain the Swagger specification from your API business code.
Step 2: Create an API group.
Step 3: Import the API definitions in the Swagger specification by using OpenAPI Explorer and publish the APIs to different environments.
Step 4: Complete additional configurations for the APIs.
Obtain the Swagger specification
You can integrate an API doc framework into your backend service during business development. SpringFox is used as an example in this topic. The API doc framework is easy to access because it is non-intrusive to the original code. When the API doc framework starts with the backend services, a Swagger acquisition URL is generated. API Gateway accesses the URL to automatically obtain the Swagger specification.
Create an API group
You can manually create an API group in the API Gateway console or by calling the CreateApiGroup operation. After you create an API group, you can bind an independent domain name and a certificate to the API group.
Import and publish APIs by using OpenAPI Explorer
You can call the ImportSwagger operation of API Gateway and specify the required parameters based on the obtained Swagger specification to create APIs. After you create APIs in the API Gateway console, you can publish the APIs to different environments based on your business requirements. After the APIs are published, you can access the related services.
Perform additional configurations
API Gateway provides a variety of plug-ins to satisfy your API management requirements. The plug-ins include the throttling plug-in, IP address-based access control plug-in, CORS plug-in, and JWT plug-in. You can configure the plug-ins based on your business requirements to enhance the authentication and control capabilities of the related APIs.
2. Example
This section describes the sample code in a basic CI/CD scenario. You can modify the code based on your business requirements.
2.1 Sample code
2.2 References and technologies
This example involves the following references and technologies.
2.2.1 API Gateway
Import Swagger files to create APIs with API Gateway extensions: This topic describes how to configure a Swagger file that can be imported into API Gateway. API Gateway provides Swagger extensions to allow you to import both standard and custom Swagger files.
ImportSwagger: This topic describes how to call the ImportSwagger operation. This operation involves the following parameters:
groupId: the ID of the API group to which the APIs you want to import belong. The APIs are imported by using Swagger.
data: the Swagger file.
globalCondition: the custom configurations that you add based on your business requirements. For example, you can add custom backend service configurations by using the x-apigateway-backend-info label.
2.2.2 SpringFox
This topic provides a backend service that uses the SpringFox library to demonstrate how to synchronize APIs from a backend service to API Gateway by using Swagger. SpringFox is an open-source API doc framework. It can conveniently form a Swagger specification by adding annotations to a Controller operation of the backend service. This framework also generates a URL for API Gateway to obtain the Swagger specification when the backend service is started.
2.3 Automatic generation of a Swagger specification
A minimal web service based on Spring Boot is created on the server. This service shows how to generate Swagger based on existing services.
2.3.1 Dependent libraries
<dependency>
    <groupId>io.springfox</groupId>
    <artifactId>springfox-swagger2</artifactId>
    <version>2.9.2</version>
</dependency>
2.3.2 SpringFox configurations
SpringFox is a framework that is ideal for your original services. To access this framework, you need only to add a configuration class of SpringFox. You do not need to modify the existing interfaces or model classes. After the service is started, this framework automatically parses the annotations in the Spring Boot web framework to generate service information required by Swagger. At the same time, this framework parses the classes referenced by the service to generate the model information required by Swagger.
Configuration items of SpringFox
The following sample code shows the core settings of SpringFox:
Document format: Swagger2
Name of the package used to generate the API documentation
@Configuration
@EnableSwagger2
public class SpringFoxConfig {
    @Bean
    public Docket api() {
        return new Docket(DocumentationType.SWAGGER_2)
                .select()
                .apis(RequestHandlerSelectors.basePackage("com.example.swagger.controller"))
                .paths(PathSelectors.any())
                .build();
    }
}
Obtain the Swagger specification
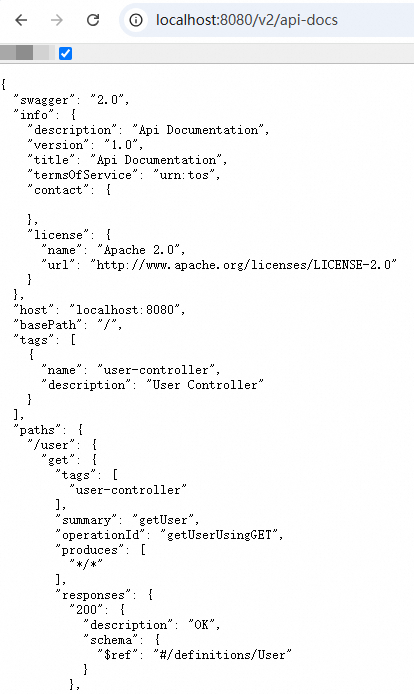
The URL from which the Swagger specification can be obtained is required if you want to integrate a CI/CD process with API Gateway. After a service is started, you can obtain the Swagger specification from the /v2/api-docs URL.
2.4 Create an API group
You can use one of the following methods to create an API group.
2.4.1 Create an API group in the API Gateway console
Log on to the API Gateway console and create an API group on the API Groups page. After you create an API group, you can go to the group details page to view the ID and other related information of this group.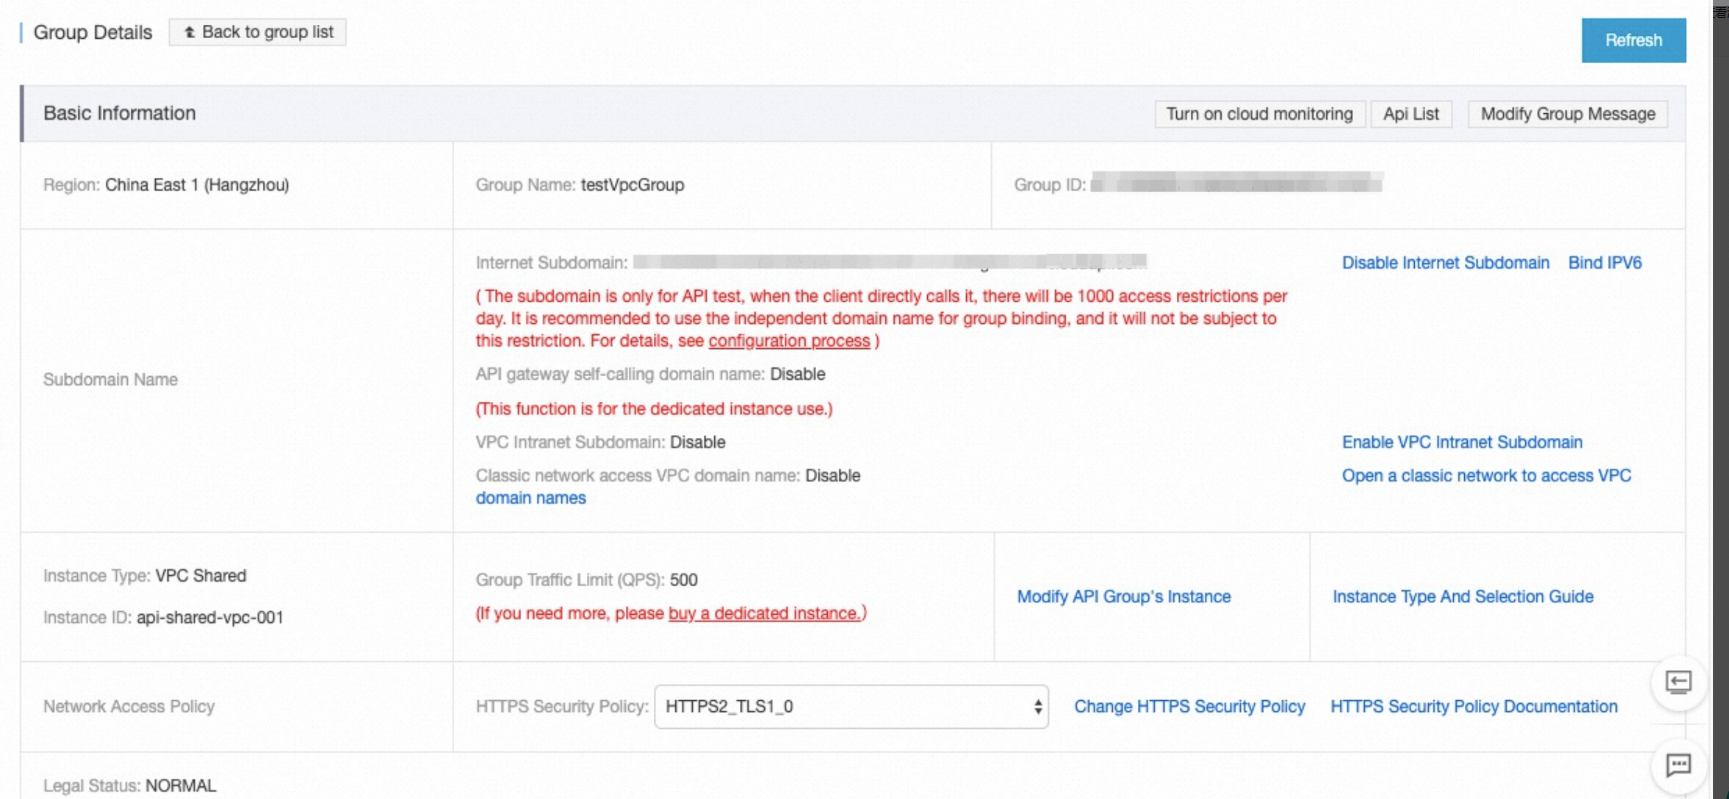
2.4.2 Create an API group by calling an API operation
Call the CreateApiGroup operation provided by API Gateway to create an API group. In addition, you can bind an independent domain name and certificate to the group by calling the corresponding operation.
2.5 2.5 Use of the ImportSwagger operation
To integrate API Gateway and a CI/CD process, take note of the following key points:
Whether a URL is available for API Gateway to obtain Swagger specification
How to import standard Swagger files to API Gateway
As described in section 2.2.2, a Swagger file that contains information about all backend service operations and models is obtained. This section focuses on how to import standard Swagger files to API Gateway.
2.5.1 Swagger extensions based on API Gateway
API Gateway allows you to import native Swagger files. This facilitates the implementation of the features provided by API Gateway. This way, API Gateway automatically creates Swagger-based APIs and the backend service runs in mock mode by default.
However, in most cases, the APIs created in the API Gateway console are required to access the backend service in CI/CD scenarios. Therefore, you must configure the backend service. Native Swagger does not contain the configuration information. To resolve this issue, API Gateway provides Swagger extensions.
Swagger extensions include the information that API Gateway requires or the special configurations, such as backend service configurations, backend parameter configurations, and authentication methods. These extensions can be configured for all APIs at the same time or for each API individually. The use of native Swagger and Swagger extensions ensures that the API configurations meet the requirements of your production environment.
The x-apigateway-backend-info extension is used in this example. In this example, the backend service is HTTP. Assume that the domain name is www.aliyun.com. You can also configure the backend service address by using #environment variables.
For more information about how to configure an HTTP backend, see Import Swagger files to create APIs with API Gateway extensions. The type and address parameters are required. The default timeout period is 10,000 ms.
x-aliyun-apigateway-backend:
  type: HTTP
  address: 'http://www.aliyun.com'
  path: '/builtin/echo'
  method: get
  timeout: 10000
2.5.2 Import the native Swagger file by calling the ImportSwagger operation
The ImportSwagger operation is used to import native Swagger files to API Gateway. This operation has the following core parameters:
groupId: the ID of the API group to which the APIs you want to import belong.
data: the native Swagger file.
globalCondition: custom configurations, such as the general backend service address.
Maven dependencies
        <dependency>
            <groupId>com.aliyun</groupId>
            <artifactId>aliyun-java-sdk-core</artifactId>
            <version>4.5.0</version>
        </dependency>
        <dependency>
            <groupId>com.aliyun</groupId>
            <artifactId>aliyun-java-sdk-cloudapi</artifactId>
            <version>4.9.3</version>
        </dependency>
Obtain the native Swagger file
After you apply the SpringFox framework and complete the related configurations, the /v2/api-docs URL is automatically generated when the service is started. API Gateway can obtain Swagger information that describes the backend service from the URL.
    private String getSwaggerData(){
        HttpURLConnection connection = null;
        ...
        ...
        String result = null;
        try {
            URL url = new URL(swaggerApiDocUrl);
            connection = (HttpURLConnection) url.openConnection();
            connection.setRequestMethod("GET");
            connection.connect();
                                                ...
            ...
        } catch (Exception e) {
            e.printStackTrace();
        } finally {
                                                ...
            ...
            connection.disconnect();
        }
        return result;
    }
Configure Swagger extensions based on API Gateway
Proper configuration of Swagger extensions is a key step for creating APIs by importing Swagger data. You can pass Swagger extensions in the globalCondition parameter of the ImportSwagger operation. The parameter value is of the Json String type.
key: the name of a Swagger extension, for example, x-apigateway-backend-in.
value: the value of a Swagger extension.
The following sample code demonstrates how to configure the general backend service address of APIs that are imported to API Gateway to enable the APIs to access their respective backend services.
An HTTP backend service is used in this example. The SwaggerBackendInfoBase class is created to configure the backend service information based on the description of the HTTP backend service.
public class SwaggerBackendInfoBase {
    private String type;
    private String address;
    public String getType() {
        return type;
    }
    public void setType(String type) {
        this.type = type;
    }
    public String getAddress() {
        return address;
    }
    public void setAddress(String address) {
        this.address = address;
    }
}
Set the globalCondition parameter based on the backend service information.
            // Configure the backend information required by API Gateway.
            SwaggerBackendInfoBase info = new SwaggerBackendInfoBase();
            info.setType("HTTP");
            info.setAddress("http://www.aliyun.com");
            // Add the custom backend service information by using the x-apigateway-backend-info extension.
            Map<String, String> globalCondition  = new HashMap<>();
            globalCondition.put("x-aliyun-apigateway-backend", JSON.toJSONString(info));
ImportSwagger
The operations, such as creating an API group, obtaining native Swagger, and adding the GlobalCondition parameter, have been completed. You can call the ImportSwagger operation provided by API Gateway to import API definitions and view the import results in the API Gateway console.

2.6 Publish APIs
You can go to the API List page for a specific API group, select the APIs that you want to publish, and click Deploy. Then, the APIs take effect.
3. Summary
This topic describes how to synchronize the APIs of your backend service to API Gateway. API Gateway allows you to focus on the development of backend services. It provides general features such as authentication and throttling. The ImportSwagger operation provided by API Gateway associates backend services with API Gateway. This significantly simplifies the configuration process for API Gateway. This operation also makes it possible to integrate the configurations and management of API Gateway into a CI/CD process.