Node auto scaling adds or removes nodes when pod scheduling fails due to insufficient cluster resources. It suits clusters with moderate, predictable scaling needs: fewer than 20 node pools with auto scaling enabled, or fewer than 100 nodes per node pool.
During scale-in, subscription instances are removed but not released, which may incur additional costs. Use pay-as-you-go instances for node pools with auto scaling enabled.
Prerequisites
Before you begin, ensure that you have:
Activated the Auto Scaling service
Read Node scaling to understand how node auto scaling works, its use cases, and usage notes
Reviewed Usage notes to understand node scaling quotas and limitations
If your workloads use scheduling policies with known limitations, choose one of the following options before proceeding:
Option 1: Switch to node instant scaling.
Option 2: Deploy affected workloads in node pools with auto scaling disabled. For example, to deploy ack-node-local-dns-admission-controller in a node pool with auto scaling disabled, add the following node affinity rule to its configuration:
nodeAffinity:
  requiredDuringSchedulingIgnoredDuringExecution:
    nodeSelectorTerms:
    - matchExpressions:
      - key: "k8s.aliyun.com"
        operator: "NotIn"
        values: ["true"]
Enable node auto scaling for a cluster
Node pool auto scaling only takes effect after you enable it at the cluster level.
Log in to the ACK console. In the left navigation pane, click Clusters.
On the Clusters page, click the name of the target cluster. In the left navigation pane, choose Nodes > Node Pools.
On the Node Pools page, click Enable next to Node Scaling.

If this is your first time enabling node auto scaling, activate the service and complete role authorization as prompted. Otherwise, skip this step.
ACK managed cluster: Authorize ACK to use the AliyunCSManagedAutoScalerRole to access your cloud resources.
ACK dedicated cluster: Authorize ACK to use the KubernetesWorkerRole and AliyunCSManagedAutoScalerRolePolicy for scaling management.
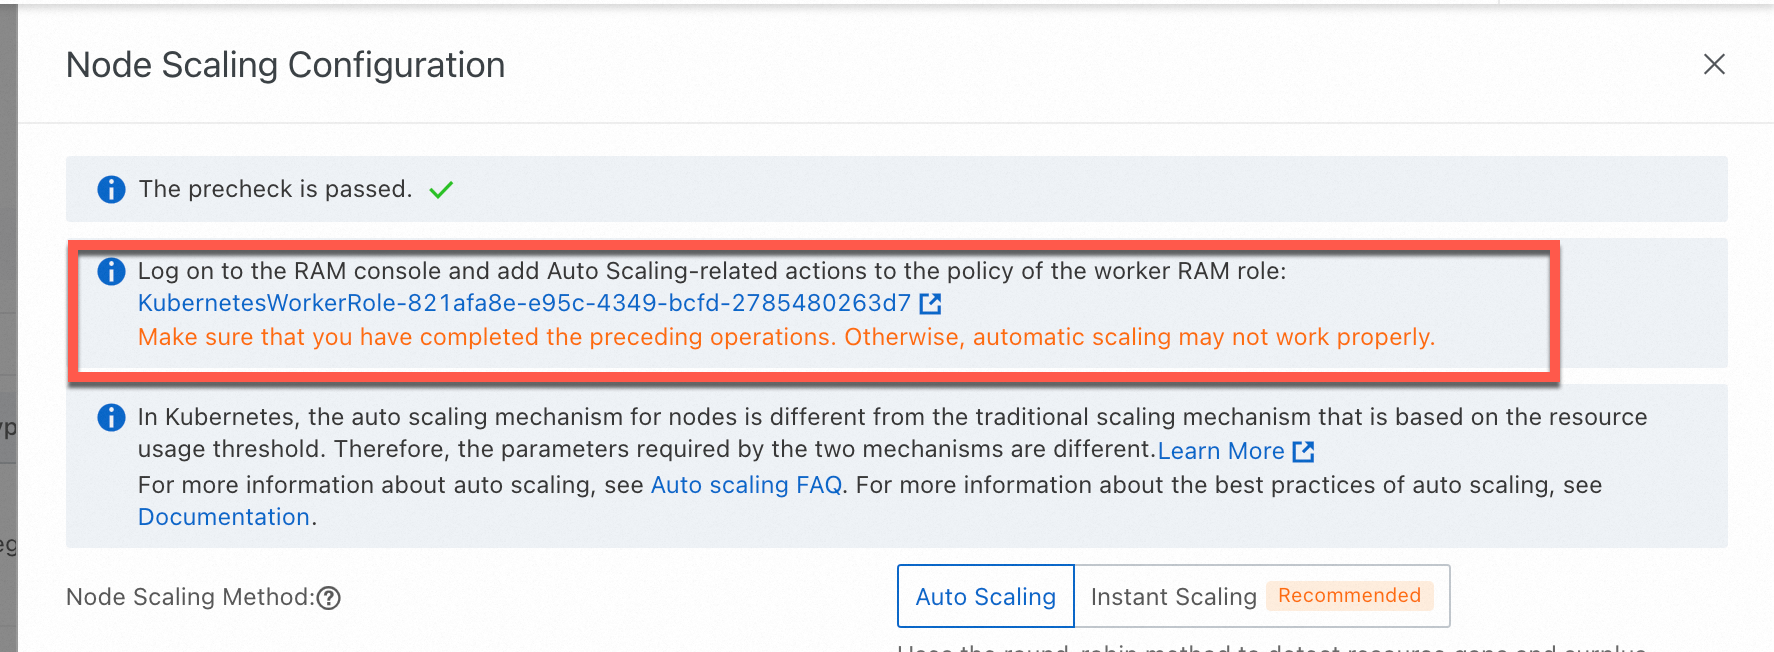
In the Node Scaling Configuration panel, set Node Scaling Method to Auto Scaling, configure the parameters below, then click OK.
To modify Node Scaling Configuration later, switch to Instant Scaling and follow the prompts.
Scale-out settings
Parameter
Description
Default
Node Pool Scale-out Policy
Determines which node pool to scale out when multiple eligible node pools exist. Random Policy: selects a node pool randomly. Default Policy: selects the node pool that wastes the least resources. Priority-based Policy: scales out node pools in priority order, defined by Node Pool Scale-out Priority.
—
Node Pool Scale-out Priority
Scale-out priority for each node pool, expressed as an integer from 1 to 100. A higher number means higher priority. Only applies when Node Pool Scale-out Policy is set to Priority-based Policy. Click + Add, select a node pool with auto scaling enabled, and set a priority value. If no auto-scaling node pools are available yet, skip this parameter and configure it after completing Configure a node pool with auto scaling enabled.
—
Scan Interval
How often the cluster is evaluated for scale-out or scale-in.
60s
Scale-in settings
ImportantScale-in for Elastic Compute Service (ECS) nodes requires the Scale-in Threshold, Defer Scale-in For, and Cooldown conditions to all be met. Scale-in for GPU-accelerated nodes additionally requires the GPU Scale-in Threshold condition.
Parameter
Description
Default
Allow Scale-in
Enables scale-in. When disabled, all scale-in configuration is ignored.
—
Scale-in Threshold
The maximum ratio of a node's resource requests to its capacity at which scale-in is triggered. Scale-in only occurs when both CPU and memory utilization fall below this threshold.
—
GPU Scale-in Threshold
The scale-in threshold for GPU-accelerated nodes. Scale-in only occurs when CPU, memory, and GPU utilization all fall below this threshold.
—
Defer Scale-in For
How long after a scale-in condition is detected before the scale-in is executed. Unit: minutes.
ImportantThe autoscaler performs scale-in activities only when Scale-in Threshold is configured and the Defer Scale-in For condition is met.
10
Cooldown
After a scale-out, the autoscaler waits for this period before performing scale-in. During the cooldown, scale-in conditions are still checked, but no scale-in is executed. After the cooldown ends, nodes that have met the scale-in conditions for the full Defer Scale-in For duration are removed. For example, with Cooldown set to 10 minutes and Defer Scale-in For set to 5 minutes, nodes are removed 5 minutes after the cooldown ends.
—
Advanced scale-in settings
Parameter
Description
Pod Termination Timeout
Maximum time to wait for pods on a node to terminate during scale-in. Unit: seconds.
Minimum Number Of Replicated Pods
Minimum number of pods in a ReplicaSet before scale-in is allowed. Nodes are not scaled in if the ReplicaSet has fewer replicas than this value.
Evict DaemonSet Pods
When enabled, DaemonSet pods are evicted during scale-in.
Skip Nodes Hosting Kube-system Pods
When enabled, nodes running pods in the kube-system namespace are excluded from scale-in. Does not apply to mirror pods or DaemonSet pods.
Configure a node pool with auto scaling enabled
Node auto scaling only applies to node pools with Scaling Mode set to Auto. Either modify an existing node pool or create a new one. For full steps, see Create and manage a node pool.
The following table describes the key parameters to configure:
Parameter | Description |
Scaling Mode | Manual: ACK adjusts node count to match the Expected Nodes value. Auto: ACK automatically scales nodes based on the configured minimum and maximum. For clusters running Kubernetes 1.24 and later, node instant scaling is the default. For earlier versions, node auto scaling is the default. |
Min. Instances / Max. Instances | These values exclude existing instances. If Min. Instances is above zero, the scaling group automatically creates instances when the configuration is applied. Set Max. Instances to be at least the current node count, or a scale-down is triggered immediately when auto scaling takes effect. |
Instance types | Select multiple instance types to improve scale-out success rate. If only one instance type is selected, ECS inventory fluctuations can cause scaling failures. Filter by vCPU, memory, instance family, and architecture. For supported specifications, see ECS specification recommendations for ACK clusters. |
Operating System | Supports Alibaba Cloud Linux, Windows, and Windows Core. Selecting Windows or Windows Core automatically adds the taint |
Node Labels | Labels are automatically applied to nodes added by scale-out. Auto scaling recognizes node labels and taints only after they are mapped to node pool tags. The total number of ECS tags, taints, and node labels must be fewer than 12. |
Scaling Policy | Priority: scales out using vSwitches in descending priority order, falling back to the next vSwitch if the higher-priority zone lacks capacity. Cost Optimization: creates instances in ascending vCPU unit price order, preferring preemptible instances when the billing method is Preemptible Instance. You can also set the Percentage of Pay-as-you-go Instances parameter. Distribution Balancing: distributes instances evenly across zones. Requires multiple vSwitches. |
Use Pay-as-you-go Instances When Preemptible Instances Are Insufficient | Requires billing method set to Preemptible Instance. When enabled, pay-as-you-go instances are created as a fallback if preemptible instances cannot be provisioned. |
Enable Supplemental Preemptible Instances | Requires billing method set to Preemptible Instance. When enabled, the node pool automatically replaces reclaimed preemptible instances. |
Scaling Mode (node pool level) | Standard: scales by creating and releasing ECS instances. Swift: scales by creating, stopping, and starting ECS instances. Stopped instances are charged for disk only, not compute. This rule does not apply to instance families that use local disks, such as big data and local SSD families. For billing details, see Economical mode. |
Taints | Nodes with taints are excluded from pod scheduling. |
(Optional) Verify node auto scaling
After completing the configuration above, verify that auto scaling is active.
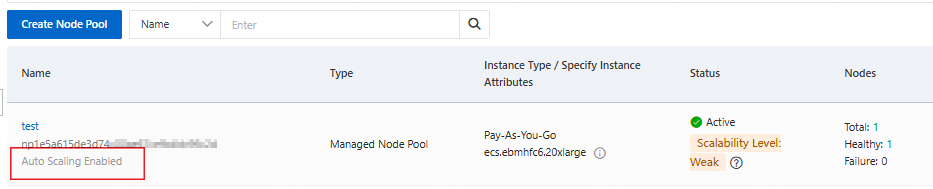
Auto scaling status on the node pool
The Node Pools page shows auto scaling as enabled for the configured node pools.
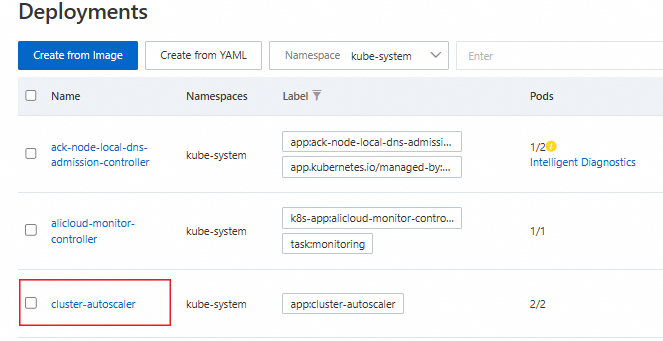
cluster-autoscaler deployment
In the left navigation pane of the cluster details page, choose Workloads > Deployments.
Select the kube-system namespace. The cluster-autoscaler component appears in the list.
FAQ
Category | Subcategory | Link |
Scaling behavior of node auto scaling | ||
| ||
Does the cluster-autoscaler support CustomResourceDefinitions (CRDs)? | ||
Custom scaling behavior | ||
cluster-autoscaler component | ||
What's next
For clusters with more than 100 nodes in an auto-scaling node pool, or more than 20 node pools with auto scaling enabled, switch to node instant scaling for faster provisioning and broader instance type support. See Enable node instant scaling.