By Arslan Ud Din Shafiq, Alibaba Cloud Tech Share Author. Tech Share is Alibaba Cloud’s incentive program to encourage the sharing of technical knowledge and best practices within the cloud community.
GoCD is an open-source continuous delivery and automation system. GoCD helps you to streamline and automate your BTR (build, test and release) cycle for perfect and continuous delivery of the product. With the help of its sequential and parallel execution, it configures the dependencies for on demand deployment and faster feedback. You can model complex workflows easily and visualize a complex workflow in real-time by using its value stream map.
GoCD compares two builds and let you deploy the version of your choice. GoCD does not restrict its installation to any specific operating system (OS). You can use any operating system (OS) of your choice; however, the installation steps would vary according to the choice of operating system.
In this tutorial, I will be installing and configuring GoCD on Alibaba Cloud Elastic Compute Service (ECS) with CentOS 7 installed on it.
sudo curl https://download.gocd.org/gocd.repo -o /etc/yum.repos.d/gocd.repo sudo yum install -y go-server sudo systemctl start go-server sudo systemctl enable go-serversudo mkdir /opt/artifacts
sudo chown -R go:go /opt/artifactsAccess your GoCD dashboard, and you will see the following screen.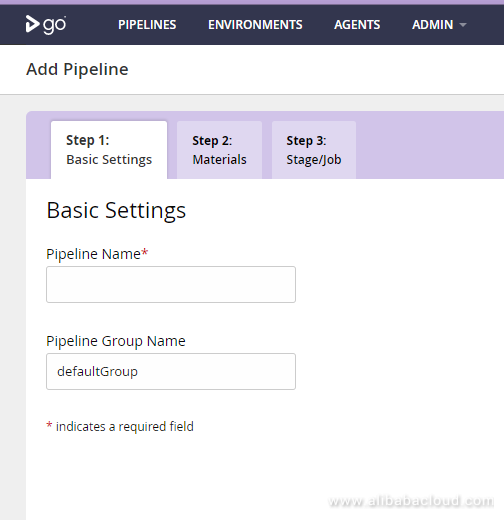
Before adding/creating any pipeline, hover on Admin and click Server Configuration.
Type your URL in Site URL field with port 8153 and Secure Site URL field with port 8154. In my case, I will use http://imarslan.com:8153 and https://imarslan.com:8154. You will need to replace imarslan.com with your domain name. 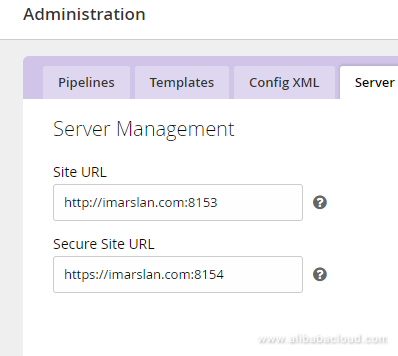
Provide your SMTP details for sending any type of email notifications from your GoCD.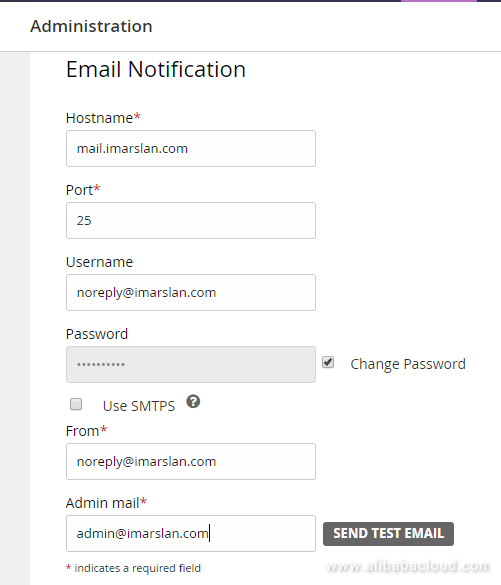
Replace imarslan.com with your chosen domain name.
You will have to do pipeline management. For this, enter /opt/artifacts in Artifacts Directory Location, because you have chosen to store artifacts on the same disk. In case, you have chosen separate disk, the path would be different.
For Auto delete old artifacts, I have set to free up-to 8GB when 3GB free space is available. This is because I’m using the same disk for storing artifacts and I don’t want all the space to be consumed. You can adopt same settings or modify according to your demand. Leave all other options as they are and save your changes.
To apply these changes, you will need to restart your GoCD server. To restart, execute the following command:
sudo systemctl restart go-server sudo yum -y install httpd-tools sudo htpasswd -B -c /etc/go/passwd_auth admin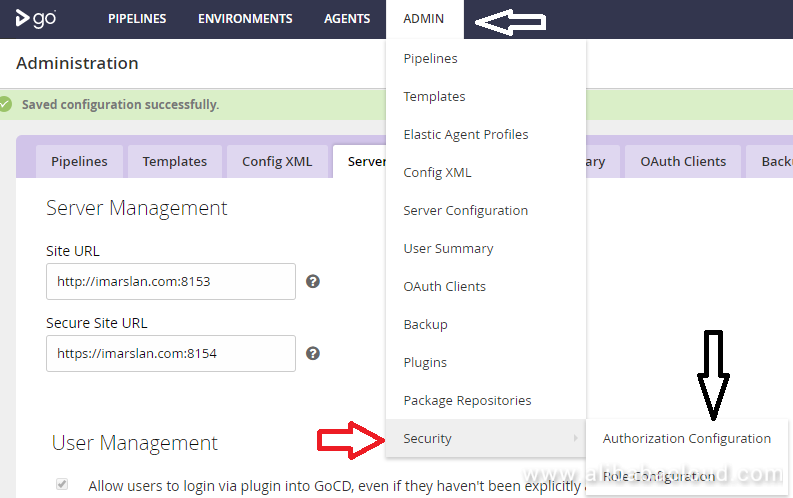

You will have to setup administrator privileges for your admin user, otherwise, every user will have administrator privileges. For this purpose, hover on Admin and click User Summary. You will see the following screen.
Select username and click Roles. Check Go System Administrator and click Apply.
You have successfully modified admin privileges. If you have more than 1 user, you will first need to update your password file that you created then you can write username in Create New field and click Add.
sudo yum -y install nginxUse the following command to enable Nginx server, so that it starts automatically after reboot.
sudo systemctl enable nginx sudo systemctl start nginx
sudo sed -i 's/default_server//g' /etc/nginx/nginx.confYou will need to create a new configuration file for your GoCD. To do so, execute the following command:
sudo nano /etc/nginx/conf.d/gocd.confCopy and paste the following data in opened file, then use Ctrl+X, then type Y and hit enter.
server 127.0.0.1:8153;
}

server {
    listen 80 default_server;
    server_name gocd.example.com;
    return 301 https://$host$request_uri;
}

server {
    listen 443 default_server;
    server_name gocd.example.com;

    ssl_certificate           /etc/letsencrypt/live/imarslan.com/fullchain.pem;
    ssl_certificate_       /etc/letsencrypt/live/imarslan.com/priv.pem;

    ssl on;
    ssl_session_cache  builtin:1000  shared:SSL:10m;
    ssl_protocols  TLSv1 TLSv1.1 TLSv1.2;
    ssl_ciphers HIGH:!aNULL:!eNULL:!EXPORT:!CAMELLIA:!DES:!MD5:!PSK:!RC4;
    ssl_prefer_server_ciphers on;

    access_log  /var/log/nginx/gocd.access.log;

location / {
        proxy_pass http://gocd;
        proxy_set_header X-Real-IP $remote_addr;
        proxy_set_header X-Forwarded-For $proxy_add_x_forwarded_for;
        proxy_set_header Host $http_host;
        proxy_set_header X-NginX-Proxy true;
        proxy_redirect off;
    }
location /go {
    proxy_pass http://gocd/go;
    proxy_http_version 1.1;
    proxy_set_header Upgrade websocket;
    proxy_set_header Connection upgrade;
    proxy_read_timeout 86400;
    }
  }
You will get clone of Let’s Encrypt from official GitHub repository that will be installed in /opt/letsencrypt. To clone, type the following command and hit enter.
sudo git clone https://github.com/letsencrypt/letsencrypt /opt/letsencryptNow navigate to /opt/letsencrypt by executing the command:
cd /opt/letsencryptCreate your SSL certificate. Let’s Encrypt performs challenges for Domain Validation on the basis of which Certificate Authority (CA) will authenticate your domain. Upon validation, you will be issued a SSL certificate by CA. To create SSL certificate for your domain using Let’s Encrypt, use the following command:
sudo -H ./letsencrypt-auto certonly --standalone -d imarslan.com -d www.imarslan.com sudo nginx -tRestart Nginx server to load your settings.
sudo systemctl restart nginx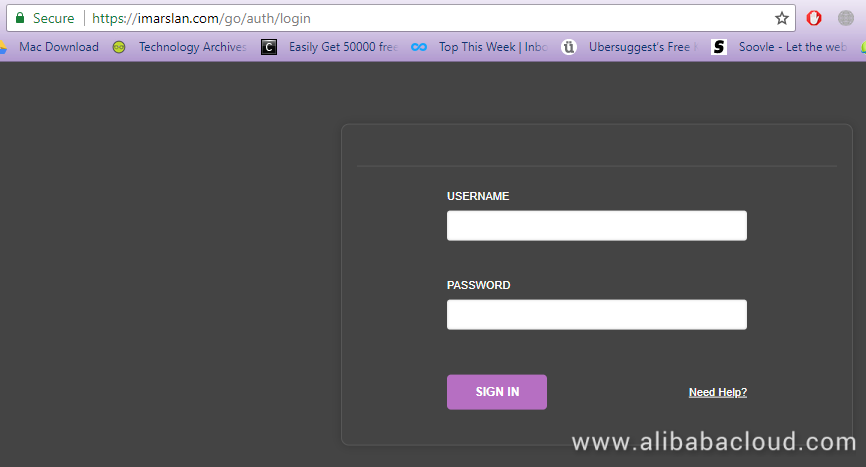
sudo yum install -y go-agentsudo systemctl start go-agent
sudo systemctl enable go-agentCongratulations! Your GoCD server is ready to use.
Beating Counterfeits with Alibaba Cloud Optical Character Recognition (OCR)

2,593 posts | 791 followers
FollowAlibaba Clouder - February 13, 2018
Alibaba Clouder - April 12, 2019
Alibaba Clouder - June 8, 2018
Alibaba Clouder - April 12, 2019
GhulamQadir - January 1, 2020
Alibaba Clouder - August 5, 2019

2,593 posts | 791 followers
Follow ECS(Elastic Compute Service)
Elastic and secure virtual cloud servers to cater all your cloud hosting needs.
Learn More OSS(Object Storage Service)
An encrypted and secure cloud storage service which stores, processes and accesses massive amounts of data from anywhere in the world
Learn MoreLearn More
More Posts by Alibaba Clouder