By Arslan Ud Din Shafiq, Alibaba Cloud Tech Share Author. Tech Share is Alibaba Cloud's incentive program to encourage the sharing of technical knowledge and best practices within the cloud community.
Pagekit is a modern open source and free content management system (CMS). It provides a central place "Site Tree" to manage all of your content. You can make your menus, edit or update your pages, and add or remove widgets.
Pagekit provides a dashboard to provide your quick access to your content. It also provides you with a HTML & Markdown editor to provide you full screen experience of code along with highlighting syntax. You can easily insert media, including videos, through file manager.
Pagekit uses Data-reactive components with Vue.js for user interface development. It employs modular architecture and package management using Composer. It also comes with a monitoring system that helps to debug easily.
Pagekit CMS does not restrict its installation to any specific operating system (OS). You can use any operating system (OS) of your choice; however, the installation steps would vary according to the choice of operating system.
In this tutorial, we will host my Pagekit CMS on an Alibaba Cloud Elastic Compute Service (ECS) instance with CentOS 7.4 installed on it.
This tutorial is divided into 2 sub-tutorials.
After completing the prerequisites, login as root user with your root username & password via SSH client (e.g. Putty – You can get Putty from https://www.putty.org ) or VNC console available in your Alibaba Cloud account dashboard.
In the first step, you will add a new user and give it sudo privileges. Sudo privileges will allow this username to make administrative changes on system when required. This user will be used to login from via SSH for everyday use. Once you have added this user, to keep your server secure from various attacks, you will disable the remote root access to root user.
# useradd aareez
where "aareez" can be any username of your choice.
# passwd aareez
# visudo

Sometimes by default the second line %wheel ALL=(ALL) ALL is commented (starting with hash #), due to which even after adding username to sudoers, it gives error on using sudo. To prevent this issue, if this line starts with '#' sign, remove this symbol and save the changes by typing :x and then hit Enter key to save.
# usermod -aG wheel aareez
After execution of the above command, you can verify the membership of for that group by executing the following command:
# groups aareez
Your username has been successfully added to sudoers group and it is able to make any administrative change.
# su – aareez
You can see that you have been logged in from your new account now. If you want to verify this, you can use the command below:
# whoami
Before proceeding with installation of any kind of package, use the following command to update your CentOS system. To execute this command, remember to login from non-root user with sudo privileges.
# sudo yum -y update
You will be prompted to enter your password. Now type your password and hit Enter key and wait for updating.
Now you have successfully updated your CentOS system. Your next step is to install Apache Web Server.
You can edit any file easily using Nano editor due to its ease of use. To install Nano editor, execute the command below:
# sudo yum install nano
To install epel-release, execute the command below:
# sudo yum install epel-release
Note: You can use either Apache or NGINX for your LAMP (LEMP) stack. In this tutorial, I will be using an Apache Web Server to install PageKit CMS.
# sudo yum -y install httpd
# sudo systemctl enable httpd
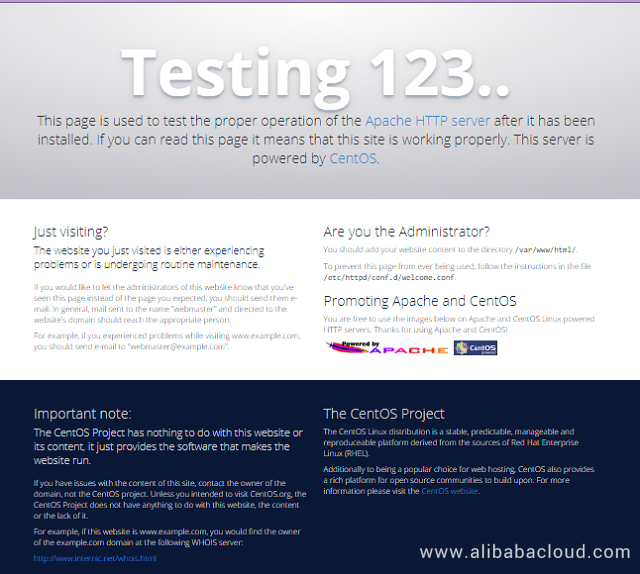
# sudo systemctl start httpd
# sudo nano /etc/httpd/conf/httpd.conf
Note: The configuration for DocumentRoot should look as DocumentRoot /var/www/html
Press Ctrl + X, to exit from editor.
# sudo nano /etc/httpd/conf.modules.d/00-base.confIf mod_rewrite module is already loaded, you will see the following line: LoadModule rewrite_module modules/mod_rewrite.so
Semi-colon is used for commenting a line in any Apache module. If the above lines starts with a semi-colon (;), remove the semi-colon and uncomment the line.
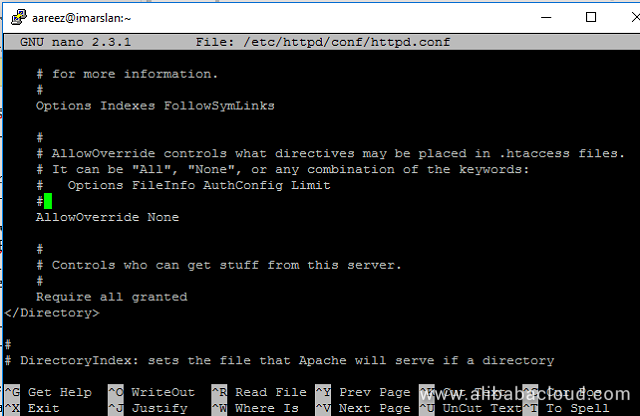
# sudo nano /etc/httpd/conf/httpd.conf
After modification, the section will look like:
<Directory "/var/www/html">
    Options Indexes FollowSymLinks
    AllowOverride All
    Require all granted
</Directory>
# sudo systemctl restart httpd

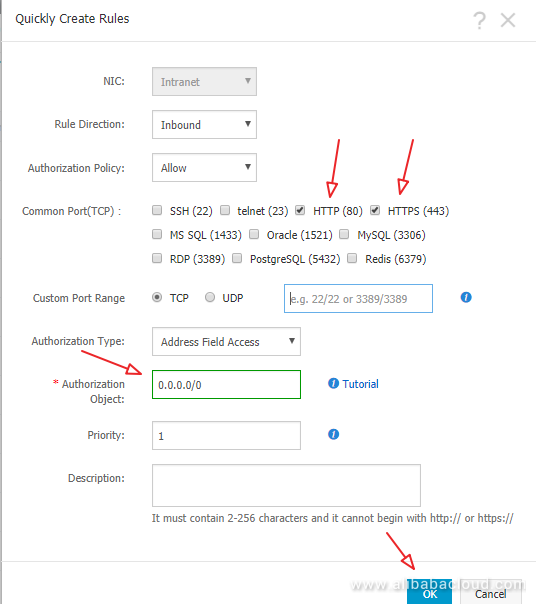
To do this, go to your Elastic Compute Service section. Click on More for the ECS you are using for ImpressPages CMS and click Security Group Configuration.
Click on Configure Rules and then click on Quickly Create Rules.
Add the configurations as shown in screenshot below & click OK.

You will have to disable SELinux to avoid any type of permissions related issues for PageKit CMS. To do so, first of all, check whether SELinux is enabled or disabled. To check use the following command:
# sudo sestatus
It is disabled by default in Alibaba Cloud ECS. However, if you had made any changes previously to your ECS, you may need to follow this step. If status is disabled, skip this step. Otherwise, open the file using following command:
# sudo nano /etc/selinux/config
Change SELINUX=enforcing to SELINUX=disabled
After disabling SELinux, you will have to reboot your ECS.
# sudo rpm -Uvh https://mirror.webtatic.com/yum/el7/webtatic-release.rpm
# sudo yum install -y php71w php71w-cli php71w-fpm php71w-common php71w-mbstring php71w-zip php71w-mysql php71w-sqlite3 php71w-curl php71w-simplexml php71w-xml
# sudo apt-get -y install mariadb-server
You can also use Alibaba Cloud Aspara DB for RDS as an alternative. Alibaba Cloud AsparaDB for RDS frees you from managing a database and you can focus on your business. It also provides protection against SQL injections, network attacks, brute force attacks and many other types of database attacks. It is highly scalable, highly available, and easy to use.
# sudo systemctl enable mariadb
# sudo systemctl start mariadb
# sudo mysql_secure_installation
The root password will be blank by default, just hit enter button to proceed and select 'Y' and choose your password.
You have successfully secured your MariaDB server.
# sudo yum -y install unzip
We have successfully installed LAMP Stack & other necessary packages to continue with second part of How to install PageKit CMS on CentOS 7.4 tutorial. In the next part, we will learn how configure your domain in Alibaba Cloud DNS, how to create virtual host to point your domain name to your ECS IP address and how to finally install PageKit on our ECS instance.
How to Install ProcessWire CMS on Debian 9 – Part 2 Installing ProcessWire
How to Install Pagekit CMS on CentOS 7.4 – Part 2 Installing Pagekit

2,593 posts | 790 followers
FollowAlibaba Clouder - April 1, 2019
Alibaba Clouder - April 12, 2019
Alibaba Clouder - May 21, 2018
Alibaba Clouder - April 12, 2019
Alibaba Clouder - May 15, 2019
Alibaba Clouder - April 12, 2019

2,593 posts | 790 followers
Follow ECS(Elastic Compute Service)
Elastic and secure virtual cloud servers to cater all your cloud hosting needs.
Learn More OSS(Object Storage Service)
An encrypted and secure cloud storage service which stores, processes and accesses massive amounts of data from anywhere in the world
Learn MoreLearn More
More Posts by Alibaba Clouder