By Hitesh Jethva, Alibaba Cloud Community Blog author.
DBeaver is a free, open source and well-known database management tool that can be used for developers, SQL programmers, database administrators and analysts. It is a multi-platform database tool that supports any database which has JDBC driver, which will make your life easier if you work with different types of databases. You can build SQL queries, edit and transfer data, view trees of objects, monitor database connection sessions and much more using DBeaver.
In this tutorial, we will learn how to install and configure Dbeaver on an Alibaba Cloud Elastic Compute Service (ECS) Ubuntu 18.04 server.
Create a new ECS instance and connect to your instance as the root user.
Once you are logged into your Ubuntu 18.04 instance, run the following command to update your base system with the latest available packages.
apt-get update -yDBeaver is written in the Java language, so you will need to install Java to your instance. so you will need to install Java to your instance. By default, the latest version of the Java is not available in the
Ubuntu 18.04 default repository. So, you will need to add the Java repository to your system.
You can add it by running the following command:
add-apt-repository ppa:linuxuprising/javaOnce the repository is added, update the repository and install Java11 with the following command:
apt-get update -y
apt-get install oracle-java11-installer -y
Once the Java is installed, you can check the version of java with the following command:
java -versionBy default, DBeaver CE is not available in the Ubuntu 18.04. So, you will need to add the DBeaver repository to your instance.
First, download and add the GPG key for DBeaver with the following command:
wget -O - https://dbeaver.io/debs/dbeaver.gpg.key | apt-key add -Add the DBeaver repository with the following command:
echo "deb https://dbeaver.io/debs/dbeaver-ce /" | tee /etc/apt/sources.list.d/dbeaver.listUpdate the repository and install DBeaver CE with the following command:
apt-get update -y
apt-get install dbeaver-ce -y
Once the DBeaver is installed, you can check the DBeaver version with the following command:
apt policy dbeaver-ce You will need to install MariaDB database server and a sample database to connect from DBeaver Database tool. First, install MariaDB server with the following command:
apt-get install mariadb-server -yAfter installing MariaDB, you will need to secure it first. You can secure it by running the following command:
mysql_secure_installationAnswer all the questions as shown below:
    Enter current password for root (enter for none):
    Set root password? [Y/n]: N
    Remove anonymous users? [Y/n]: Y
    Disallow root login remotely? [Y/n]: Y
    Remove test database and access to it? [Y/n]:  Y
    Reload privilege tables now? [Y/n]:  Y
Once the MariaDB server is secured, log in to MariaDB shell with the following command:
mysql -u root -pEnter your root password, then create a database and user for DBeaver:
MariaDB [(none)]> CREATE DATABASE dbeaverdb;
MariaDB [(none)]> CREATE USER 'dbeaver'@'localhost' IDENTIFIED BY 'password';
Next, grant all the privileges to DBeaver with the following command:
MariaDB [(none)]> GRANT ALL PRIVILEGES ON dbeaverdb.* TO 'dbeaver'@'localhost';Next, flush the privileges and exit from the MariaDB shell with the following command:
MariaDB [(none)]> FLUSH PRIVILEGES;
MariaDB [(none)]> QUIT;DBeaver is now installed, it's time to access it from Unity dash.
You can open DBeaver from Unity Applications Launcher as shown below:

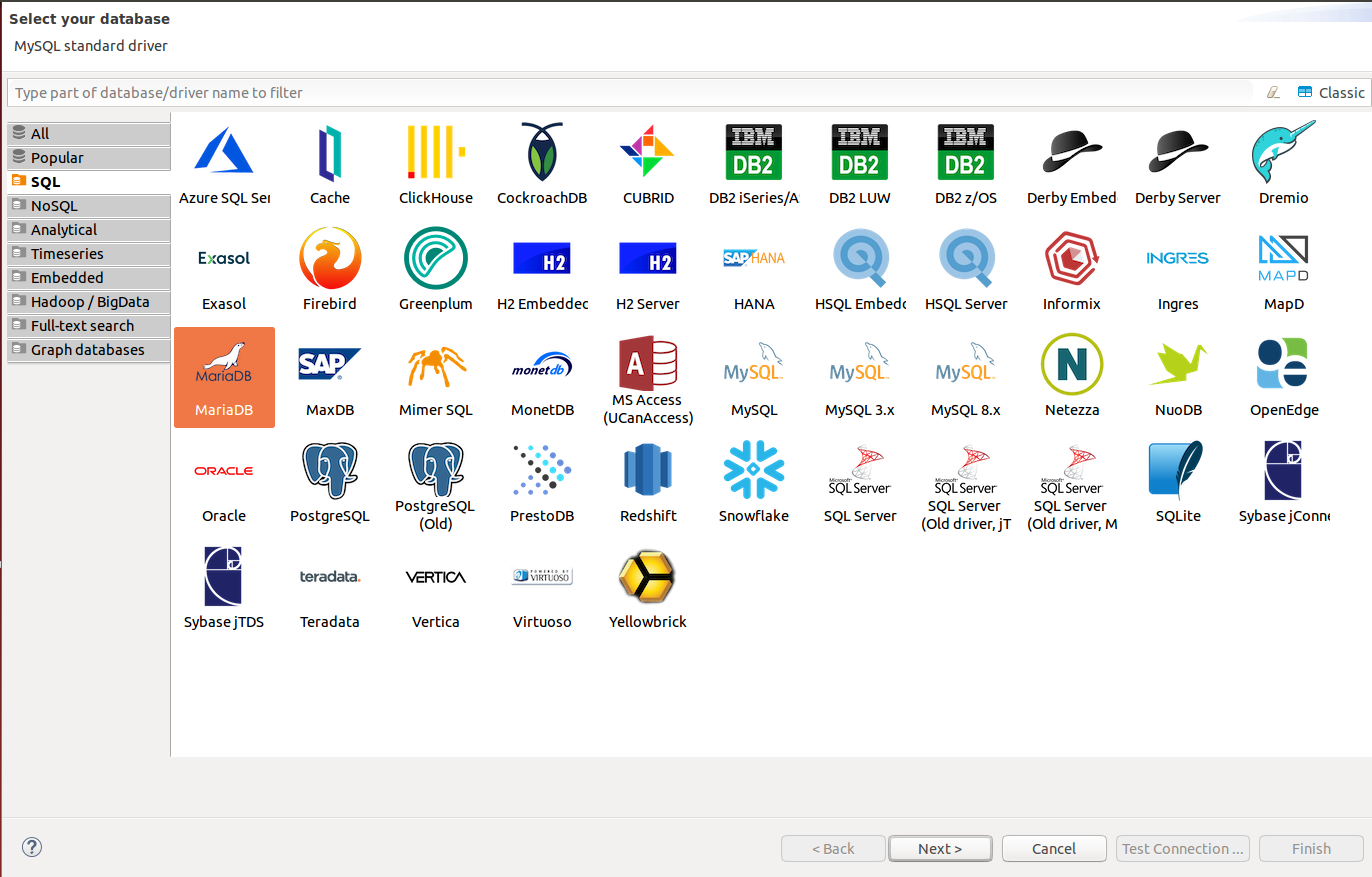
Now, choose MariaDB database and click on the Next button. You should see the following page:

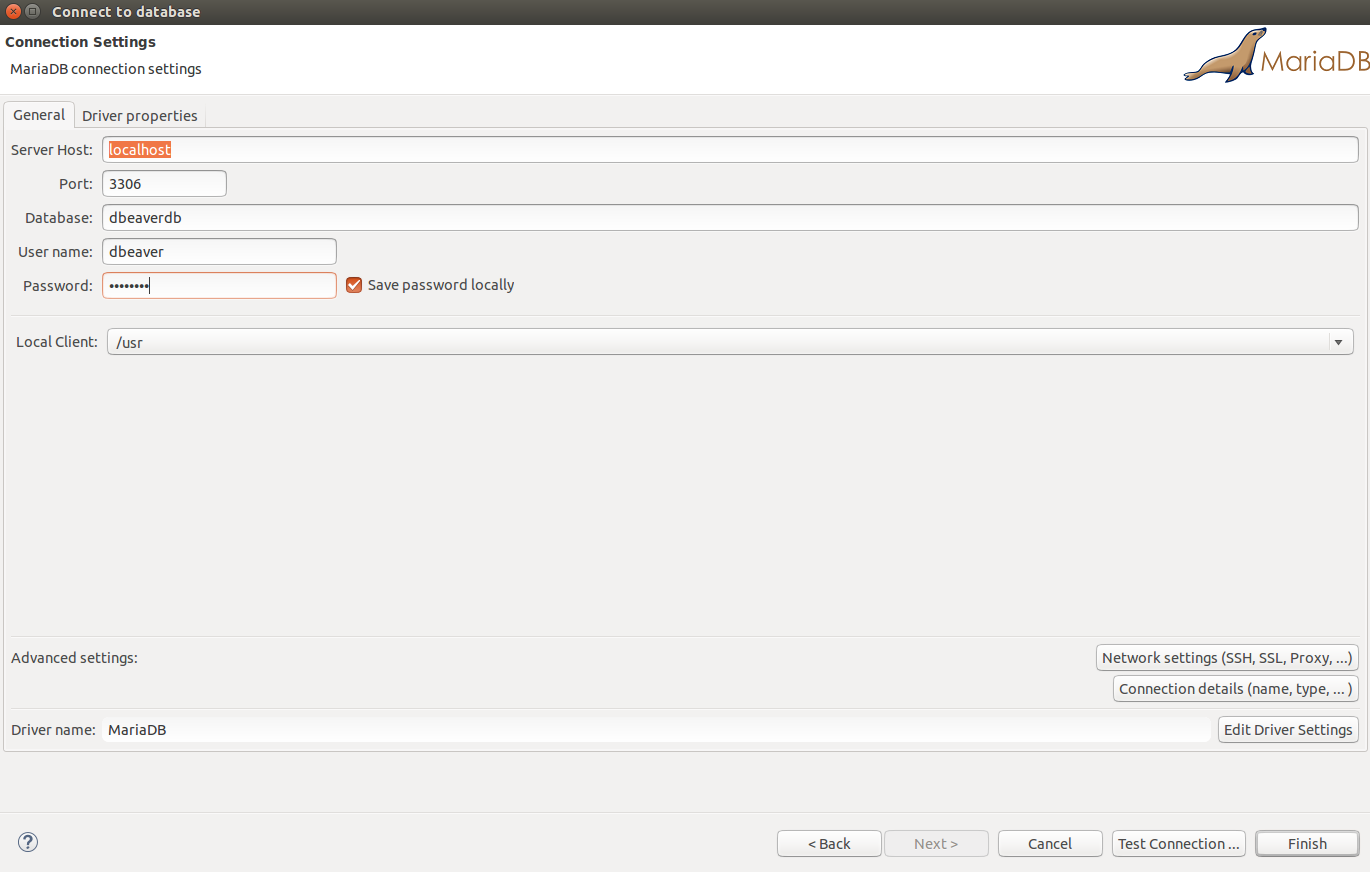
Enter your database username, database name and password. Then, click on the test Connection button. You should see the following page:

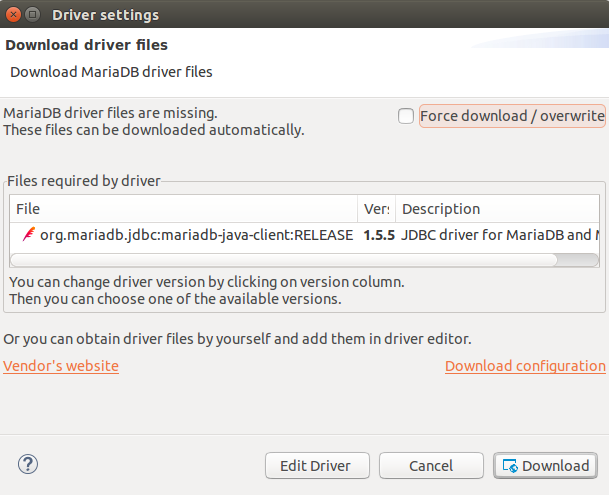
Click on the Download button to download MariaDB driver. Once the database connection test returns a success. You should see the following page:

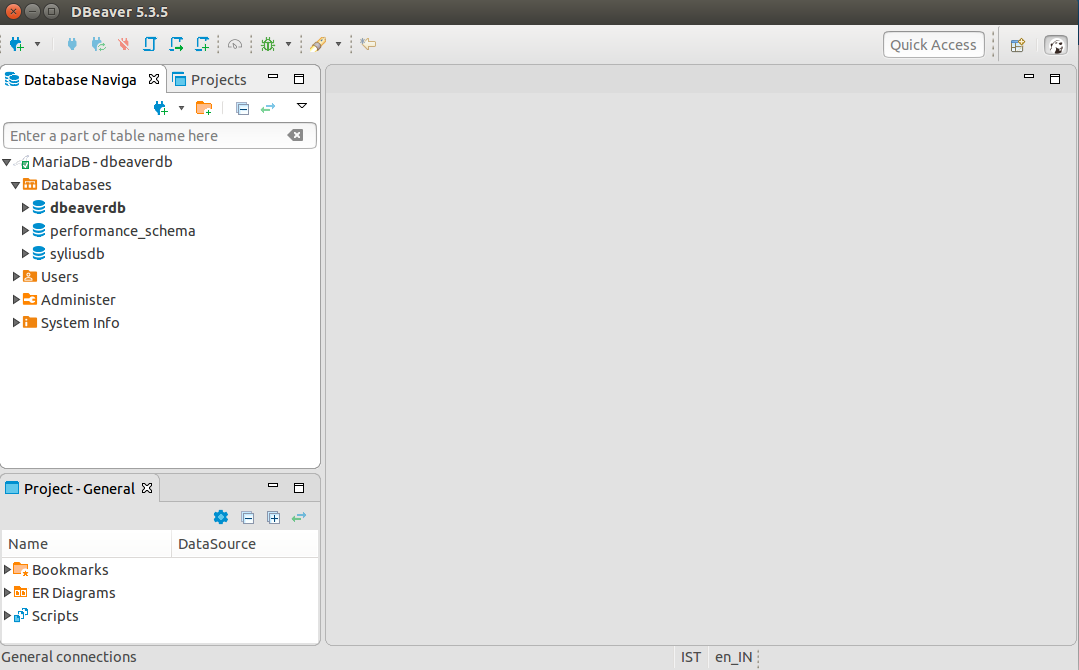
Click OK. You should see the database which you have created earlier in the following page:

Congratulations! You have successfully installed DBeaver CE tool on an Ubuntu 18.04 server. You can now easily manage your database using DBeaver.
How to Install Ganglia Monitoring Server on ECS Ubuntu 18.04

39 posts | 6 followers
FollowHiteshjethva - March 2, 2020
Hiteshjethva - October 31, 2019
Hiteshjethva - January 8, 2020
Hiteshjethva - March 2, 2020
Hiteshjethva - January 8, 2020
Hiteshjethva - March 2, 2020

39 posts | 6 followers
Follow Super App Solution for Telcos
Alibaba Cloud (in partnership with Whale Cloud) helps telcos build an all-in-one telecommunication and digital lifestyle platform based on DingTalk.
Learn More ECS(Elastic Compute Service)
Elastic and secure virtual cloud servers to cater all your cloud hosting needs.
Learn More ECS Bare Metal Instance
An elastic and horizontally scalable high-performance computing service providing the same computing performance as traditional physical servers including physical isolation.
Learn More EMAS Superapp
Build superapps and corresponding ecosystems on a full-stack platform
Learn MoreMore Posts by Hiteshjethva