By Martin Tumusiime, Alibaba Cloud Tech Share Author. Tech Share is Alibaba Cloud's incentive program to encourage the sharing of technical knowledge and best practices within the cloud community.
October CMS is one of the most popular powerful, open source and modular Content Management System (CMS). The CMS platform is based on the Laravel PHP framework. A lot of developers love it because it saves them time and resources while trying to develop backends for their web platforms.
For the past, I have used this CMS to design a customized backend for one of our projects and I must confirm that the results were overwhelmingly great. So are you willing to get your hands on and get started using October CMS on your web project?
If yes, then this is probably the right way to deploy October CMS on your Alibaba Cloud Elastic Compute Service (ECS) server. To mention, I have gone through all the mentioned steps below and I expect everything to work out very fine for you.
In this tutorial, we shall use the Ubuntu 18.04 or Debian 9 servers for our deployment. Setup your Ubuntu 18.04 or Debian 9 servers Instances on Alibaba Cloud.
You can also read the tutorial below just in case you need to upgrade.
October CMS is compatible with PHP 7.0 and above and thus all the modules and PHP version we install should at least meet the above requirement. To install the above packages, use the following command below.
sudo apt install -y php php-cli php-mysql php-zip php-json php-gd php-mbstring php-curl php-xml php-pear php-bcmath php-pdo opensslFor production purposes, I recommend using Alibaba Cloud ApsaraDB for RDS for increased security and reliability.
To install MySQL DB on your ECS, use the following command below. (You can use the latest version as long as it's 7.0 and above)
sudo apt-get install mysql-server php7.0-mysqlYou'll then be prompted to enter your MySQL password. Don't lose or forget this password as it will be needed for setting up our October CMS Database.
You can now complete the whole installation process of MySQL DB with the following commands below.
/usr/bin/mysql_secure_installationYou'll be asked to enter the MySQL password you just created. Continue with the installation process by making the following selections.
Would you like to setup VALIDATE password plugin? [Y/N] N
Change the root password? [ Y/N ] N
Remove anonymous users? [Y/N] Y
Disallow root login remotely? [Y/N] Y
Remove test database and access to it? [Y/N] Y
Reload privilege tables now? [Y/N] Y
Congratulations on setting up your MySQL Database Server.
Once the database server has been set up, next, we shall need to create a database for our October CMS. This can only be done in the MySQL console. Enter the following command below to get started.
$ mysql -u root -pEnter the MySQL password once prompted and on successfully logging in you'll be taken to the MySQL console.
Let's now create our October CMS database named 'october', You can name it anything you like. Use the commands below.
CREATE USER 'october'@'localhost' IDENTIFIED BY 'StrongPassword';
CREATE DATABASE october;
GRANT ALL ON october.* TO 'october'@'localhost' WITH GRANT OPTION;
FLUSH PRIVILEGES;
QUIT
The first command creates a user named october and password 'StrongPassword' you can change it to anything you like.
Then we created our database october, granted the database all permissions required and exited.
You can test connection to the MySQL DB by:
mysql -u OctoberCMS -pEnter password once prompted, then use the command below to show all databases
SHOW DATABASES;And you can quit with this command
QUITThe next step is to install Apache 2 server on your Ubuntu 18.04 or Debian 9, use the following command below.
sudo apt -y install apache2 libapache2-mod-php unzip vimNow that you have installed your Database, PHP and Apache 2 server, our last task is to install our October CMS on our instance.
We shall do this by following the command below.
Download, UnZip and install October CMS
You can download OctoberCMS onto your server using the commands below. (the command will get you the latest version of OctoberCMS)
wget http://octobercms.com/download -O octobercms.zipUnZip the downloaded file using the command below
unzip octobercms.zipThen install OctoberCMS platform with the following command
sudo mv install-master /srv/octobercmsYou can now set the correct permissions for /srv/octobercms
sudo chown -R www-data:www-data /srv/octobercmsNext, create Apache configuration file for your October CMS
sudo vim /etc/apache2/sites-enabled/octobercms.confAdd the following:
<VirtualHost *:80>
     DocumentRoot /srv/octobercms/
     ServerName yourwebsite.com
     ServerAlias www.yourwebsite.com
     ServerAdmin admin@yourwebsite.com

     <Directory /srv/octobercms/>
        Options +FollowSymlinks
        AllowOverride All
        Require all granted
     </Directory>

     ErrorLog /var/log/apache2/octobercms-error.log
     CustomLog /var/log/apache2/octobercms-access.log combined
</VirtualHost>
Then enable the Apache2 rewrite module and restart the system.
sudo a2enmod rewrite
sudo systemctl restart apache2Navigate to your browser and go to OctoberCMS server domain name
E.g https://yourwebsite.com/install.php
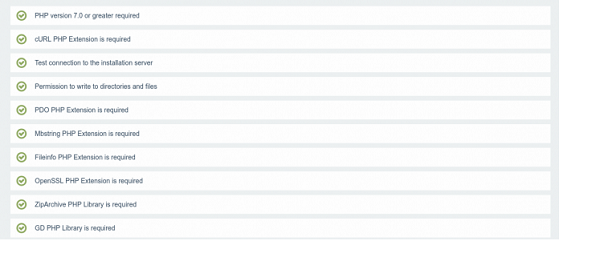
1. Now you'll need to ensure that every check returns a pass( which is green in this case) and Accept License Agreement. You can StackOverflow some solutions in case some modules don't pass.
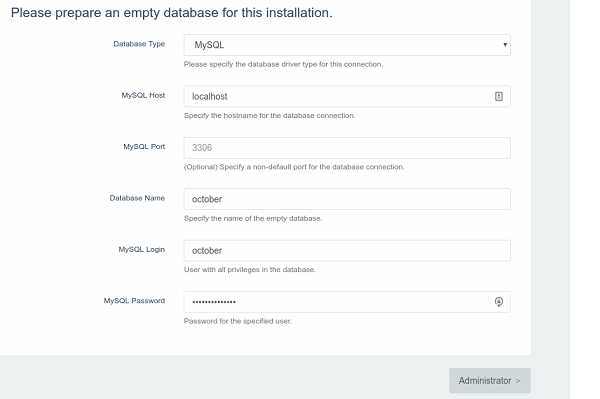
2. On the next section, enter database details we created earlier as shown below.
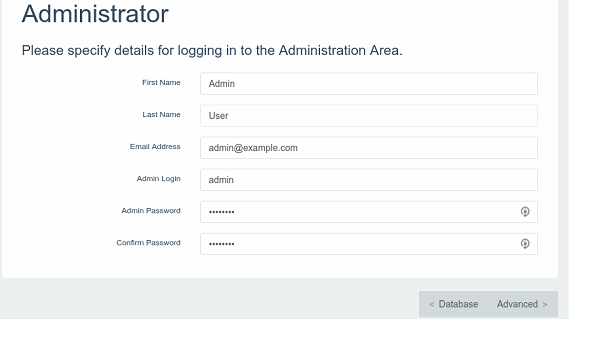
3. Next, Enter Admin User details and click continue.
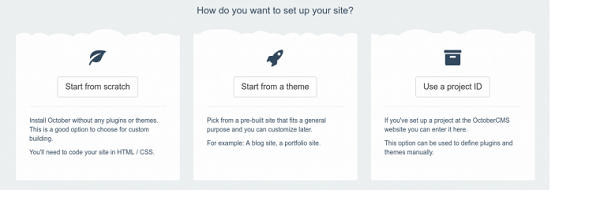
4. Everything is now set up, you can select to start using with a theme or from scratch.
The following are some of the helpful links to access your deployed OctoberCMS
Website: www.yourwebsite.com (this was my test website, it can be an IP Address or your customized server domain name)
Access Backend: www.yourwebsite.com/backend (You can log in from here as Admin )
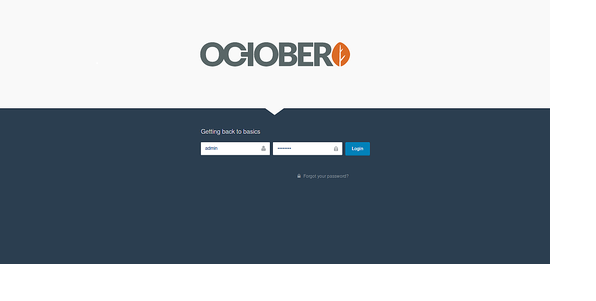
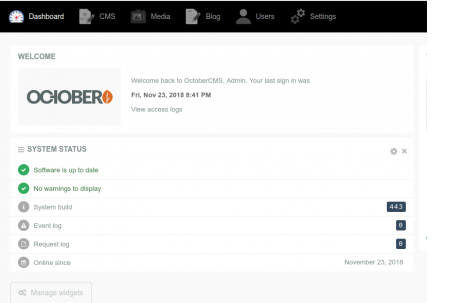
Upon successfully logging in, you'll see something like below. That's Our OctoberCMS backend.
Enjoy OctoberCMS on your Ubuntu 18.04 or Debian 9.0.

2,593 posts | 791 followers
FollowAlibaba Clouder - November 21, 2019
Alibaba Clouder - May 21, 2018
Alibaba Clouder - May 18, 2018
Alibaba Clouder - May 21, 2018
Alibaba Clouder - January 15, 2019
Alibaba Clouder - May 21, 2018

2,593 posts | 791 followers
Follow ECS(Elastic Compute Service)
Elastic and secure virtual cloud servers to cater all your cloud hosting needs.
Learn MoreLearn More
 OSS(Object Storage Service)
An encrypted and secure cloud storage service which stores, processes and accesses massive amounts of data from anywhere in the world
Learn MoreMore Posts by Alibaba Clouder
5316206321858932 June 25, 2019 at 2:34 pm
Manually installing OctoberCMS or any other Laravel based cms on a hosting server is quite difficult and time taking. You have to first install the stack and then install Laravel and finally you can install the CMS. It is better to use platform, like Cloudways Laravel hosting, where you can launch laravel in a single click, then you can install October through a single composer command.