In this tutorial, you will learn how you can create a Wordpress from a Docker application template on Alibaba Cloud using Container Service. This is a quick and easy way to create a Wordpress, and it only takes a few minutes, and by hosting your Wordpress on Alibaba Cloud, you'll be able to take advantage of the cost-effective pricing plans that Alibaba Cloud has to offer.
For this tutorial, you'll need to have a valid Alibaba Cloud account and have created a cluster using Alibaba Cloud Container Service. If you do not have a cluster, you need to first create a cluster first before going any further in this tutorial. For information about how to do this, check out the tutorial Create a cluster. Once finished, you can proceed with the rest of the tutorial.
Follow these steps to go through this tutorial:
1. Log on to the Container Service Management Console.
2. Click Applications in the left navigation pane, and then click Create Application in the upper-right corner. For a bit of reference, consider the screenshot below.

3. Enter the application information, and click Create with application template.
4. Click Use existing application template, and click Select beside the wordpress template.

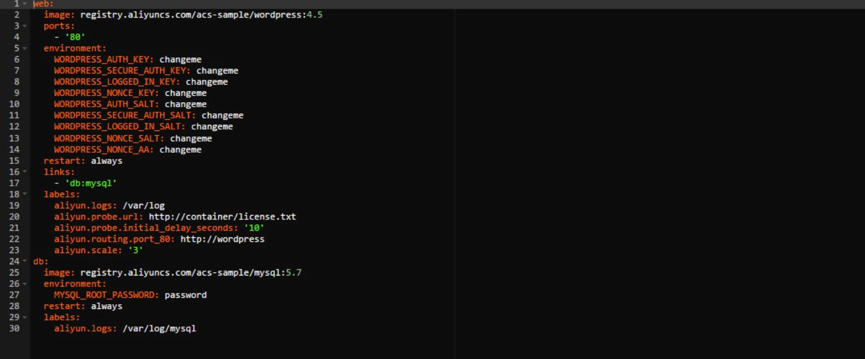
5. Modify corresponding settings in the template edit box. Note that aliyun.routing.port_80: http://wordpress indicates that requests from http://wordpress.$testDomain are forwarded to Port 80 on the container after the container starts running.

6. Click Create and deploy.
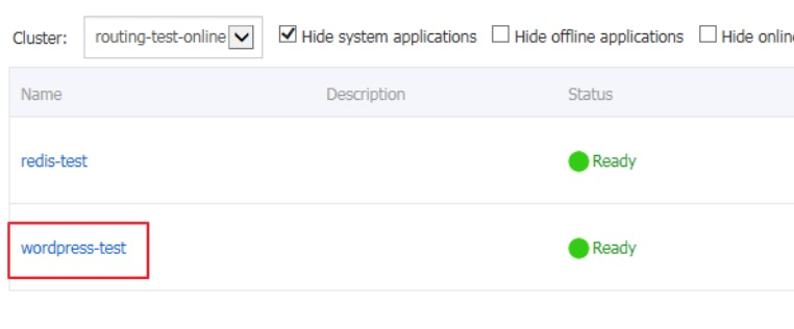
7. Click View application list, Back to application list or Applications in the left navigation pane. As shown in the screenshot below, the application wordpress-test was already created now. So, you can click wordpress-test in the application list to view the application details.

8. Click the service name web in the service list to view the service details.

9. Click the access endpoint address of the service web. This address is the domain name for access. Note, though, that this domain name is only used for testing in this tutorial. You'll need to replace it with your own domain name.

Now, if you have followed all of the steps outlined in this tutorial, you should have created a WordPress on Alibaba Cloud. Wasn't that easy? Stay tuned for more insightful tutorials from Alibaba Cloud.

2,593 posts | 793 followers
FollowAlibaba Cloud Community - January 5, 2024
Alibaba Clouder - July 15, 2019
ApsaraDB - February 21, 2023
Alibaba Clouder - February 12, 2019
Shevy - May 8, 2025
Alibaba Cloud Blockchain Service Team - October 25, 2018

2,593 posts | 793 followers
FollowLearn More
 Container Service for Kubernetes
Alibaba Cloud Container Service for Kubernetes is a fully managed cloud container management service that supports native Kubernetes and integrates with other Alibaba Cloud products.
Learn More Container Registry
A secure image hosting platform providing containerized image lifecycle management
Learn MoreMore Posts by Alibaba Clouder