EAS提供了一站式LLM部署解决方案,可一键部署DeepSeek、Qwen等热门模型,免去手动部署时复杂的环境配置、性能调优和成本管理。
快速入门:部署一个开源模型
以部署开源模型Qwen3-8B为例,该流程同样适用于其他支持的模型。
步骤一:创建服务
步骤二:通过在线调试验证
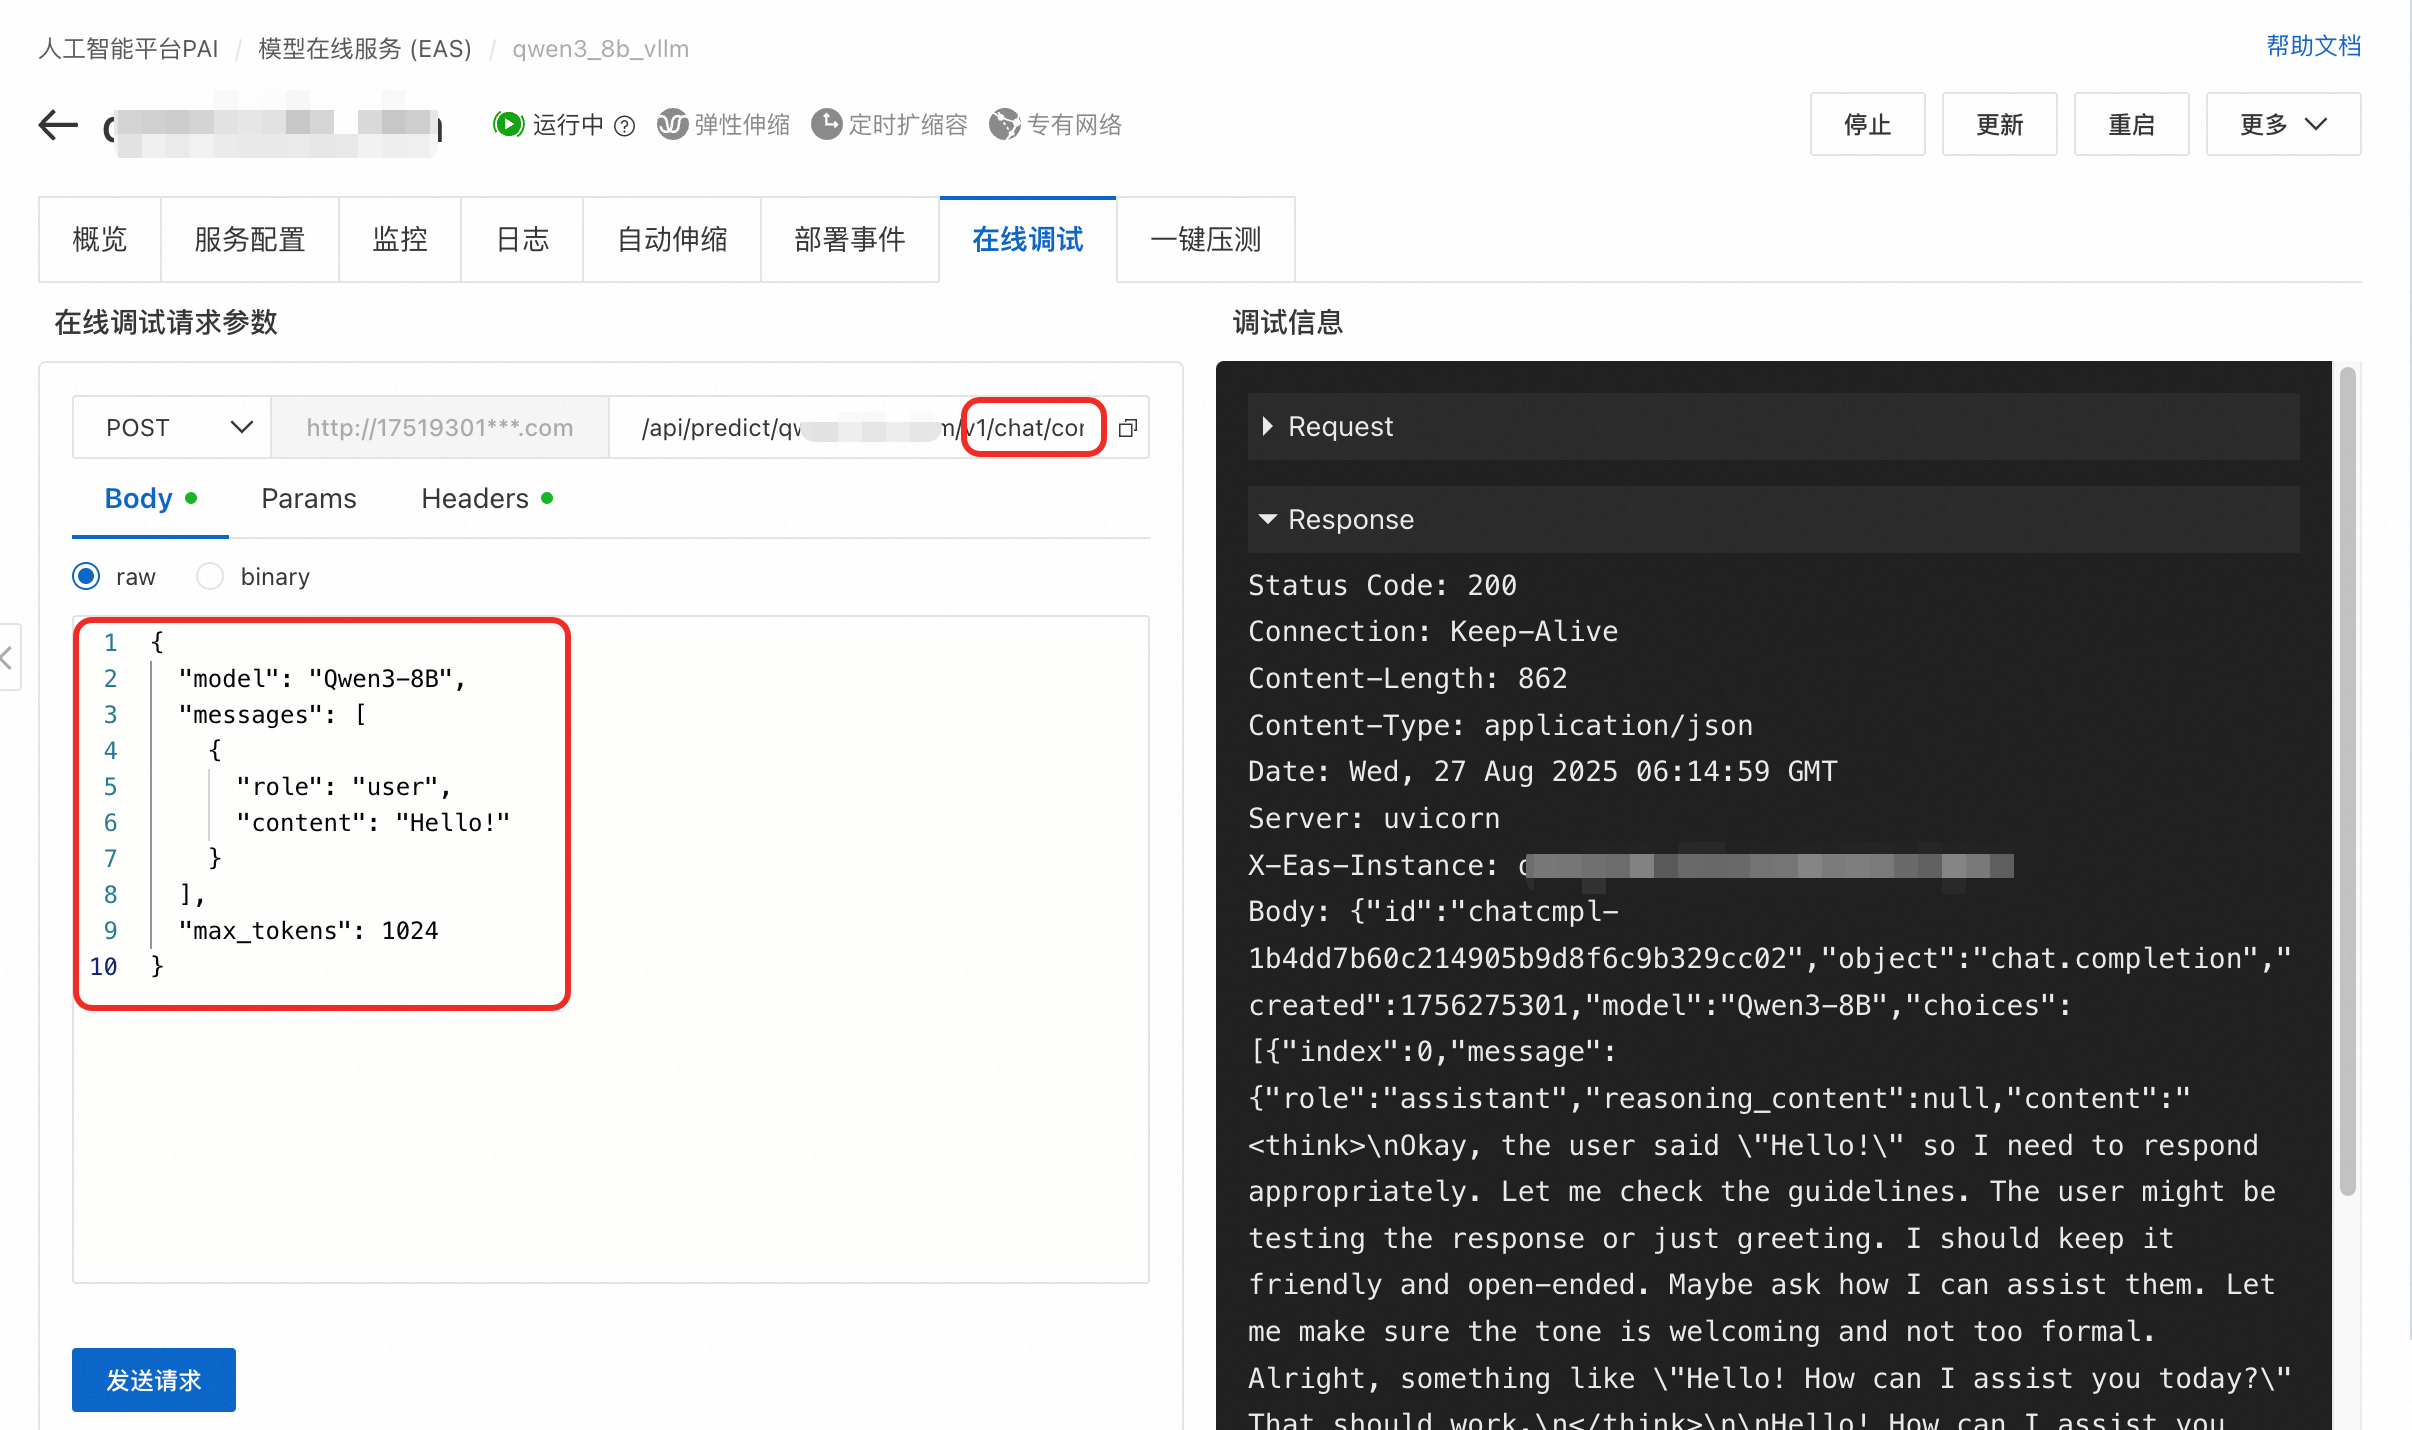
部署成功后,建议先通过在线调试验证服务正常运行。
单击服务名称进入详情页面,切换到在线调试页签。
配置如下请求参数:
配置项
值
请求方法
POST
URL路径
在现有 URL 后追加
/v1/chat/completions,示例:/api/predict/llm_qwen3_8b_test/v1/chat/completions。Body
{
  "model": "Qwen3-8B",
  "messages": [
    {"role": "user", "content": "Hello!"}
  ],
  "max_tokens": 1024
}
Headers
确保包含
Content-Type: application/json。点击发送请求。您应该会收到包含模型回复的响应。
通过API调用
在调用之前,请在服务详情页面的概览页签查看调用信息,获取访问地址和Token。
API调用服务示例代码如下:
cURL
curl -X POST <EAS_ENDPOINT>/v1/chat/completions \
    -H "Content-Type: application/json" \
    -H "Authorization: <EAS_TOKEN>" \
    -d '{
        "model": "<model_name>",
        "messages": [
        {
            "role": "system",
            "content": "You are a helpful assistant."
        },
        {
            "role": "user",
            "content": "hello"
        }
        ],
        "max_tokens":1024,
        "temperature": 0.7,
        "top_p": 0.8,
        "stream":true
    }'
其中:
<EAS_ENDPOINT>和<EAS_TOKEN>需替换为部署服务的访问地址和Token。<model_name>需替换为模型名称。对于vLLM/SGLang,可通过模型列表接口<EAS_ENDPOINT>/v1/models获取。curl -X GET <EAS_ENDPOINT>/v1/models -H "Authorization: <EAS_TOKEN>"
OpenAI SDK
推荐使用官方Python SDK与服务交互。确保已安装OpenAI SDK:pip install openai。
from openai import OpenAI

# 1. 配置客户端
# <EAS_TOKEN>需替换为部署服务的Token
openai_api_key = "<EAS_TOKEN>"
# <EAS_ENDPOINT>需替换为部署服务的访问地址
openai_api_base = "<EAS_ENDPOINT>/v1"

client = OpenAI(
    api_key=openai_api_key,
    base_url=openai_api_base,
)

# 2. 获取模型名称
# 对于BladeLLM, 设置model = ""。 因为BladeLLM不需要model入参,也不支持使用client.models.list()方式获取模型名称。设置空字符串以兼容OpenAI SDK的强制参数要求
models = client.models.list()
model = models.data[0].id
print(model)

# 3. 发起对话请求
# 支持流式(stream=True)和非流式(stream=False)输出
stream = True
chat_completion = client.chat.completions.create(
    messages=[
        {"role": "system", "content": "You are a helpful assistant."},
        {"role": "user", "content": "hello"},
    ],
    model=model,
    top_p=0.8,
    temperature=0.7,
    max_tokens=1024,
    stream=stream,
)

if stream:
    for chunk in chat_completion:
        print(chunk.choices[0].delta.content, end="")
else:
    result = chat_completion.choices[0].message.content
    print(result)
Python requests库
对于不希望引入OpenAI SDK依赖的场景,可使用requests库。
import json
import requests

# <EAS_ENDPOINT>需替换为部署服务的访问地址
EAS_ENDPOINT = "<EAS_ENDPOINT>"
# <EAS_TOKEN>需替换为部署服务的Token
EAS_TOKEN = "<EAS_TOKEN>"
# <model_name>需替换为模型名称,可通过模型列表接口<EAS_ENDPOINT>/v1/models获取(对于BladeLLM,不支持该接口,可省略 "model" 字段或设为 "")。
model = "<model_name>"

url = f"{EAS_ENDPOINT}/v1/chat/completions"
headers = {
    "Content-Type": "application/json",
    "Authorization": EAS_TOKEN,
}

stream = True
messages = [
    {"role": "system", "content": "You are a helpful assistant."},
    {"role": "user", "content": "hello"},
]

req = {
    "messages": messages,
    "stream": stream,
    "temperature": 0.7,
    "top_p": 0.8,
    "max_tokens": 1024,
    "model": model,
}
response = requests.post(
    url,
    json=req,
    headers=headers,
    stream=stream,
)

if stream:
    for chunk in response.iter_lines(chunk_size=8192, decode_unicode=False):
        msg = chunk.decode("utf-8")
        # 以下代码用于处理Server-Sent Events (SSE)格式的流式响应
        if msg.startswith("data:"):
            info = msg[6:]
            if info == "[DONE]":
                break
            else:
                resp = json.loads(info)
                if resp["choices"][0]["delta"].get("content") is not None:
                    print(resp["choices"][0]["delta"]["content"], end="", flush=True)
else:
    resp = json.loads(response.text)
    print(resp["choices"][0]["message"]["content"])
使用Gradio构建本地Web UI
Gradio是一个基于Python的用户友好的界面库,能快速创建机器学习模型的交互式界面。请参考以下步骤,在本地运行Gradio WebUI。
集成至第三方应用
EAS服务可集成至支持OpenAI API的各类客户端和开发工具。配置的核心要素是服务访问地址、Token和模型名称。
Dify
安装模型供应商OpenAI-API-compatible
单击页面右上角的头像-设置,左侧选择模型供应商。如果模型列表中没有OpenAI-API-compatible,在下方列表查找安装。
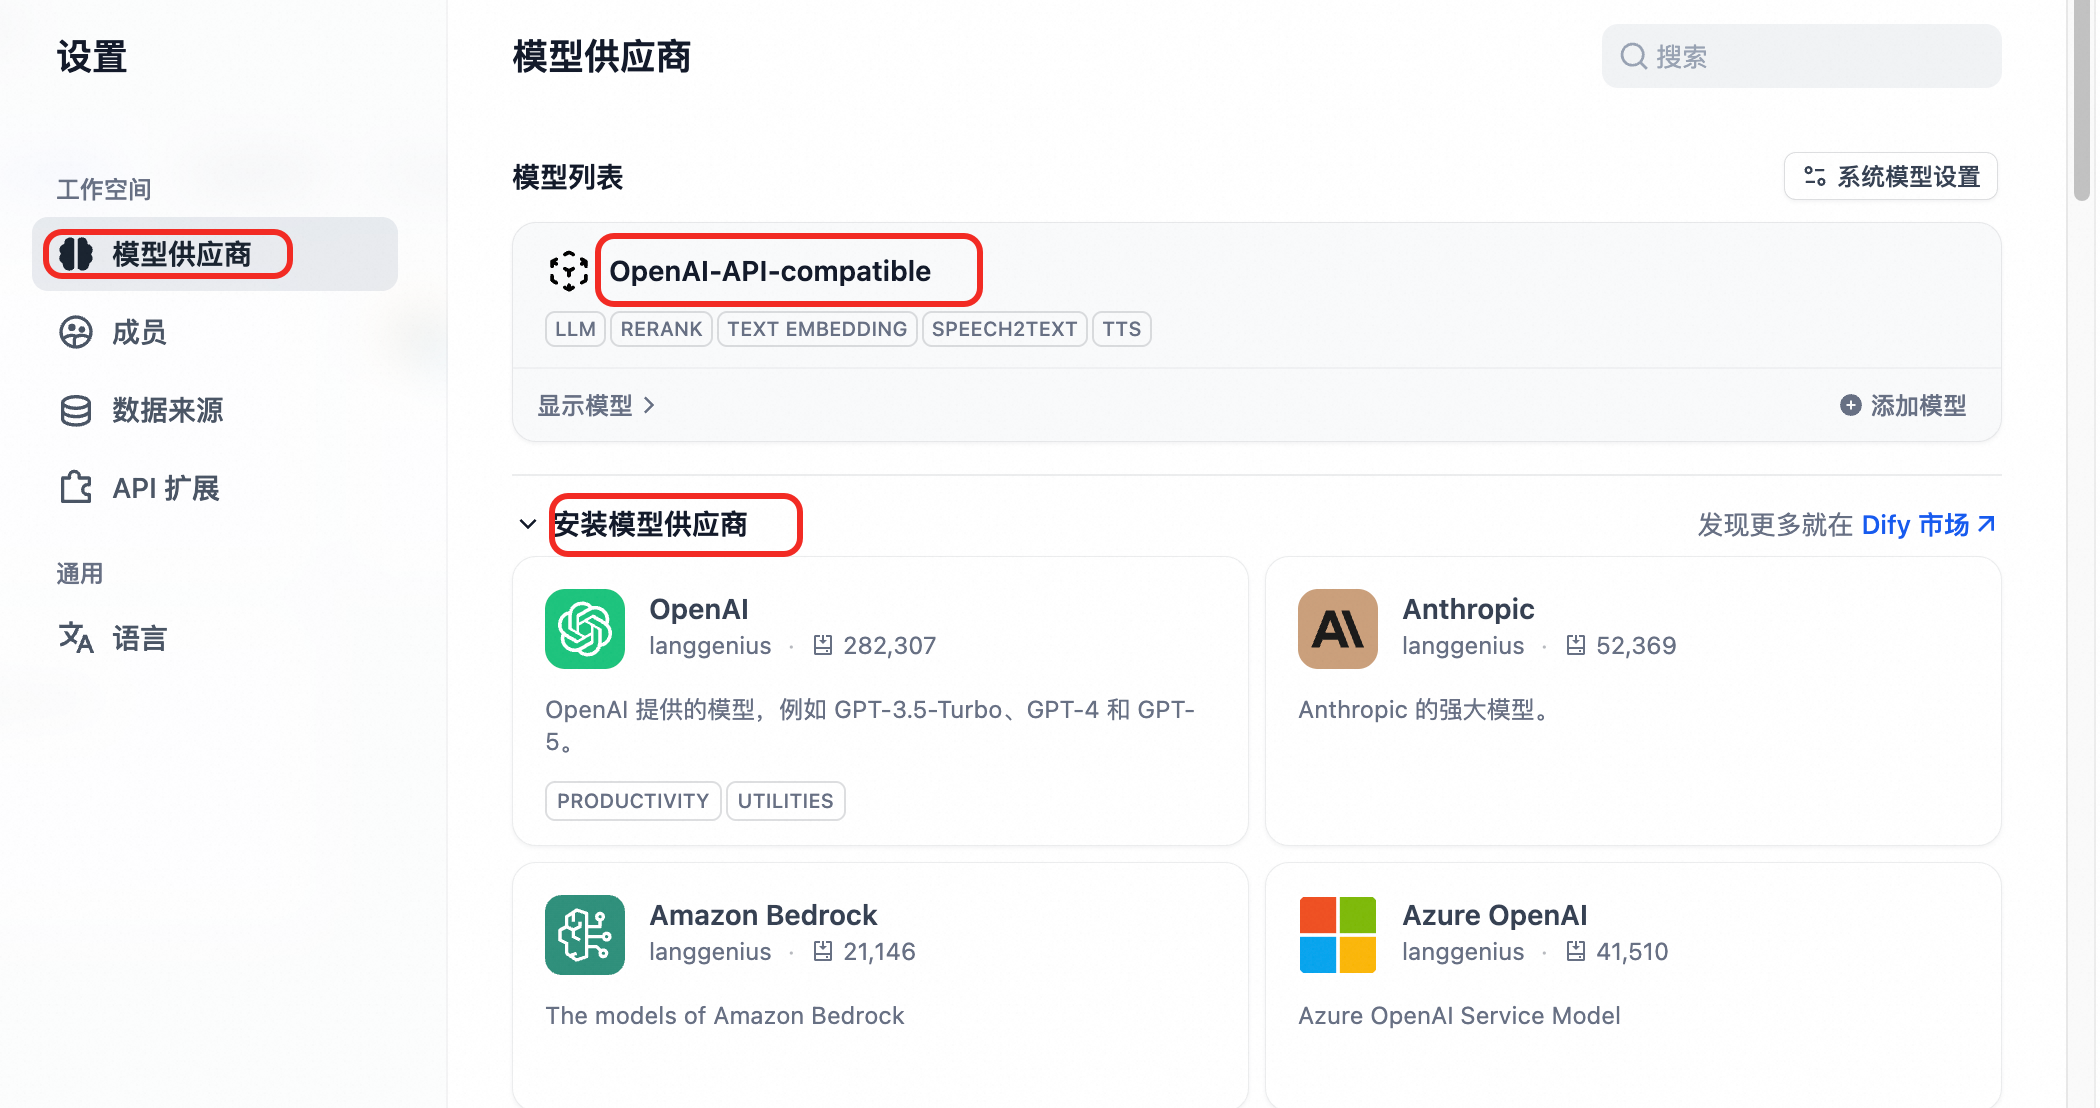
添加模型
单击OpenAI-API-compatible卡片右下角添加模型,参数如下配置:
模型类型:选择LLM。
模型名称:vLLM部署请通过
/v1/models接口发送GET请求获取。示例填写Qwen3-8B。API Key:填写EAS服务Token。
API endpoint URL:填写EAS服务公网调用地址(注意末尾加上/v1)。
测试使用
在Dify主界面单击创建空白应用,选择Chatflow类型,填入应用名称等信息后单击创建。
单击LLM节点,选择添加的模型,并设置上下文和提示词。
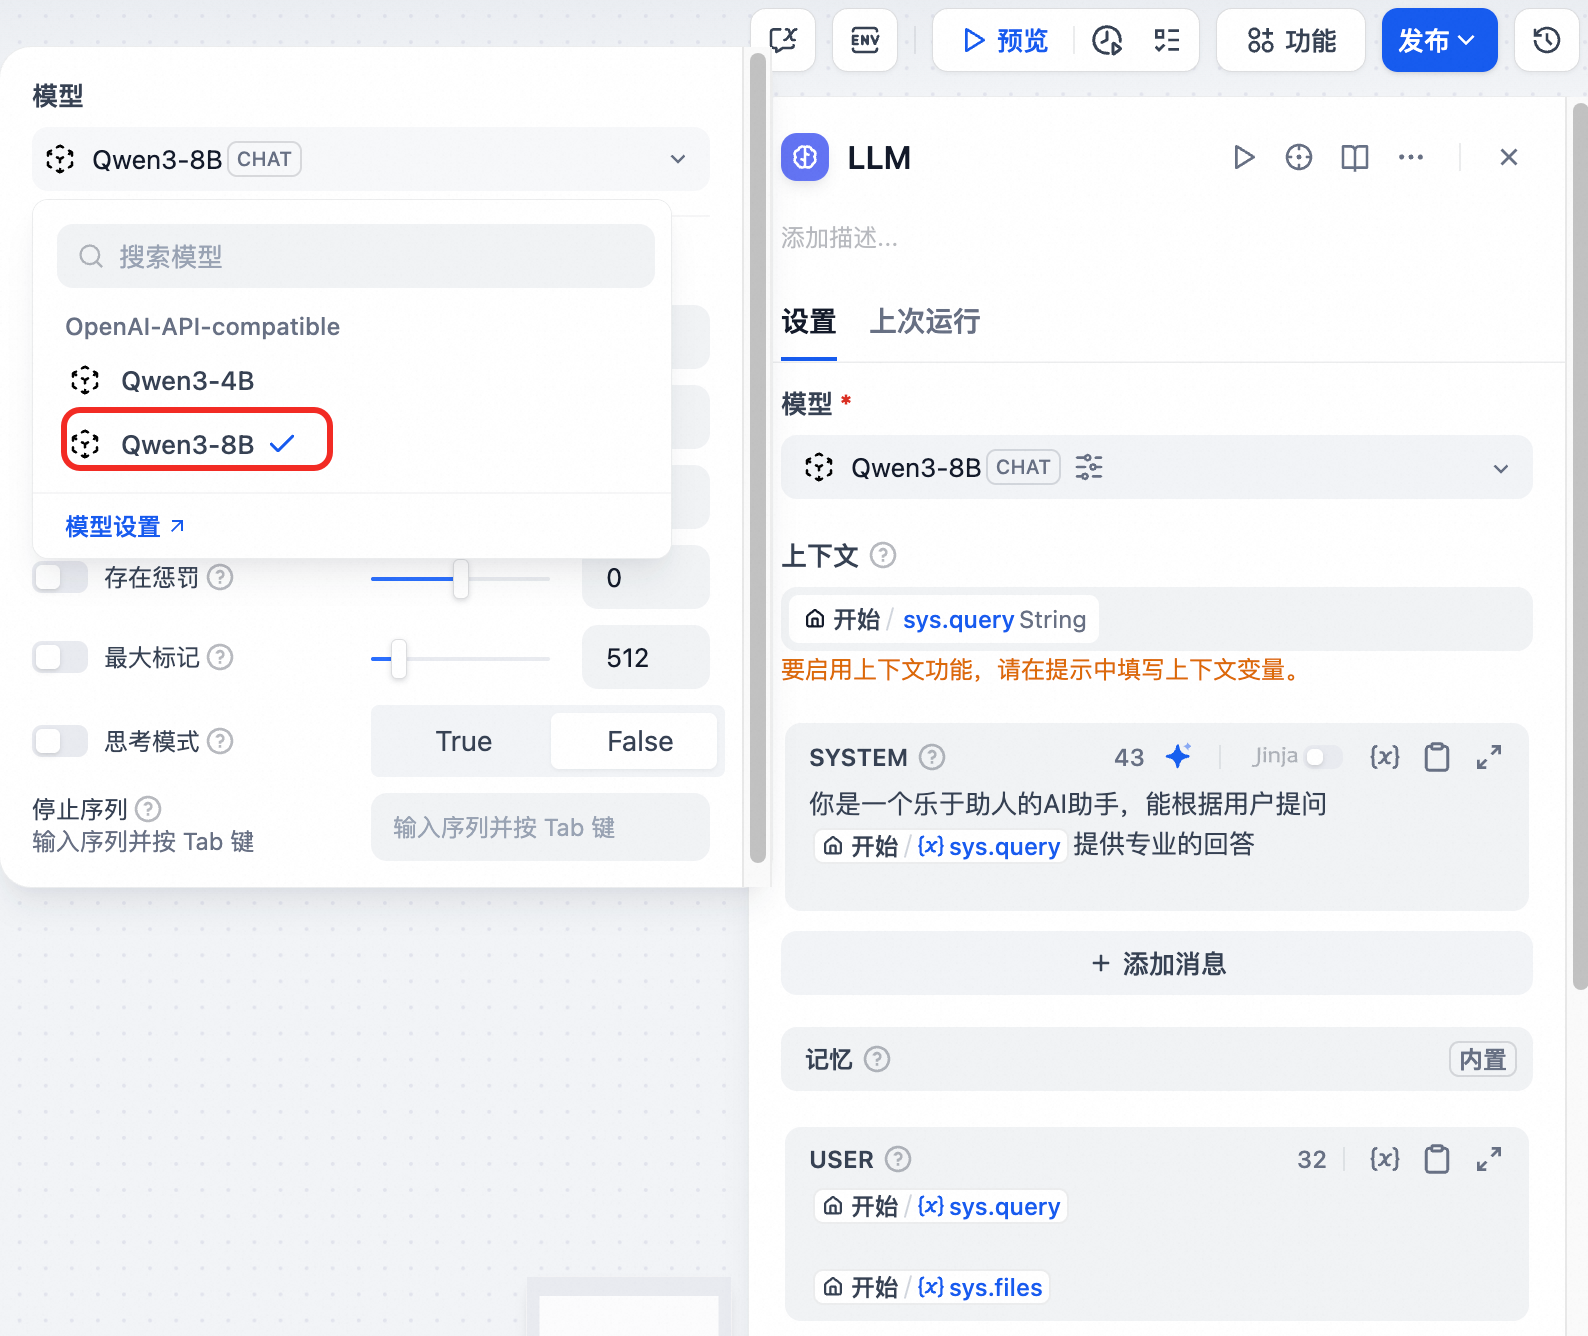
单击右上角预览,输入问题。

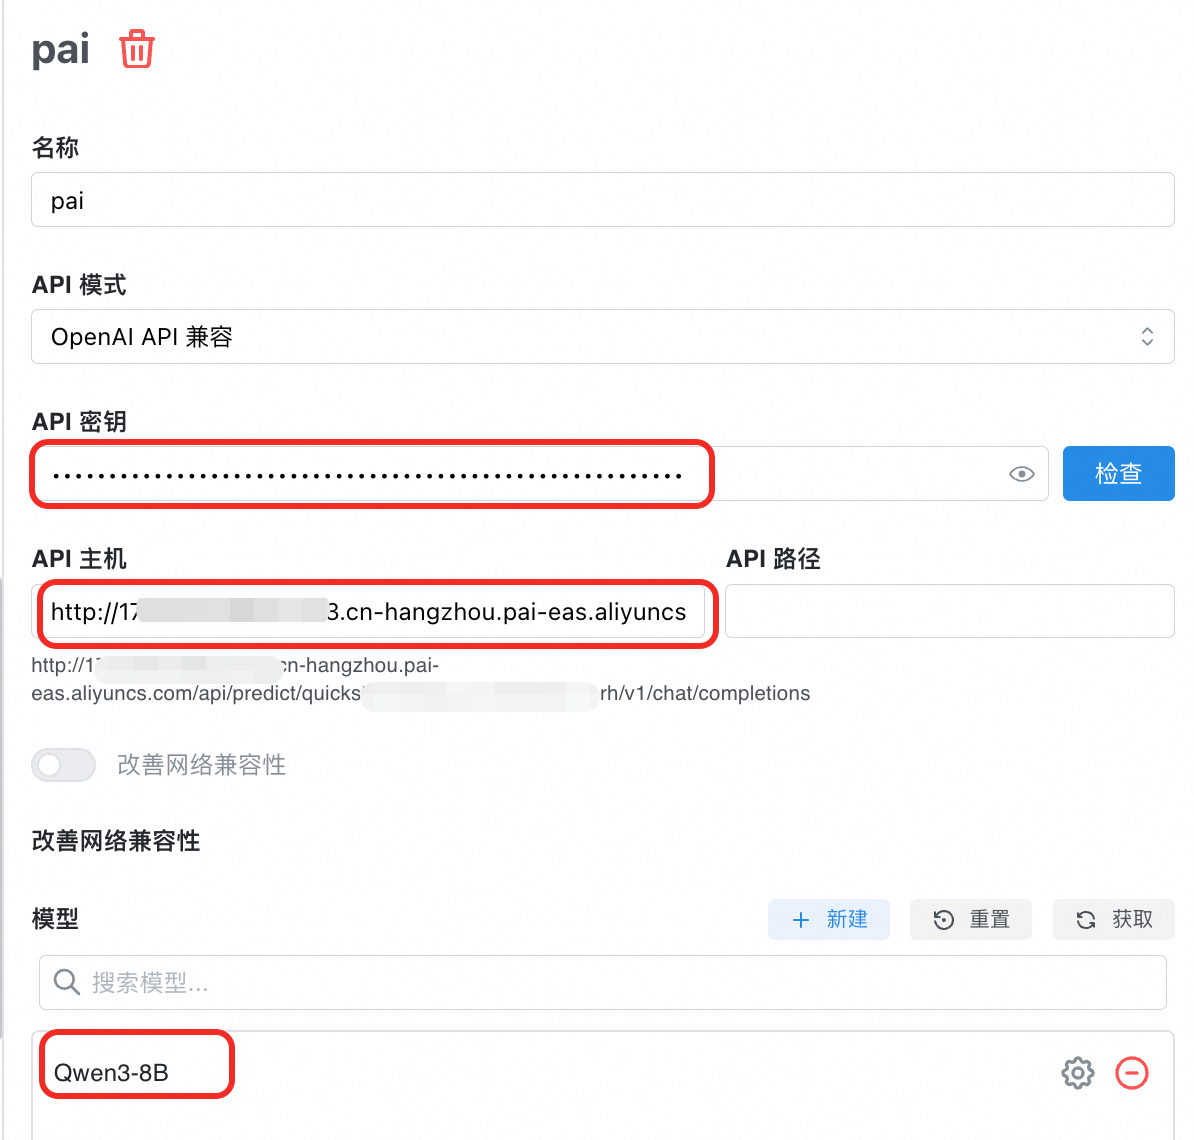
Chatbox
前往Chatbox,根据您的设备下载并安装合适的版本,或直接启动网页版。本方案以macOS M3为例。
添加模型提供方。单击设置,添加模型提供方,填写名称如pai,API模式选择OpenAI API兼容。
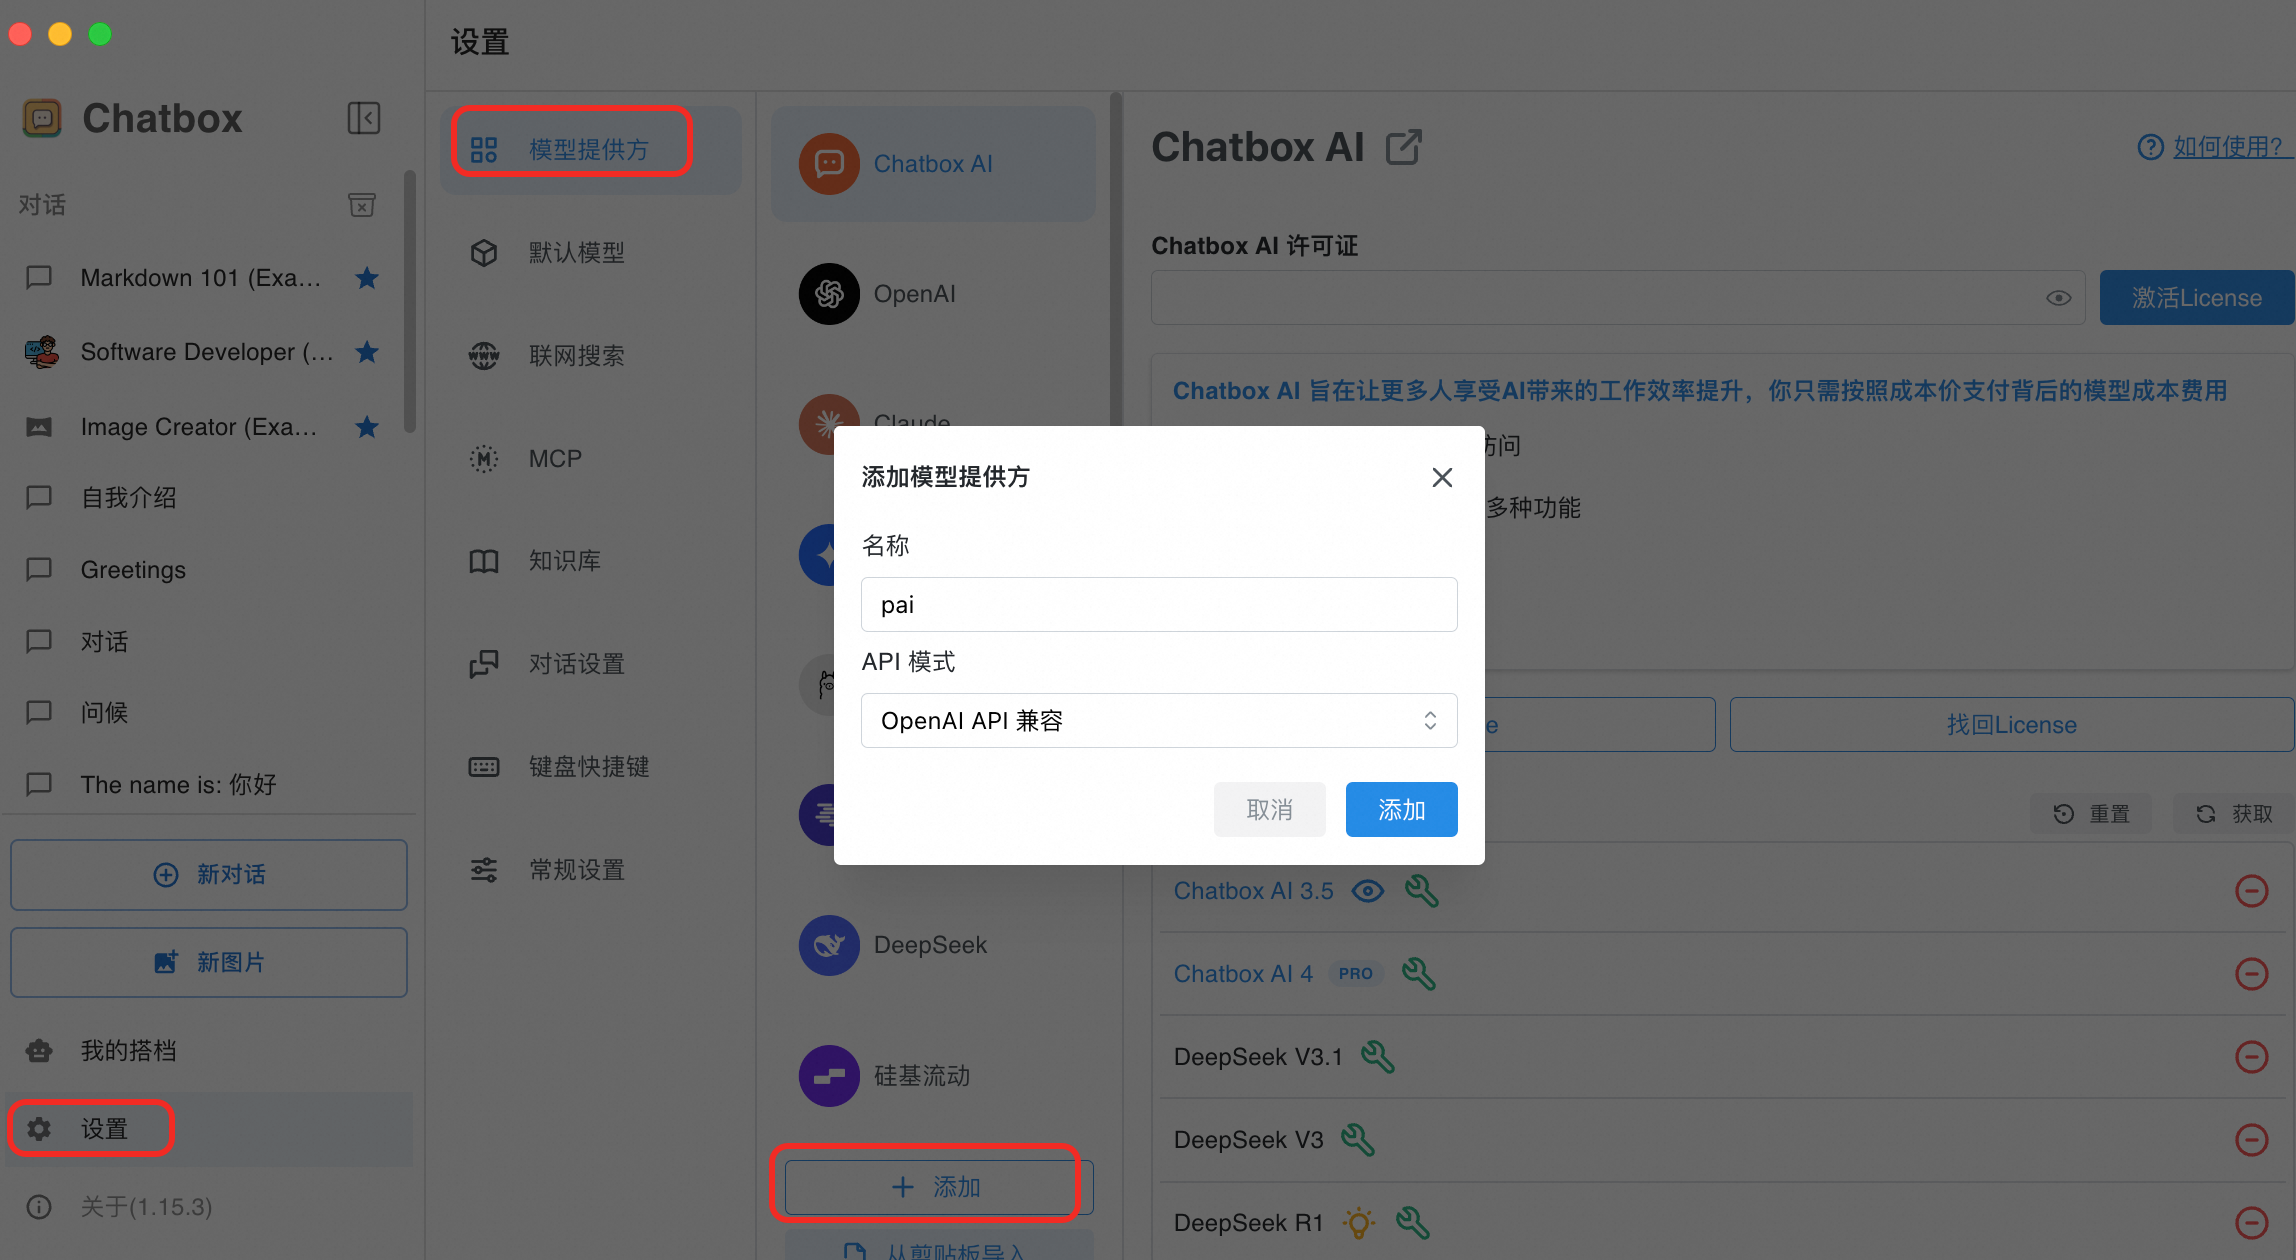
选择模型提供方pai,配置如下参数。
API 密钥:填写EAS服务Token。
API 主机:填写EAS服务公网调用地址(注意末尾加上/v1)。
API 路径:无需填写。
模型:单击获取进行添加(若推理引擎为BladeLLM,不支持通过接口获取,可单击新建填写)。
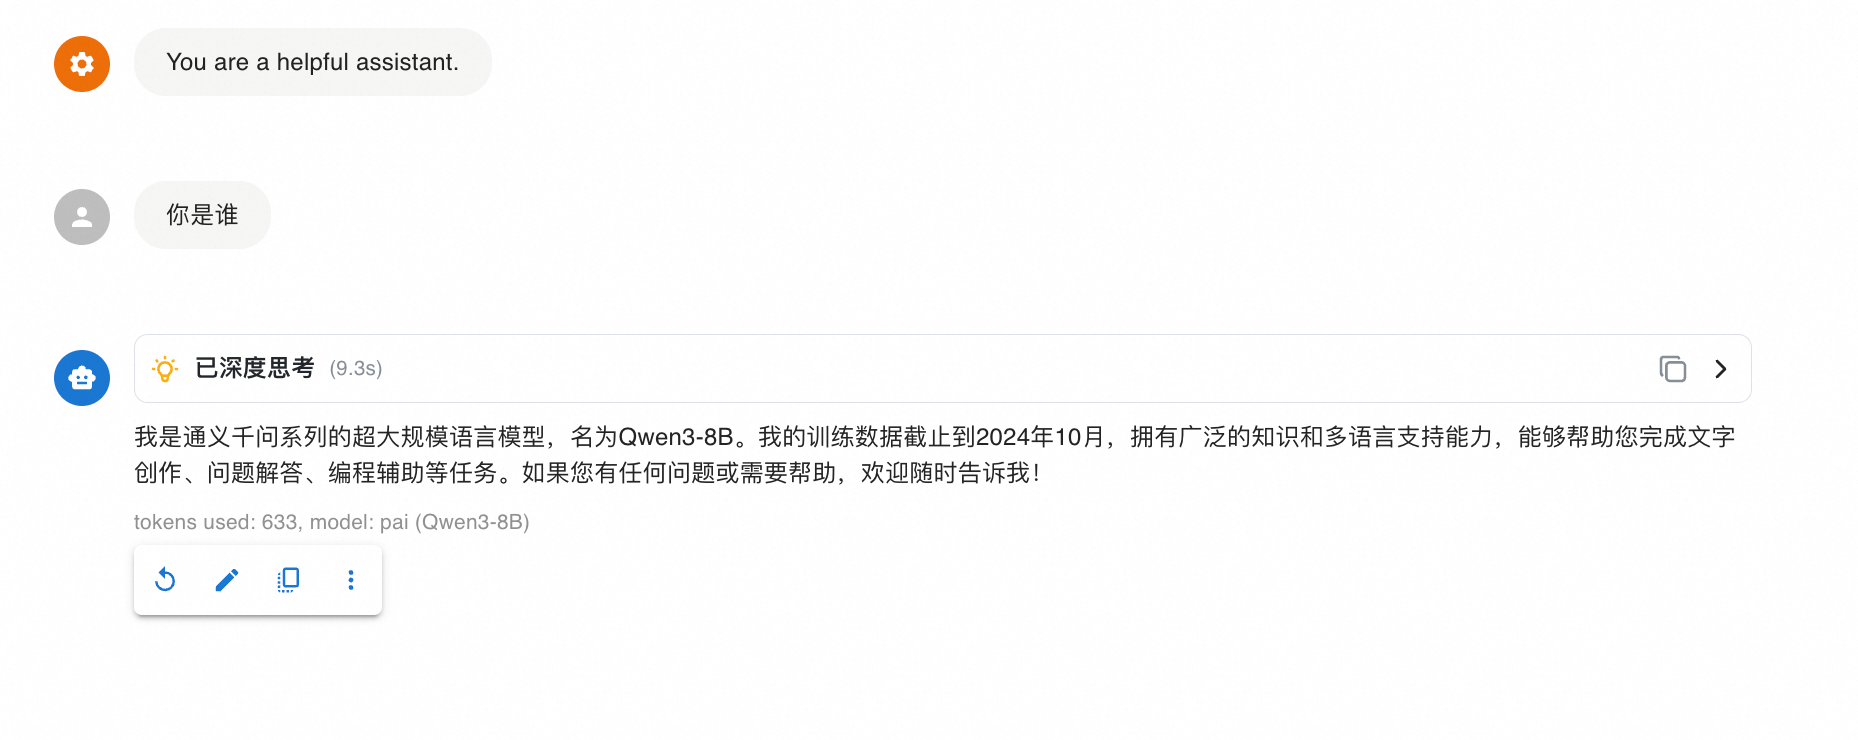
对话测试。单击新对话,文本输入框右下角选择模型服务。
Cherry Studio
安装客户端
访问 Cherry Studio 下载并安装客户端。
也可以访问
https://github.com/CherryHQ/cherry-studio/releases进行下载。配置模型服务。
单击左下角的设置按钮,在模型服务栏下方单击添加。在提供商名称中填写自定义名称,如PAI,提供商类型为OpenAI。单击确定。
在API 密钥填写EAS服务Token;在API 地址填写EAS服务公网调用地址。
单击添加,在模型ID 中填写模型名称(vLLM部署请通过
/v1/models接口发送GET请求获取),示例填写Qwen3-8B(注意大小写)。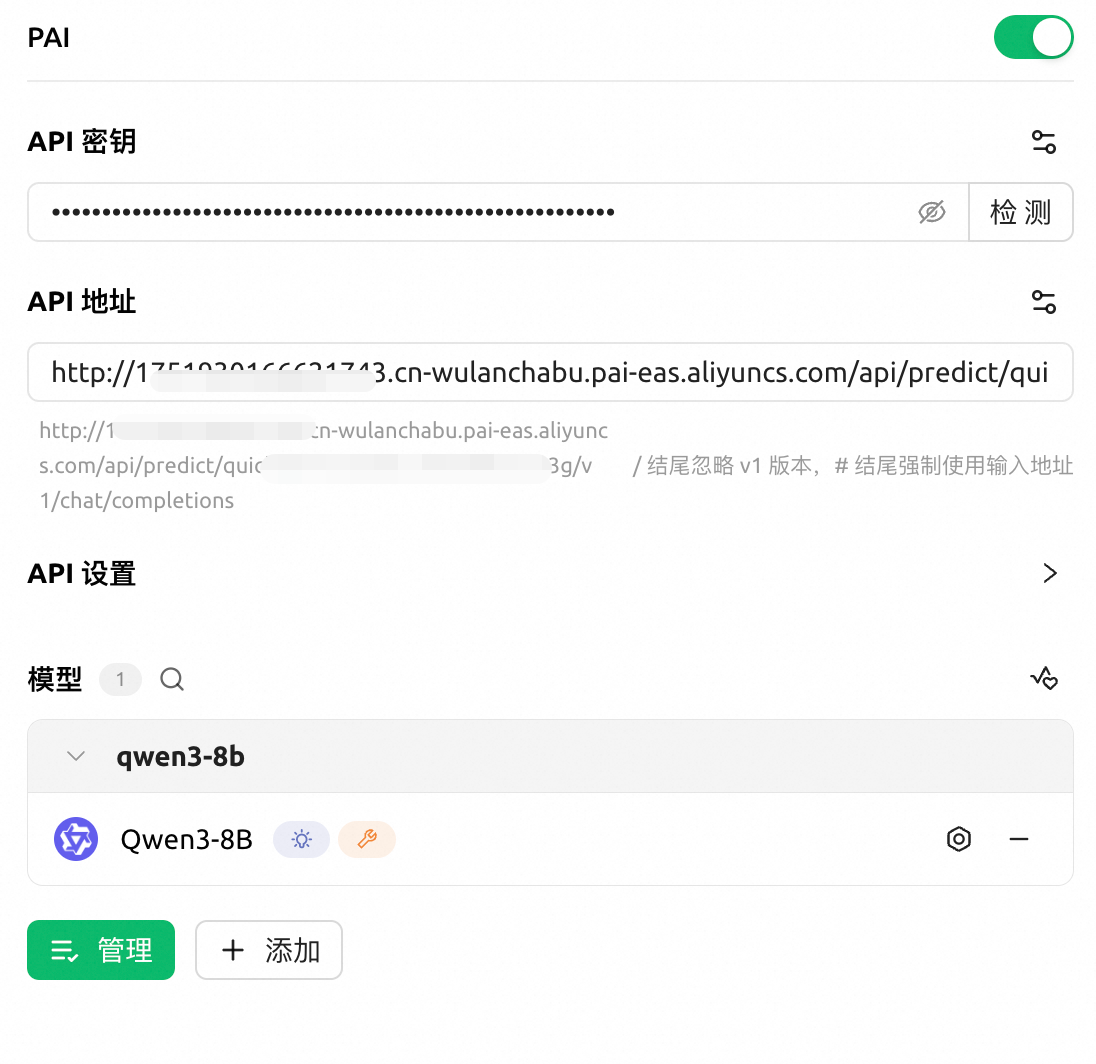
在API 密钥输入框旁单击检测来确认连通性。
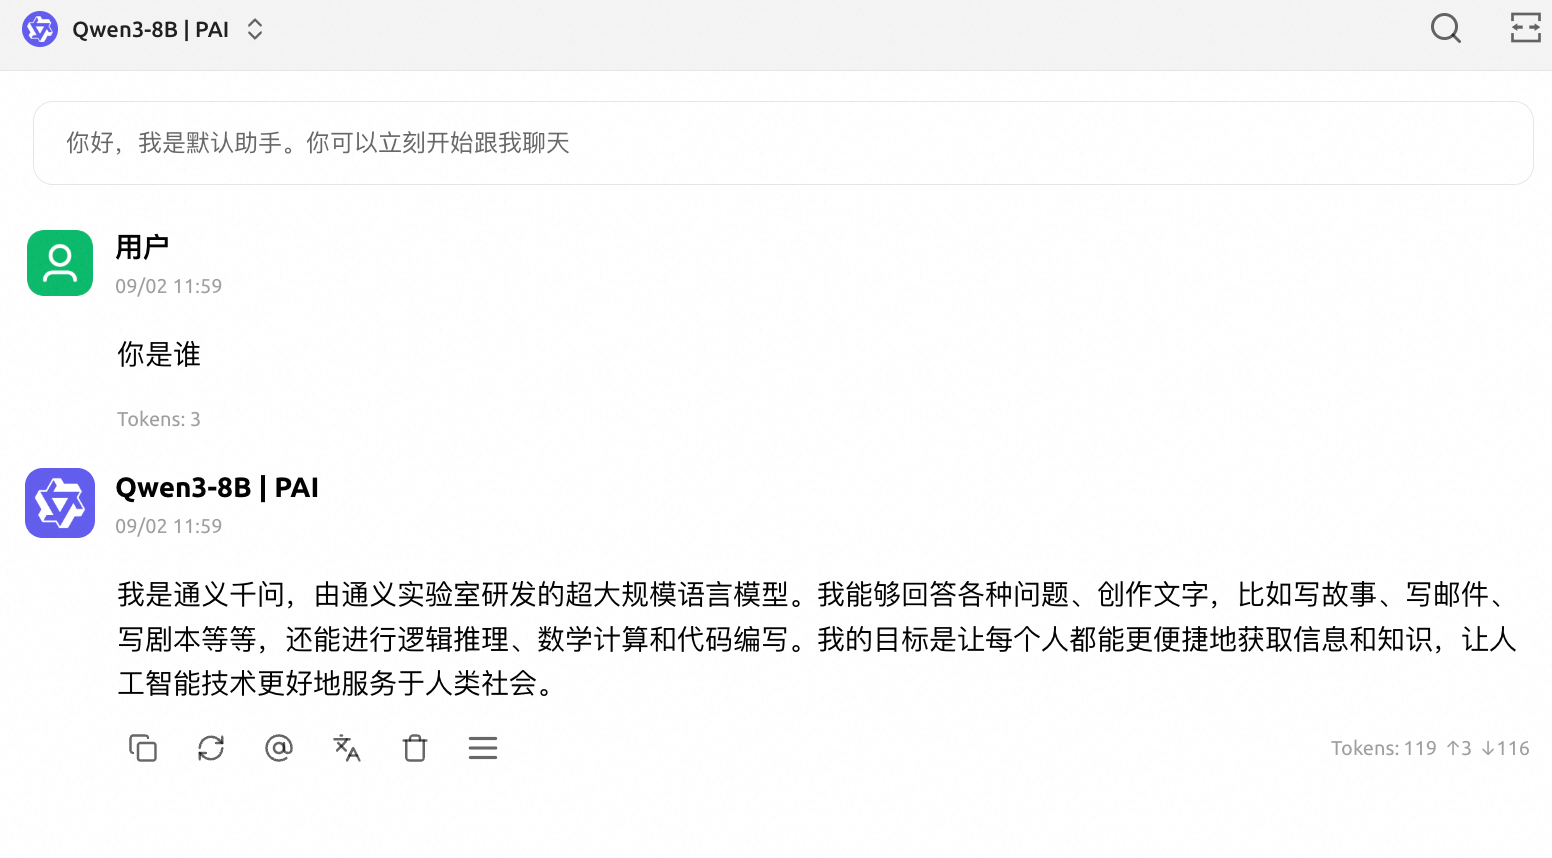
快速体验模型
回到对话框界面,在顶部选择模型后开始对话。
计费说明
包括但不限于以下费用,详情请参见模型在线服务(EAS)计费说明。
计算费用:主要成本来源,在创建EAS服务时,根据需求选择按量付费或包年包月的资源。
存储费用:如果使用自定义模型,模型文件存储在对象存储OSS中,会根据存储用量产生相应的对象存储费用。
应用于生产环境
选择合适的模型
明确应用场景:
通用对话:请务必选择指令微调模型,而非基础模型,以确保模型能理解并遵循您的指令。
代码生成:选择专门的代码模型,如
Qwen3-Coder系列,它们在代码相关任务上表现通常远超通用模型。特定领域任务:如果任务非常专业(如金融、法律),可以考虑寻找在该领域微调过的模型,或者使用通用模型进行微调。
性能与成本:通常,模型参数量越大,能力越强,但部署所需的计算资源也越多,推理成本相应更高。建议您从较小的模型(如7B级别)开始验证,若性能无法满足需求,再逐步尝试更大的模型。
参考权威评测:可以参考OpenCompass、LMSys Chatbot Arena等行业公认的评测榜单。这些榜单从推理、编码、数学等多个维度对模型进行客观评估,能提供有价值的选型依据。
选择合适的推理引擎
vLLM/SGLang:作为开源社区的主流选择,拥有广泛的模型支持和丰富的社区文档与示例,易于集成和问题排查。
BladeLLM:阿里云PAI团队自研的推理引擎,针对特定模型(尤其是Qwen系列)有深度优化,可能获得更高的性能和更低的显存占用。
推理优化
LLM智能路由部署:基于实时token吞吐量、GPU显存使用率等指标动态分发请求,均衡各推理实例的算力与显存分配,适用于部署多个推理实例,且预期请求负载不均的场景,提升集群资源利用率与系统稳定性。
基于专家并行和PD分离部署MoE模型:针对专家混合(Mixture-of-Experts, MoE)模型,通过专家并行(EP)和Prefill-Decode(PD)分离部署等技术,提升推理吞吐、降低部署成本。
常见问题
Q:服务一直处于"等待中"状态,无法启动怎么办?
请按以下步骤排查:
检查实例状态:在服务列表页,单击服务名称进入详情页,在服务实例部分查看实例状态,如果显示库存不足,说明当前公共资源组资源不足。
解决方案(按优先级):
方案1:更换实例规格。返回部署页面,选择其他GPU型号。
方案2:使用专有资源。资源类型选择EAS资源组以使用专有资源(需提前创建)。
预防措施:
建议企业用户创建专有资源组,避免受公共资源限制。
高峰期建议选择多个地域进行测试。
Q:调用报错
调用返回错误
Unsupported Media Type: Only 'application/json' is allowed请确保请求Headers中包含
Content-Type: application/json。调用返回错误
The model '<model_name>' does not exist.vLLM推理引擎要求model字段必须填写正确。可通过调用
/v1/models接口(GET请求)获取模型名称。
更多问题请参见EAS常见问题。