阿里雲Jindo CLI是管理OSS-HDFS服務的命令列工具。本文通過Java Spring Boot封裝Jindo CLI命令為API介面,實現OSS-HDFS的程式化管理。支援集中式部署和分離式部署兩種架構,適用於營運管控系統、自動化指令碼、CI/CD工具等情境。
方案選型
方式一:集中式部署
業務應用與Jindo CLI工具部署在同一台伺服器,通過本地調用方式實現整合。如圖所示,業務應用在商務服務器上直接調用Jindo CLI,再訪問OSS-HDFS服務。
優點:實現簡單,無網路開銷。
缺點:CLI執行會佔用主業務資源。
適用情境:快速驗證、內部自動化指令碼、單一管理平台等情境。
方式二:分離式部署
業務應用(伺服器 A)與 Jindo CLI(伺服器 B)分離,CLI 封裝為獨立的 HTTP Agent 服務,通過 Restful API 通訊。如圖所示,業務應用遠程調用 HTTP Agent,由 Agent 調用 Jindo CLI,最終訪問 OSS-HDFS 服務。
優點:AccessKey隔離在工具伺服器;業務與工具解耦,支援獨立升級與跨語言調用;可同時為多個業務平台提供服務。
缺點:需額外維護Agent服務,存在一定網路開銷;RESTful API調用預設無鑒權,需要客戶自行實現安全校正(如使用Auth Token等機制)。
適用情境:生產環境,尤其是對擴充性要求高的系統,以及需要為多個業務平台提供服務的情境。
前置準備
在開始部署前,請確保已完成以下準備工作:
OSS-HDFS服務:已開通OSS-HDFS服務的Bucket。參見開通OSS-HDFS服務。
許可權準備:RAM使用者擁有訪問OSS-HDFS許可權。建議遵循最小許可權原則,例如,若僅需讀取,則不授予寫或刪除許可權 。參見授權訪問OSS-HDFS服務。
伺服器環境:至少一台伺服器(ECS 或自建),並滿足以下條件:與 Bucket 同地區、能通過內網訪問 OSS、已安裝 JDK。
Jindo SDK:已安裝並配置 Jindo SDK。
集中式部署:在商務服務器上安裝。
分離式部署:僅在 Agent 伺服器(伺服器 B)上安裝。
方式一:集中式部署
業務應用與Jindo CLI 在同一伺服器,直接在業務應用內部調用 Jindo CLI 命令。適用於快速驗證。
步驟一:開發後端API介面
建立 Spring Boot API 介面,封裝 jindo fs -ls 命令。
不同版本的 Jindo SDK 主命令可能存在差異。部分新版本使用 jindo,而一些早期版本使用 jindofs。
在複製代碼前,建議您先在伺服器的命令列中手動執行jindo -v或jindofs -v,以確認您環境中正確的命令。本文所有樣本均以 jindo 為例。
package com.example.jindotest;

import org.springframework.http.HttpStatus;
import org.springframework.http.ResponseEntity;
import org.springframework.web.bind.annotation.PostMapping;
import org.springframework.web.bind.annotation.RequestParam;
import org.springframework.web.bind.annotation.RestController;

import java.io.BufferedReader;
import java.io.InputStreamReader;
import java.io.IOException;

@RestController
public class JindoController {

    @PostMapping("/jindo-ls")
    public ResponseEntity<String> executeJindoLs(@RequestParam("path") String path) {
        // 校正路徑格式
        if (path == null || !path.startsWith("oss://")) {
            return ResponseEntity.badRequest().body("Invalid OSS path");
        }

        try {
            // 構建 Jindo CLI 命令
            ProcessBuilder processBuilder = new ProcessBuilder("jindo", "fs", "-ls", path);
            processBuilder.redirectErrorStream(true);

            // 啟動進程
            Process process = processBuilder.start();

            // 讀取命令輸出
            BufferedReader reader = new BufferedReader(new InputStreamReader(process.getInputStream()));
            StringBuilder result = new StringBuilder();
            String line;
            while ((line = reader.readLine()) != null) {
                result.append(line).append("\n");
            }

            // 等待進程結束並檢查退出碼
            int exitCode = process.waitFor();
            if (exitCode == 0) {
                // 返回命令執行結果
                return ResponseEntity.ok(result.toString());
            } else {
                return ResponseEntity.status(HttpStatus.INTERNAL_SERVER_ERROR)
                    .body("Command failed with exit code: " + exitCode);
            }
        } catch (IOException | InterruptedException e) {
            return ResponseEntity.status(HttpStatus.INTERNAL_SERVER_ERROR)
                .body("Error executing command: " + e.getMessage());
        }
    }
}
步驟二:結果驗證
完成部署後,可通過以下方式驗證整合效果。
web介面驗證:
參考附錄Web介面範例程式碼,將代碼中的請求路徑修改為
/jindo-ls。訪問http://<商務服務器公網IP>:8080(需要開啟商務服務器入方向的8080連接埠)進行測試。輸入檔案路徑:如:oss://my-bucket.cn-hangzhou.oss-dls.aliyuncs.com/,單擊"List Files"按鈕。如果介面成功展示了OSS的檔案清單,則整合成功。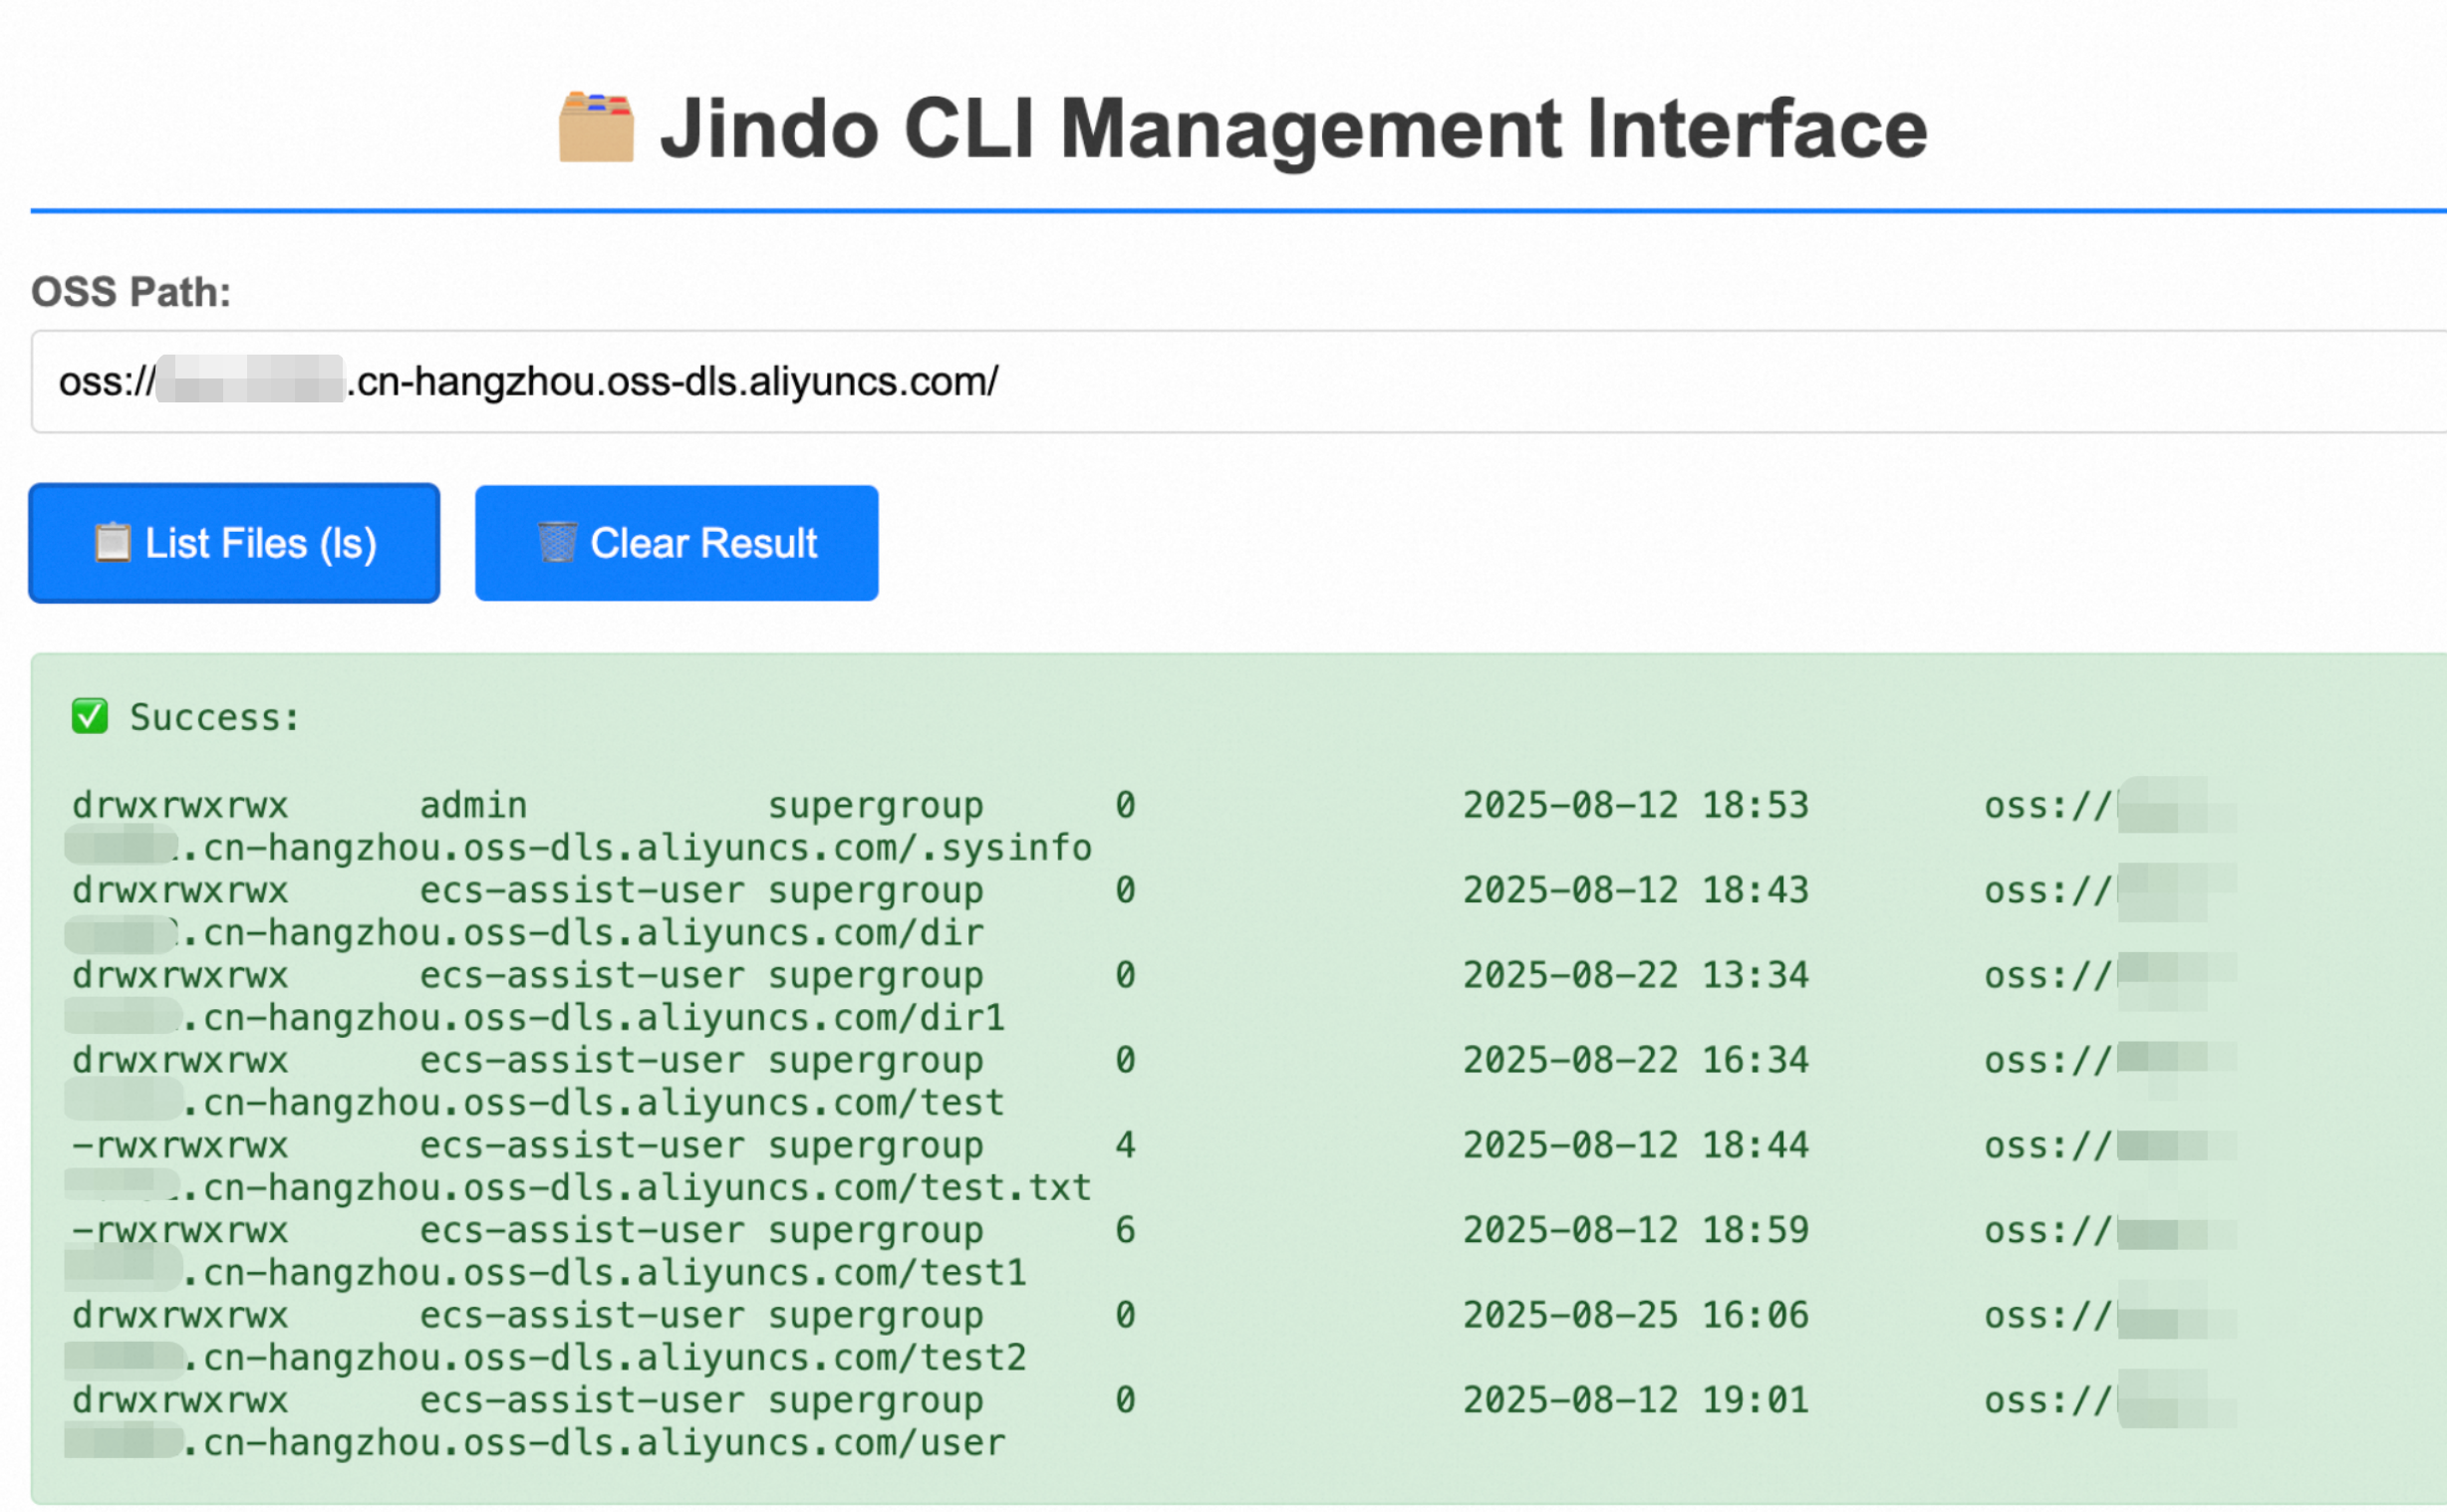
API介面驗證(備選)
如果暫不方便部署前端,可使用 curl 直接測試後端介面是否工作正常。
curl -X POST "http://localhost:8080/jindo-ls?path=oss://bucket.endpoint/"返迴文件列表即為整合成功。
驗證成功後,可參考附錄中的常用Jindo CLI命令,將其他命令整合到您的系統中。
方式二:分離式部署
生產環境推薦。此方案將Jindo CLI封裝為獨立的Agent服務,實現責任分離。適用於內網環境或安全要求相對較低的情境,如需高安全要求,請自行實現API訪問校正機制。
步驟一:在伺服器 B 啟動 Agent 服務
建立Agent指令碼
建立
JindoCliHttpAgent.py檔案,指令碼使用Python3實現。其他技術棧可參考相同思路進行實現。#!/usr/bin/env python3 # -*- coding: utf-8 -*- import http.server import json import subprocess import socketserver import shlex class CommandHandler(http.server.SimpleHTTPRequestHandler): def do_POST(self): if self.path == '/execute': # 讀取請求體 content_length = int(self.headers.get('Content-Length', 0)) post_data = self.rfile.read(content_length) try: # 解析 JSON 請求 data = json.loads(post_data) command = data.get('command', '') # 驗證命令參數 if not command: self.send_response(400) self.send_header('Content-Type', 'application/json') self.end_headers() self.wfile.write(json.dumps({'error': 'Missing "command" parameter'}).encode('utf-8')) return # 安全執行命令 command_list = shlex.split(command) output = subprocess.check_output(command_list, stderr=subprocess.STDOUT) output_str = output.decode('utf-8').strip() # 返回執行結果 self.send_response(200) self.send_header('Content-Type', 'application/json') self.end_headers() self.wfile.write(json.dumps({'output': output_str}).encode('utf-8')) except Exception as e: # 返回錯誤資訊 self.send_response(500) self.send_header('Content-Type', 'application/json') self.end_headers() self.wfile.write(json.dumps({'error': str(e)}).encode('utf-8')) else: self.send_error(404, 'Not Found') # 多線程 HTTP 伺服器 class ThreadedHTTPServer(socketserver.ThreadingMixIn, http.server.HTTPServer): pass if __name__ == '__main__': # 啟動 HTTP Agent 服務 server_address = ('0.0.0.0', 8000) httpd = ThreadedHTTPServer(server_address, CommandHandler) print('Starting secure HTTP Agent on port 8000...') httpd.serve_forever()配置防火牆
為伺服器B開放入方向8000連接埠,僅允許商務服務器A的私網IP訪問,禁止公網訪問。
添加執行許可權
chmod +x JindoCliHttpAgent.py啟動HTTP Agent服務
python3 JindoCliHttpAgent.py服務啟動後會監聽8000連接埠請求,啟動效果如下圖所示。

驗證Agent服務
新開終端,測試Agent是否正常工作。替換<Bucketname>和<EndPoint>為實際值,例如:
oss://my-bucket.cn-hangzhou.oss-dls.aliyuncs.com/curl -X POST http://localhost:8000/execute \ -H "Content-Type: application/json" \ -d '{"command": "jindo fs -ls oss://<Bucketname>.<EndPoint>/"}'如果返回 JSON 格式的檔案清單,如下圖示,則證明Agent已部署成功。

步驟二:在伺服器A上整合業務系統
不同版本的 Jindo SDK 主命令可能存在差異。部分新版本使用 jindo,而一些早期版本使用 jindofs。
在複製代碼前,建議您先在伺服器的命令列中手動執行jindo -v或jindofs -v,以確認您環境中正確的命令。本文所有樣本均以 jindo 為例。
建立Java API介面調用Agent服務。請將代碼中的<伺服器B的私網IP>替換為實際的伺服器B私網IP地址。
package com.example.jindotest;

import org.springframework.http.HttpStatus;
import org.springframework.http.ResponseEntity;
import org.springframework.web.bind.annotation.PostMapping;
import org.springframework.web.bind.annotation.RequestParam;
import org.springframework.web.bind.annotation.RestController;

import java.io.BufferedReader;
import java.io.InputStreamReader;
import java.io.IOException;

@RestController
public class JindoAgentController {

    @PostMapping("/jindo-agent-ls")
    public ResponseEntity<String> executeJindoLs(@RequestParam String path) {
        // 校正路徑格式
        if (path == null || !path.startsWith("oss://")) {
            return ResponseEntity.badRequest().body("Invalid OSS path");
        }

        try {
            // 構造 JSON 請求體
            String requestBody = String.format("{\"command\": \"jindo fs -ls %s\"}", path);

            // 通過 curl 調用 Agent 服務
            ProcessBuilder processBuilder = new ProcessBuilder(
                "curl", "-X", "POST", "http://<伺服器B的私網IP>:8000/execute",
                "-H", "Content-Type: application/json",
                "-d", requestBody
            );

            // 啟動進程
            Process process = processBuilder.start();

            // 讀取輸出資料流
            BufferedReader reader = new BufferedReader(new InputStreamReader(process.getInputStream()));
            StringBuilder result = new StringBuilder();
            String line;
            while ((line = reader.readLine()) != null) {
                result.append(line).append("\n");
            }

            // 檢查執行結果
            int exitCode = process.waitFor();
            if (exitCode == 0) {

                return ResponseEntity.ok(result.toString());
            } else {
                return ResponseEntity.status(HttpStatus.INTERNAL_SERVER_ERROR).body("Command failed with exit code: " + exitCode);
            }
        } catch (IOException | InterruptedException e) {
            return ResponseEntity.status(HttpStatus.INTERNAL_SERVER_ERROR).body("Error executing command: " + e.getMessage());
        }
    }
}生產環境建議使用RestTemplate或WebClient等HTTP用戶端庫替代curl,獲得更好的效能和錯誤處理能力。
步驟三:結果驗證
網路連通性檢查
如果採用分離式部署,需要確保伺服器間網路連通。在伺服器A上執行
ping <伺服器B私網IP>。若穩定收到ping響應,無丟包。則證明兩台伺服器連通。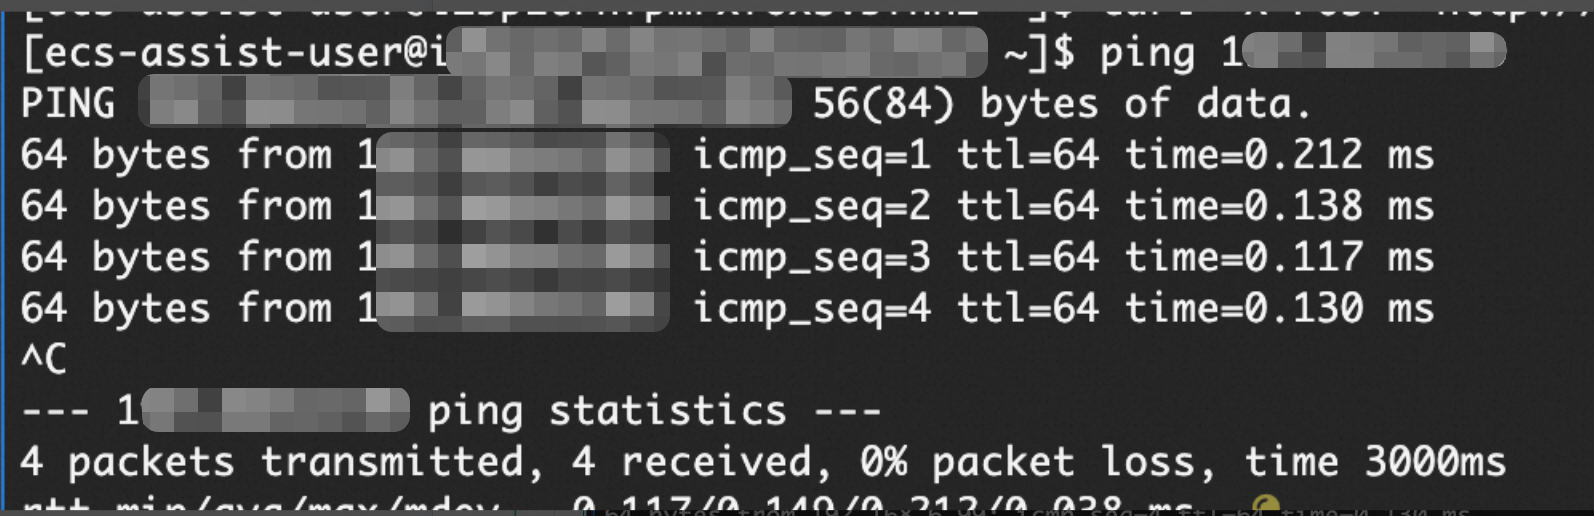
web介面驗證
參考附錄Web介面範例程式碼,將代碼中的請求路徑修改為
/jindo-agent-ls。訪問http://<伺服器A公網IP>:8080(需要開啟伺服器A入方向的8080連接埠)進行測試。輸入檔案路徑:如:oss://my-bucket.cn-hangzhou.oss-dls.aliyuncs.com/,單擊"List Files"按鈕。如果介面成功展示了OSS的檔案清單,則整合成功。API介面驗證(備選方式)
如果暫不方便部署前端,可使用 curl 直接測試後端介面是否工作正常。
curl -X POST "http://localhost:8080/jindo-agent-ls?path=oss://<bucket>.<Endpoint>/"返迴文件列表即為整合成功。
驗證成功後,可參考附錄中的常用Jindo CLI命令,將其他命令整合到您的系統中。
安全建議
Jindo CLI 具有 OSS-HDFS 服務組態管理和資料刪除能力,使用不當可能造成嚴重後果。在生產環境部署前,務必在測試環境充分驗證。
核心原則
最小許可權:僅授予完成任務所需的最小許可權,避免過度授權。
存取控制:在調用端實施嚴格的身分識別驗證和授權機制。
並發控制:限制並行作業數量,防止配置衝突和資料管理混亂。
網路安全
分離式部署:Agent 伺服器僅允許商務服務器私網 IP 訪問,禁止公網暴露。
連接埠管理:通過安全性群組或防火牆精確控制訪問連接埠。
相關文檔
附錄
常用Jindo CLI命令
命令 | 功能說明 | 命令樣本 |
stat | 顯示檔案狀態。 |
|
ls | 列出目錄下檔案。選擇性參數-R,表示遞迴顯示。 |
|
du | 顯示目錄中所有檔案的大小。選擇性參數如下:
|
|
count | 顯示檔案大小以及檔案數量。選擇性參數-h,顯示檔案大小單位。 |
|
listUserGroupsMappings | 列出所有使用者和組的關係。 |
|
dumpInventory | 匯出檔案中繼資料。 |
|
putConfig | 服務特性設定(如設定目錄保護) |
|
getConfig | 擷取配置資訊(如目錄保護資訊) |
|
Web介面範例程式碼
將以下代碼儲存為index.html,放置在Spring Boot專案的src/main/resources/static/目錄下:
<!DOCTYPE html>
<html>
<head>
    <meta charset="UTF-8">
    <title>Jindo CLI Management Interface</title>
    <style>
        body {
            font-family: Arial, sans-serif;
            max-width: 1000px;
            margin: 50px auto;
            padding: 20px;
            background-color: #f5f5f5;
        }
        .container {
            background-color: white;
            padding: 30px;
            border-radius: 8px;
            box-shadow: 0 2px 10px rgba(0,0,0,0.1);
        }
        h1 {
            color: #333;
            text-align: center;
            border-bottom: 2px solid #007bff;
            padding-bottom: 10px;
        }
        .form-group {
            margin-bottom: 20px;
        }
        label {
            display: block;
            margin-bottom: 5px;
            font-weight: bold;
            color: #555;
        }
        input[type="text"] {
            width: 100%;
            padding: 10px;
            border: 1px solid #ddd;
            border-radius: 4px;
            font-size: 16px;
            box-sizing: border-box;
        }
        button {
            background-color: #007bff;
            color: white;
            padding: 12px 24px;
            border: none;
            border-radius: 4px;
            cursor: pointer;
            font-size: 16px;
            margin-right: 10px;
        }
        button:hover {
            background-color: #0056b3;
        }
        button:disabled {
            background-color: #6c757d;
            cursor: not-allowed;
        }
        .result {
            margin-top: 20px;
            padding: 15px;
            border: 1px solid #ddd;
            border-radius: 4px;
            background-color: #f8f9fa;
            min-height: 100px;
            font-family: monospace;
            white-space: pre-wrap;
            font-size: 14px;
        }
        .loading {
            color: #007bff;
            font-style: italic;
        }
        .error {
            color: #dc3545;
            background-color: #f8d7da;
            border-color: #f5c6cb;
        }
        .success {
            color: #155724;
            background-color: #d4edda;
            border-color: #c3e6cb;
        }
    </style>
</head>
<body>
    <div class="container">
        <h1> Jindo CLI Management Interface</h1>

        <div class="form-group">
            <label for="ossPath">OSS Path:</label>
            <input type="text" id="ossPath"
                   value="oss://your-bucket-name.cn-hangzhou.oss-dls.aliyuncs.com/"
                   placeholder="Enter OSS path (e.g., oss://bucket-name.endpoint/)">
        </div>

        <div class="form-group">
            <button onclick="listFiles()">List Files (ls)</button>
            <button onclick="clearResult()">Clear Result</button>
        </div>

        <div id="result" class="result">
            Ready to execute Jindo CLI commands...
        </div>
    </div>

    <script>
        function listFiles() {
            const path = document.getElementById('ossPath').value;
            const resultDiv = document.getElementById('result');

            if (!path || !path.startsWith('oss://')) {
                resultDiv.innerHTML = 'Error: Please enter a valid OSS path starting with "oss://"';
                resultDiv.className = 'result error';
                return;
            }

            // Show loading
            resultDiv.innerHTML = 'Loading... Please wait';
            resultDiv.className = 'result loading';

            // Call backend API
            fetch('/jindo-ls', {
                method: 'POST',
                headers: {
                    'Content-Type': 'application/x-www-form-urlencoded',
                },
                body: 'path=' + encodeURIComponent(path)
            })
            .then(response => {
                if (response.ok) {
                    return response.text();
                } else {
                    throw new Error('HTTP ' + response.status + ': ' + response.statusText);
                }
            })
            .then(data => {
                resultDiv.innerHTML = 'Success:\n\n' + data;
                resultDiv.className = 'result success';
            })
            .catch(error => {
                resultDiv.innerHTML = 'Error:\n\n' + error.message;
                resultDiv.className = 'result error';
            });
        }

        function clearResult() {
            document.getElementById('result').innerHTML = 'Ready to execute Jindo CLI commands...';
            document.getElementById('result').className = 'result';
        }

        // Allow Enter key to trigger listFiles
        document.getElementById('ossPath').addEventListener('keypress', function(e) {
            if (e.key === 'Enter') {
                listFiles();
            }
        });
    </script>
</body>
</html>