可觀測可視化 Grafana 版支援使用AzureAD進行統一認證登入。本文介紹如何通過AzureAD活動目錄進行統一認證登入,以及如何通過AzureAD提供的應用許可權來設定使用者和使用者組角色。
前提條件
-
已建立Grafana工作區。
-
已配置Azure AD。
更多資訊,請參見 開源版Grafana AzureAD文檔 。
步驟一:建立Registration
-
登入Azure Portal,在左側導覽列選擇Azure AD。
說明如果您有多個AD域,可以在頁面右側選擇您需要添加的AD,同時選擇您需要進行配置的AD Tenant。
-
在側面管理菜單,單擊App registration > New Registration。
-
添加重新導向URL ,選擇Web,這裡Grafana的URL地址為
https://<my_grafana_server_name_or_ip>:<grafana_server_port>/login/azuread,然後單擊Register,系統會跳轉至建立APP的Overview頁面。 -
在Certificates & secrets中添加新的Client Secret。
步驟二:設定許可權
-
在左側單擊Manifest,定義應用的Role和許可權。
Grafana分為Viewer、Editor、Admin三個角色。如果不進行定義,所有使用者將會都是Viewer角色。每個角色要求一個不重複的ID,可以使用uuidgen或者PowerShell的New-Guid命令,具體樣本如下:
說明用資訊清單檔中產生的ID替換每個SOME_UNIQUE_ID。
"appRoles": [ { "allowedMemberTypes": [ "User" ], "description": "Grafana org admin Users", "displayName": "Grafana Org Admin", "id": "SOME_UNIQUE_ID", "isEnabled": true, "lang": null, "origin": "Application", "value": "Admin" }, { "allowedMemberTypes": [ "User" ], "description": "Grafana read only Users", "displayName": "Grafana Viewer", "id": "SOME_UNIQUE_ID", "isEnabled": true, "lang": null, "origin": "Application", "value": "Viewer" }, { "allowedMemberTypes": [ "User" ], "description": "Grafana Editor Users", "displayName": "Grafana Editor", "id": "SOME_UNIQUE_ID", "isEnabled": true, "lang": null, "origin": "Application", "value": "Editor" } ], -
在Azure Active Directory頁面找到Enterprise Application,然後搜尋並單擊進入您的應用。
-
單擊Users and Groups,並添加使用者和許可權。
步驟三:設定Grafana參數
登入可觀測可視化 Grafana 版控制台,在左側導覽列單擊工作区管理。
在工作区管理頁面,單擊目標工作區ID。
-
在左側導覽列單擊参数设置。
-
在左側參數列表選擇auth.azuread,然後單擊修改参数。
-
參考以下配置,修改參數的運行參數,然後單擊保存并生效。
[auth.azuread] name = Azure AD enabled = true allow_sign_up = true client_id = <client_id> client_secret = <client_secret> scopes = openid email profile auth_url= https://login.microsoftonline.com/<application-id>/oauth2/v2.0/authorize token_url = https://login.microsoftonline.com/<application-id>/oauth2/v2.0/token allowed_domains = allowed_groups =說明client_id,client_secret,application-id為您自己在Azure中建立的。
其中:
-
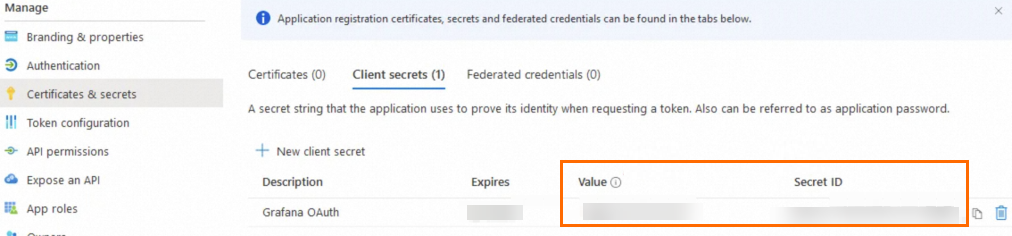
Azure Client ID 和Secret ID,您可以在Certificates & secret頁面尋找。
-
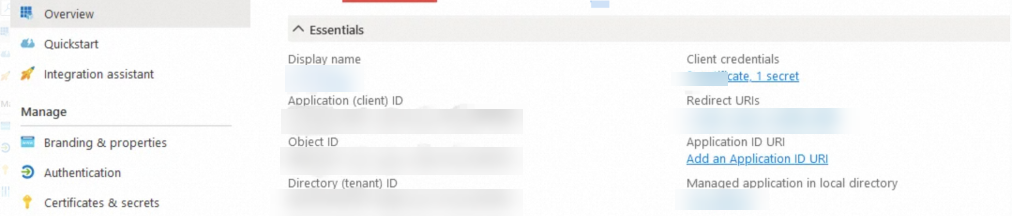
Auth URL和Token URL,您可以在Overview頁面中單擊end-point尋找。
-
步驟四:登入Grafana
Azure參數設定完成後大約等待1分鐘,開啟Grafana地址,並單擊Sign in with Azure AD,即可登入成功。表示已成功通過AzureAD統一認證登入Grafana。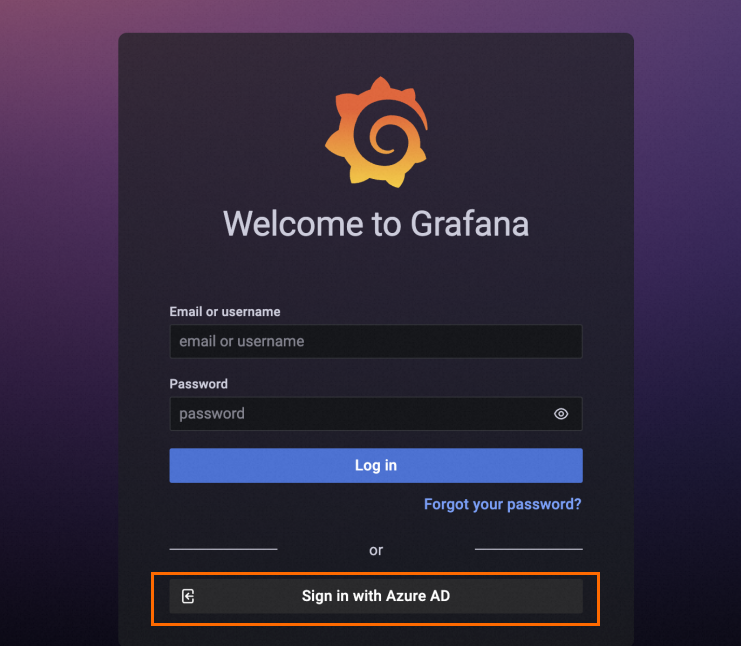
如果您無法登入Grafana, 請檢查是否已將訪問裝置的IP地址加入到工作區的公網或私網訪問白名單組中 。 。