このトピックでは、MaxCompute 開発環境で Spark をセットアップする方法について説明します。
Windowsオペレーティングシステムがインストールされている場合は、[Windows開発環境の設定] に移動します。
前提条件
Spark on MaxCompute開発環境をセットアップする前に、Linuxオペレーティングシステムに次のソフトウェアがインストールされていることを確認してください。
このトピックで使用されているソフトウェアのバージョン番号とソフトウェアのインストールパスは参考用です。 ダウンロードしてインストールする必要がある実際のソフトウェアのバージョンは、オペレーティングシステムによって異なります。
JDK
次のサンプルコマンドは、LinuxオペレーティングシステムにJDKをインストールする方法を示しています。 JDKパッケージ名は、実際の状況によって異なります。
sudo yum -y list java *コマンドを実行して、JDKパッケージ名を取得できます。sudo yum install -y java-1.8.0-openjdk-devel.x86_64Python
次のサンプルコマンドは、LinuxオペレーティングシステムにPythonをインストールする方法を示しています。 Pythonパッケージ名は、実際の状況によって異なります。
# Obtain the Python package.
sudo wget https://www.python.org/ftp/python/2.7.10/Python-2.7.10.tgz
# Decompress the Python package.
sudo tar -zxvf Python-2.7.10.tgz
# Switch to the path to which the Python package is decompressed and specify the installation path.
cd Python-2.7.10
sudo ./configure --prefix=/usr/local/python2
# Compile and install the Python package.
sudo make
sudo make install
Maven
次のサンプルコマンドは、LinuxオペレーティングシステムにMavenをインストールする方法を示しています。 Mavenパッケージのパスは、実際の状況によって異なります。
# Obtain the Maven package.
sudo wget https://dlcdn.apache.org/maven/maven-3/3.8.7/binaries/apache-maven-3.8.7-bin.tar.gz
# Decompress the Maven package.
sudo tar -zxvf apache-maven-3.8.7-bin.tar.gz
Git
次のサンプルコマンドは、LinuxオペレーティングシステムにGitをインストールする方法を示しています。
# Obtain the Git package.
sudo wget https://github.com/git/git/archive/v2.17.0.tar.gz
# Decompress the Git package.
sudo tar -zxvf v2.17.0.tar.gz
# Install the dependencies that are required for compiling the source code of Git.
sudo yum install curl-devel expat-devel gettext-devel openssl-devel zlib-devel gcc perl-ExtUtils-MakeMaker
# Switch to the path to which the Git package is decompressed.
cd git-2.17.0
# Compile the source code of Git.
sudo make prefix=/usr/local/git all
# Install Git in the /usr/local/git path.
sudo make prefix=/usr/local/git install
Spark on MaxComputeクライアントパッケージをダウンロードし、お使いのオペレーティングシステムにアップロードします
Spark on MaxComputeクライアントパッケージは、MaxCompute認証機能とともにリリースされます。 これにより、MaxComputeのSparkは、spark-submitスクリプトを使用してMaxComputeプロジェクトにジョブを送信するクライアントとして機能します。 MaxComputeは、Spark 1.x、Spark 2.x、およびSpark 3.xのリリースパッケージを提供します。 これらのパッケージは、次のリンクからダウンロードできます。
Spark-1.6 3: Spark 1.xアプリケーションの開発に使用されます。
Spark-2.3 0: Spark 2.xアプリケーションの開発に使用します。
Spark-2.4 5: Spark 2.xアプリケーションの開発に使用されます。 Spark 2.4.5の使用に関する注意事項の詳細については、「Spark 2.4.5の使用に関する注意事項」をご参照ください。
Spark-3.1 1: Spark 3.xアプリケーションの開発に使用されます。 Spark 3.1.1の使用に関する注意事項の詳細については、「Spark 3.1.1の使用に関する注意事項」をご参照ください。
Spark on MaxComputeクライアントパッケージをLinuxオペレーティングシステムにアップロードし、パッケージを解凍します。 Spark on MaxComputeクライアントパッケージがあるパスに移動し、次のコマンドを実行してパッケージを解凍します。
sudo tar -xzvf spark-2.3.0-odps0.33.0.tar.gz環境変数を設定します。
このセクションで环境変数を设定するコマンドは, 管理者権限を持つユーザーだけが実行できます。
LinuxオペレーティングシステムのCLIで環境変数を設定する必要があります。 次のコンテンツでは、環境変数の設定方法と関連情報について説明します。
Java環境変数を設定します。
Javaインストールパスを取得します。 サンプルコマンド:
# If you use yum to install Java, Java is installed in the /usr path by default. You can run the following command to query the Java installation path. If you use a custom installation path, the actual path prevails.
whereis java
ls -lrt /usr/bin/java
ls -lrt /etc/alternatives/java

# The following result is returned. In the result, /usr/lib/jvm/java-1.8.0-openjdk-1.8.0.322.b06-1.1.al7.x86_64 is the Java installation path.
/etc/alternatives/java -> /usr/lib/jvm/java-1.8.0-openjdk-1.8.0.322.b06-1.1.al7.x86_64/jre/bin/java
Java環境変数を編集します。 サンプルコマンド:
# Edit the configuration file for environment variables.
vim /etc/profile

# Press i to enter the edit mode and add environment variables to the end of the configuration file.
# Set JAVA_HOME to the actual Java installation path.
export JAVA_HOME=/usr/lib/jvm/java-1.8.0-openjdk-1.8.0.322.b06-1.1.al7.x86_64
export CLASSPATH=.:$JAVA_HOME/lib/dt.jar:$JAVA_HOME/lib/tools.jar
export PATH=$JAVA_HOME/bin:$PATH
# Press the Esc key to exit the edit mode and enter :wq to close the configuration file.

# Run the following command to make the modification take effect:
source /etc/profile

# Check whether the Java environment variables are successfully configured.
java -version
# The following result is returned:
openjdk version "1.8.0_322"
OpenJDK Runtime Environment (build 1.8.0_322-b06)
OpenJDK 64-Bit Server VM (build 25.322-b06, mixed mode)
Spark環境変数を設定します。
Spark on MaxComputeクライアントパッケージが解凍されたパスを取得します。 次の図は、パスが
/home/spark-2.3.0-odps0.33.0であることを示しています。 解凍パスとパッケージ名は、実際の状況によって異なります。
Spark環境変数を編集します。 サンプルコマンド:
# Edit the configuration file for environment variables.
vim /etc/profile
# Press i to enter the edit mode and add environment variables to the end of the configuration file.
# Set SPARK_HOME to the actual path to which the Spark on MaxCompute client package is decompressed.
export SPARK_HOME=/home/spark-2.3.0-odps0.33.0
export PATH=$SPARK_HOME/bin:$PATH
# Press the Esc key to exit the edit mode and enter :wq to close the configuration file.

# Run the following command to make the modification take effect:
source /etc/profile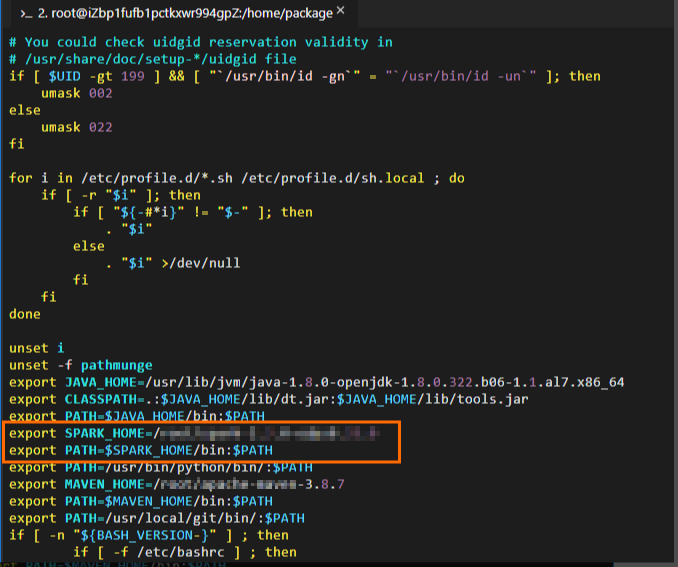
Python環境変数を設定します。
PySparkを使用する場合は、Python環境変数を設定する必要があります。
Pythonのインストールパスを取得します。 サンプルコマンド:

Python環境変数を編集します。 サンプルコマンド:
# Edit the configuration file for environment variables.
vim /etc/profile

# Press i to enter the edit mode and add environment variables to the end of the configuration file.
# Set PATH to the actual Python installation path.
export PATH=/usr/bin/python/bin/:$PATH
# Press the Esc key to exit the edit mode and enter :wq to close the configuration file.

# Run the following command to make the modification take effect:
source /etc/profile

# Check whether the Python environment variables are successfully configured.
python --version
# The following result is returned:
Python 2.7.5
Maven環境変数を設定します。
Mavenパッケージの解凍先のパスを取得します。 次の図は、パスが
/home/apache-maven-3.8.7であることを示しています。 解凍パスとパッケージ名は、実際の状況によって異なります。
Maven環境変数を編集します。 サンプルコマンド:
# Edit the configuration file for environment variables.
vim /etc/profile

# Press i to enter the edit mode and add environment variables to the end of the configuration file.
# Set MAVEN_HOME to the actual path to which the Maven package is decompressed.
export MAVEN_HOME=/home/apache-maven-3.8.7
export PATH=$MAVEN_HOME/bin:$PATH
# Press the Esc key to exit the edit mode and enter :wq to close the configuration file.
# Run the following command to make the modification take effect:
source /etc/profile

# Check whether the Maven environment variables are successfully configured.
mvn -version
# The following result is returned:
Apache Maven 3.8.7 (9b656c72d54e5bacbed989b64718c159fe39b537)
Maven home: /home/apache-maven-3.8.7
Java version: 1.8.0_322, vendor: Red Hat, Inc., runtime: /usr/lib/jvm/java-1.8.0-openjdk-1.8.0.322.b06-1.1.al7.x86_64/jre
Default locale: en_US, platform encoding: UTF-8
OS name: "linux", version: "4.19.91-25.1.al7.x86_64", arch: "amd64", family: "unix"
Git環境変数を設定します。
Gitインストールパスを取得します。 サンプルコマンド:
whereis git
Git環境変数を編集します。 サンプルコマンド:
# Edit the configuration file for environment variables.
vim /etc/profile

# Press i to enter the edit mode and add environment variables to the end of the configuration file. # Set PATH to the actual Git installation path.
export PATH=/usr/local/git/bin/:$PATH
# Press the Esc key to exit the edit mode and enter :wq to close the configuration file.

# Run the following command to make the modification take effect:
source /etc/profile

# Check whether the Git environment variables are successfully configured.
git --version
# The following result is returned:
git version 2.24.4
spark-defaults.confファイルの設定
MaxComputeクライアントでSparkを初めて使用する場合は、Spark on MaxComputeクライアントパッケージの解凍パスのconfフォルダーにあるspark-defaults.conf.templateファイルの名前をspark-defaults.confに変更します。 次に、ファイル内の情報を設定します。 ファイルの名前を変更しない場合、設定は有効になりません。 サンプルコマンド:
# Switch to the path to which the Spark on MaxCompute client package is decompressed and go to the conf folder. The actual path prevails.
cd /home/spark-2.3.0-odps0.33.0/conf

# Rename the spark-defaults.conf.template file.
mv spark-defaults.conf.template spark-defaults.conf

# Edit the spark-defaults.conf file.
vim spark-defaults.conf
# Press i to enter the edit mode and add the following configuration to the end of the configuration file.
spark.hadoop.odps.project.name = <MaxCompute_project_name>
spark.hadoop.odps.access.id = <AccessKey_id>
spark.hadoop.odps.access.key = <AccessKey_secret>
spark.hadoop.odps.end.point = <Endpoint>   # The endpoint that is used to connect the Spark on MaxCompute client to your MaxCompute project. You can modify the endpoint based on your business requirements. For more information, see Endpoint.
# For Spark 2.3.0, set spark.sql.catalogImplementation to odps. For Spark 2.4.5, set spark.sql.catalogImplementation to hive.
spark.sql.catalogImplementation={odps|hive}
# Retain the following configurations:
spark.hadoop.odps.task.major.version = cupid_v2
spark.hadoop.odps.cupid.container.image.enable = true
spark.hadoop.odps.cupid.container.vm.engine.type = hyper
spark.hadoop.odps.moye.trackurl.host = http://jobview.odps.aliyun.comMaxCompute_project_name: アクセスするMaxComputeプロジェクトの名前。
このパラメーターには、MaxComputeプロジェクトが対応するDataWorksワークスペースではなく、MaxComputeプロジェクトの名前を指定します。 MaxComputeコンソールにログインできます。 上部のナビゲーションバーで、リージョンを選択します。 左側のナビゲーションウィンドウで、[ワークスペース] > [プロジェクト] を選択して、MaxComputeプロジェクトの名前を表示します。
AccessKey_id: MaxComputeプロジェクトへのアクセスに使用されるAccessKey ID。
AccessKeyペアページからAccessKey IDを取得できます。
AccessKey_secret: AccessKey IDに対応するAccessKeyシークレット。
AccessKeyペアページからAccessKey secretを取得できます。
Endpoint: MaxComputeプロジェクトが存在するリージョンのパブリックエンドポイント。
各リージョンのパブリックエンドポイントの詳細については、「異なるリージョンのエンドポイント (インターネット) 」をご参照ください。
VPC_endpoint: MaxComputeプロジェクトが存在するリージョンのVPCエンドポイント。
各リージョンのVPCエンドポイントの詳細については、「異なるリージョンのエンドポイント (VPC) 」をご参照ください。
その他の設定パラメータは、特別なシナリオと機能に必要です。 詳細については、「Spark on MaxCompute設定の詳細」をご参照ください。
プロジェクトの準備
MaxComputeのSparkは、デモプロジェクトテンプレートを提供します。 テンプレートをダウンロードしてコピーし、アプリケーションを開発することを推奨します。
デモプロジェクトでは、Spark on MaxComputeの依存関係スコープが提供されています。 このスコープを変更しないでください。 そうしないと、送信したジョブが期待どおりに実行されない場合があります。
Linuxオペレーティングシステムでプロジェクトを準備します。
Spark 1.xテンプレートをダウンロードし、テンプレートをコンパイルします。
git clone https://github.com/aliyun/MaxCompute-Spark.git
cd MaxCompute-Spark/spark-1.x
mvn clean package
Spark 2.xテンプレートをダウンロードし、テンプレートをコンパイルします。
git clone https://github.com/aliyun/MaxCompute-Spark.git
cd MaxCompute-Spark/spark-2.x
mvn clean package
Spark 3.xテンプレートをダウンロードし、テンプレートをコンパイルします。
git clone https://github.com/aliyun/MaxCompute-Spark.git
cd MaxCompute-Spark/spark-3.x
mvn clean package
上記のコマンドを実行した後、環境設定が無効であることを示すエラーメッセージが表示された場合は、上記の手順に従って設定を確認します。 無効な設定が見つかった場合は、設定を変更します。
依存関係の設定
準備したSpark on MaxComputeプロジェクトで、依存関係を設定します。 サンプルコマンド:
MaxComputeプロジェクトのテーブルにアクセスするために必要な依存関係を設定します。
Spark-1.xテンプレートが使用されます。
# Go to the spark-1.x folder.
cd MaxCompute-Spark/spark-1.x

# Edit the POM file to add the odps-spark-datasource dependency.
<dependency>
  <groupId>com.aliyun.odps</groupId>
  <artifactId>odps-spark-datasource_2.10</artifactId>
  <version>3.3.8-public</version>
</dependency>
Spark-2.xテンプレートが使用されます。
# Go to the spark-2.x folder.
cd MaxCompute-Spark/spark-2.x

# Edit the POM file to add the odps-spark-datasource dependency.
<dependency>
    <groupId>com.aliyun.odps</groupId>
    <artifactId>odps-spark-datasource_2.11</artifactId>
    <version>3.3.8-public</version>
</dependency>
Object Storage Service (OSS) へのアクセスに必要な依存関係を設定します。
ジョブがOSSにアクセスする必要がある場合は、次の依存関係を追加します。
<dependency>
    <groupId>com.aliyun.odps</groupId>
    <artifactId>hadoop-fs-oss</artifactId>
    <version>3.3.8-public</version>
</dependency>
Spark-1.x、Spark-2.x、またはSpark-3.xテンプレートを使用する場合に必要な依存関係の詳細については、「Spark-1.x pom」、「Spark-2.x pom」、または「Spark-3.x pom」をご参照ください。
外部ファイルの参照
次の種類のSparkジョブを開発する場合は、外部ファイルを参照する必要があります。
特定の構成ファイルからデータを読み取る必要があるSparkジョブ。
追加のリソースパッケージまたはJARファイルやPythonライブラリなどのサードパーティライブラリが必要なSparkジョブ。
実際のアプリケーションでは、ファイルを参照する前に外部ファイルをアップロードする必要があります。 次のいずれかの方法で外部ファイルをアップロードできます。
方法1: Sparkパラメーターを使用して外部ファイルをアップロードします。
MaxComputeのSparkは、Apache Sparkで定義されている
-- jars、-- py-files、-- files、-- archivesのパラメーターをサポートしています。 これらのパラメーターを設定して、ジョブの送信時に外部ファイルをアップロードできます。 ジョブを実行すると、これらの外部ファイルが作業ディレクトリにアップロードされます。spark-submitスクリプトを使用して、Spark on MaxComputeクライアントにファイルをアップロードします。
説明-- jars: このパラメーターは、ドライバーと各エグゼキュータの現在の作業ディレクトリにアップロードするJARパッケージを指定します。 パッケージ名はコンマ (,) で区切ります。 これらのJARパッケージは、ドライバと各エグゼキュータのクラスパスに追加されます。 これらのパッケージを指定するには、Sparkジョブの設定で"./your_jar_name"を使用します。 これはApache Sparkの場合です。-- filesと-- py-files: 2つのパラメーターは、ドライバーと各エグゼキュータの現在の作業ディレクトリにアップロードする共通ファイルまたはPythonファイルを指定します。 ファイル名はコンマ (,) で区切ります。 これらのファイルを指定するには、Sparkジョブの設定で"./your_file_name"を使用します。 これはApache Sparkの場合です。-- archives: このパラメーターは、Apache Sparkで定義されているパラメーターとは少し異なります。 このパラメーターをxxx#yyy形式で設定し、ファイル名をコンマ (,) で区切ります。 -- archivesパラメーターを設定すると、指定したアーカイブファイル (ZIPファイルなど) が、ドライバーおよび各エグゼキュータの現在の作業ディレクトリのサブディレクトリに解凍されます。 たとえば、このパラメーターがxx.zip#yyに設定されている場合、アーカイブファイルのコンテンツを参照するには"./yy/xx/"を使用する必要があります。 このパラメーターがxx.zipに設定されている場合、"./xx.zip/xx/"を使用してアーカイブファイルの内容を参照する必要があります。"./xxx/"を使用してアーカイブファイルを現在の作業ディレクトリに直接解凍する必要がある場合は、spark.hadoop.odps.cupid.resourcesパラメーターを使用する必要があります。
DataWorksを使用して、ジョブに必要なリソースを追加します。 詳細については、「MaxComputeリソースの作成と使用」をご参照ください。
説明DataWorksコンソールでは、最大200 MBのサイズのファイルをアップロードできます。 アップロードするファイルのサイズが200 MBを超える場合は、MaxComputeクライアントを使用してこれらのファイルをMaxComputeリソースとしてアップロードし、DataWorksコンソールのDataStudioページに追加する必要があります。 MaxComputeリソースの詳細については、「MaxComputeリソースの管理」をご参照ください。
方法2: MaxComputeリソースとしてファイルをアップロードします。
MaxComputeのSparkは、
spark.hadoop.odps.cupid.resourcesパラメーターを提供します。 このパラメーターを使用すると、MaxComputeのリソースを直接参照できます。 ジョブを実行すると、参照されるリソースが作業ディレクトリにアップロードされます。 MaxComputeリソースとしてファイルをアップロードするには、次の手順を実行します。MaxComputeクライアントにログインし、ファイルをリソースとしてMaxComputeプロジェクトにアップロードします。 アップロードできるファイルの最大サイズは500 MBです。
spark.hadoop.odps.cupid.resourcesパラメーターをSparkジョブの設定に追加します。 このパラメーターは、Sparkジョブの実行に必要なMaxComputeリソースを指定します。 このパラメーターは、<projectname>.<resourcename>形式で設定します。 複数のファイルを参照する必要がある場合は、ファイル名をコンマ (,) で区切ります。 次の構成は例を示しています。spark.hadoop.odps.cupid.resources=public.python-python-2.7-ucs4.zip,public.myjar.jar指定されたリソースファイルは、ドライバと各エグゼキュータの現在の作業ディレクトリにダウンロードされます。 デフォルトでは、ダウンロードしたファイルの名前は
<projectname>.<resourcename>形式です。<projectname>.<resourcename >:< newresourcename>形式でファイル名を変更することもできます。 次の構成は例を示しています。spark.hadoop.odps.cupid.resources=public.myjar.jar:myjar.jar重要spark.hadoop.odps.cupid.resourcesパラメーターは、spark-defaults.confファイルまたはDataWorksコンソールでこのパラメーターを設定した後にのみ有効になります。 このパラメーターがコードで記述されている場合、このパラメーターは有効になりません。
上記のいずれかの方法を使用してファイルをアップロードした後、コード内の外部ファイルを参照できます。 次のコードは例を示しています。
val targetFile = "File name"
val file = Source.fromFile(targetFile)
for (line <- file.getLines)
    println(line)
file.close
SparkPi煙テストを実施する
上記の操作が完了したら、スモークテストを実行して、MaxComputeでSparkのエンドツーエンドの接続を確認します。 たとえば、次のコマンドを実行して、Spark 2.xアプリケーションのSparkPiスモークテストを実行できます。
# /path/to/MaxCompute-Spark Configure a valid path for the compiled JAR package of the application.
cd $SPARK_HOME
bin/spark-submit \
--class com.aliyun.odps.spark.examples.SparkPi \
--master yarn \
--deploy-mode cluster \
/path/to/your/spark-examples_2.11-1.0.0-SNAPSHOT-shaded.jar

# If the following log information is displayed, smoke testing is successful.
19/06/11 11:57:30 INFO Client:
         client token: N/A
         diagnostics: N/A
         ApplicationMaster host: 11.222.166.90
         ApplicationMaster RPC port: 38965
         queue: queue
         start time: 1560225401092
         final status: SUCCEEDED
IntelliJ IDEAを使用してローカルモードでMaxComputeでSparkを実行する際の注意事項
ほとんどの場合、ローカルデバッグが成功した後、コードはクラスターモードで実行されます。 ただし、MaxComputeのSparkでは、IntelliJ IDEAを使用してローカルモードでコードを実行できます。 IntelliJ IDEAを使用してローカルモードでコードを実行する場合、次の点に注意してください。
コードでspark.masterパラメーターを指定します。
val spark = SparkSession
      .builder()
      .appName("SparkPi")
      .config("spark.master", "local[4]") // The code can run after you set spark.master to local[N]. N indicates the number of concurrent Spark jobs.
      .getOrCreate()
IntelliJ IDEAでSpark on MaxComputeクライアントの次の依存関係を追加します。
<dependency> <groupId>org.apache.spark</groupId> <artifactId>spark-core_${scala.binary.version}</artifactId> <version>${spark.version}</version> <scope>provided</scope> </dependency>pom.xmlファイルでは、scopeパラメーターが指定されています。 この設定は、コードを実行するときに "NoClassDefFoundError" エラーを引き起こす可能性があります。
Exception in thread "main" java.lang.NoClassDefFoundError: org/apache/spark/sql/SparkSession$
    at com.aliyun.odps.spark.examples.SparkPi$.main(SparkPi.scala:27)
    at com.aliyun.odps.spark.examples.Spa. r. kPi.main(SparkPi.scala)
Caused by: java.lang.ClassNotFoundException: org.apache.spark.sql.SparkSession$
    at java.net.URLClassLoader.findClass(URLClassLoader.java:381)
    at java.lang.ClassLoader.loadClass(ClassLoader.java:424)
    at sun.misc.Launcher$AppClassLoader.loadClass(Launcher.java:335)
    at java.lang.ClassLoader.loadClass(ClassLoader.java:357)
    ... 2 more
MaxComputeのSparkの -- jarsパラメーターで指定されたディレクトリをIntelliJ IDEAのプロジェクトテンプレートに手動で追加するには、次の手順を実行します。 このようにして、IntelliJ IDEAを使用してローカルモードでコードを実行しても、構成
scope=providedは保持され、"NoClassDefFoundError" エラーは返されません。IntelliJ IDEAのメインメニューバーで、[ファイル] > [プロジェクト構造] を選択します。

[プロジェクト構造] ページで、左側のナビゲーションウィンドウから [モジュール] をクリックします。 次に、リソースパッケージを選択し、リソースパッケージの [依存関係] タブをクリックします。
[依存関係] タブで、左下隅のプラス記号 (+) をクリックし、[JARまたはディレクトリ] を選択して、MaxComputeのSparkに -- JARsパラメーターで指定されたディレクトリを追加します。
ローカルモードでコードを実行する場合、spark-defaults.confファイルを直接参照することはできません。 コードで関連パラメーターを手動で設定する必要があります。
spark-submitスクリプトを使用してジョブを送信すると、システムはspark-defaults.confファイルから設定を読み取ります。 ローカルモードでジョブを送信する場合は、コード内の関連パラメーターを手動で設定する必要があります。 次のコードは、Spark SQLを使用してローカルモードでMaxComputeテーブルからデータを読み取る方法を示しています。
val spark = SparkSession
      .builder()
      .appName("SparkPi")
      .config("spark.master", "local[4]") // The code can run after you set spark.master to local[N]. N indicates the number of concurrent Spark jobs.
      .config("spark.hadoop.odps.project.name", "****")
      .config("spark.hadoop.odps.access.id", "****")
      .config("spark.hadoop.odps.access.key", "****")
      .config("spark.hadoop.odps.end.point", "http://service.cn.maxcompute.aliyun.com/api")
      .config("spark.sql.catalogImplementation", "odps")
      .getOrCreate()
Spark 2.4.5の使用に関する注意事項
Spark 2.4.5を使用してジョブを送信する
Yarnクラスターでジョブを送信します。 詳細は、「クラスターモード」をご参照ください。
DataWorksコンソールで、
spark.hadoop.odps.spark.versionパラメーターをspark-2.4.5-odps0.33.0に設定します。 DataWorksの排他的リソースグループのSparkバージョンがSpark 2.4.5に更新されていない場合、共有リソースグループを使用してジョブをスケジュールするか、MaxComputeテクニカルサポートチームに連絡してSparkバージョンを更新できます。
Spark 2.4.5の使用の変更点
Yarnクラスターでジョブを送信する場合は、
export HADOOP_CONF_DIR=$SPARK_HOME/confコマンドを実行して、SPARK_HOME環境変数を追加する必要があります。ローカルモードでデバッグを実行する場合は、
$SPARK_HOME/confパスにodps.confという名前のファイルを作成し、次の設定をファイルに追加する必要があります。odps.project.name = odps.access.id = odps.access.key = odps.end.point =
Spark 2.4.5のパラメーター設定の変更
spark.sql.ca talogImplementation: このパラメーターはhiveに設定されます。spark.sql.sources.de fault: このパラメーターはhiveに設定されています。spark.sql.odps.columnarReaderBatchSize: ベクトル化されたリーダーが一度にデータを読み取る行数を指定します。 デフォルト値: 4096spark.sql.odps.enableVectorizedReader: ベクトル化されたリーダーを有効にするかどうかを指定します。 デフォルト値は True です。spark.sql.odps.enableVectorizedWriter: ベクトル化されたライターを有効にするかどうかを指定します。 デフォルト値は True です。spark.sql.odps.split.size: このパラメーターは、MaxComputeテーブルに対するデータ読み取り操作の同時実行性を調整するために使用できます。 デフォルトでは、このパラメーターはパーティションごとに256に設定されています。 単位:MB。
Spark 3.1.1の使用に関する注意事項
Spark 3.1.1を使用してジョブを送信する
Yarnクラスターでジョブを送信します。 詳細は、「クラスターモード」をご参照ください。
バージョン3.1.1のSparkジョブを送信し、ジョブがScalaまたはJavaで記述されている場合は、spark-defaults.confファイルに次の設定を追加できます。
spark.hadoop.odps.cupid.resources = public.__spark_libs__3.1.1-odps0.33.0.zip,[projectname].[Main JAR Package],[projectname].[Other JAR Package] spark.driver.extraClassPath = ./public.__spark_libs__3.1.1-odps0.33.0.zip/* spark.executor.extraClassPath = ./public.__spark_libs__3.1.1-odps0.33.0.zip/*説明バージョン3.1.1のSparkジョブを送信する場合は、spark.hadoop.odps.cupid.resourcesパラメーターで必要なすべてのリソースを指定する必要があります。 必要なリソースには、メインのJARパッケージが含まれます。 そうしないと、関連するJavaクラスが見つからない可能性があります。
上記の方法を使用してPySparkジョブを送信することはできません。
Spark 3.1.1の使用の変更点
Yarnクラスターでジョブを送信する場合は、
export HADOOP_CONF_DIR=$SPARK_HOME/confコマンドを実行して、SPARK_HOME環境変数を追加する必要があります。YarnクラスターでPySparkジョブを送信する場合、Spark for Python 3を使用するには、spark-defaults.confファイルに次の設定を追加する必要があります。
spark.hadoop.odps.cupid.resources = public.python-3.7.9-ucs4.tar.gz
spark.pyspark.python = ./public.python-3.7.9-ucs4.tar.gz/python-3.7.9-ucs4/bin/python3
ローカルモードでデバッグを実行する場合は、次の操作を実行する必要があります。
$SPARK_HOME/confディレクトリにodps.confファイルを作成し、次の設定をファイルに追加する必要があります。odps.project.name = odps.access.id = odps.access.key = odps.end.point =spark.hadoop.fs.de faultFS = file:///をコードに追加する必要があります。 サンプルコード:val spark = SparkSession .builder() .config("spark.hadoop.fs.defaultFS", "file:///") .enableHiveSupport() .getOrCreate()
Spark 3.1.1のパラメーター設定の変更
spark.sql.de faultCatalog: このパラメーターはodpsに設定されます。spark.sql.ca talog.odps: このパラメーターは、org.apache.spark.sql.exe cution.datasources.v2.odps.OdpsTableCatalogに設定されます。spark.sql.sources.partitionOverwriteMode: このパラメーターはdynamicに設定されます。spark.sql.extensions: このパラメーターは、org.apache.spark.sql.exe cution.datasources.v2.odps.extension.OdpsExtensionsに設定されます。spark.sql.odps.enableVectorizedReader: ベクトル化されたリーダーを有効にするかどうかを指定します。 デフォルト値は True です。spark.sql.odps.enableVectorizedWriter: ベクトル化されたライターを有効にするかどうかを指定します。 デフォルト値は True です。spark.sql.ca talog.odps.splitSizeInMB: このパラメーターは、MaxComputeテーブルに対するデータ読み取り操作の同時実行性を調整するために使用できます。 デフォルトでは、このパラメーターはパーティションごとに256に設定されています。 単位:MB。