Terraform is an open source infrastructure as code (IaC) tool that enables you to manage the full lifecycle of Alibaba Cloud resources using declarative configuration files. This topic shows how to get started with Terraform quickly—using either a visual interface or the command line—to create your first Alibaba Cloud resource.
Choose a method
Terraform offers two methods: visual and command-line. Choose the one that fits your needs.
Method | Scenarios | Advantages | Limits |
First-time use, unfamiliar with parameters, quick debugging | Configure resources using a graphical form. No coding required. | Supports only single-resource operations. | |
Quick evaluation, production environments, complex orchestration | Supports multi-resource orchestration and state management. | Requires a CLI environment. |
If you choose the CLI method, prepare your environment using either Cloud Shell or local installation.
Use Terraform Explorer
Terraform Explorer is Alibaba Cloud’s online debugging tool built on Terraform. It generates Terraform configuration files from forms and runs them online. For more information, see Explorer overview.
This section uses creating a Virtual Private Cloud (VPC) as an example. It covers two ways to use Terraform Explorer: custom parameters and sample templates.
Create resources using custom parameters
To configure parameters based on your needs, follow these steps:
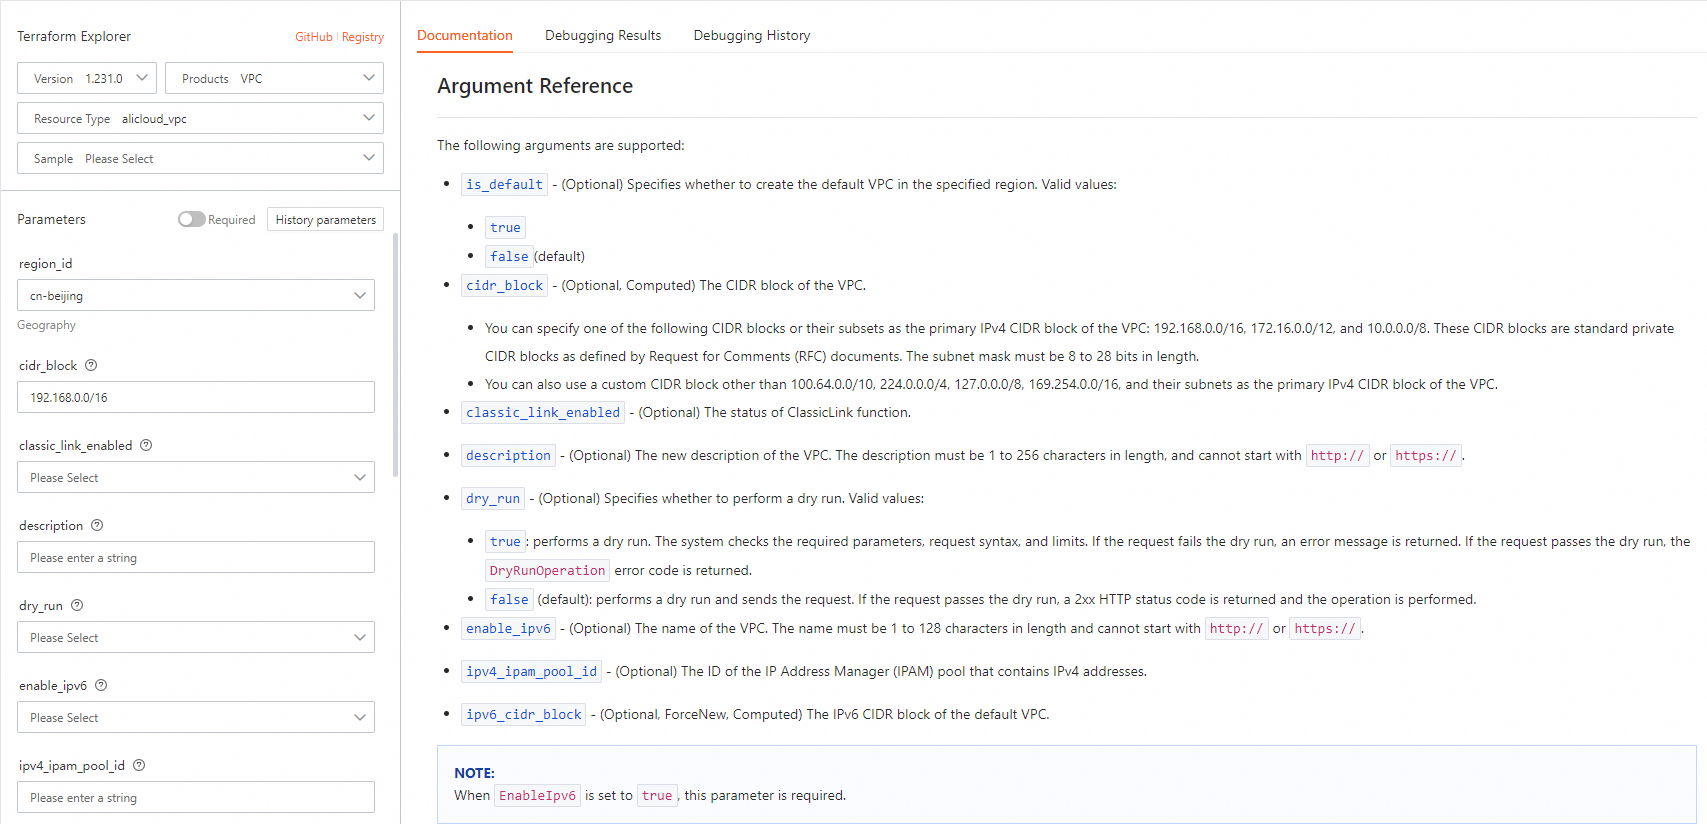
Log on to Terraform Explorer. Select a product and a resource type. Fill in parameters using the resource documentation. Click Start debugging.
The main parameters for creating a VPC are listed below. For more parameter details, see alicloud_vpc.
Parameter Name
Description
Example value
vpc_name
VPC name
tf-test-vpc
cidr_block
Private CIDR block for the VPC
192.168.0.0/16
description
Description of the VPC
The VPC was created using Terraform.
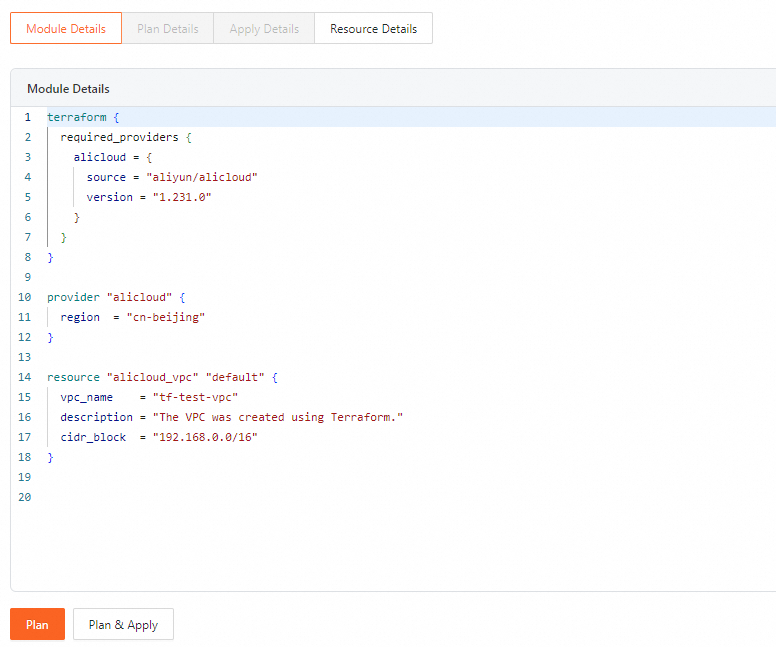
In the Template details tab, confirm your parameters are correct. Click Preview to view the execution plan.
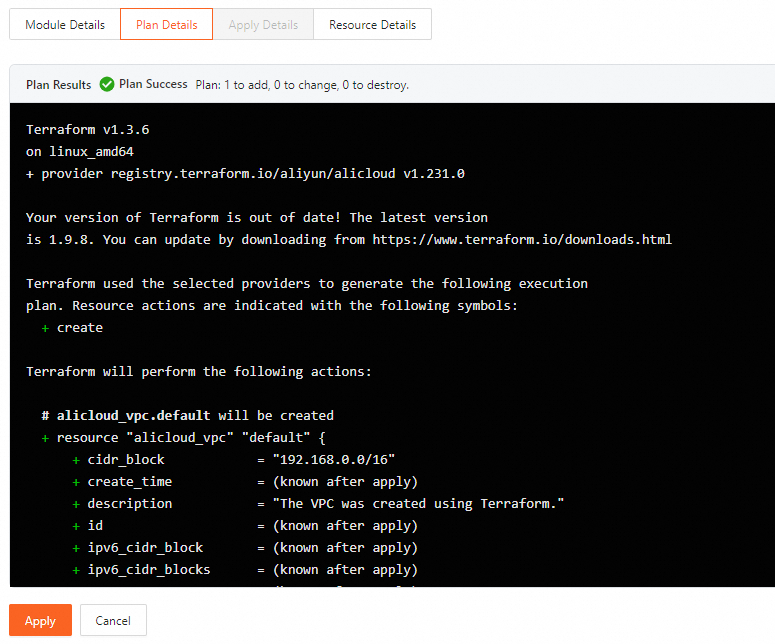
In the Preview details tab, review the resources to be created. Click Execute.
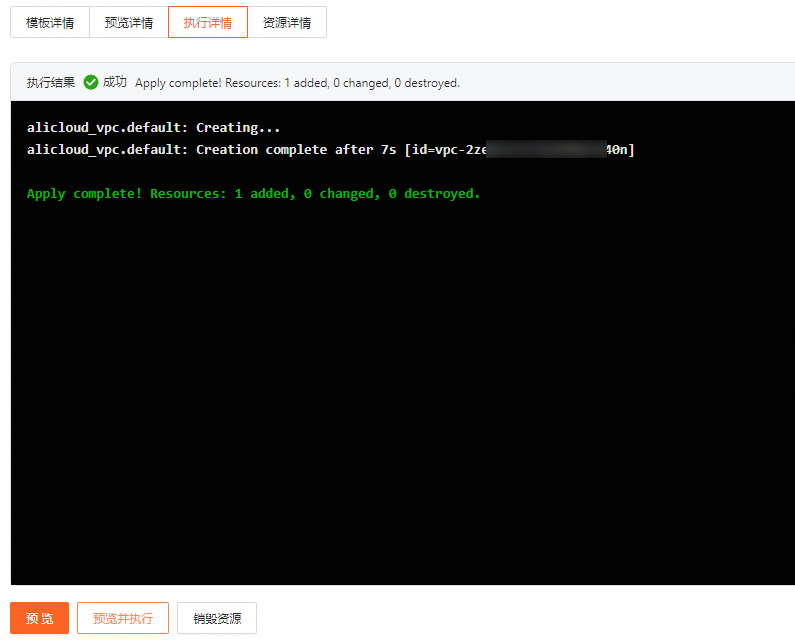
In the Execution details tab, check the result. A successful execution returns "
Apply complete! Resources: 1 added, 0 changed, 0 destroyed.". If it fails, adjust your parameters and debug again.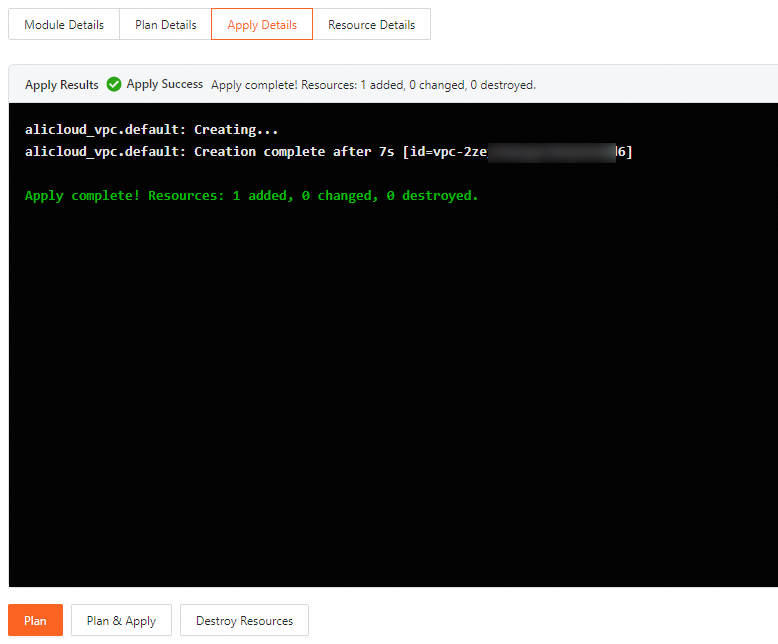
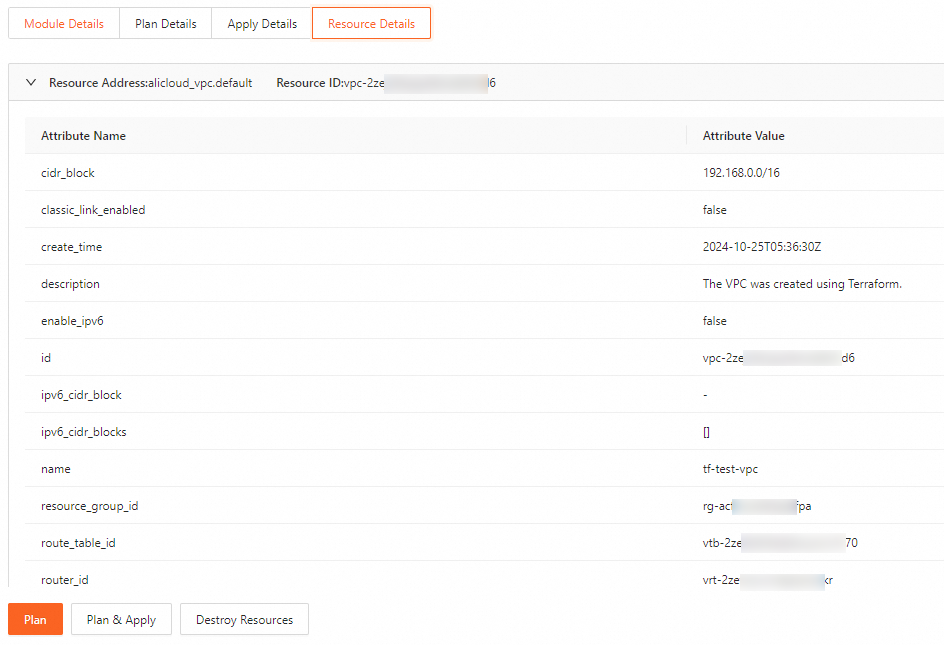
In the Resource details tab, view information about the created resource.
(Optional) Modify the resource: Adjust parameters and click Preview and execute. Repeat steps 2–4. A successful update returns "
Apply complete! Resources: 0 added, 1 changed, 0 destroyed.".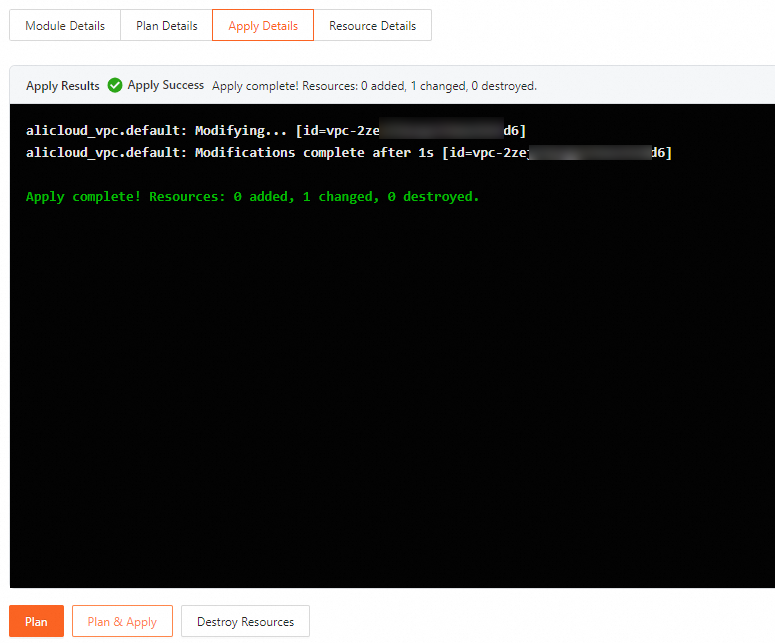
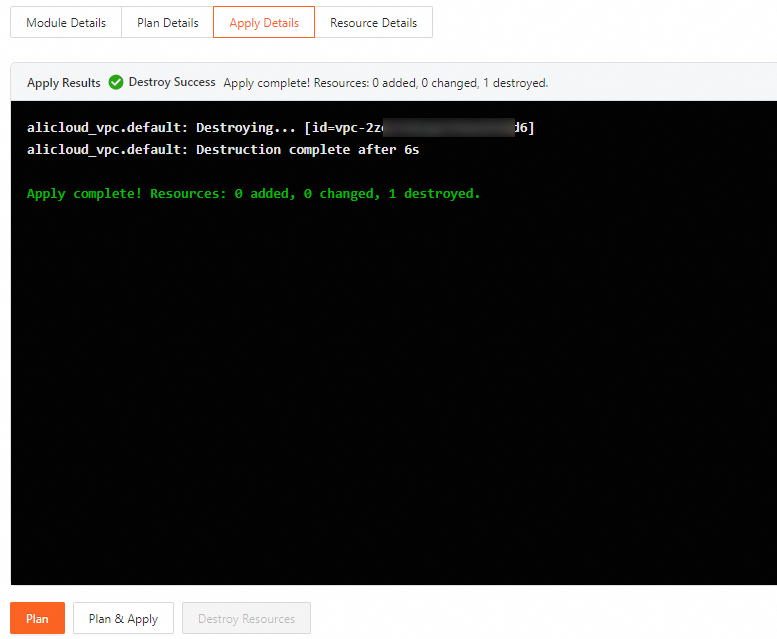
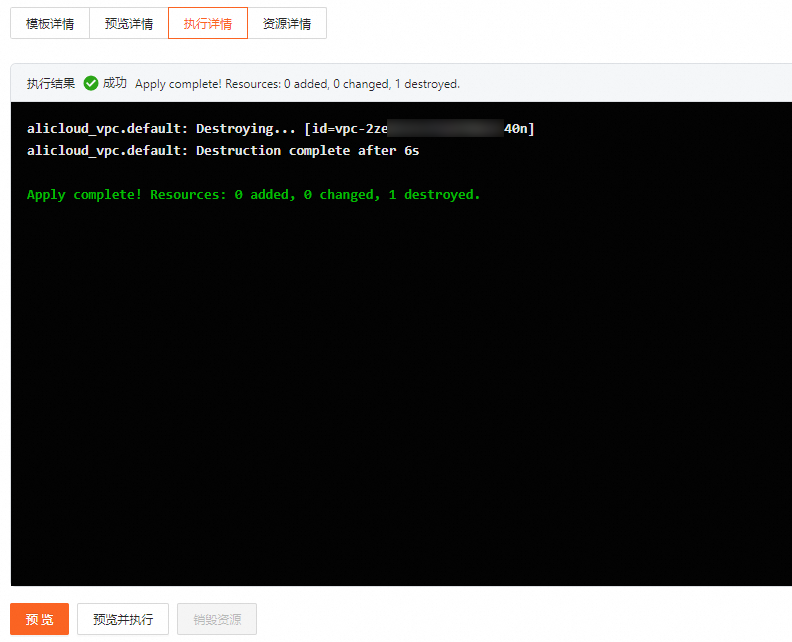
(Optional) Release the resource: In the Execution details tab, click Destroy resources. Then in the Preview details tab, click Execute.
Create resources using a sample template
If you are unfamiliar with resource parameters or want a quick start, use a sample template from Terraform Explorer.
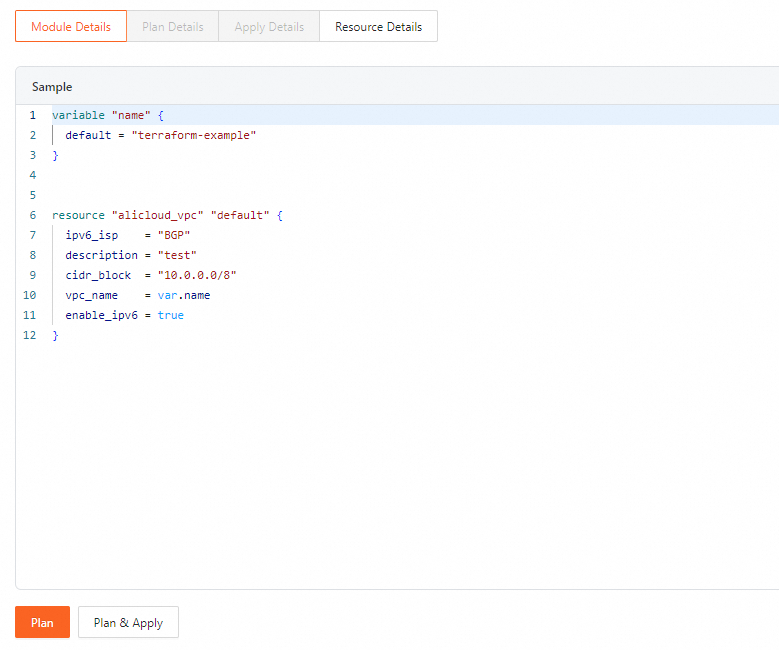
Log on to Terraform Explorer. Select a product, a resource type, and a sample template. Click Start debugging. View the template details in the Sample template tab on the right.
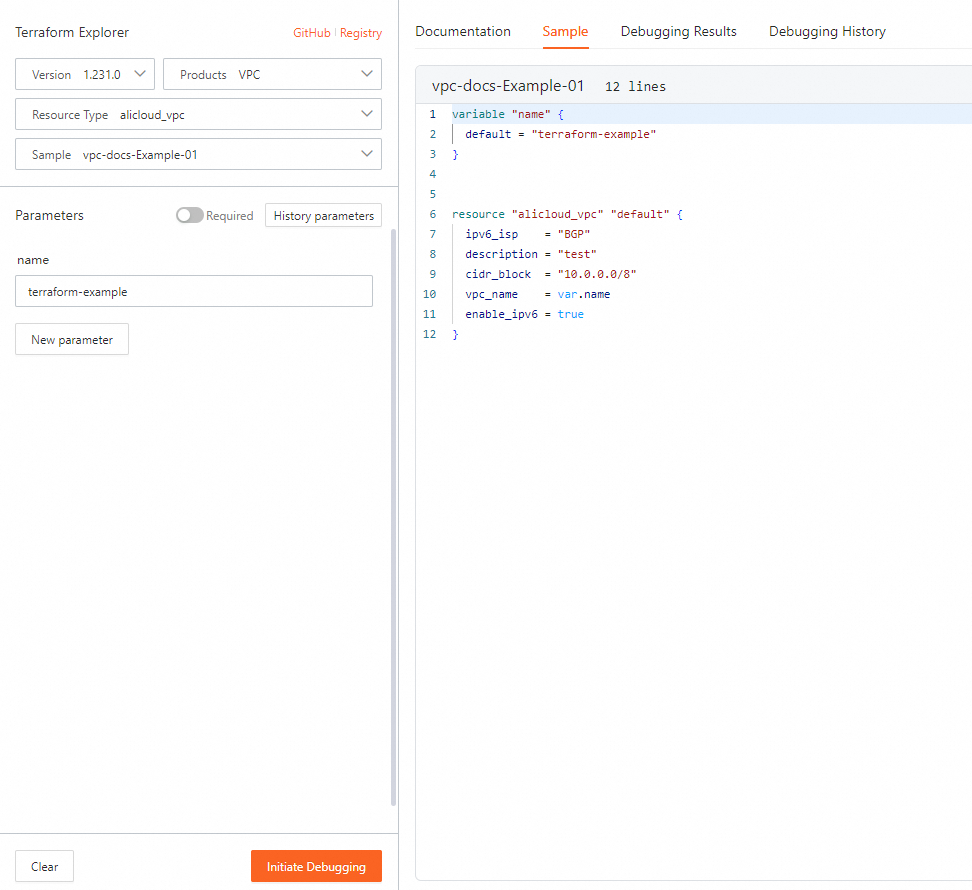
In the Template details tab, click Preview and execute.
In the Execution details tab, view the execution result.
(Optional) To release the created resource, click the Execution details tab, click Destroy resources. Then in the Preview details tab, click Execute.
You can also perform operations such as Continue Debugging and Destroy Resources in the Call History.
Use Terraform CLI
To use Terraform from the command line, prepare a CLI environment, write a configuration file, and run commands to create resources. Choose one of the following methods to set up your Terraform CLI environment:
Cloud Shell (recommended): No installation needed. Ideal for quick evaluation and learning.
Local installation: Best for production environments, continuous integration, and long-term use.
Cloud Shell
Alibaba Cloud Cloud Shell is a free operations and maintenance tool. It comes pre-installed with Terraform and configured with identity credentials. You can run Terraform commands directly.
Log on to Cloud Shell
Open your browser and go to Cloud Shell. For more information, see Use Cloud Shell.
Log on as a RAM user. To ensure the security of your Alibaba Cloud account, avoid using your Alibaba Cloud account to access cloud resources unless necessary.
Switch Terraform versions
The default Terraform version in Cloud Shell may be outdated. Switch to version 1.2 or later to ensure all features work correctly.
Check your current Terraform version:
terraform version
List available Terraform versions in Cloud Shell:
tfenv list
Switch to a specific version (for example, 1.9.5):
tfenv use 1.9.5
Local installation
Best for production environments and complex orchestration. Install Terraform and configure identity credentials first.
Install using a package manager (recommended)
macOS
Install using Homebrew:
# Add HashiCorp's tap to define where packages are located in Homebrew
brew tap hashicorp/tap
# Install Terraform
brew install hashicorp/tap/terraform
Update to the latest version:
# Update Homebrew
brew update
# Upgrade Terraform
brew upgrade hashicorp/tap/terraform
Windows
Install using Chocolatey:
choco install terraformLinux
For example, using the yum package manager:
yum install -y dnf-plugin-releasever-adapter
yum-config-manager --add-repo https://rpm.releases.hashicorp.com/RHEL/hashicorp.repo
yum install terraform
Manual installation
If a package manager is unavailable, install manually.
Use a precompiled binary
Download the ZIP file for your operating system from the Terraform website. Extract the archive.
Move the
terraformbinary file to a directory in your systemPATH:macOS or Linux
mv ~/Downloads/terraform /usr/local/bin/Windows
Open Control Panel > System > System Settings > Environment Variables.
In System Variables, find PATH and click Edit.
Add the path to your Terraform directory. Separate it from other entries with a semicolon (for example,
c:\path;c:\path2).Open a new command-line window for the change to take effect.
Compile from source
You must first install the Go development environment.
Clone the Terraform source repository:
git clone https://github.com/hashicorp/terraform.gitNavigate to the directory, and then compile and install the software.
cd terraform
go install
After compilation, the binary is placed in the
$GOPATH/bin/directory.Ensure
$GOPATH/binis added to your system PATH. Use the same steps as in Use a precompiled binary, step 2.
Verify the installation
Run this command to confirm Terraform is installed correctly:
terraform versionIf the command runs successfully and displays the version number, the installation is complete.
Example: Create an ECS instance
This example creates an ECS instance to show the full Terraform orchestration workflow: create a VPC → create a vSwitch → create a security group → create an ECS instance.
Create a working directory and write the Terraform configuration file
main.tf:mkdir tf-demo && cd tf-demo vim main.tfCopy the following code into
main.tf:provider "alicloud" { region = var.region } # Region for resource creation variable "region" { default = "cn-beijing" } # ECS instance name variable "instance_name" { default = "tf-cloudshell-test" } # ECS instance type variable "instance_type" { default = "ecs.n2.small" } # Outbound public bandwidth, value 0 means no public network access variable "internet_bandwidth" { default = 10 } # ECS OS image variable "image_id" { default = "ubuntu_18_04_64_20G_alibase_20190624.vhd" } # ECS system disk type variable "disk_category" { default = "cloud_efficiency" } # ECS instance logon password variable "password" { default = "TF-test@1234" } # Create a VPC resource "alicloud_vpc" "vpc" { vpc_name = "tf_test_foo" cidr_block = "172.16.0.0/12" } # Query available zones based on instance type and disk category data "alicloud_zones" "default" { available_disk_category = var.disk_category available_resource_creation = "VSwitch" available_instance_type = var.instance_type } # Create a vSwitch resource "alicloud_vswitch" "vsw" { vpc_id = alicloud_vpc.vpc.id cidr_block = "172.16.0.0/21" zone_id = data.alicloud_zones.default.zones.0.id } # Create a security group resource "alicloud_security_group" "default" { security_group_name = "default" vpc_id = alicloud_vpc.vpc.id } # Create an inbound rule for the security group resource "alicloud_security_group_rule" "allow_all_tcp" { type = "ingress" ip_protocol = "tcp" nic_type = "intranet" policy = "accept" port_range = "1/65535" priority = 1 security_group_id = alicloud_security_group.default.id cidr_ip = "0.0.0.0/0" } resource "alicloud_instance" "instance" { # Attach security group security_groups = alicloud_security_group.default.*.id instance_type = var.instance_type system_disk_category = var.disk_category image_id = var.image_id instance_name = var.instance_name # vSwitch vswitch_id = alicloud_vswitch.vsw.id internet_max_bandwidth_out = var.internet_bandwidth password = var.password }ImportantThe security group rule in this example opens all TCP ports (1–65535) and allows traffic from any IP address (0.0.0.0/0). Use this only in test environments. In production, restrict ports and source IP addresses as needed.
Initialize the Terraform working directory:
terraform initPreview the execution plan to confirm which resources will be created:
terraform plan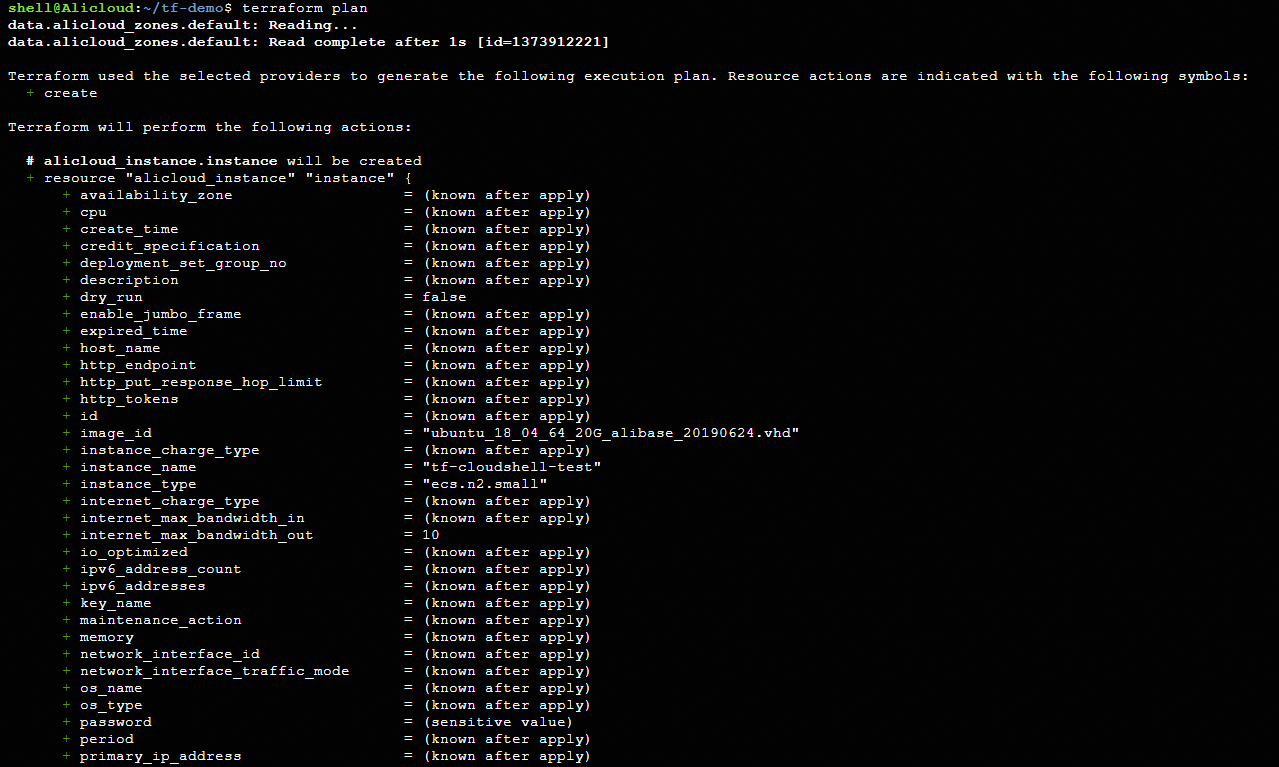
Create the resources. The output "
Apply complete!" means success:terraform apply
To release these resources, run:
terraform destroy