Aggregate access logs from multiple OSS buckets across regions into a single logstore for centralized auditing and analysis by using Log Audit Service.
Background
How it works
OSS bucket logs are first stored in their respective default logstores. After a collection rule is configured, Log Audit Service creates a data transformation task to aggregate logs from default logstores into the associated project and logstore. The following diagram illustrates this process for buckets under the same account.

Billing
Log Audit Service is free. Log storage and traffic incur standard charges. For more information, see Billing.
Prerequisites
Real-time log query enabled for OSS buckets. For more information, see Enable the real-time log query feature.
(Optional) RAM user permissions if operating as a RAM user. For more information, see Grant a RAM user the permissions to use the new version of Log Audit Service.
Procedure
Step 1: Associate a project
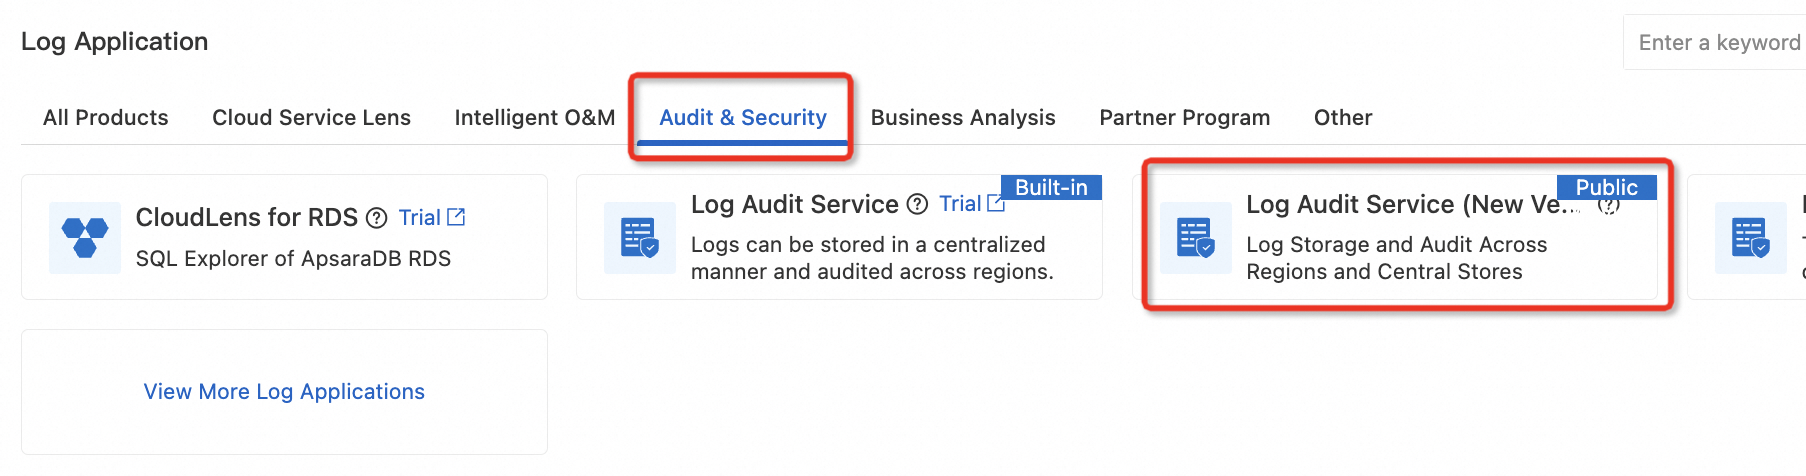
Log on to the Simple Log Service console. On the Audit & Security tab of the Log Application section , click Log Audit Service (New Version).
On the Log Audit Service (New Version) page, click Associate Project, configure the project in the dialog box, and then click Confirm.

Step 2: Create a collection rule
On the Log Audit (New Version) page, click the name of the project associated in the previous step.
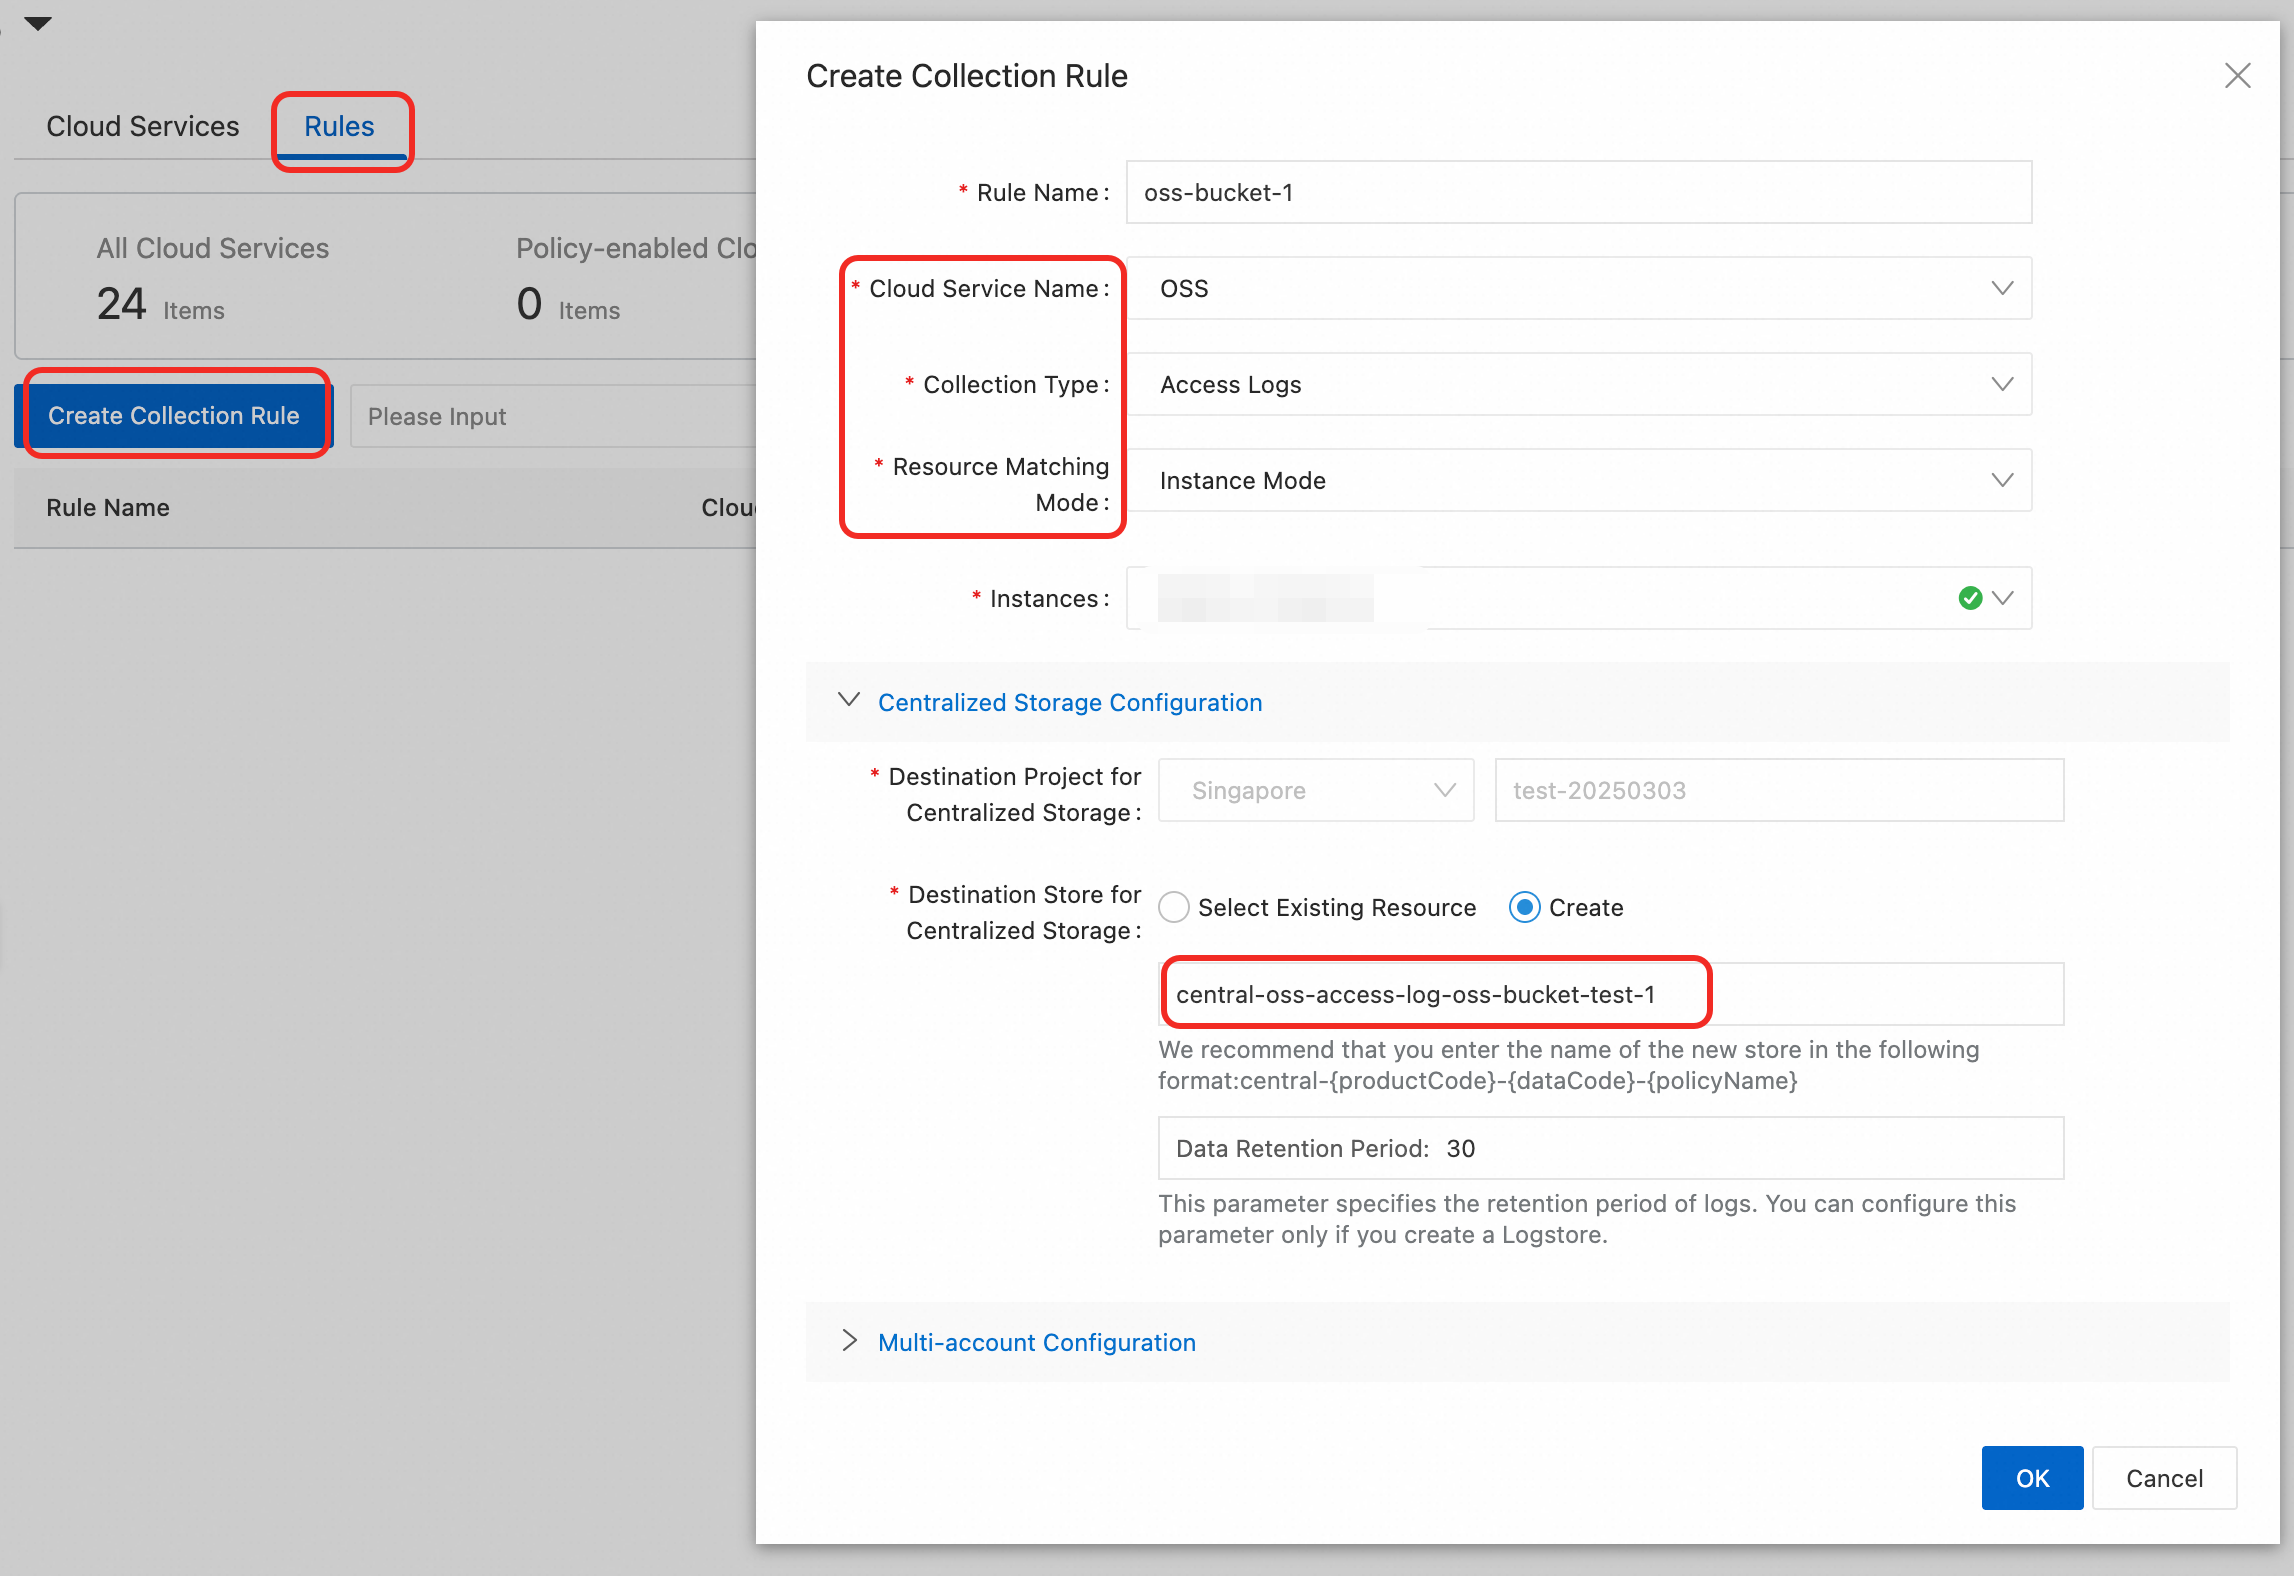
On the Rules tab, click Create Collection Rule.
On the Create Collection Rule dialog box, configure the collection rule, as shown in the following figure. The recommended name for the new logstore (Destination Store for Centralized Storage) is
central-{productCode}-{dataCode}-{ruleName}. For more information about the collection rule parameters, see Usage notes of cloud service log collection.NoteIf the Resource Matching Mode parameter is set to Instance Mode, enter the bucket name in the Instances field for the first time. After you create at least one collection rule, select buckets from the Instances drop-down list.
Step 3: Verify the collection results
On the Rules tab, click the name of the collection rule you just created.
Select Query and Analysis > Access Logs to view the logs. Use the search syntax to specify query conditions. For field descriptions of the access logs, see Access logs.

References
For the steps to view, create, modify, and delete collection rules, see Manage the collection rules of cloud services.
To collect logs from OSS buckets across multiple accounts, start by enabling a resource directory. Then use the resource directory administrator or a delegated administrator to configure the collection rules for logs from member accounts, aggregating the logs into the specified project. For more information, see Multi-account configuration.