Data preparation (lightweight ETL) allows you to cleanse, aggregate, associate, and merge data in data source tables or datasets, and output the processed data. This allows business personnel who do not need to write SQL code to prepare data for BI visualization at a low cost.
The regular process is that after the database connection is established in the data source module, the developer uses the data source table or dataset as input, models in the dataset module, and analyzes and displays the data based on the dataset depth. In actual applications, from the data source table to the dataset, you need to perform additional processing on the data source table, such as merging and aggregating data. Therefore, Quick BI introduces the data preparation module, which cleans and processes the data source table or data set through lightweight ETL, writes the processed data back to the data source table or data set, and then performs data modeling and data depth analysis.
You can follow these steps to complete the quick start.
Limits
Developer accounts support lightweight ETL.
If the input data source is a public data source, you can select MySQL, MaxCompute(ODPS), SQL Server, Oracle, ClickHouse, Hologres, AnalyticDB for MySQL 3.0, PostgreSQL, PolarDB for MySQL, PolarDB for POSTGRE, PolarDB Distributed Edition (PolarDB-X, DRDS), AnalyticDB for PostgreSQL, Tencent TDSQL-H LibraDB, and Impala (EMR is not supported).
To use ETL, you must have permissions on the dataset or data source.
Input Node:
Dataset: You must have permissions to use the dataset.
Data Source Table: You must have permissions to use the data source.
Output Node:
Dataset: You must have the Create or Edit permission on a dataset.
Data Source Table: You must have permissions to use the data source.
Only the Professional Edition group workspace supports lightweight ETL.
Professional Edition Official Customer ETL Tasks: You can publish 10 tasks.
ETL trial users can publish three tasks, including users who try out the professional edition and customers who try out the ETL module in the advanced edition.
You can select a maximum of 200 fields.
The maximum number of rows of input data for an ETL input node is 10 million.
Go to the Workbooks page
After you log on to the Quick BI console.
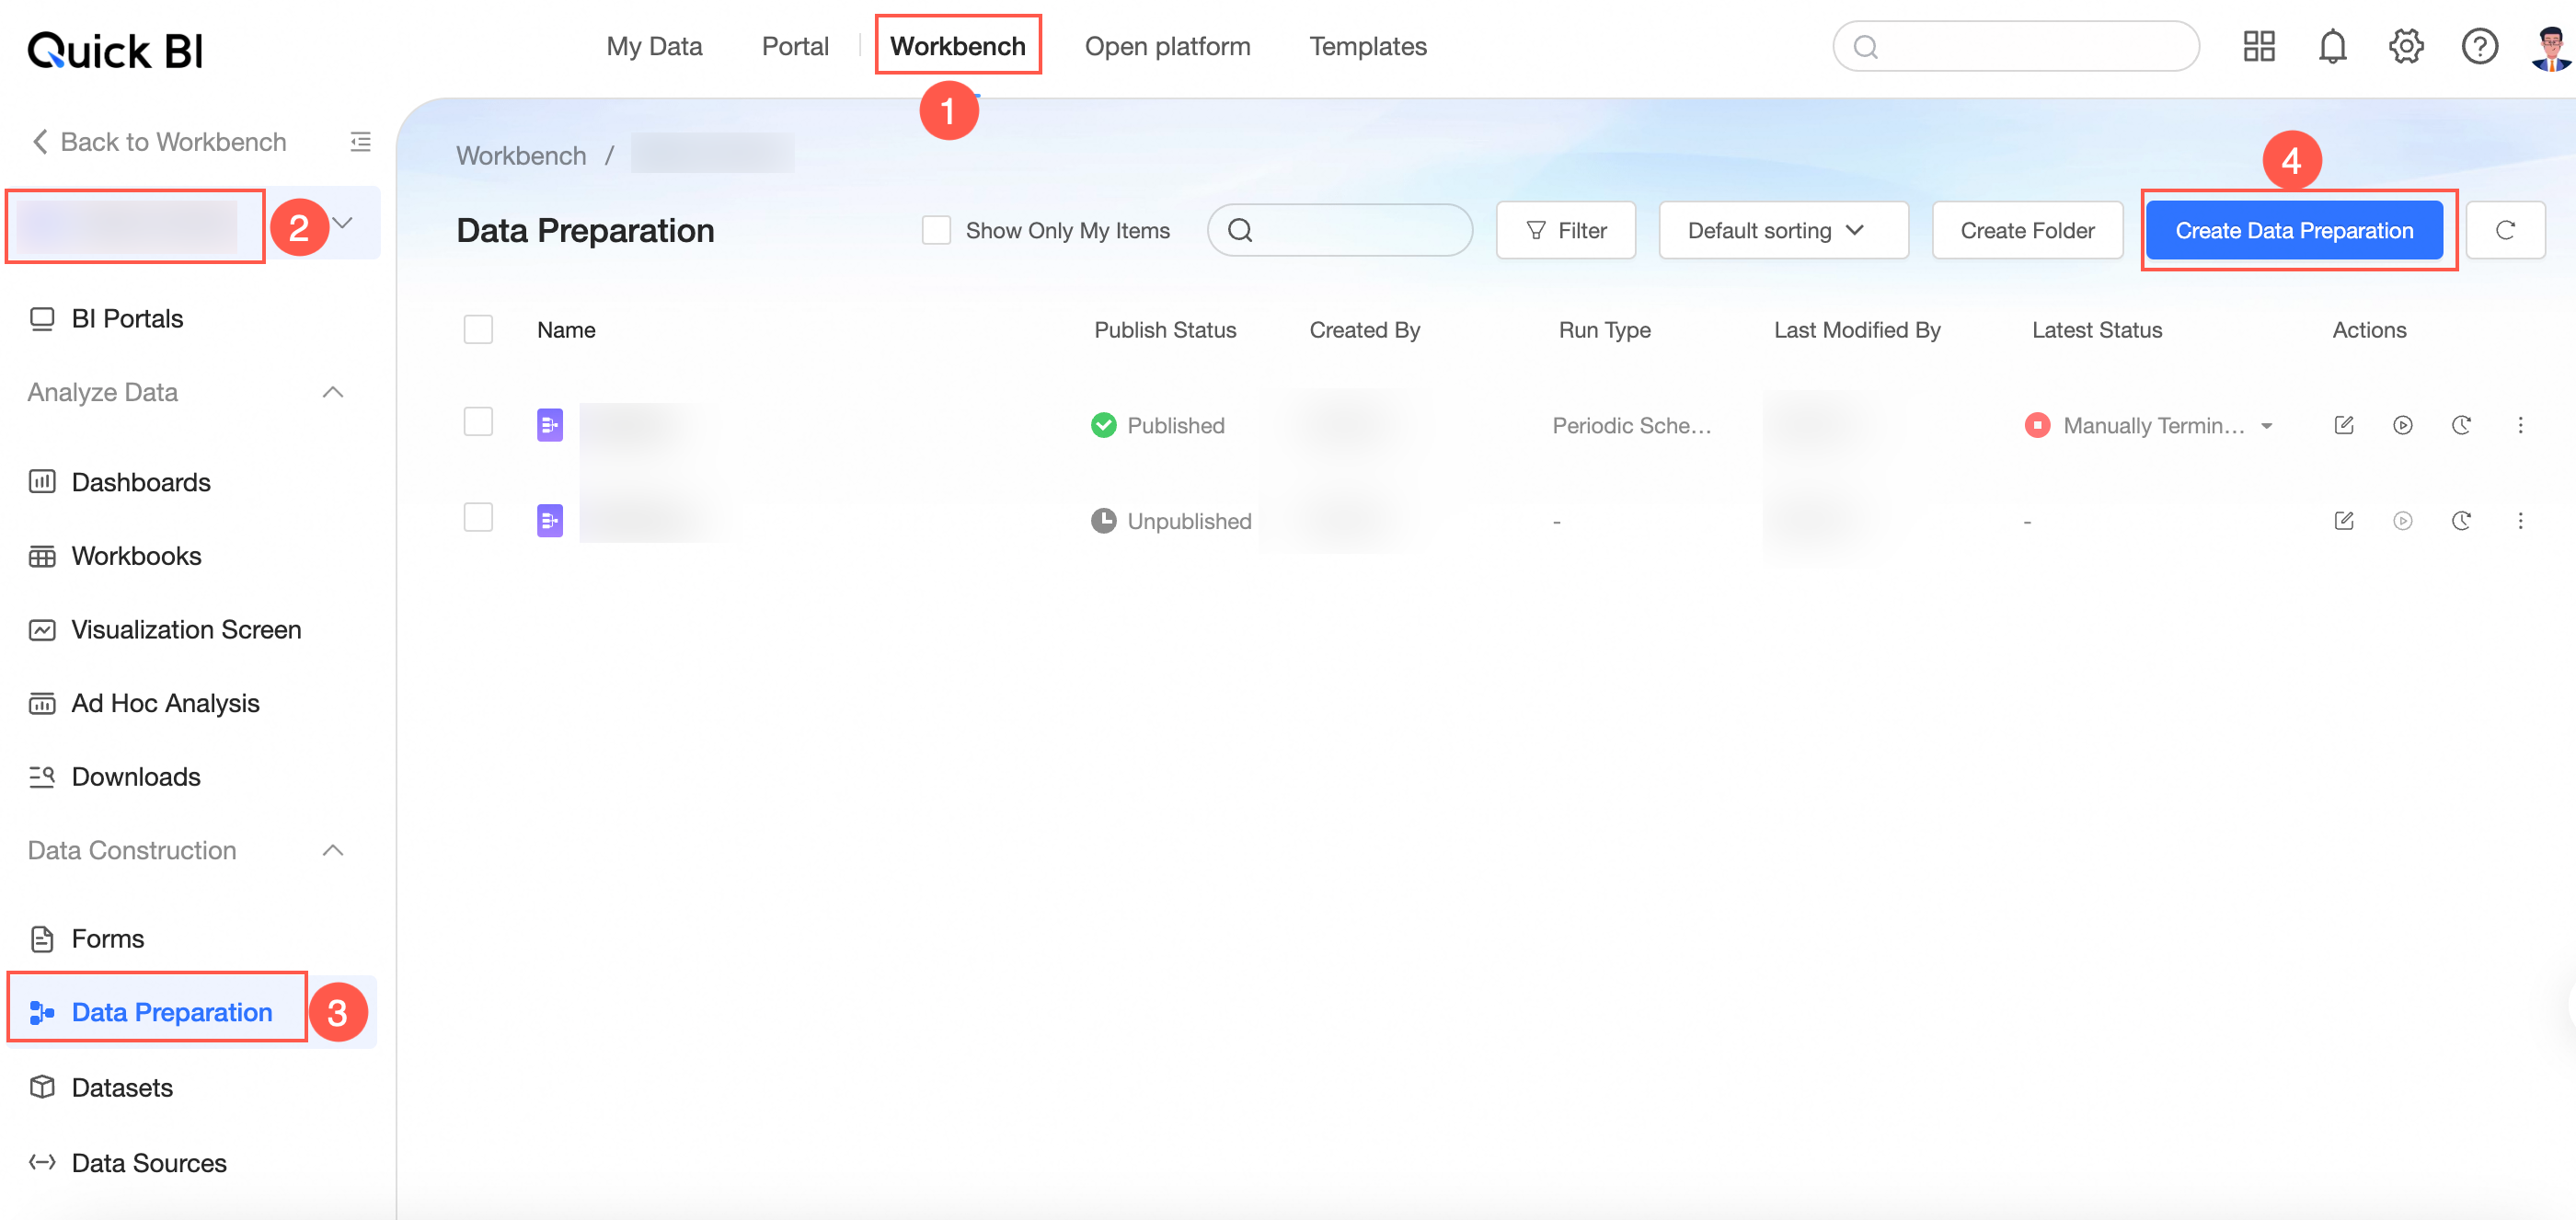
On the Quick BI product homepage, use the following entry to create a data preparation.
Entry 1: console-> select a workspace-> click data preparation-> click create data preparation.
entry 2: console-> select a workspace-> click the icon on the right of
 data preparation to quickly create a data preparation.
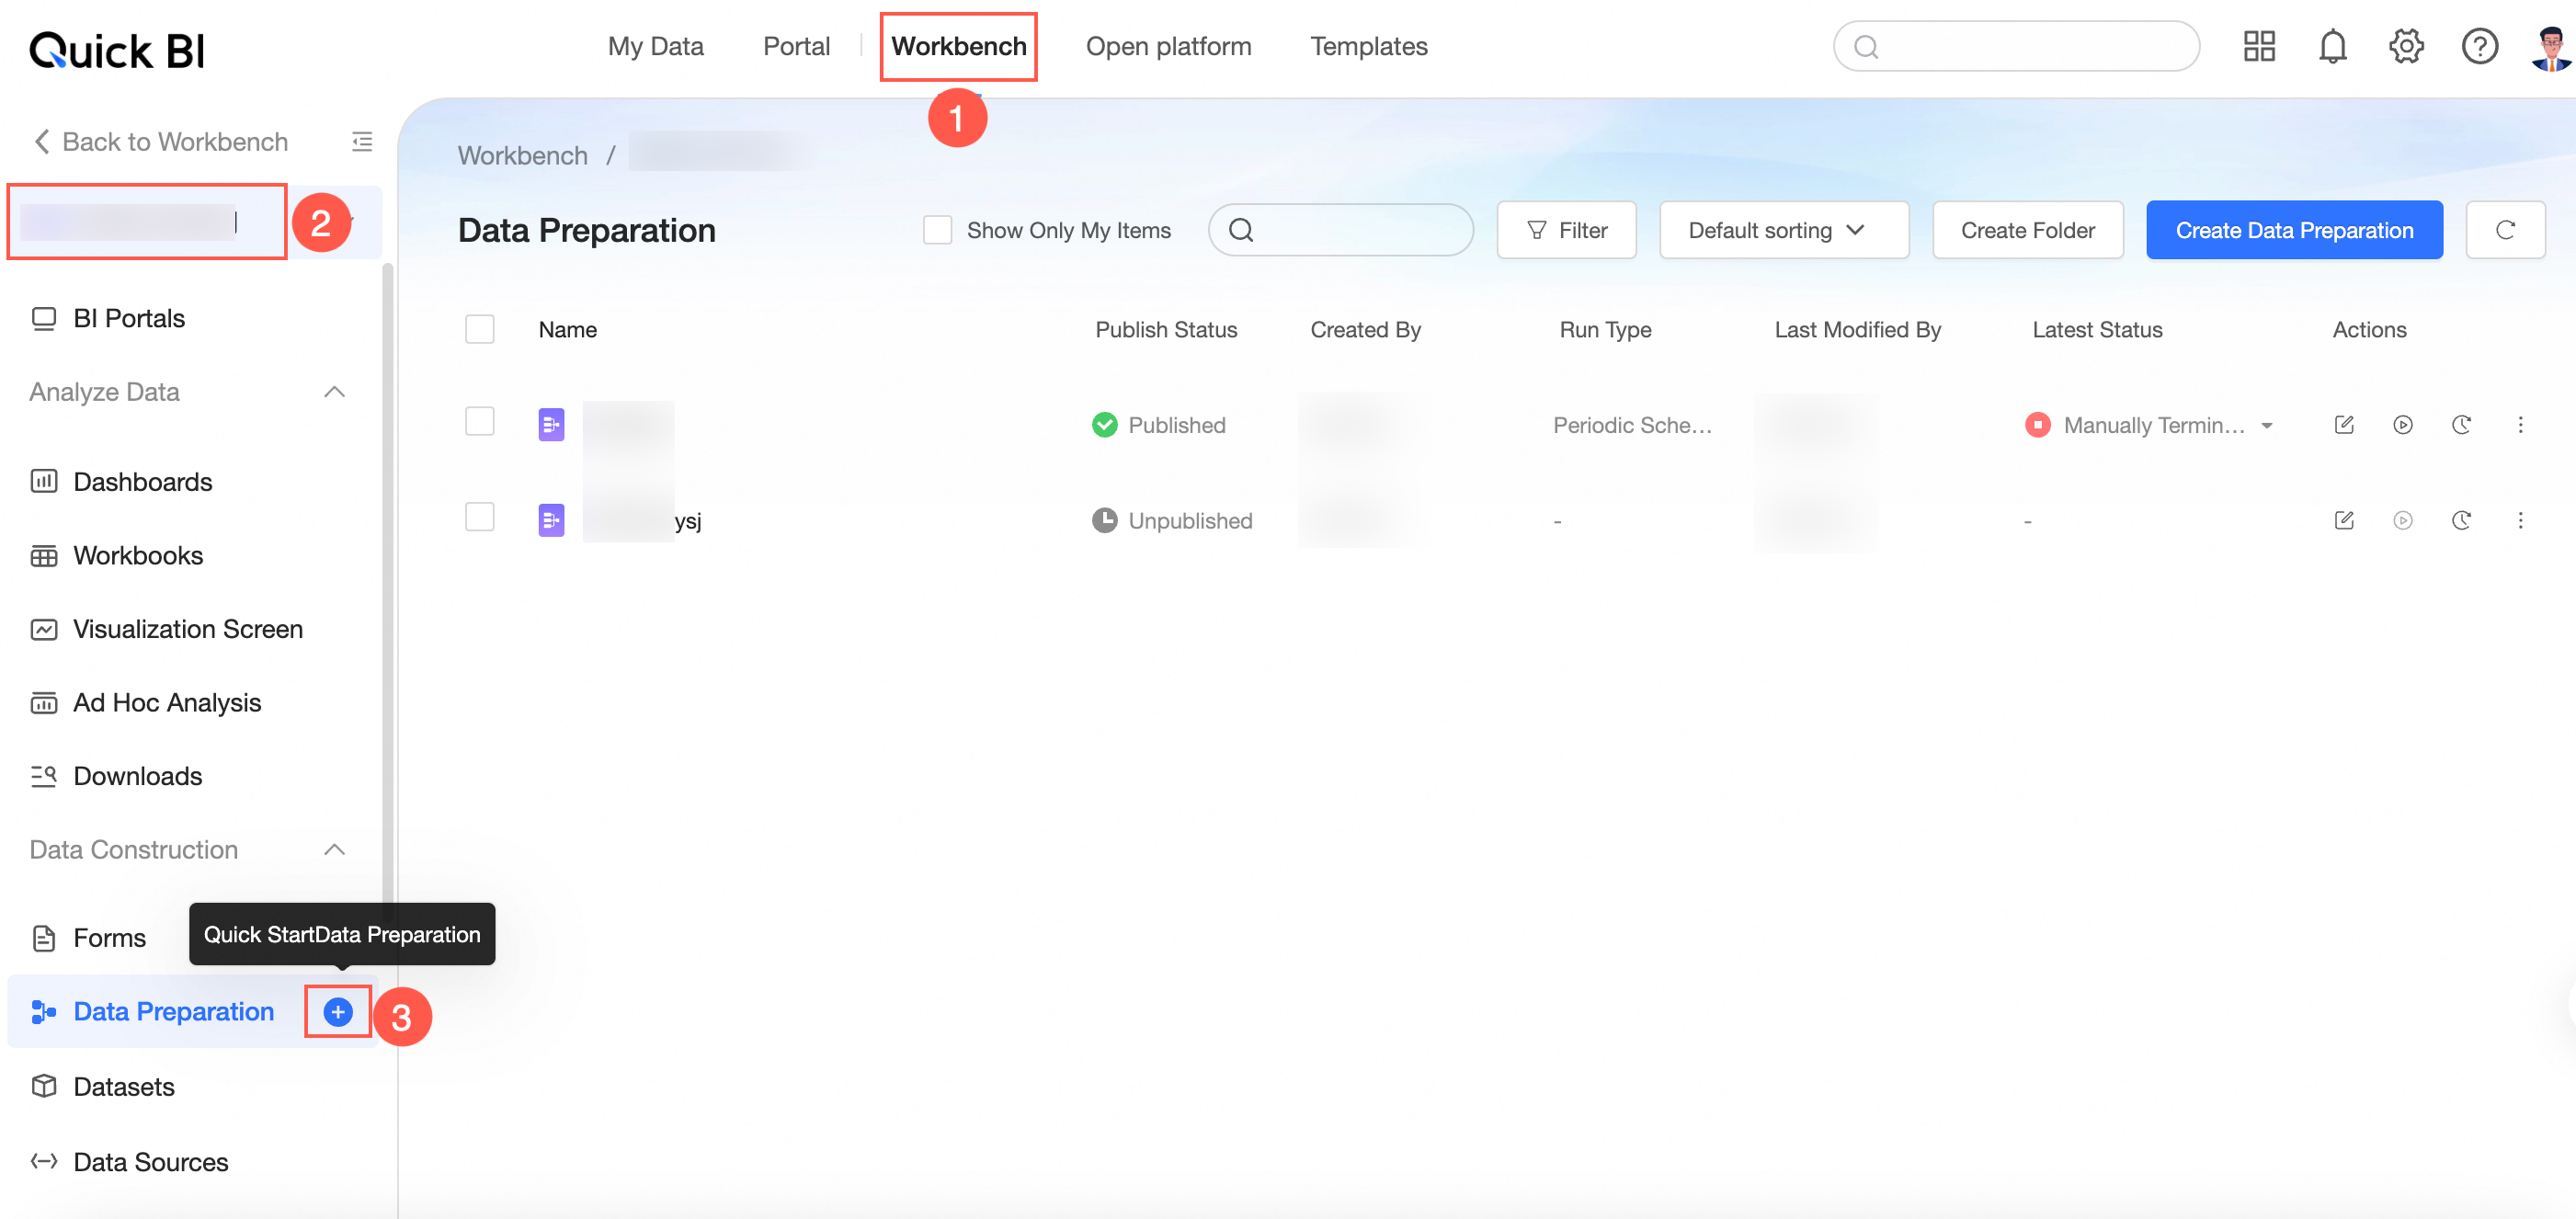
Entry 3: console-> select a workspace-> click dataset-> select the target dataset and click the icon on the right of the
 dataset-> click new data preparation.
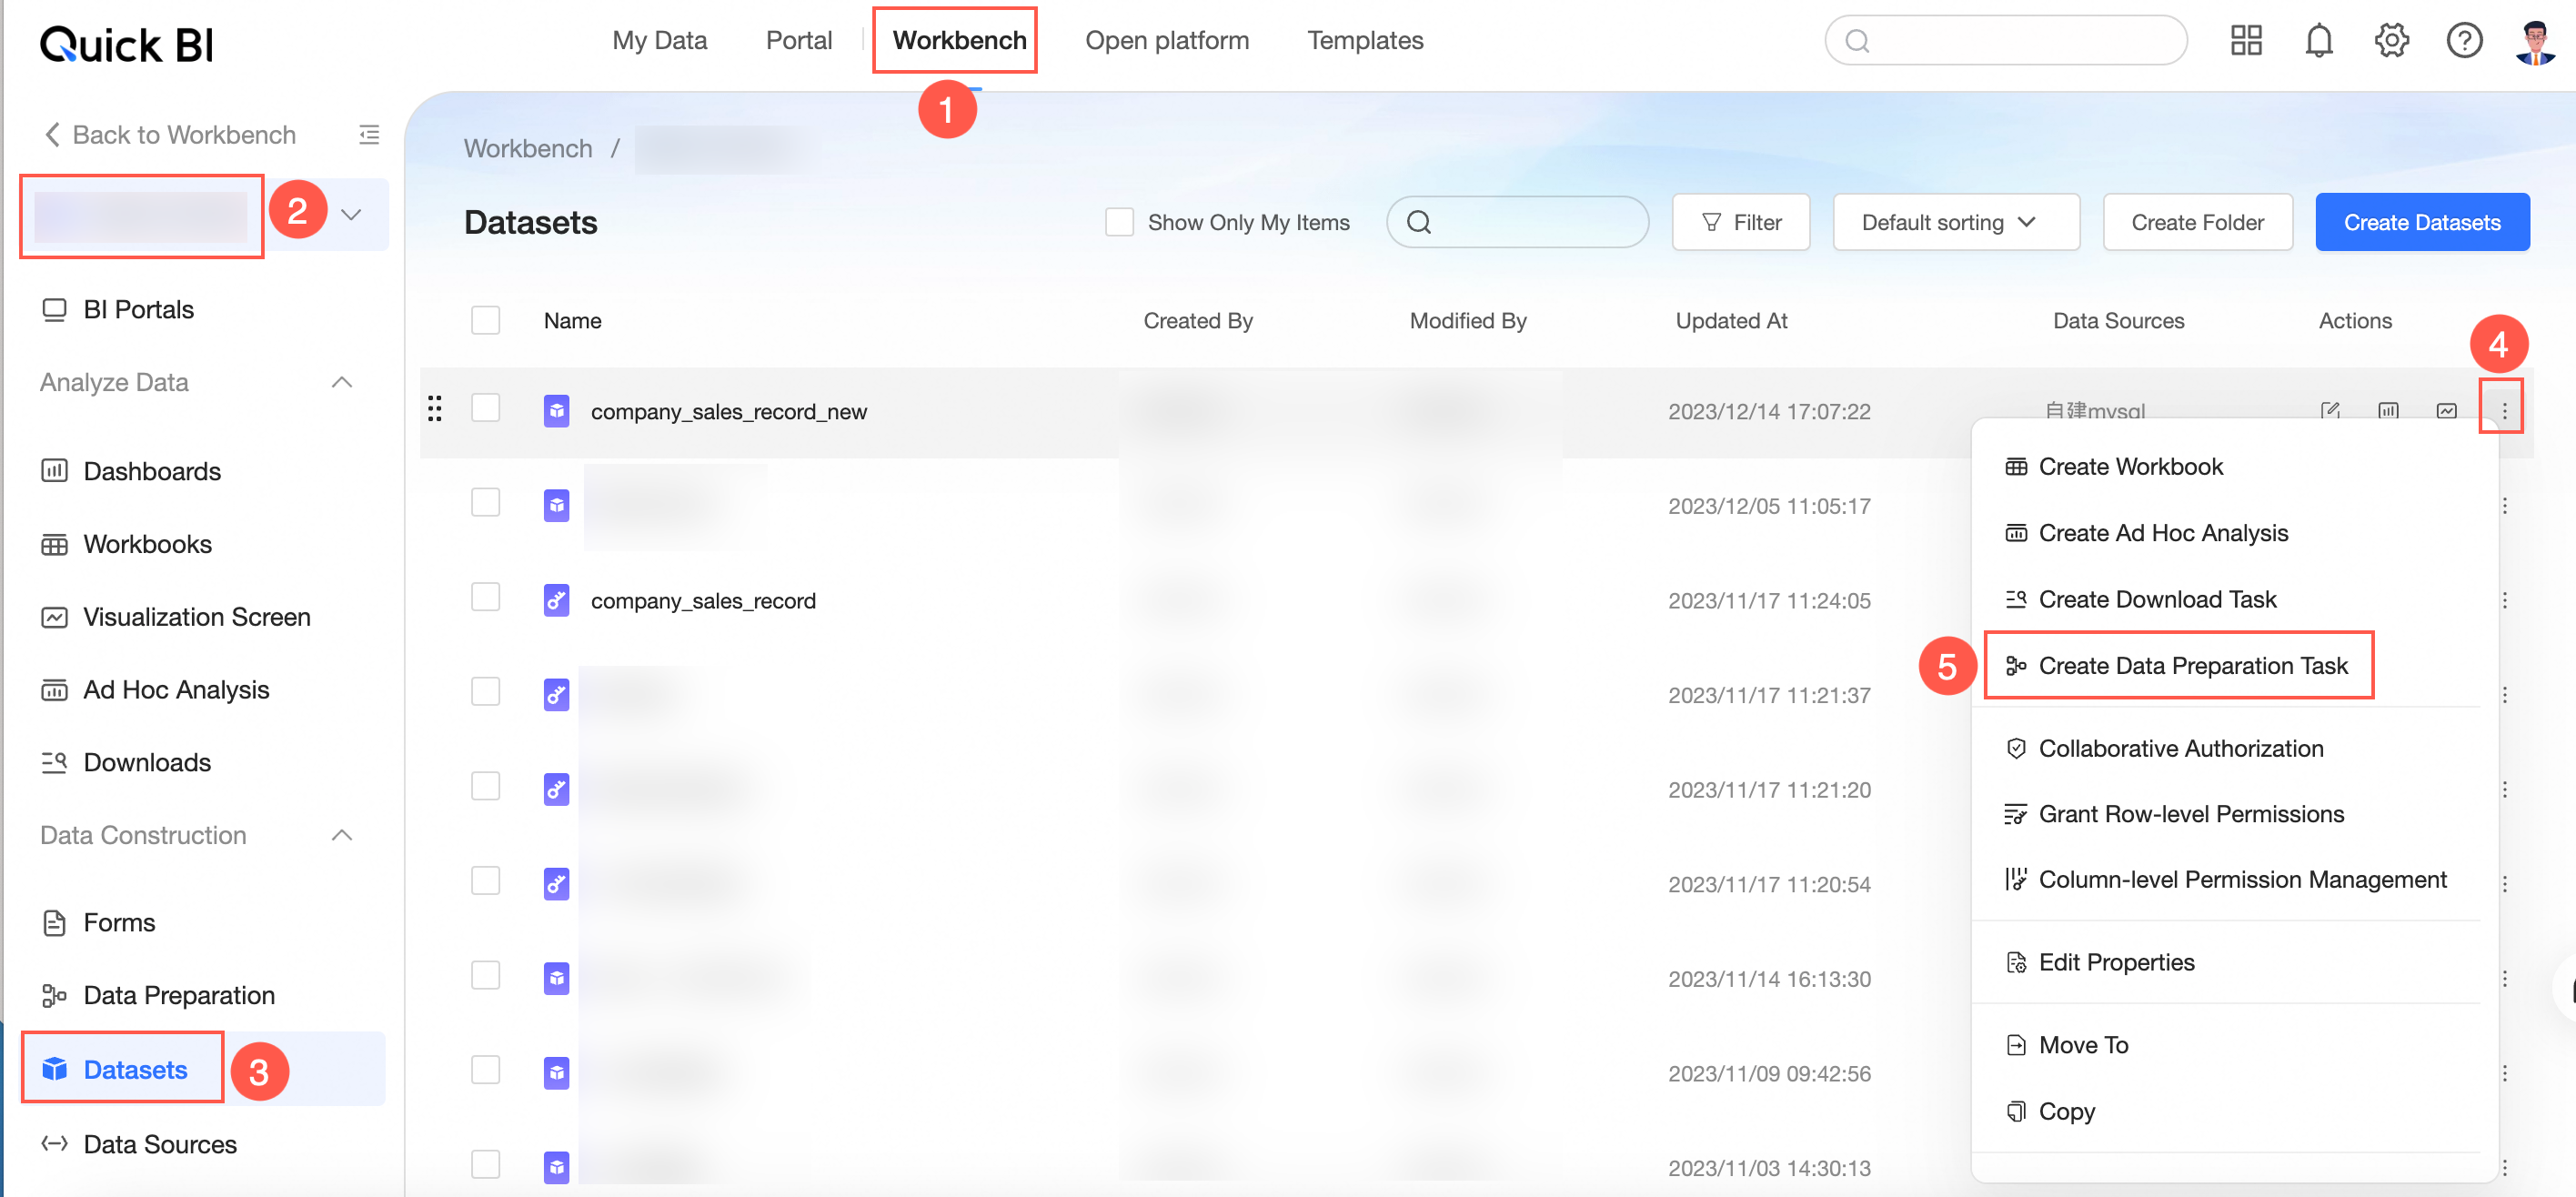
Entry 4: console-> select a workspace-> click the data source-> select the target data source-> select the target data table and click the icon
 to create a new data preparation.
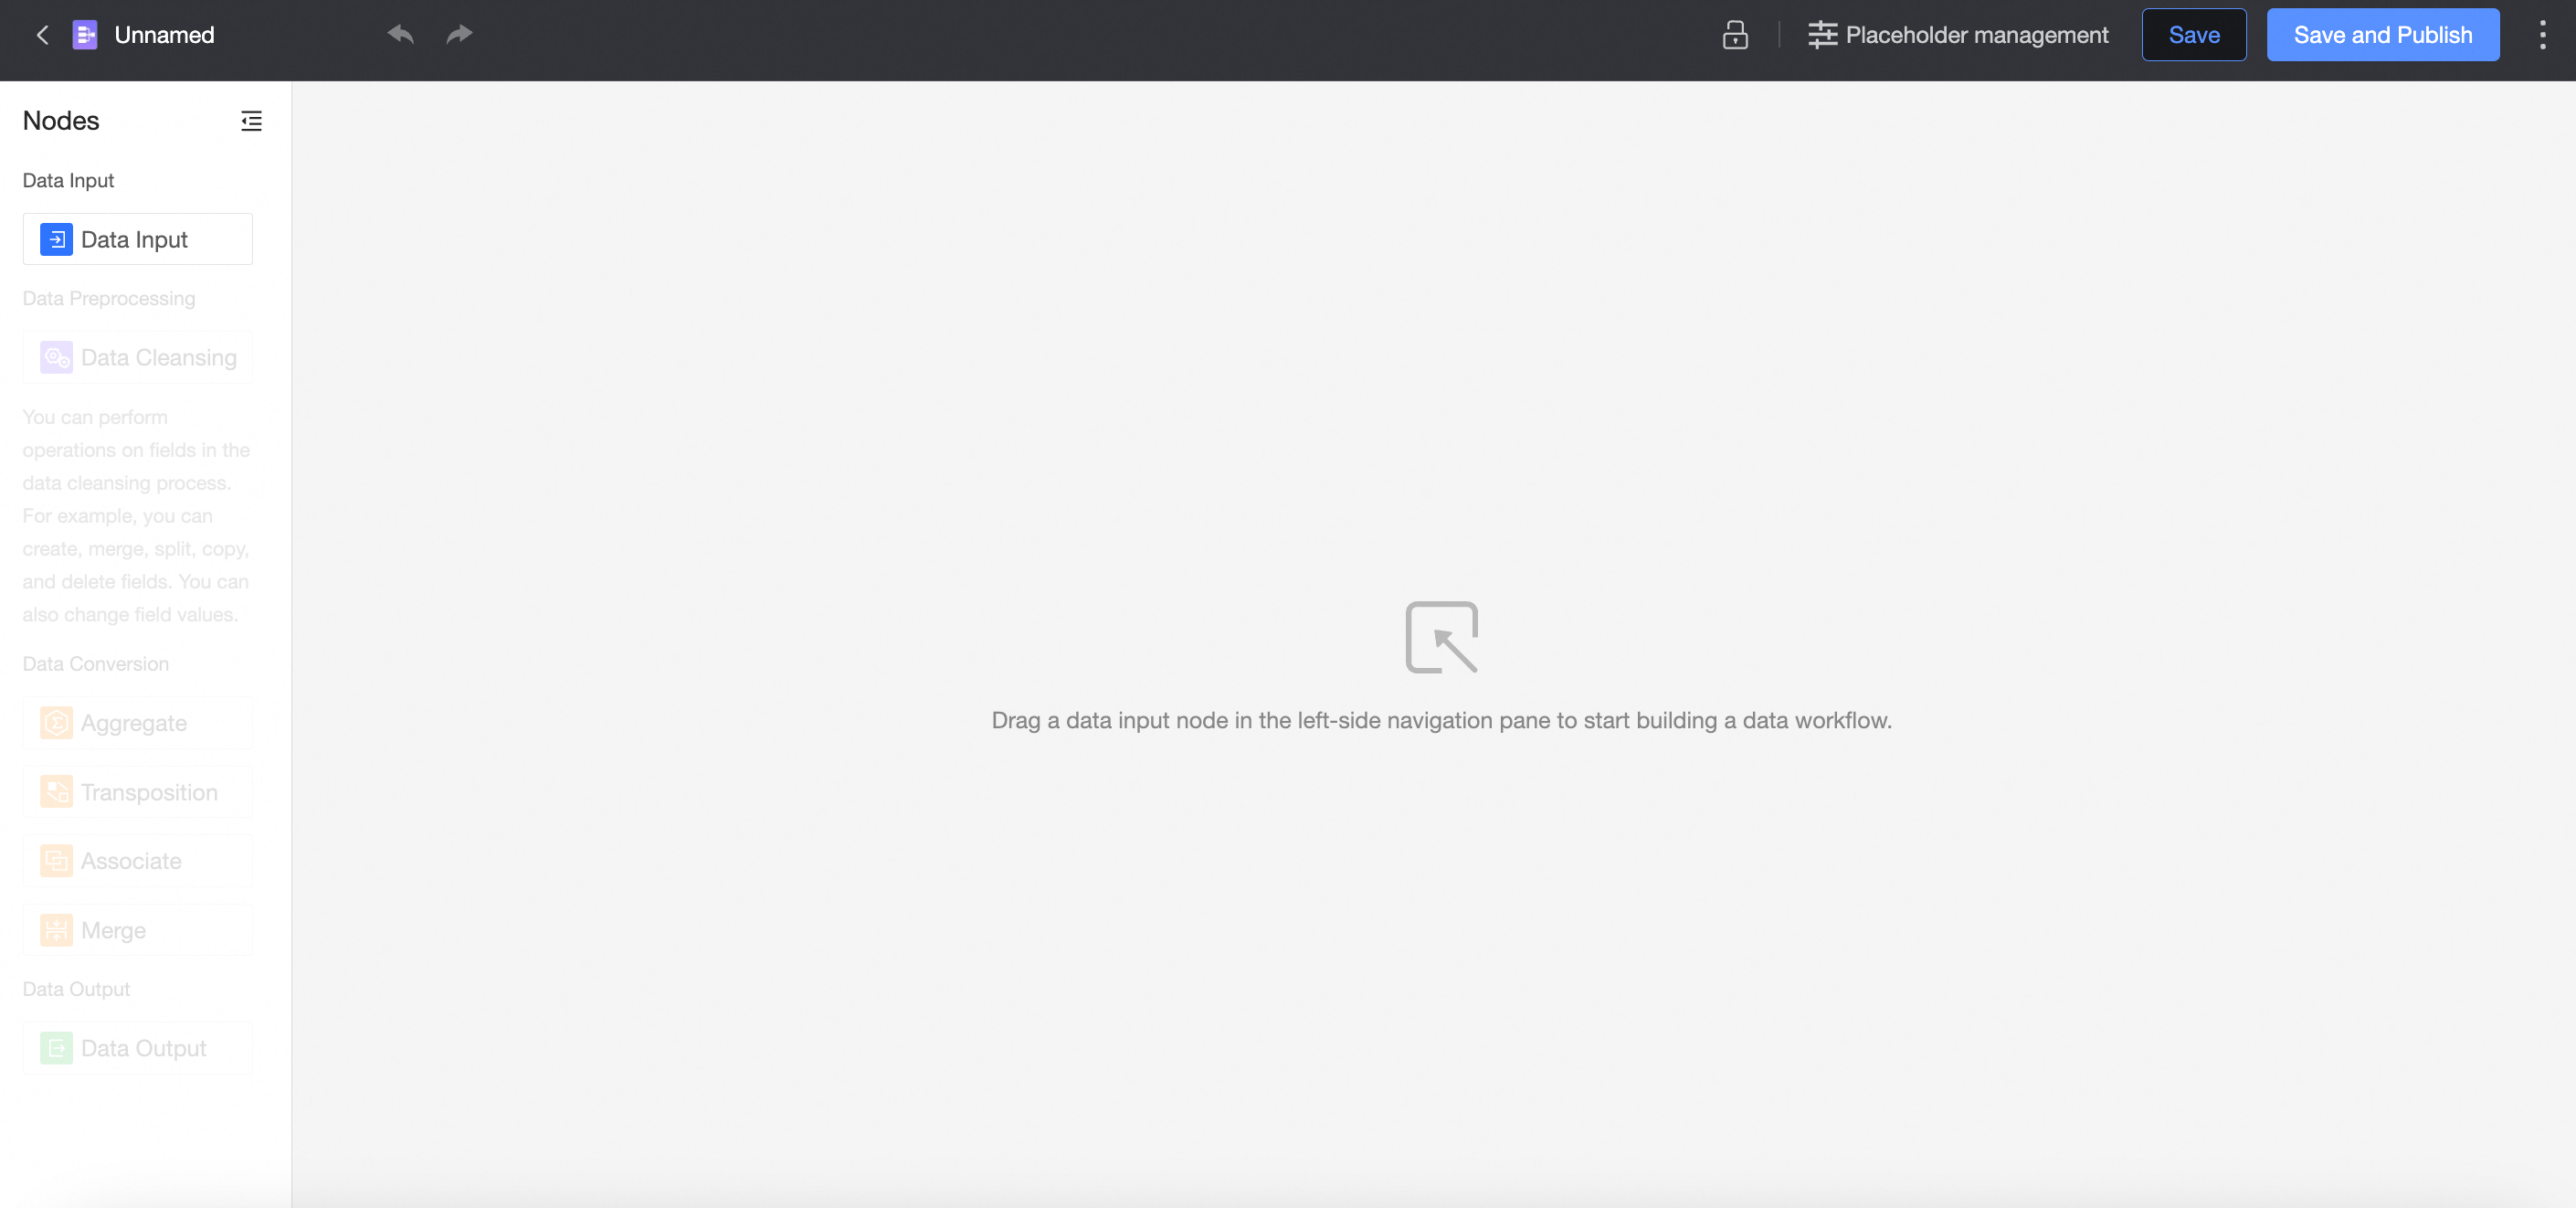
Go to the data editing page.
Input data
You can obtain data tables from data sources or use datasets on which you have permissions as input data.
On the page that appears, drag Data Input from the left-side node section to the canvas to build a data flow. 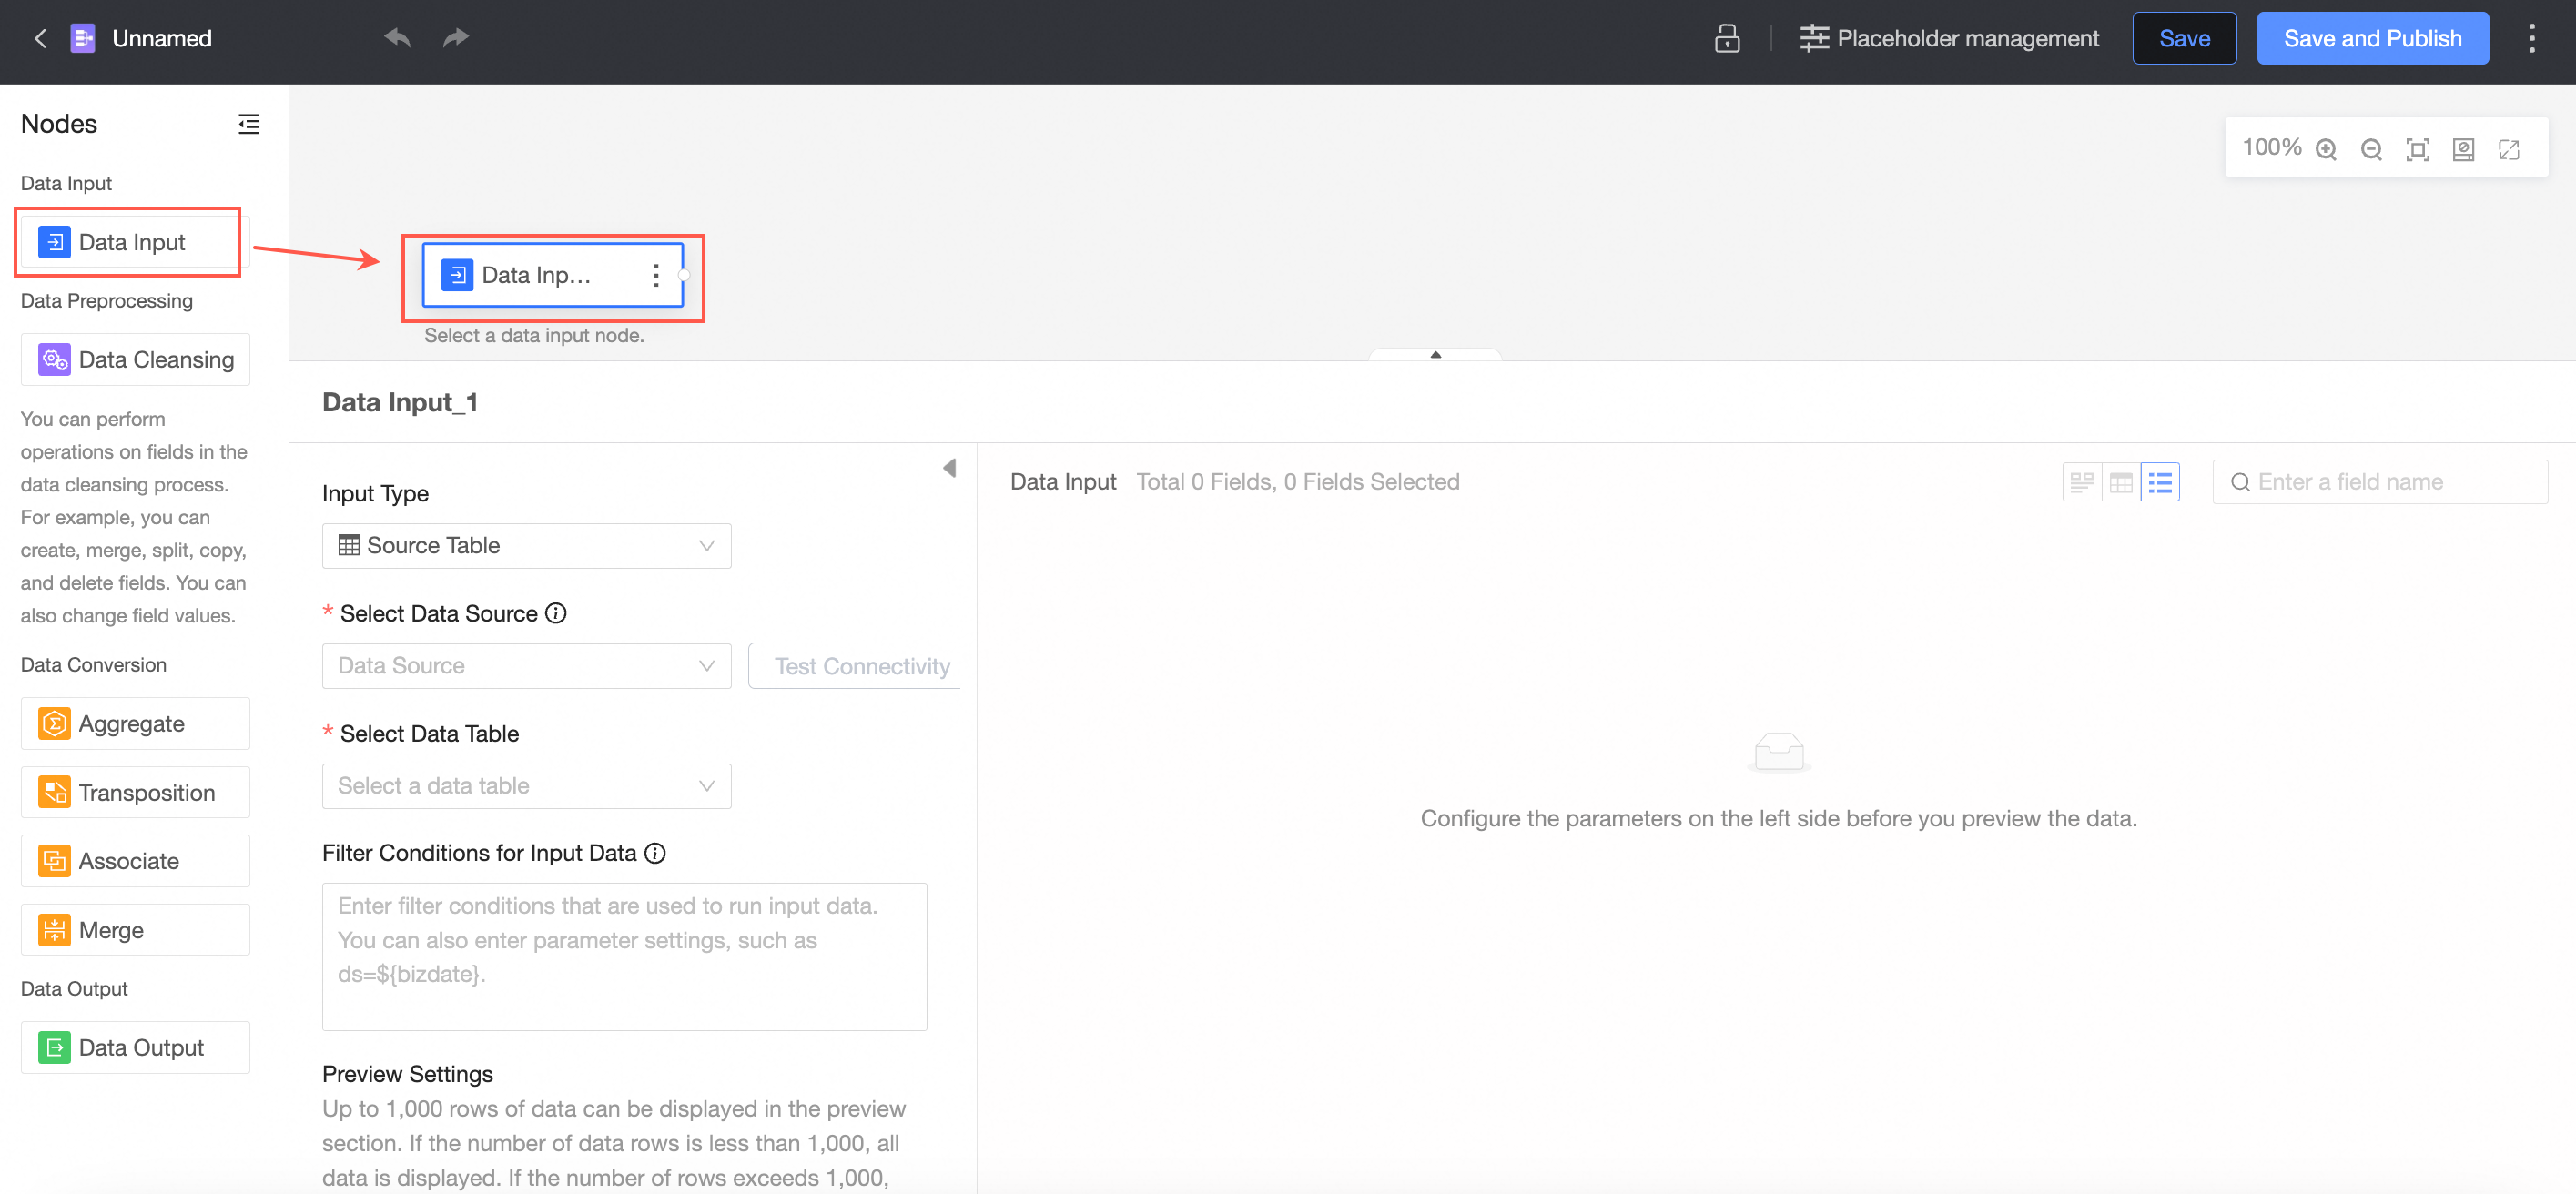
Configure the node
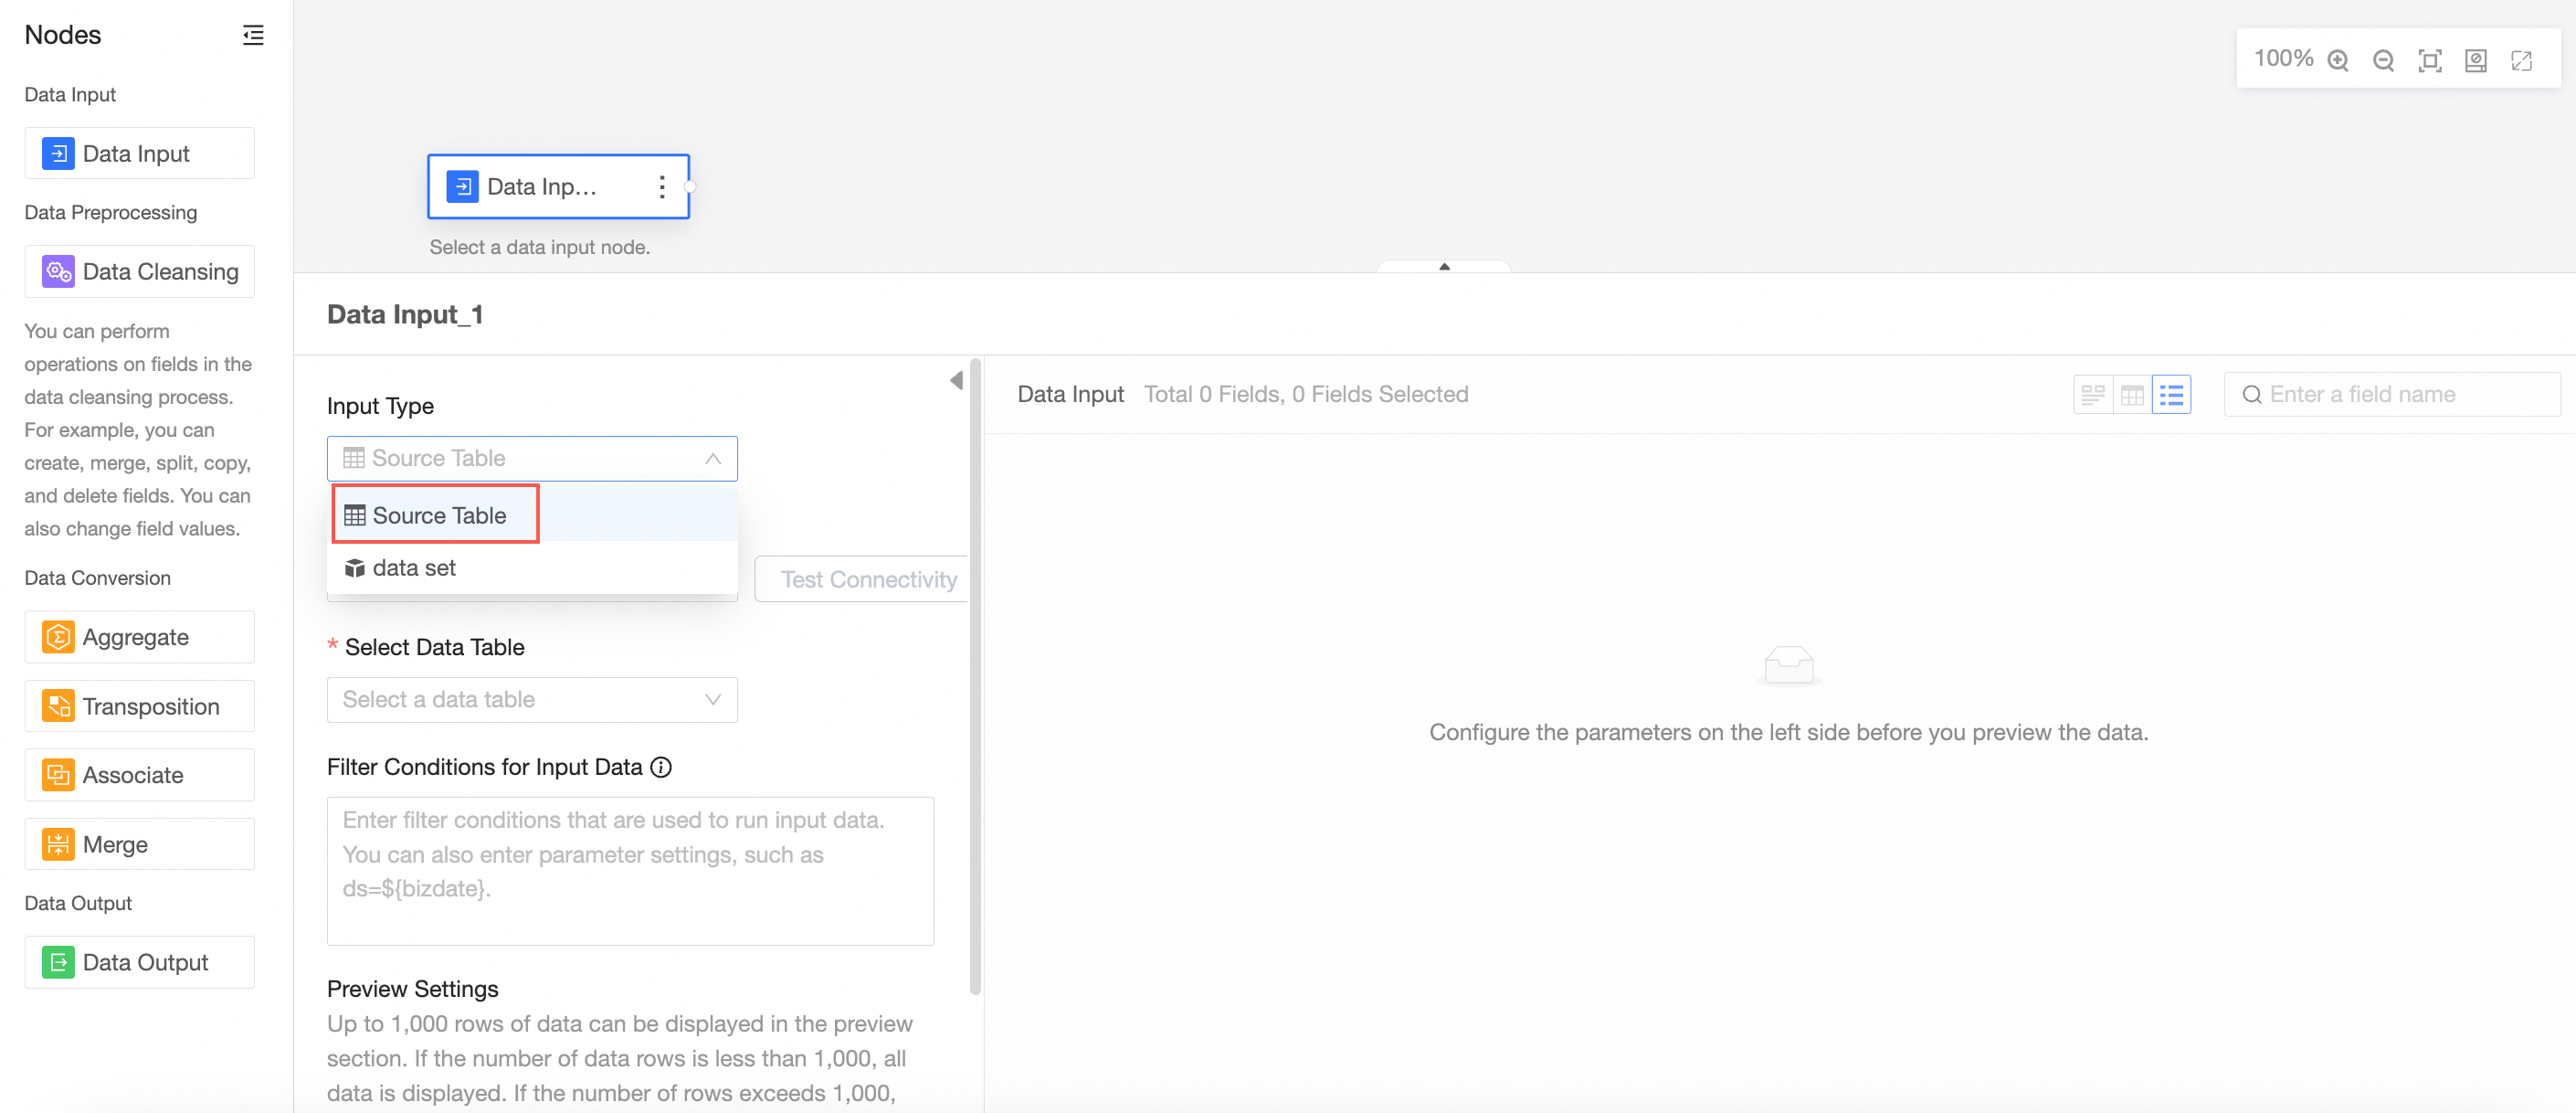
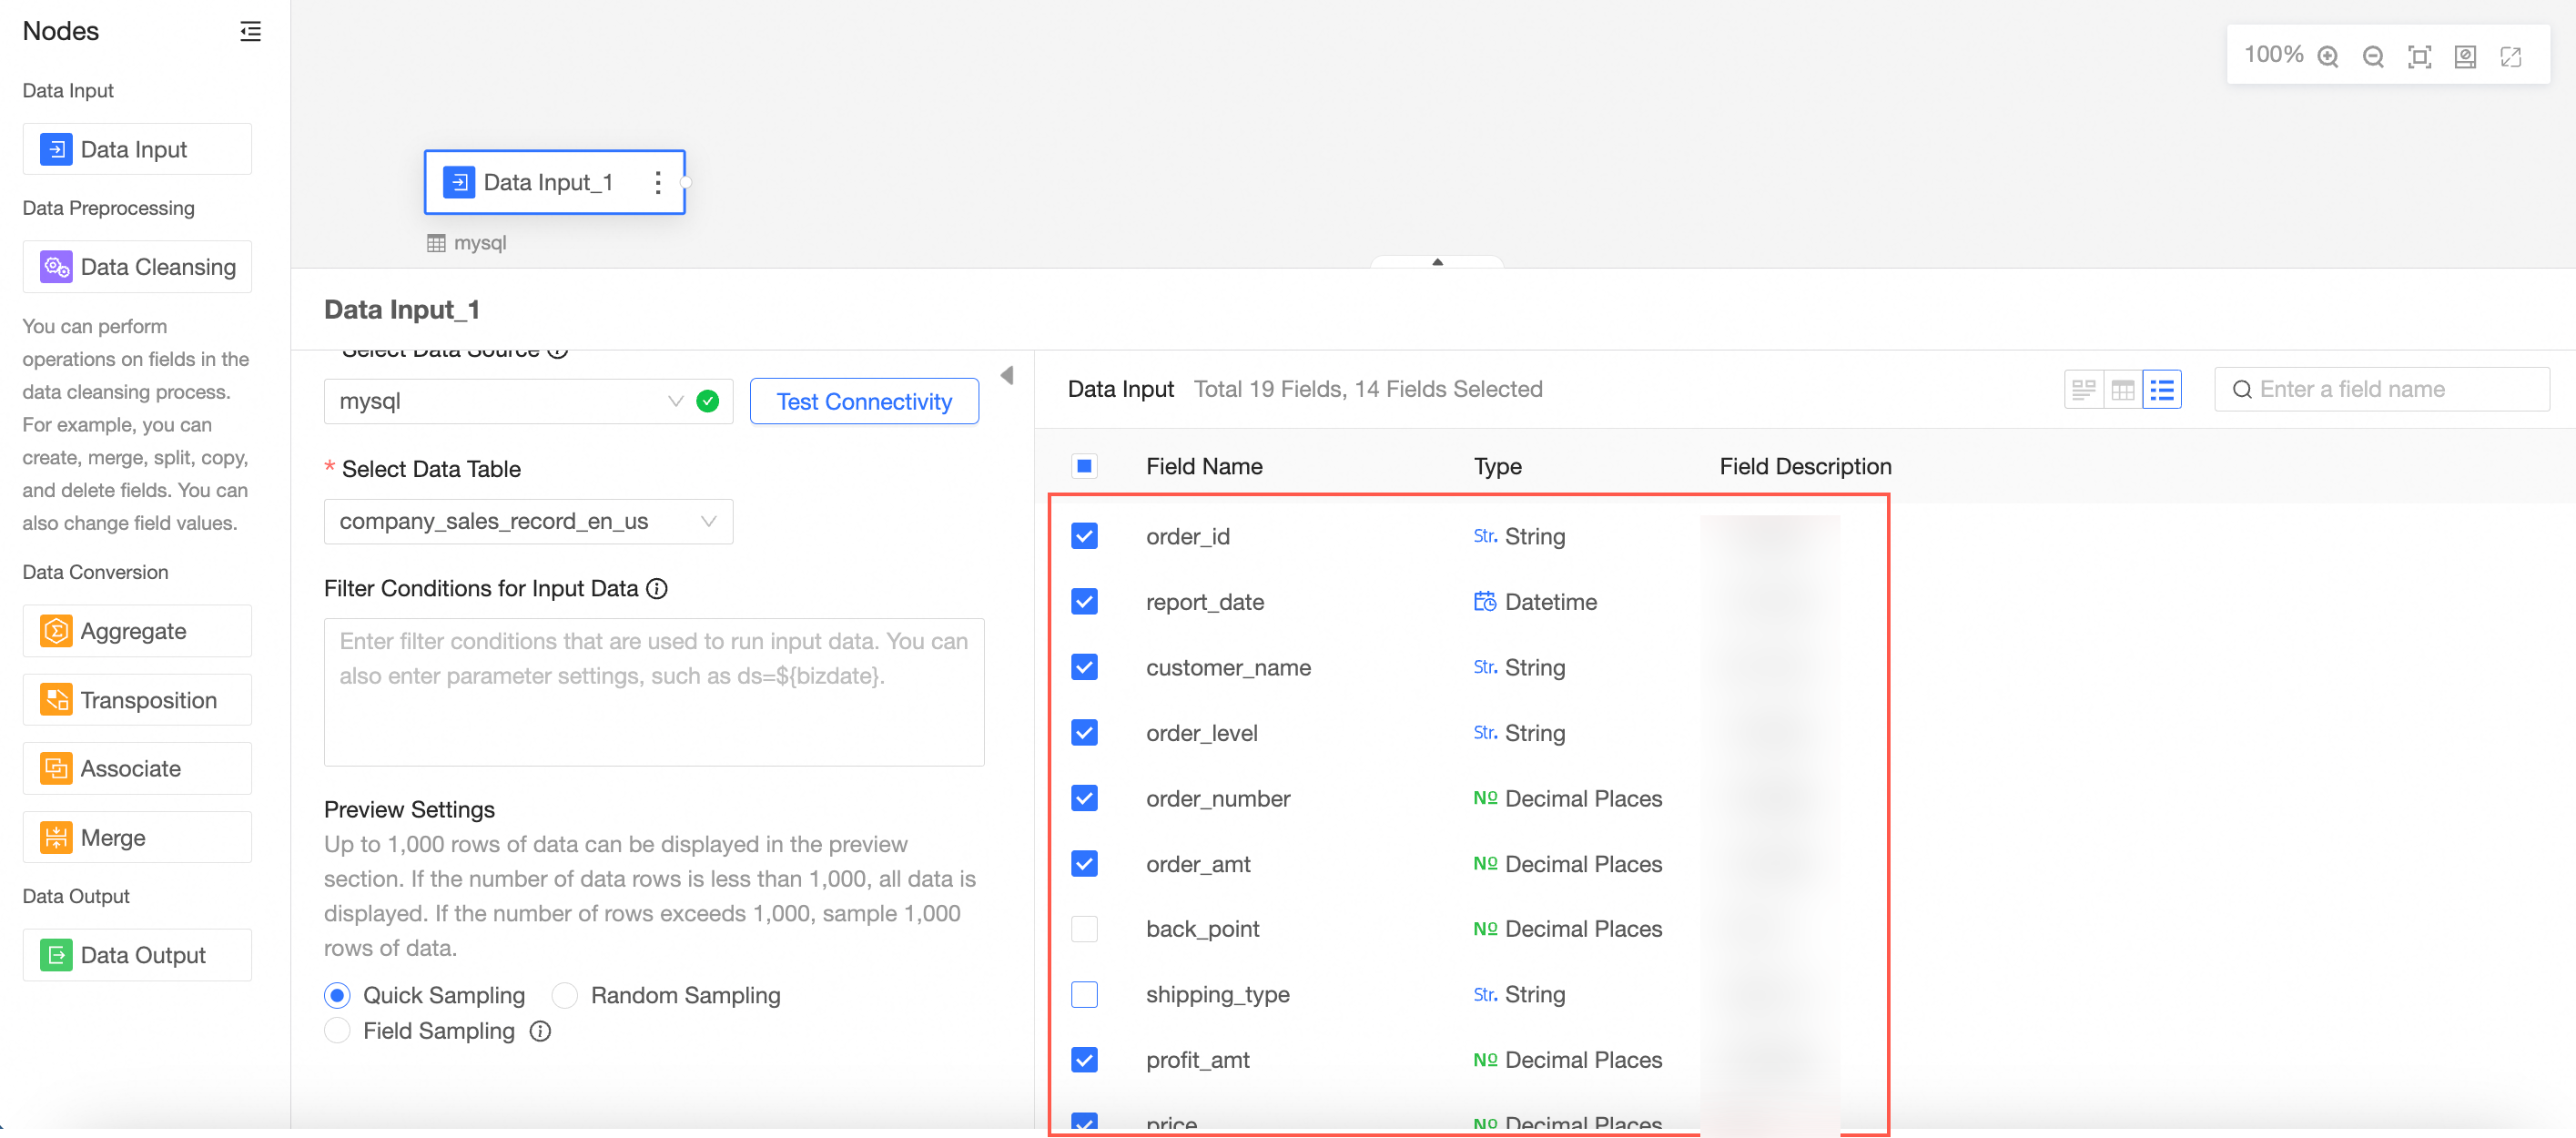
Input Type: Data Source Table
Select Data Source Table as the input type.
Select a data source.
Valid values: MySQL, MaxCompute(ODPS), SQL Server, Oracle, ClickHouse, Hologres, AnalyticDB for MySQL 3.0, PostgreSQL, PolarDB for MySQL, PolarDB for POSTGRE, PolarDB-X(DRDS), ADB for PostgreSQL, and Tencent TDSQL-H LibraDB.
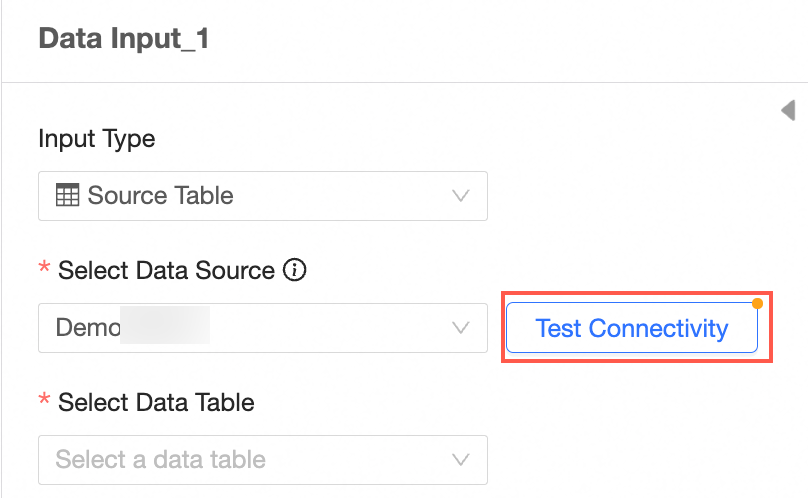
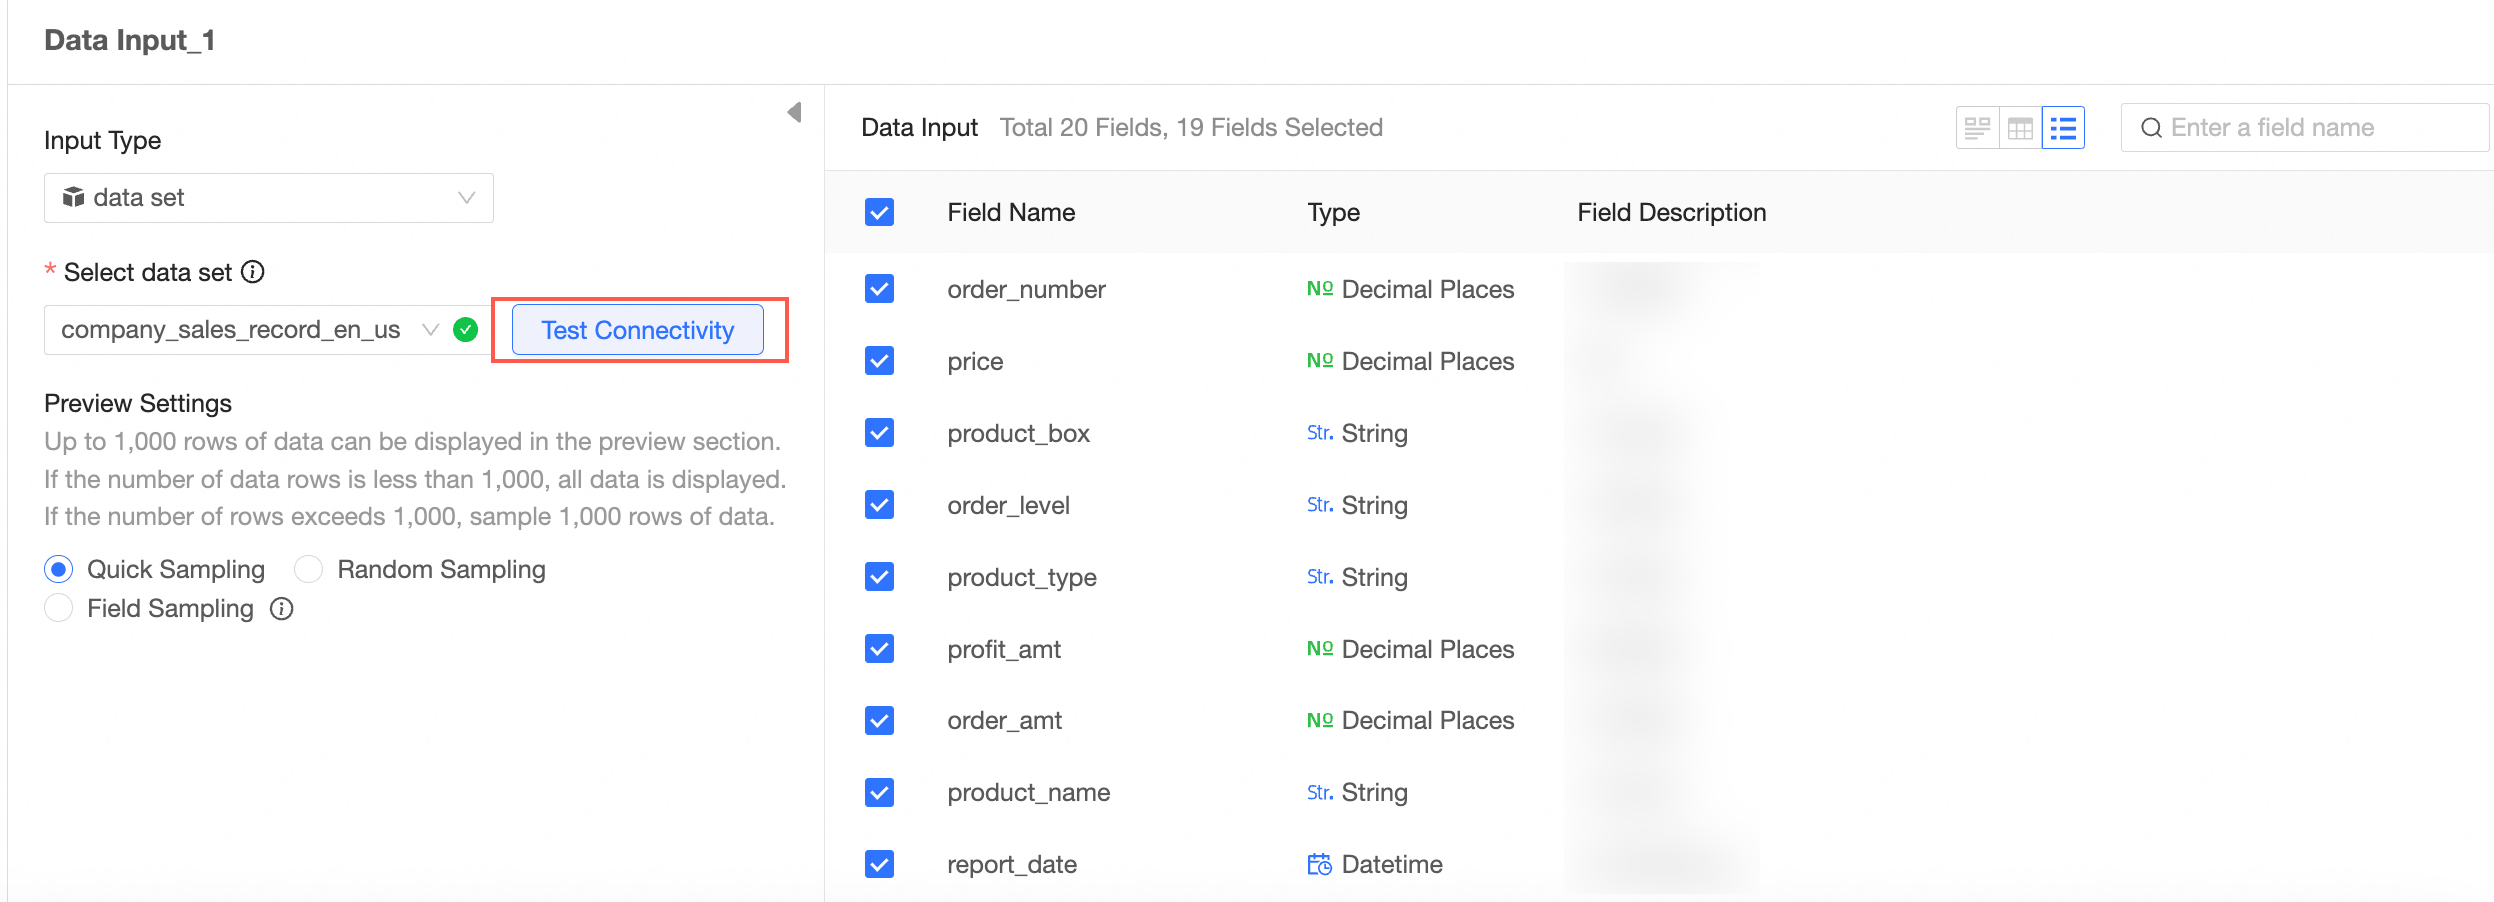
Verify the connectivity.
If the Automatic Connection Failed message appears after you select a data source, click Verify Connectivity.
 Note
NoteTo ensure a successful connection to the data source, add 106.15.233.0/24 to your database whitelist.
The name of the source table.
You can view all the fields in the table on the right side of the page.
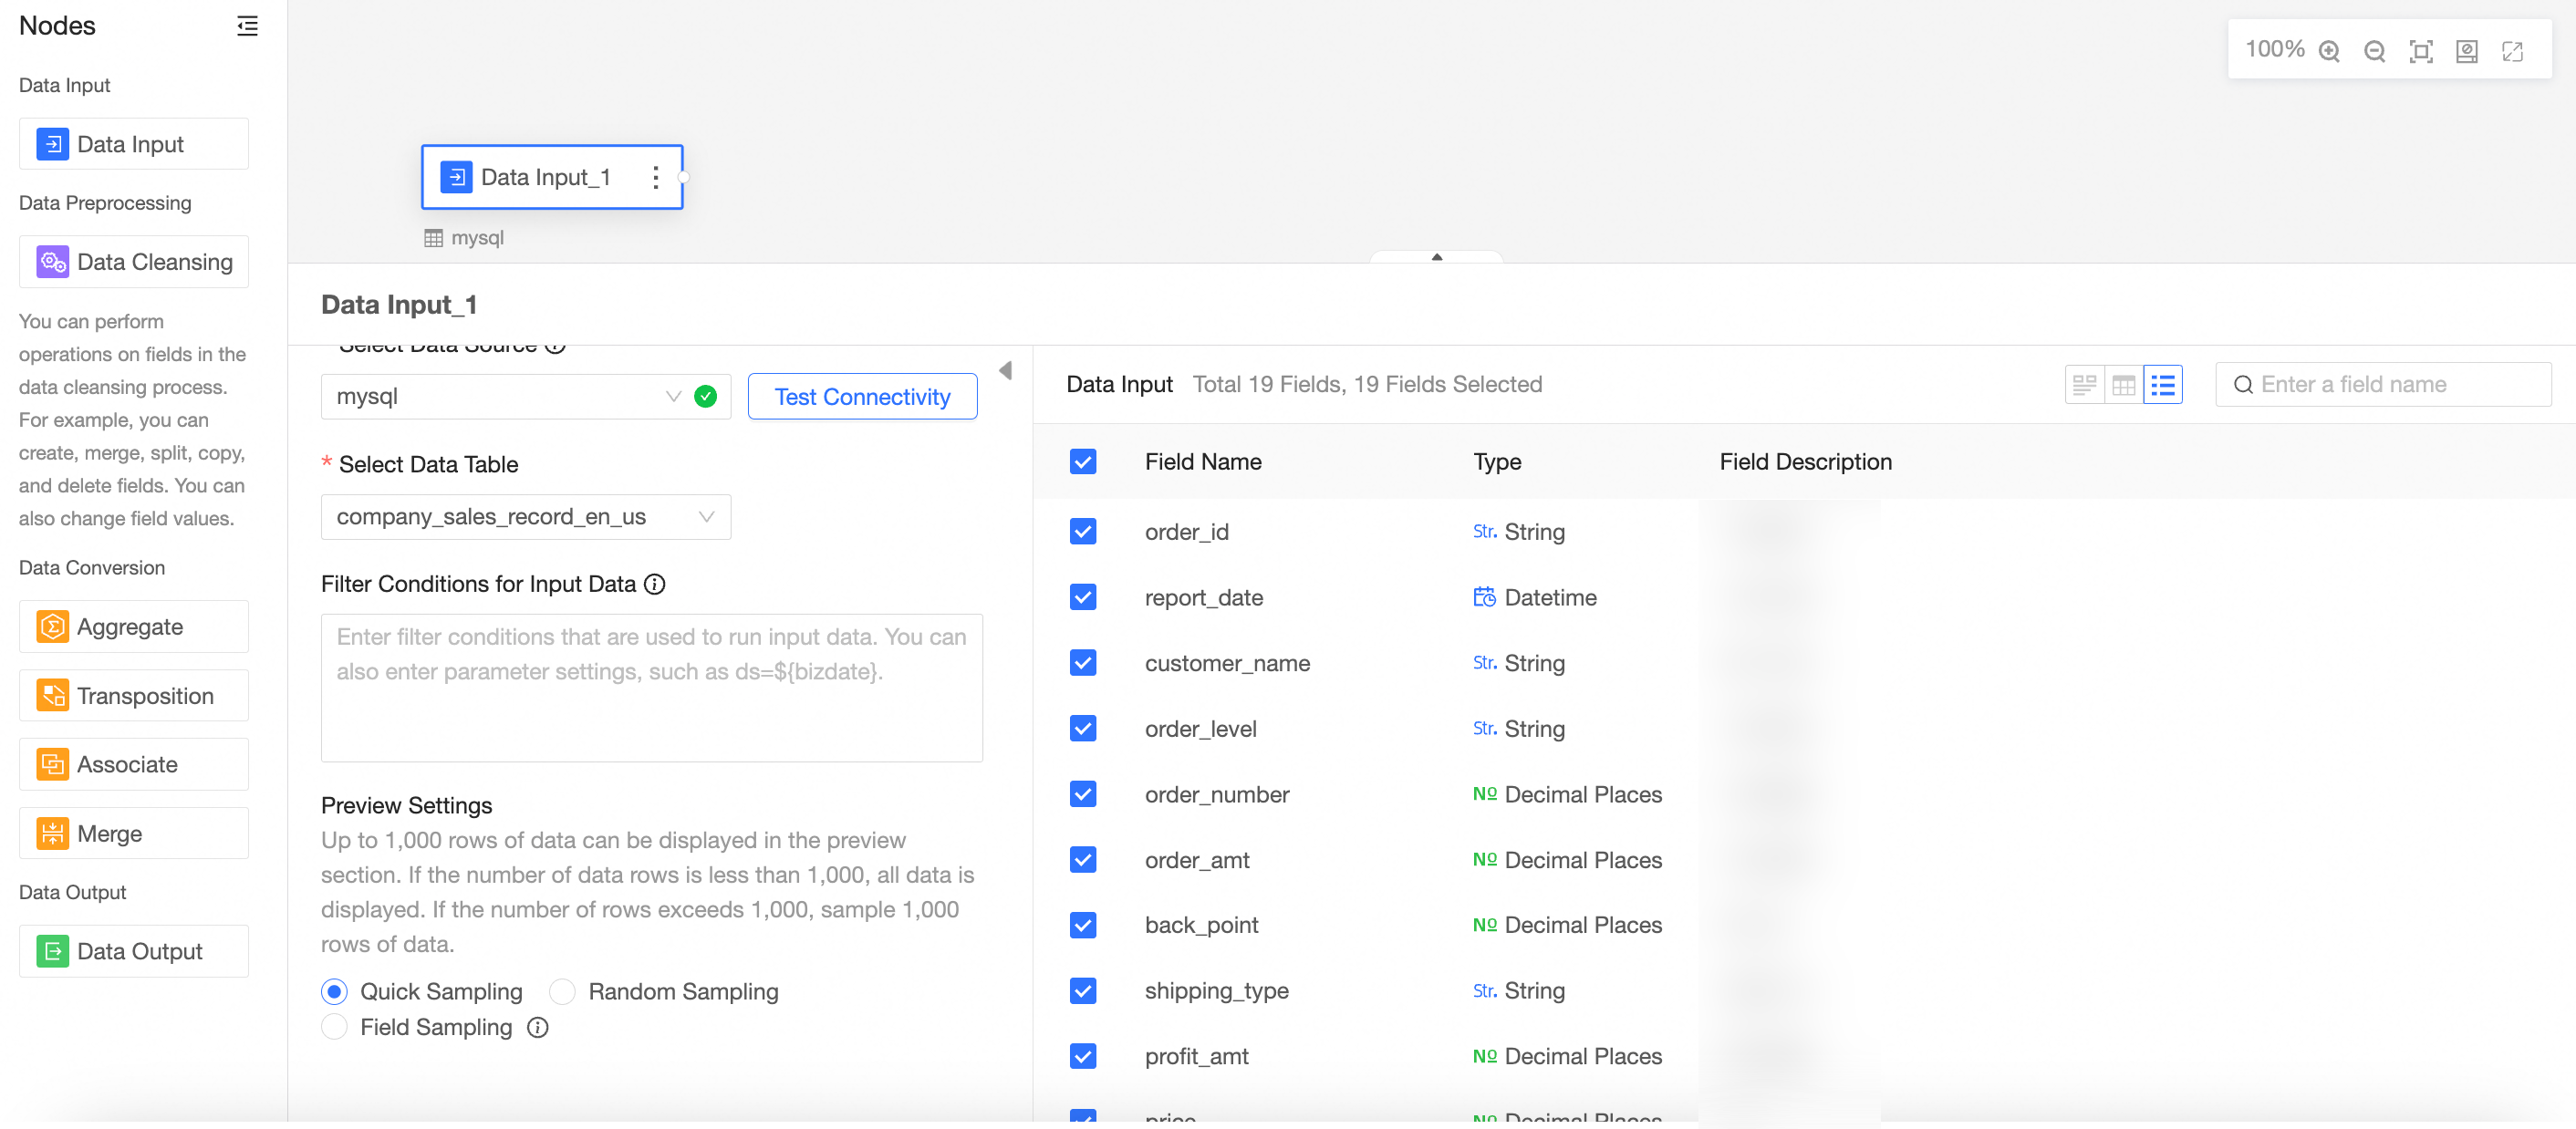
Select the target field as the data input.
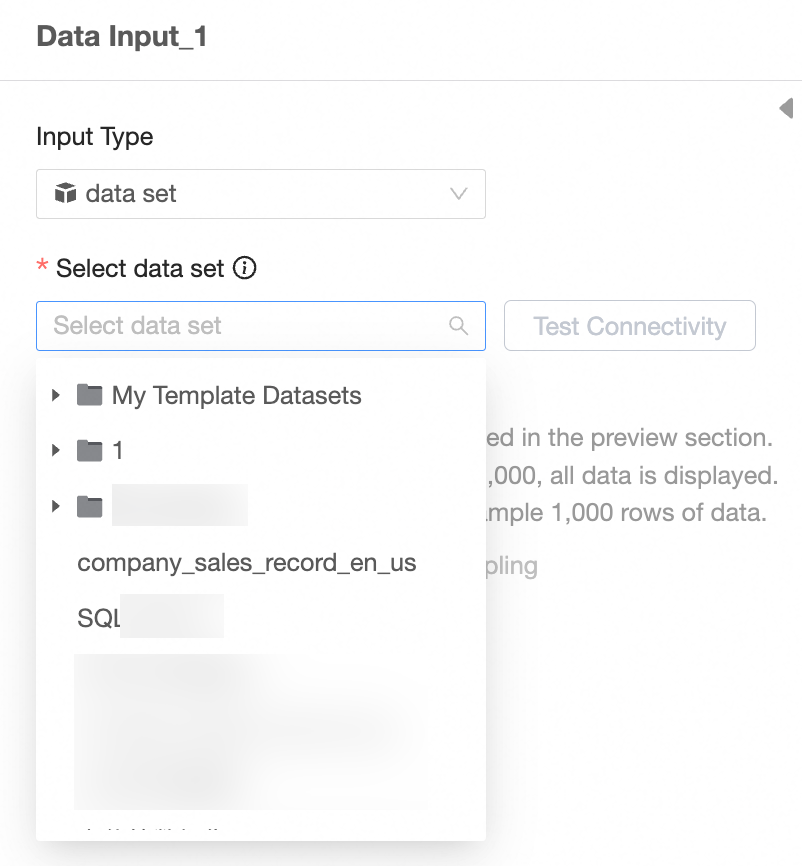
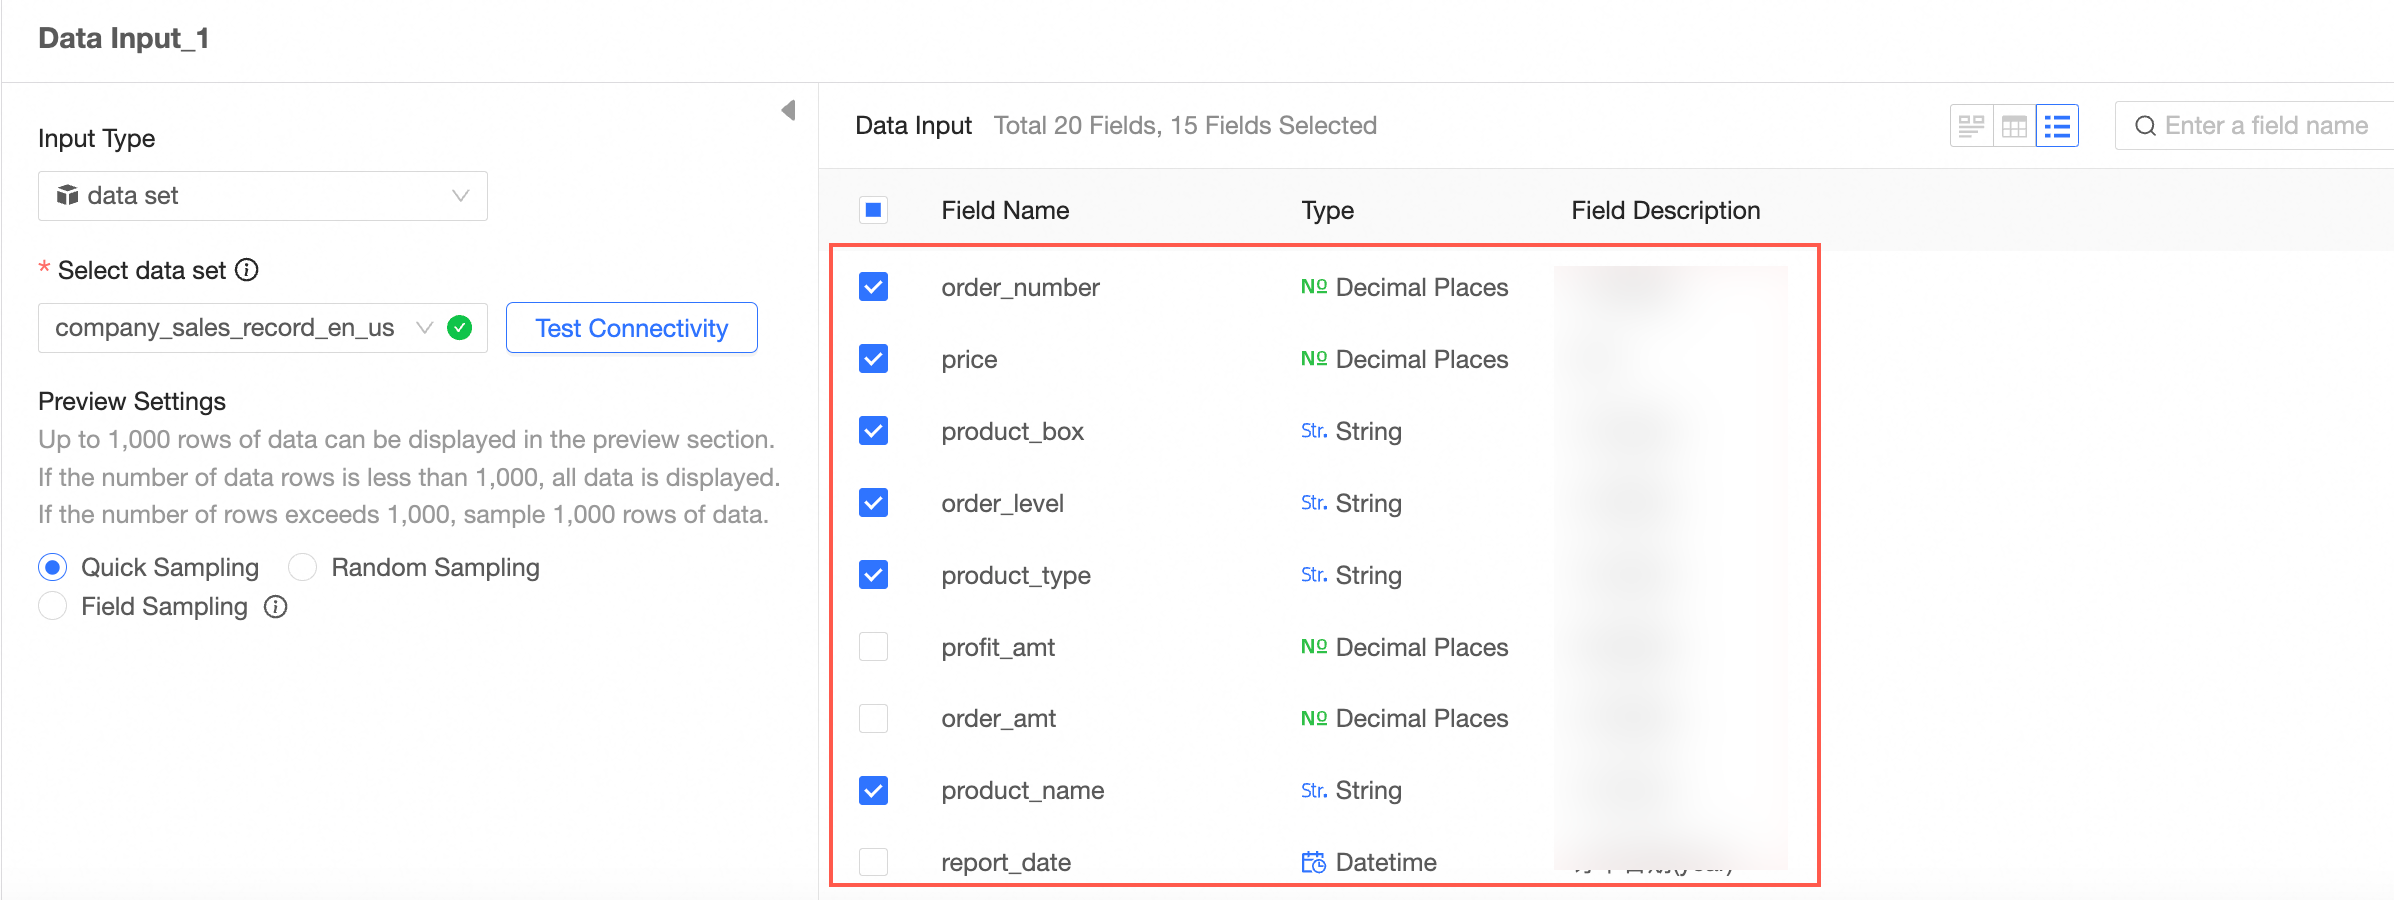
Input Type: Dataset
Select Input Type Dataset.
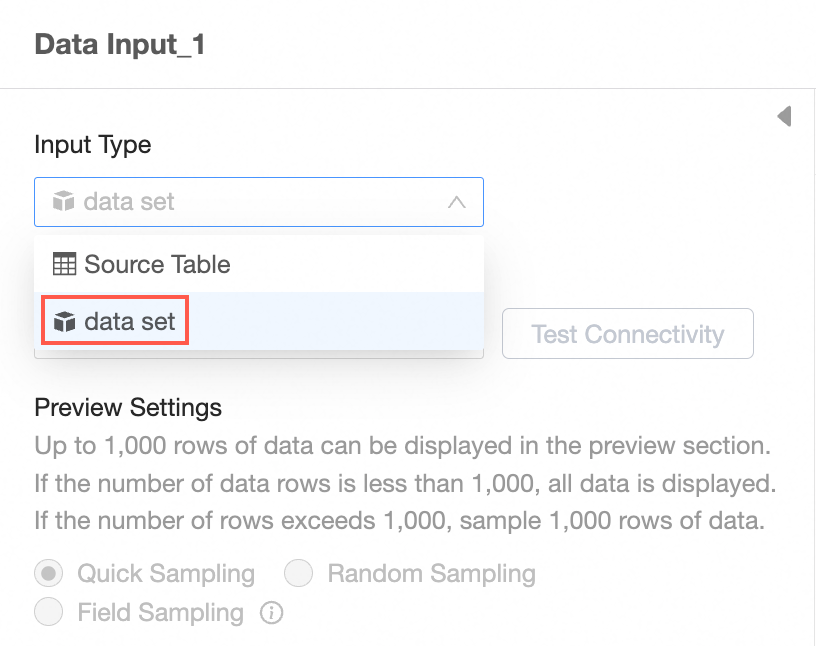
Select a dataset.
 Note
NoteThe input dataset still depends on the underlying data source. The corresponding data source type is required to support data preparation.
Verify the connectivity.
Select the target field as the data input.
Repeat the preceding steps to configure multiple data input nodes.
When you configure multiple data input nodes, the data source can be the same database or different databases.
You can add up to five data input nodes.
In this example, two data input nodes are added.
The following example shows how to configure Data Input 1.
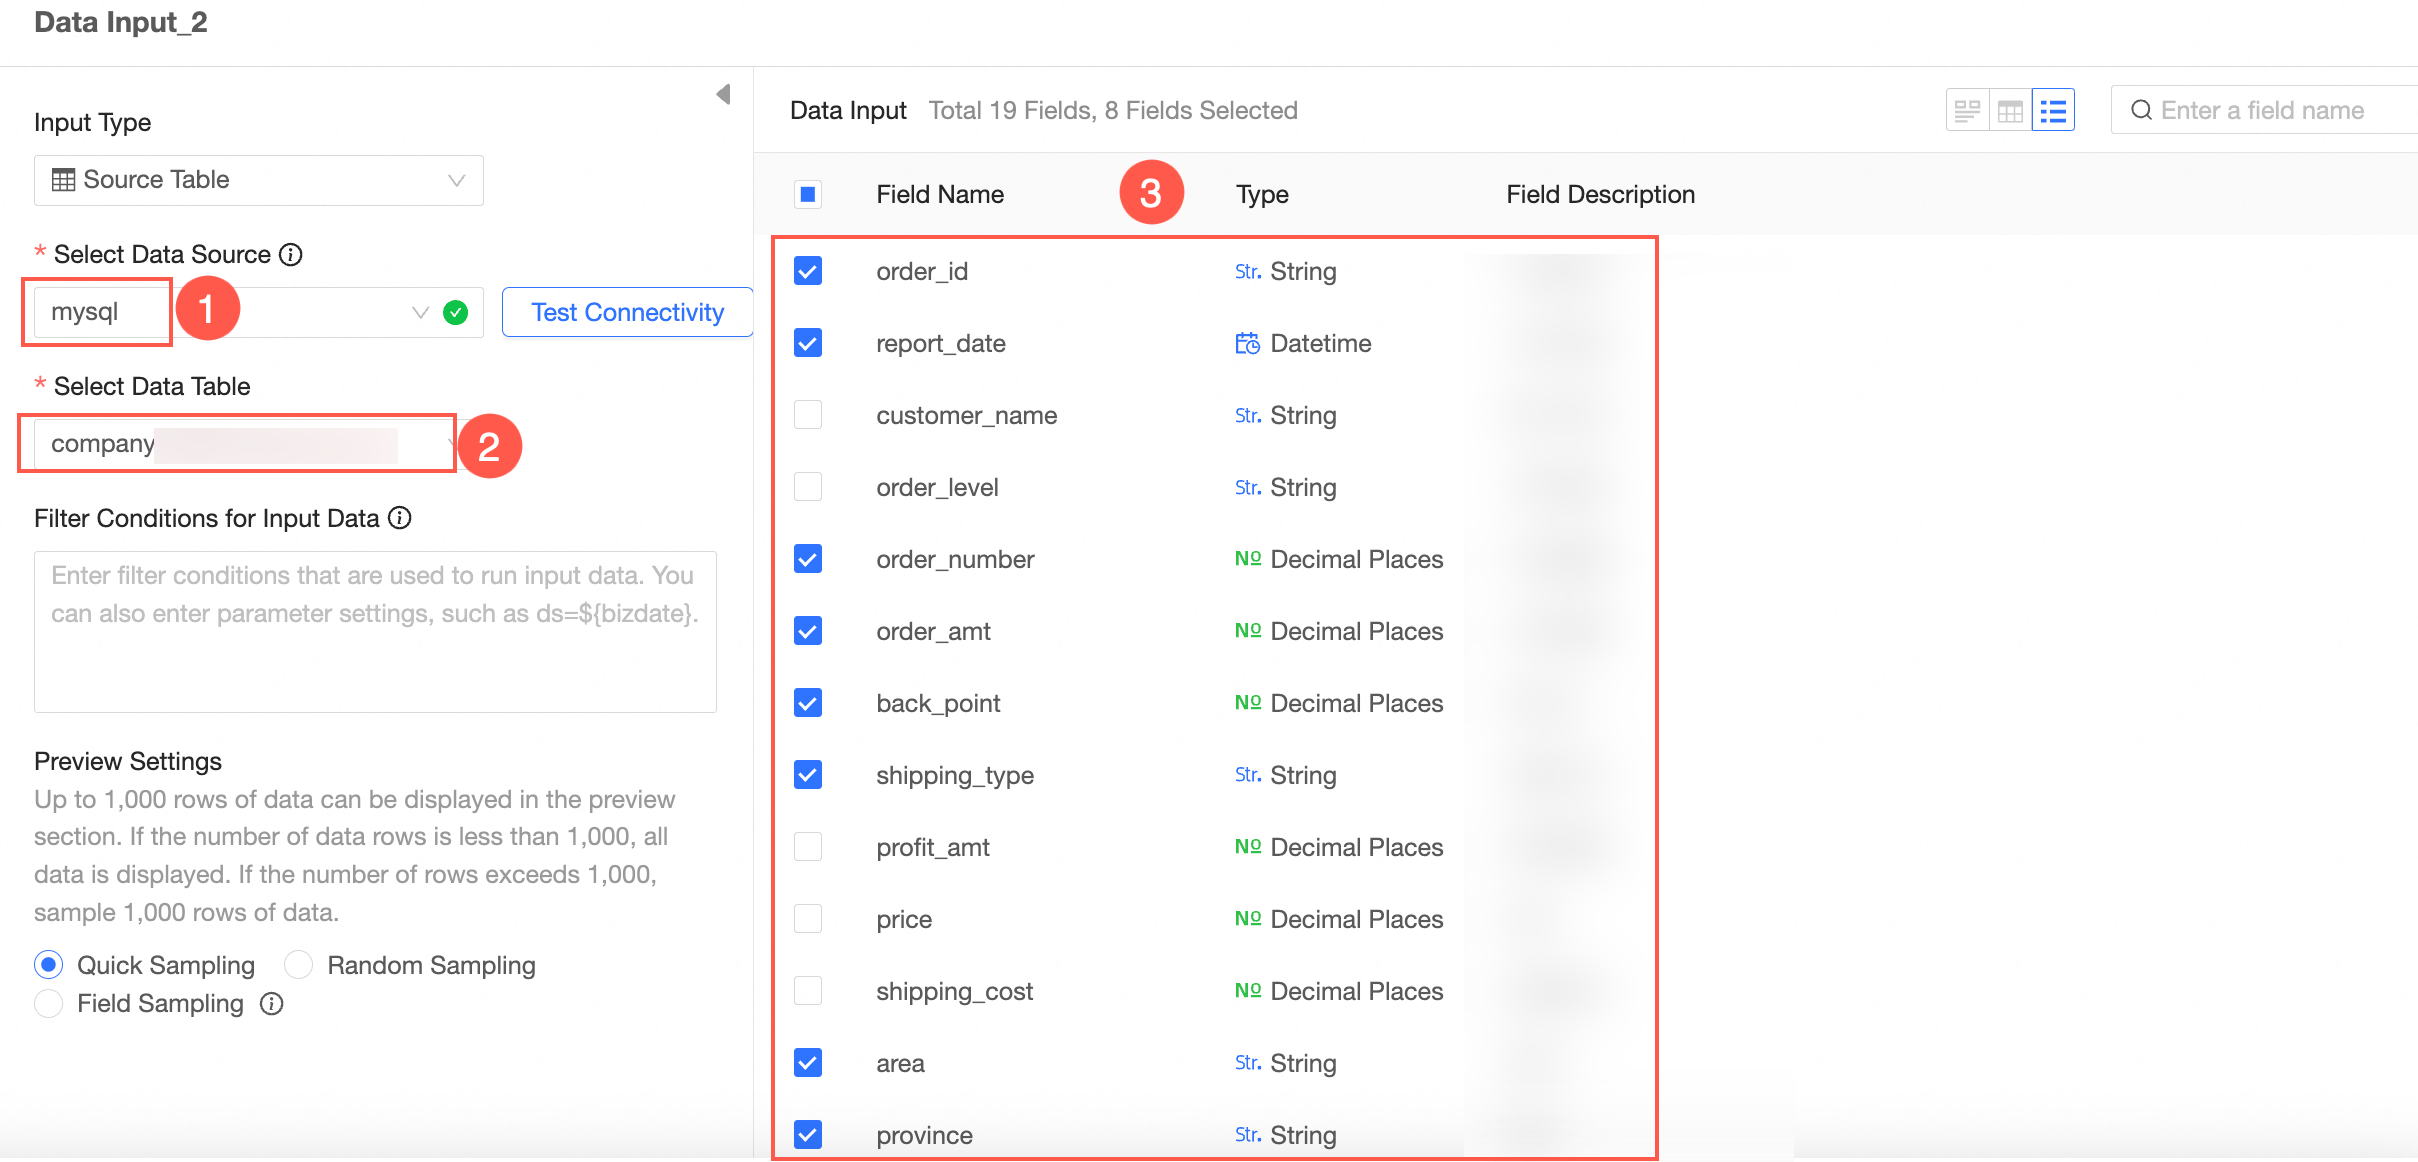
The following example shows how to configure Data Input 2.
Connect nodes
The input data is cleaned and processed, so the input node and data processing node need to be connected to form a task flow.
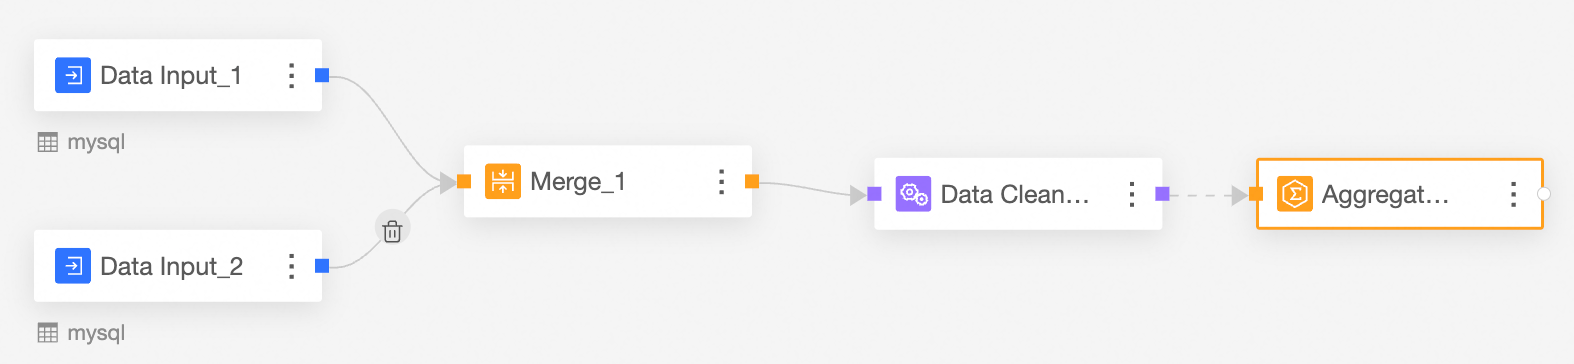
In this example, the orders distributed in two databases are merged, and operations such as cleaning, processing, and aggregation are performed.
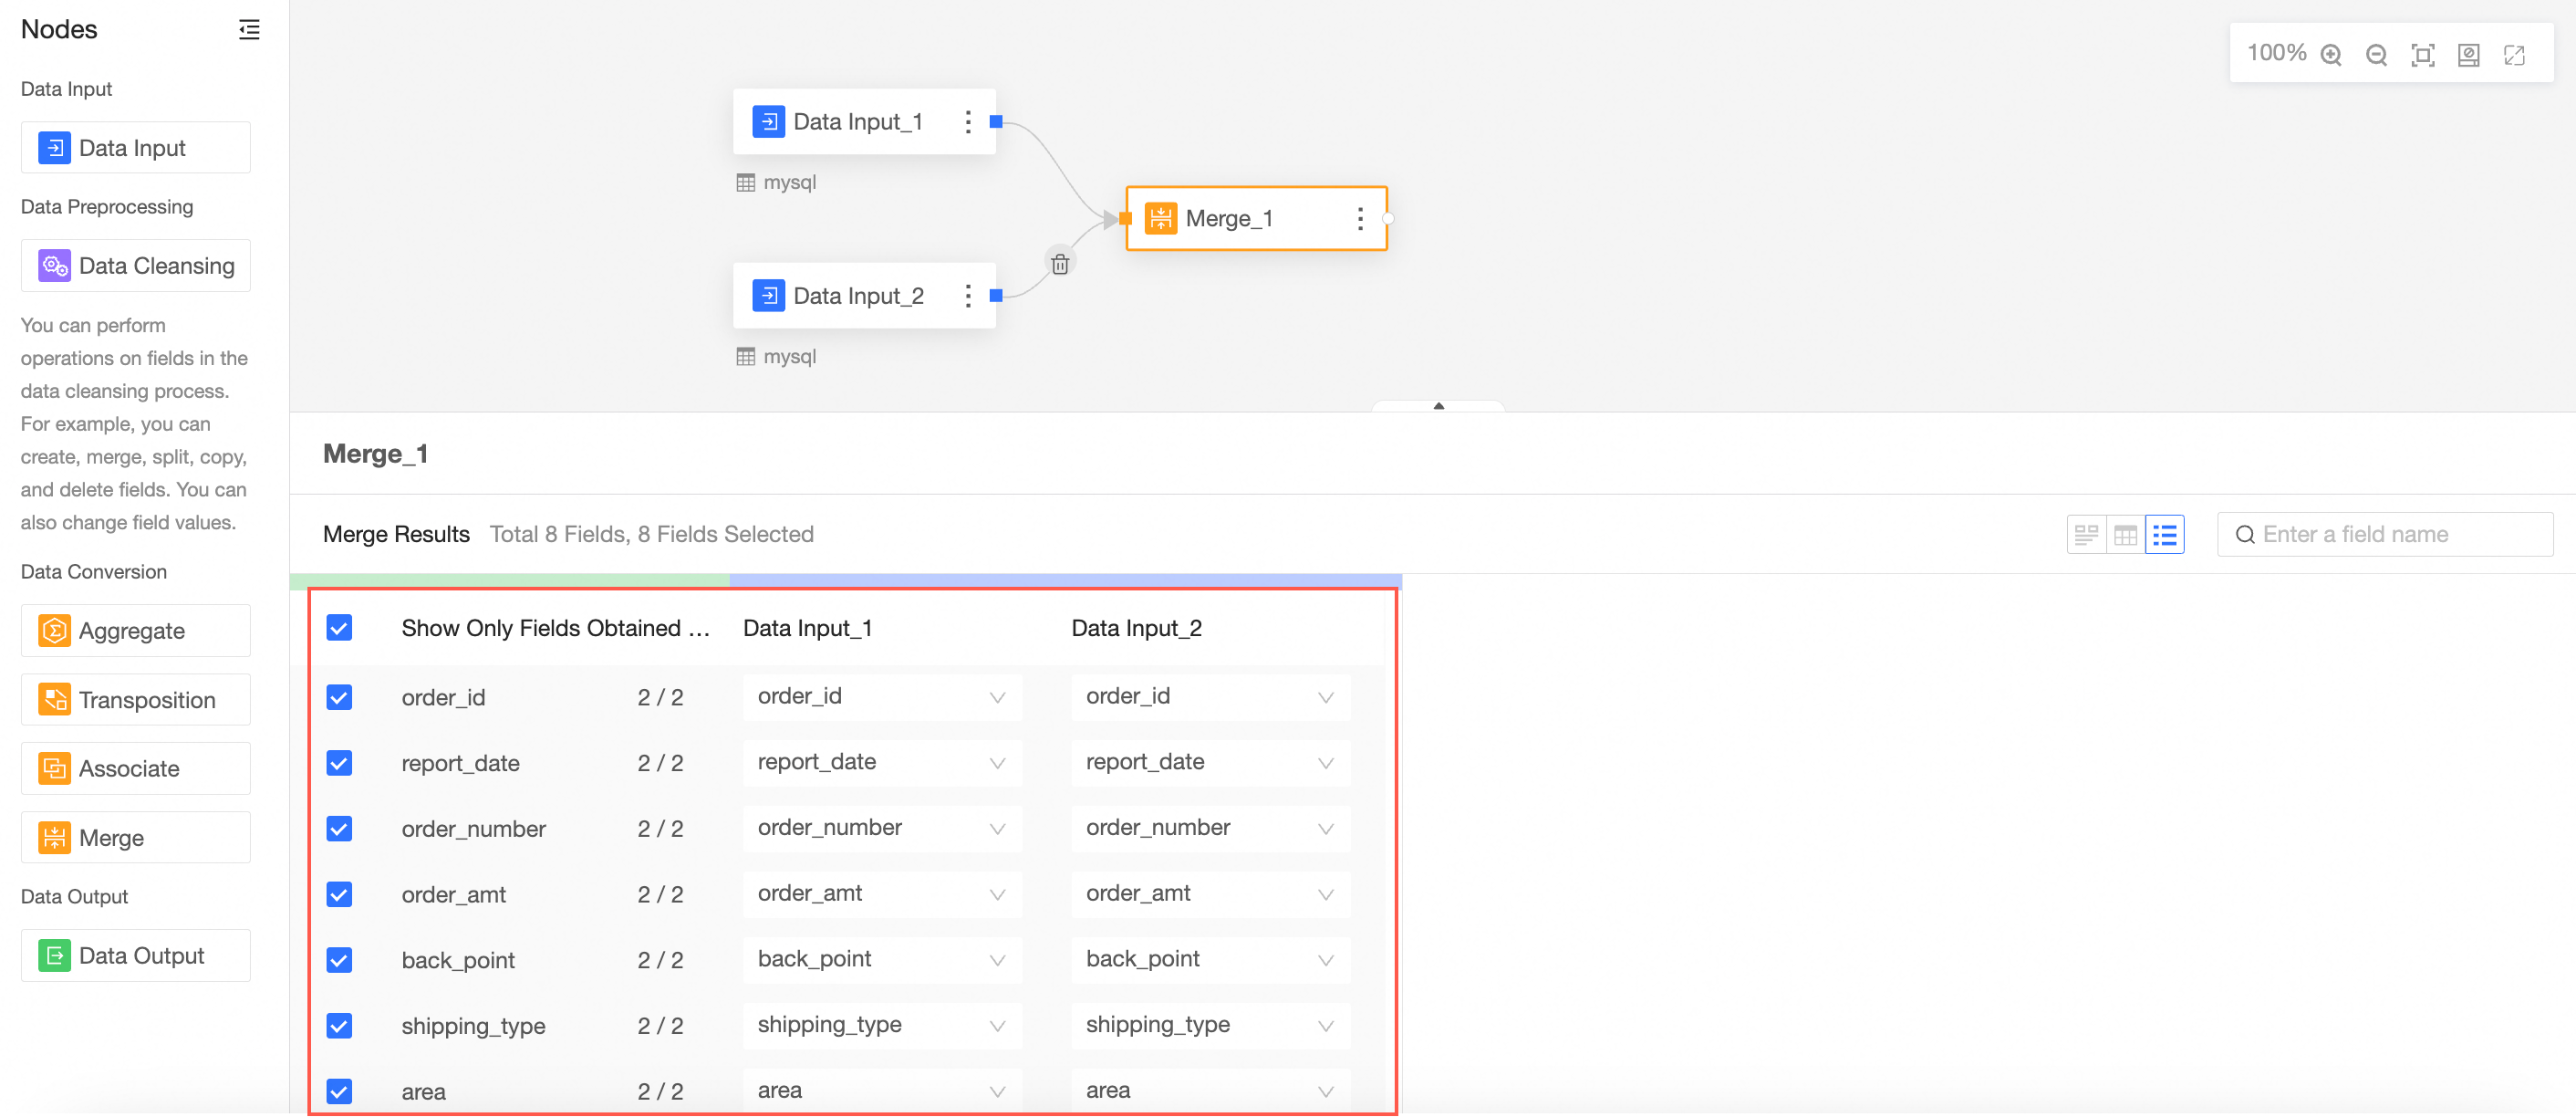
Merge the Input Data node.
The merge node is used to merge the fields with the same name in the data input 1 node and the data input 2 node.
Drag Merge from the left-side node section to the canvas section.
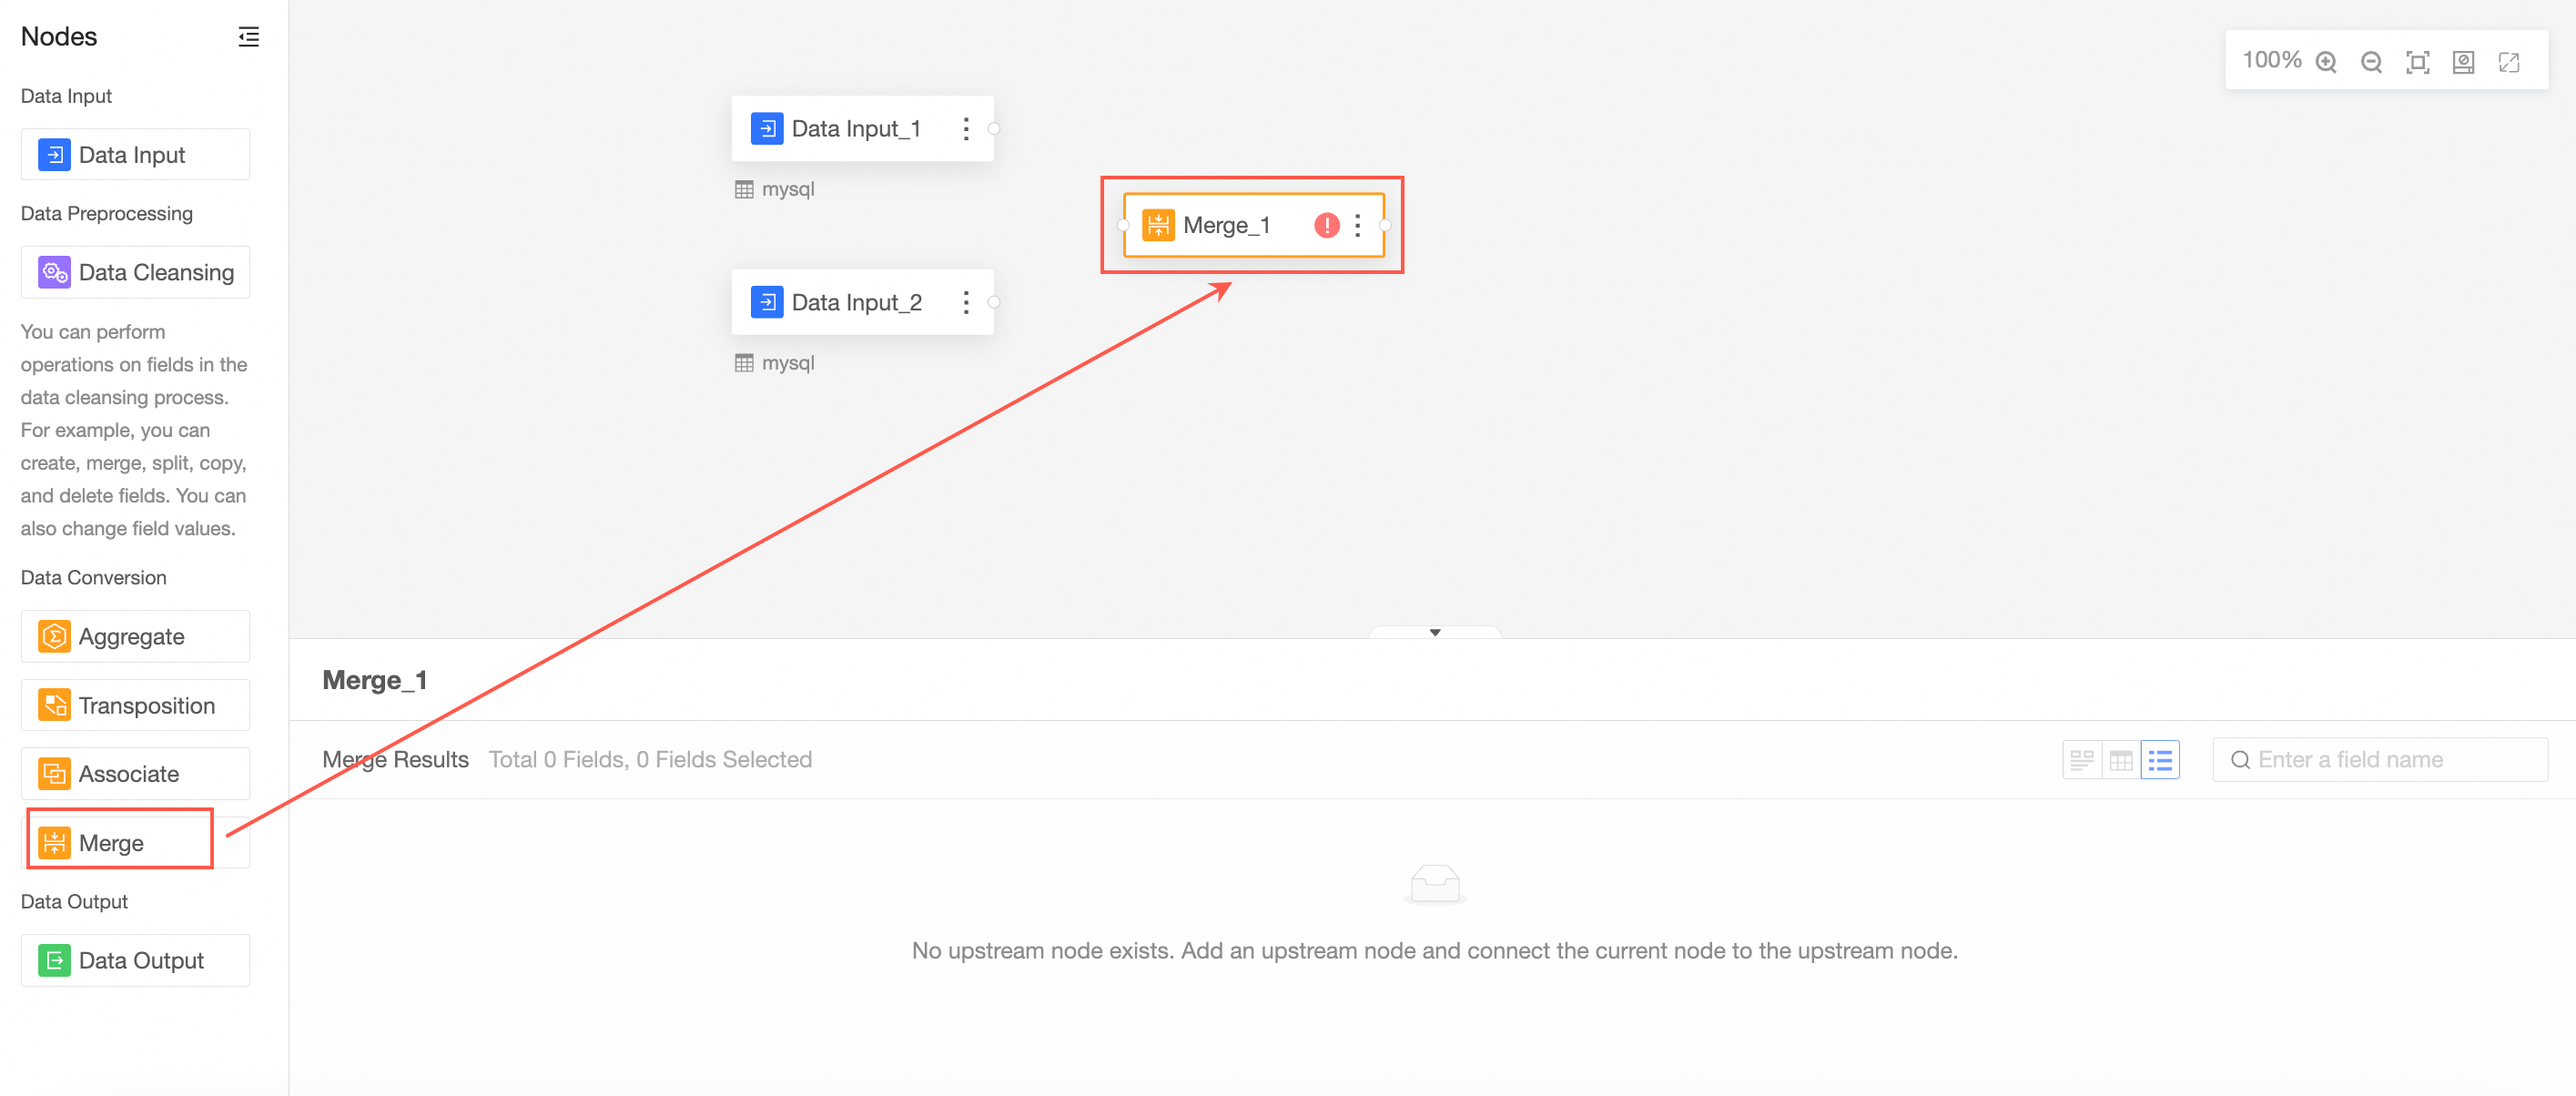
Connect the nodes to be merged.
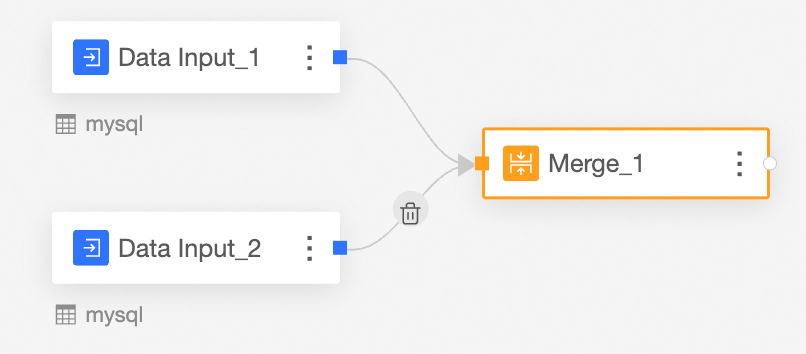
Configure the merge node and view the merge result.
In this case, the fields in the merge node are the fields with the same name in data input 1 and data input 2.
Clean and process the merged data.
Drag Cleaning and Processing from the left-side node section to the canvas section.
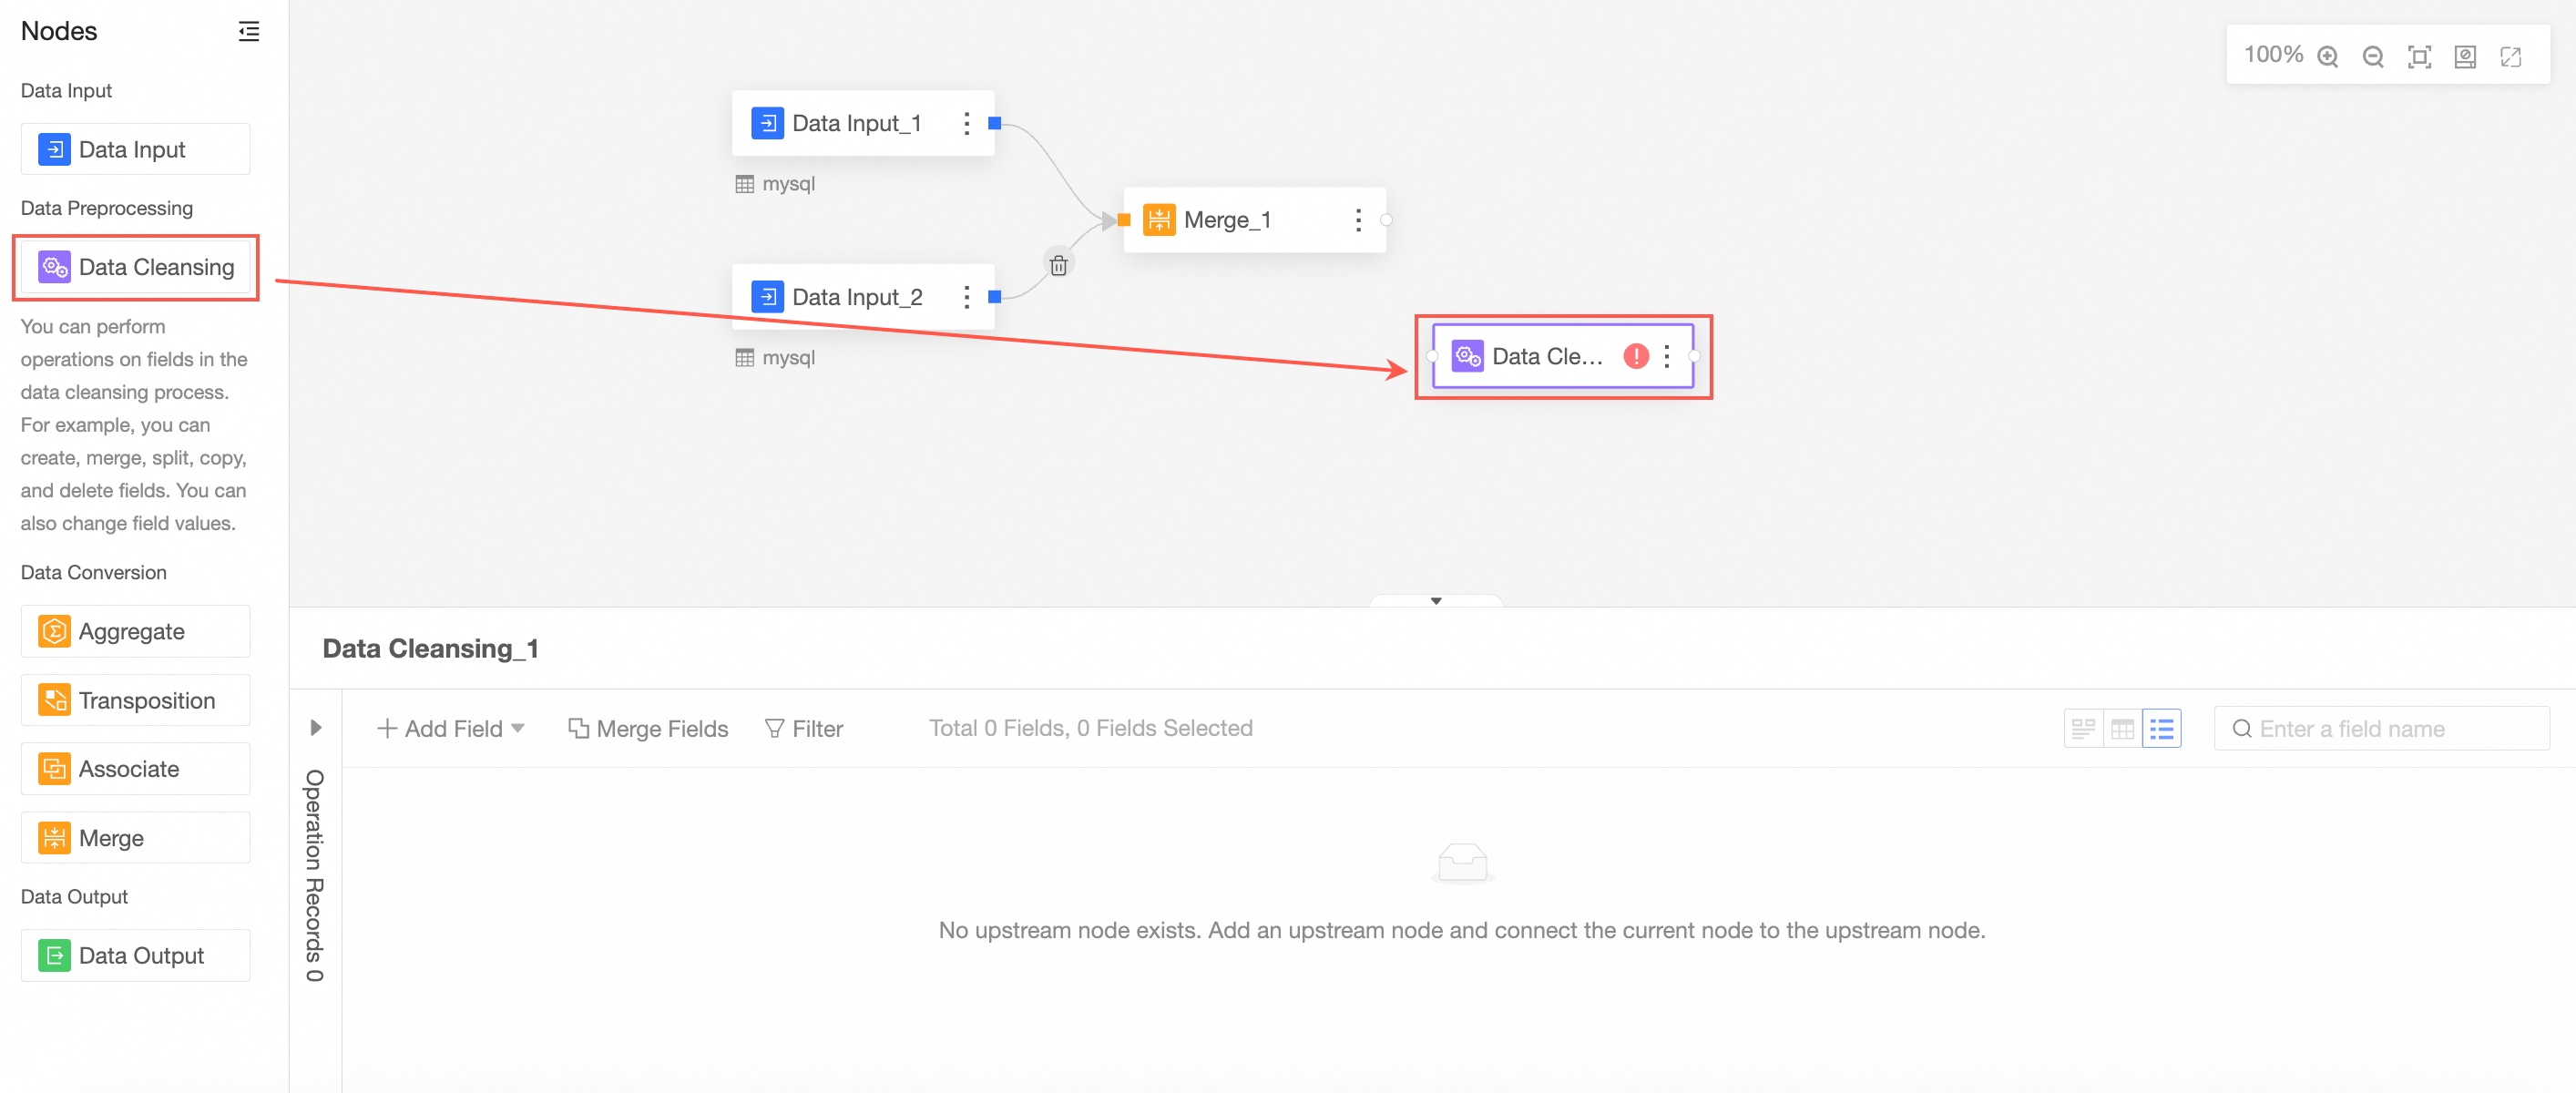
Connect the nodes to be cleaned and processed.
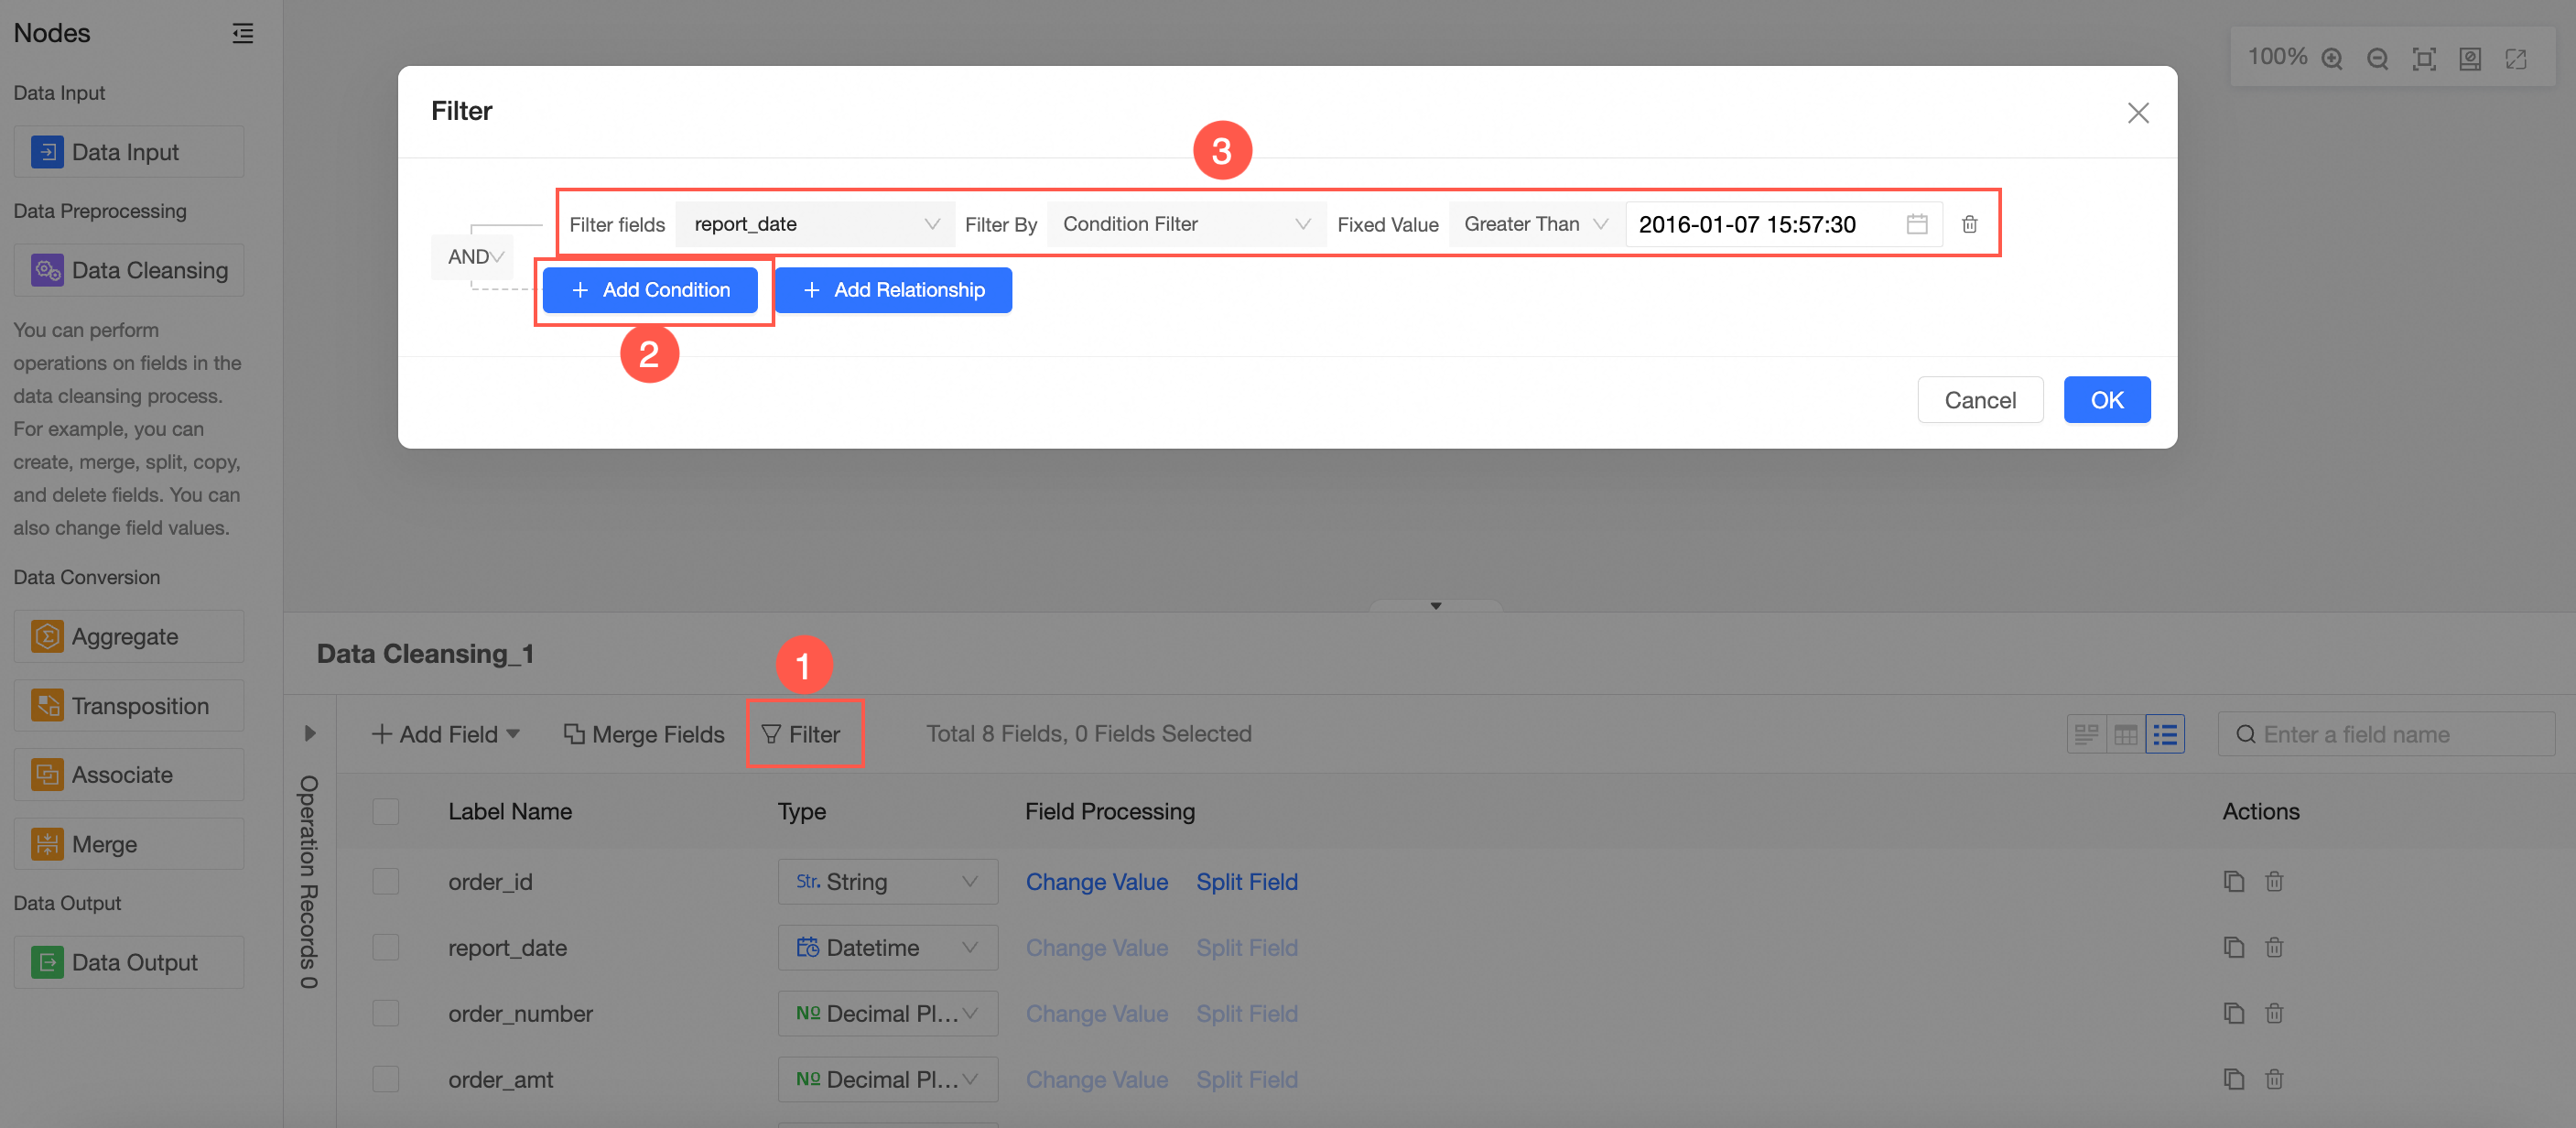
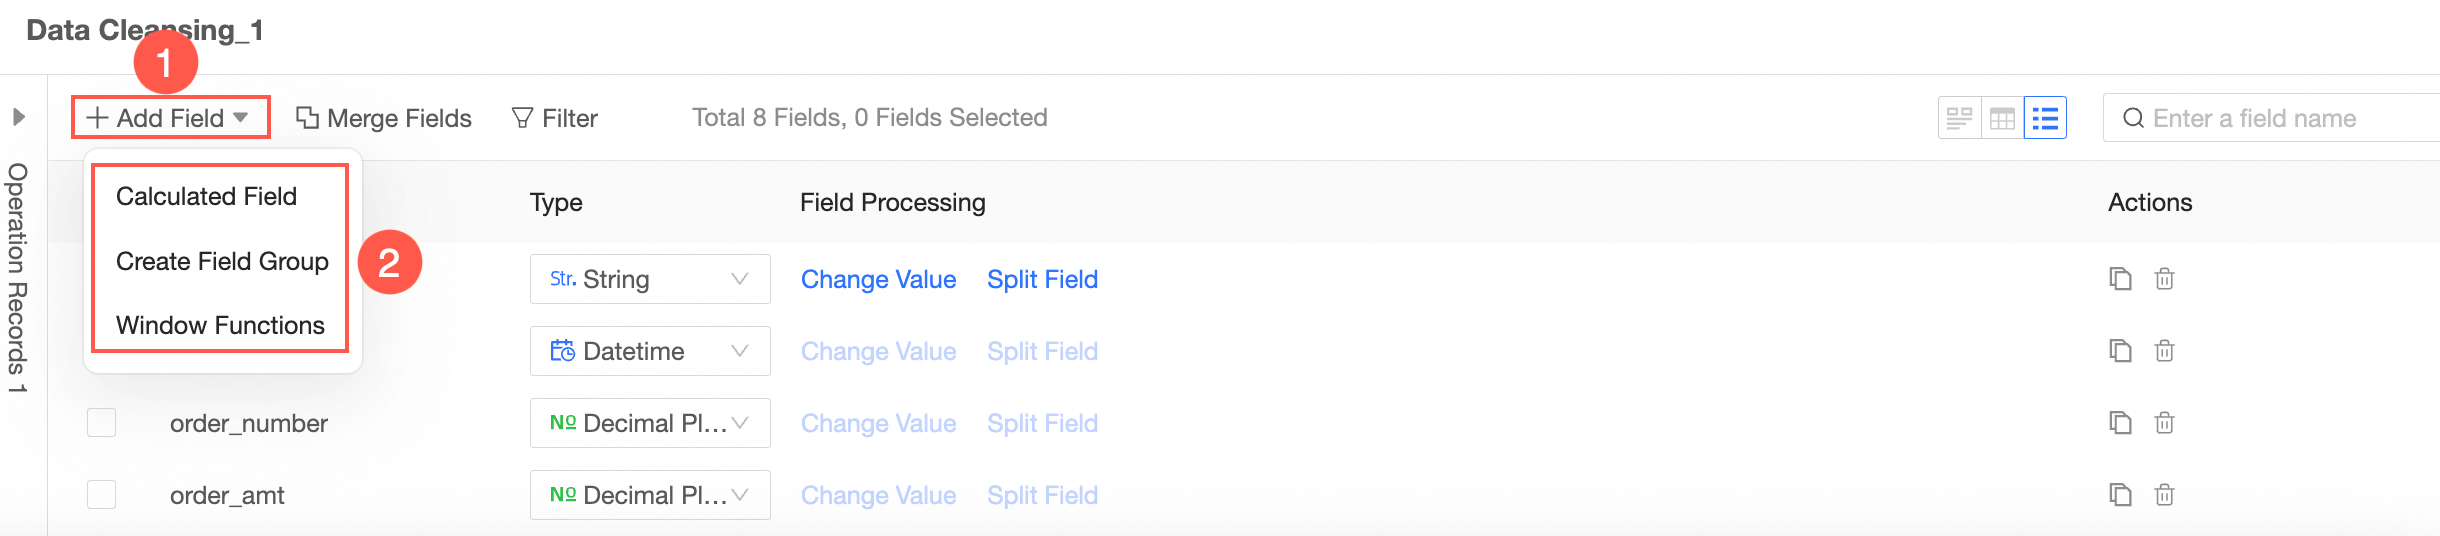
In the Cleaning and Processing Node Configuration section, configure field filtering by following the instructions shown in the following figure.
Follow the guidelines in the following figure to add fields. You can add calculated fields, group assignment, and window functions.
Aggregate the processed data.
Drag Aggregate from the left-side node section to the canvas.
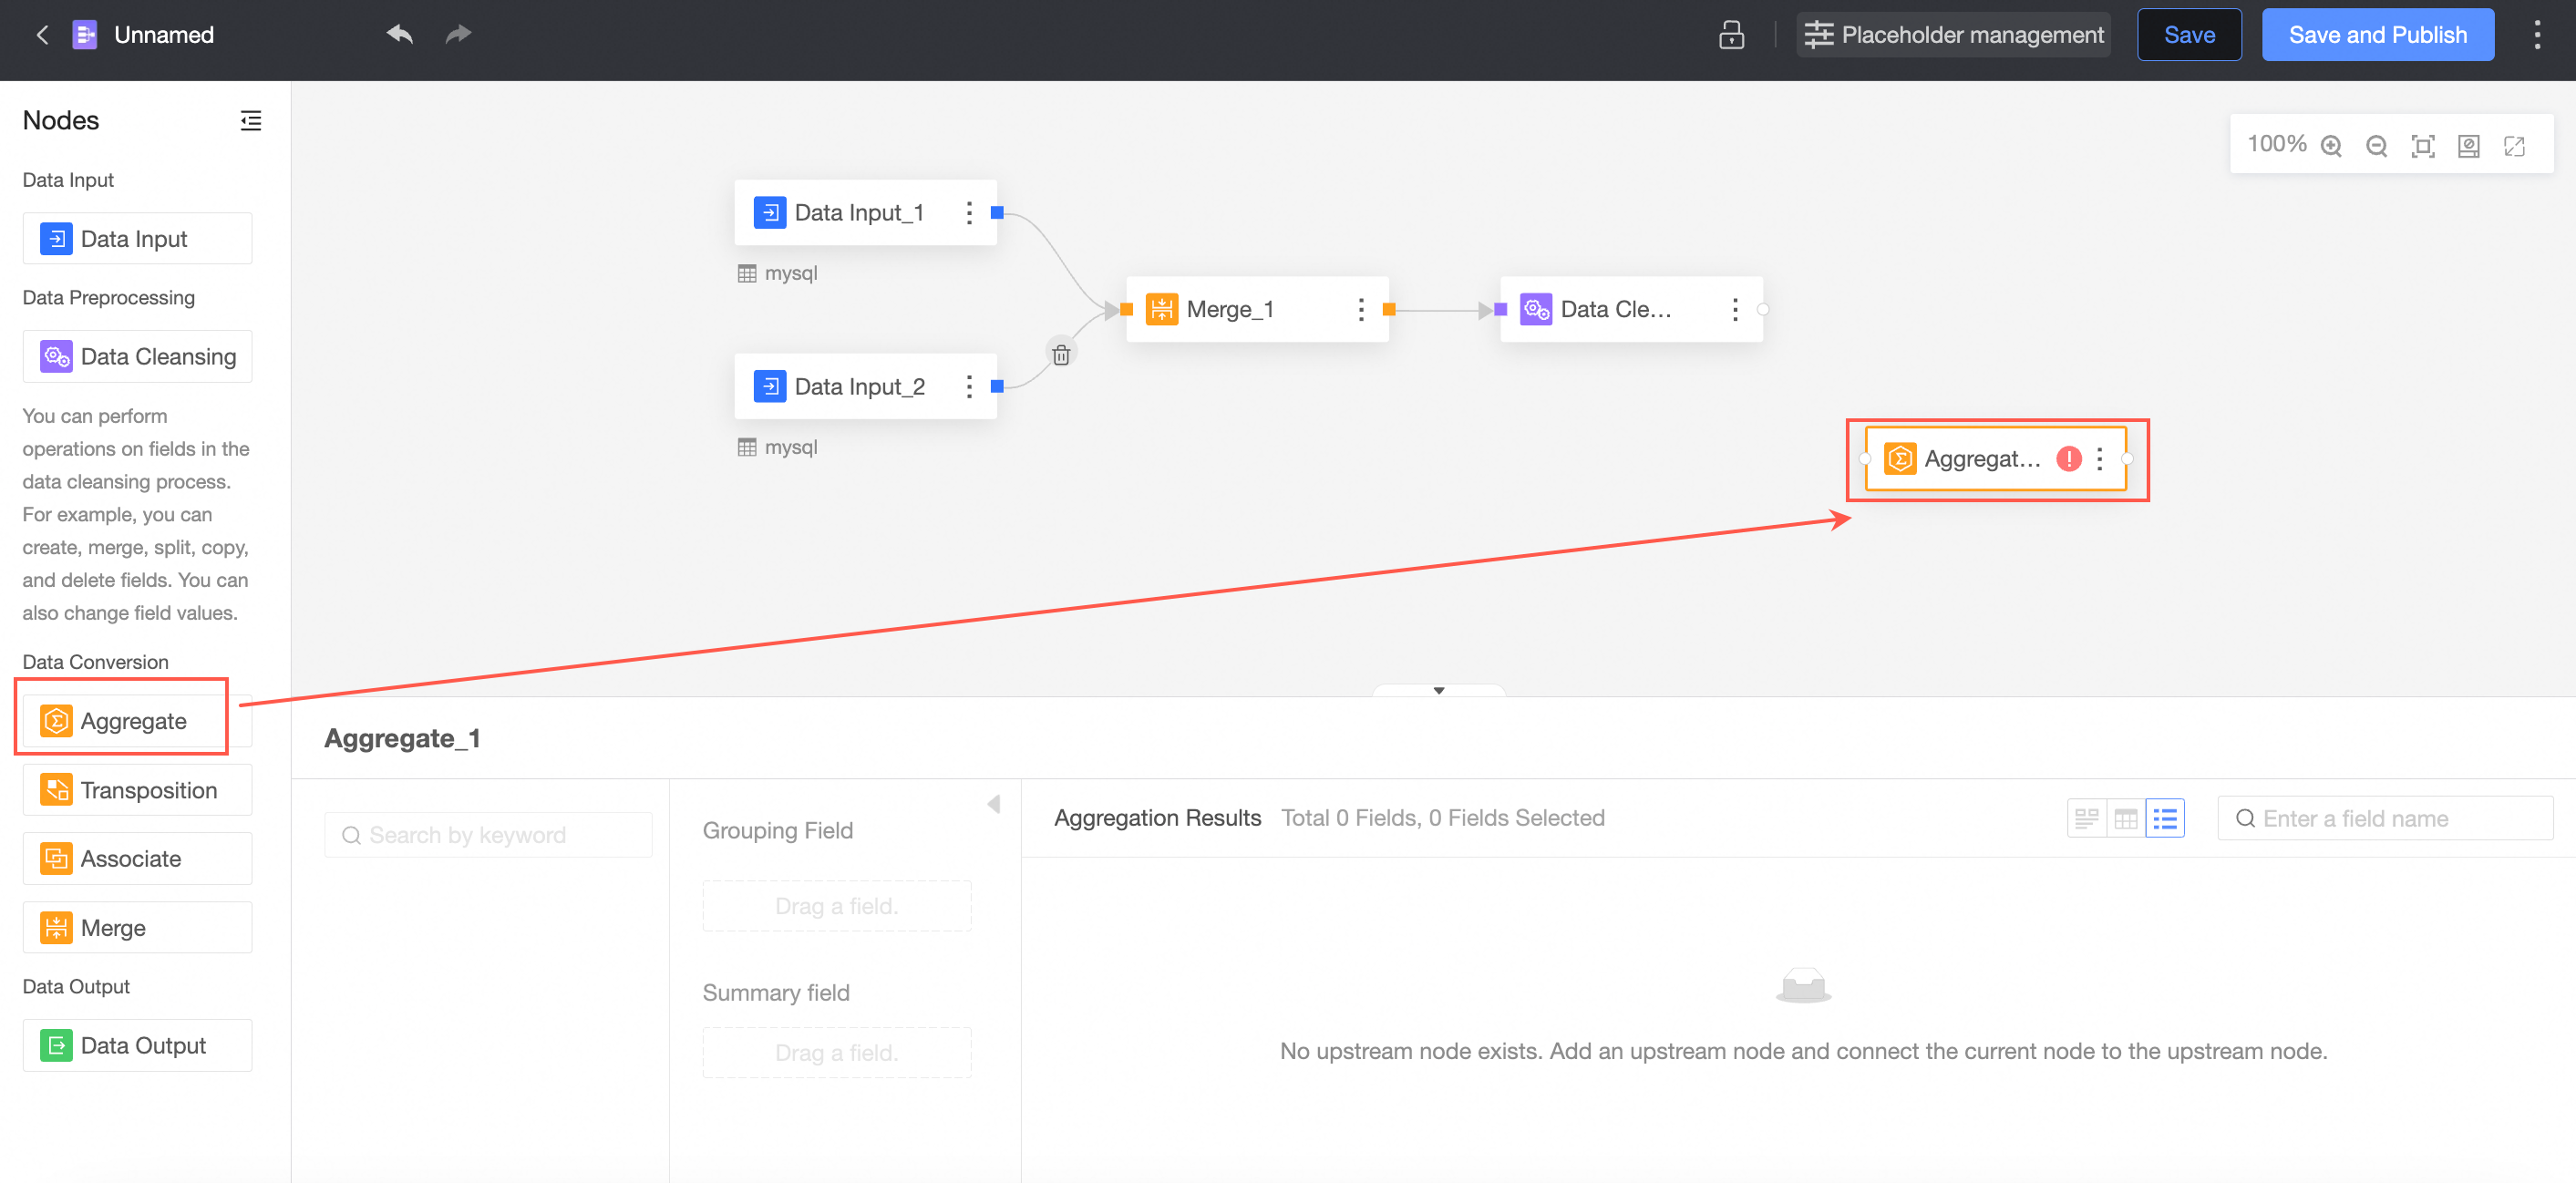
The connection requires an aggregation node.
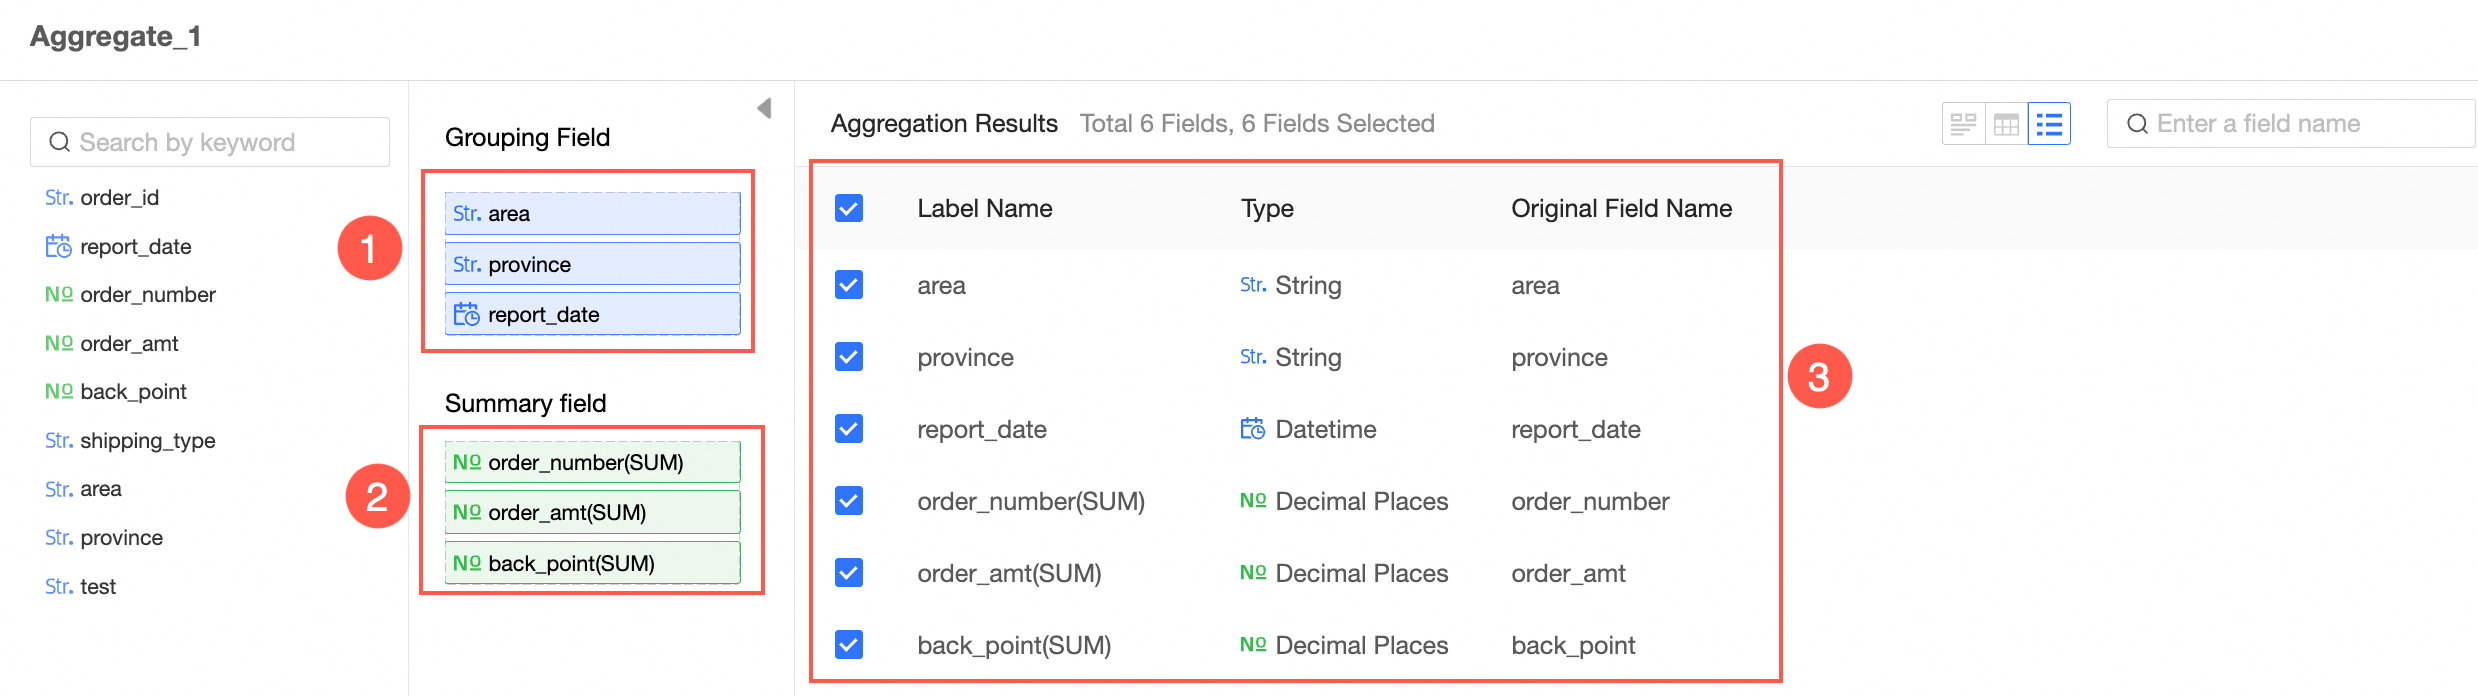
In the Aggregate Node Configuration section, follow the instructions in the following figure to configure grouping fields and summary fields.
Obtain output data
You can export data to an existing database table, a new database table, or a dataset.
partition table: Each write operation deletes existing data from the table and inserts new data.
Non-partition table:
Overwrite data: Each write overwrites the previous data.
Append data: If the primary key and constraint do not conflict, data is inserted. If the primary key and constraint are constraint violation, an error is reported.
Drag Data Output from the left-side node section to the canvas section.
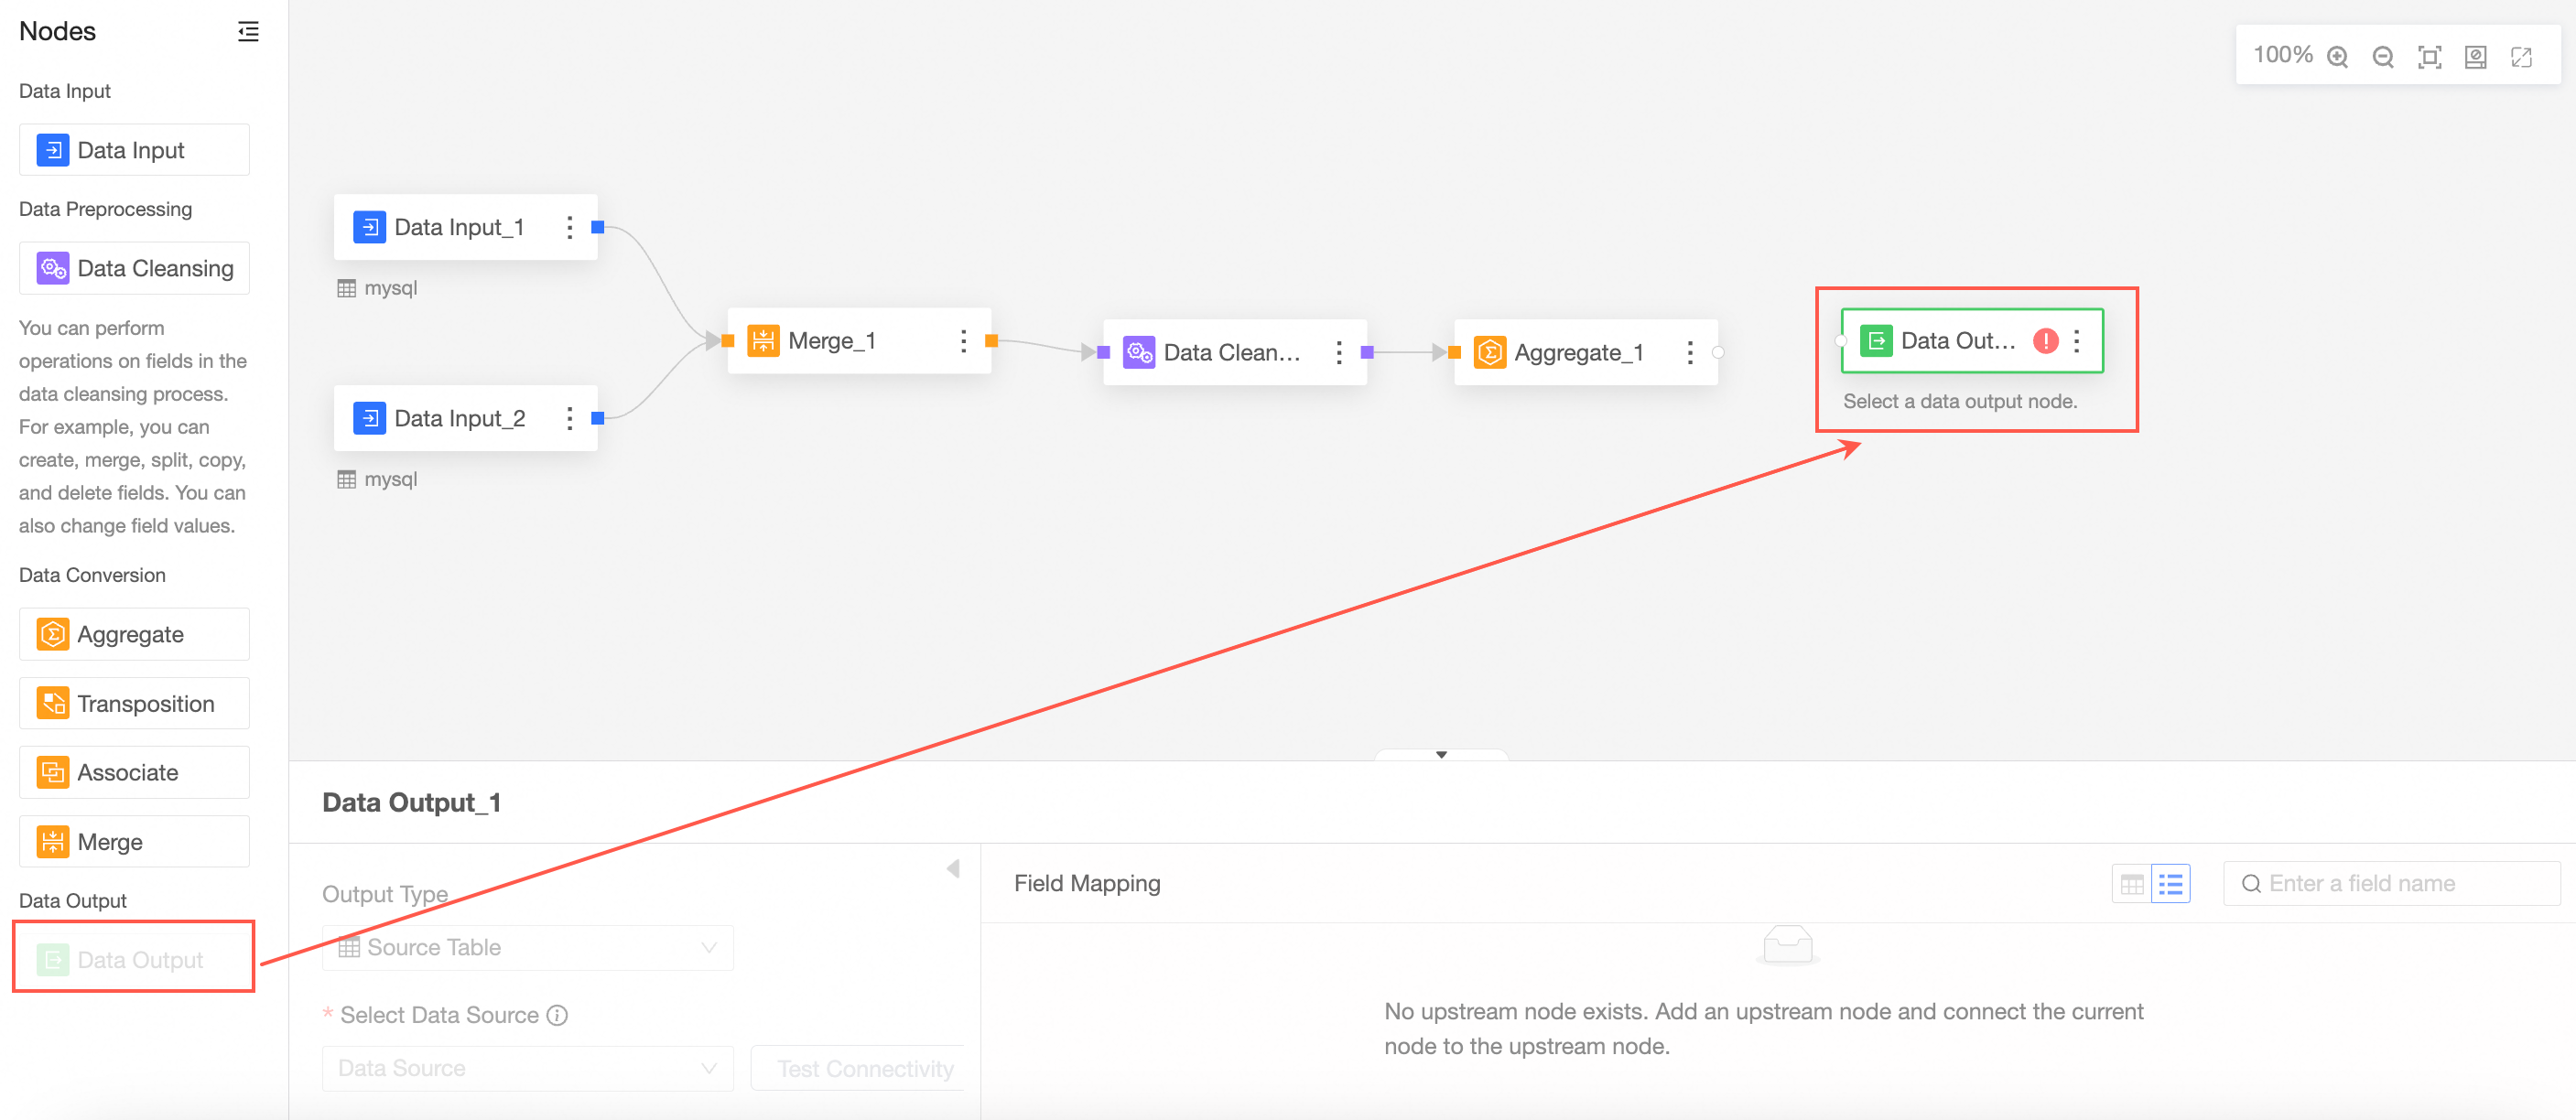
Connect to the node from which you want to export data.

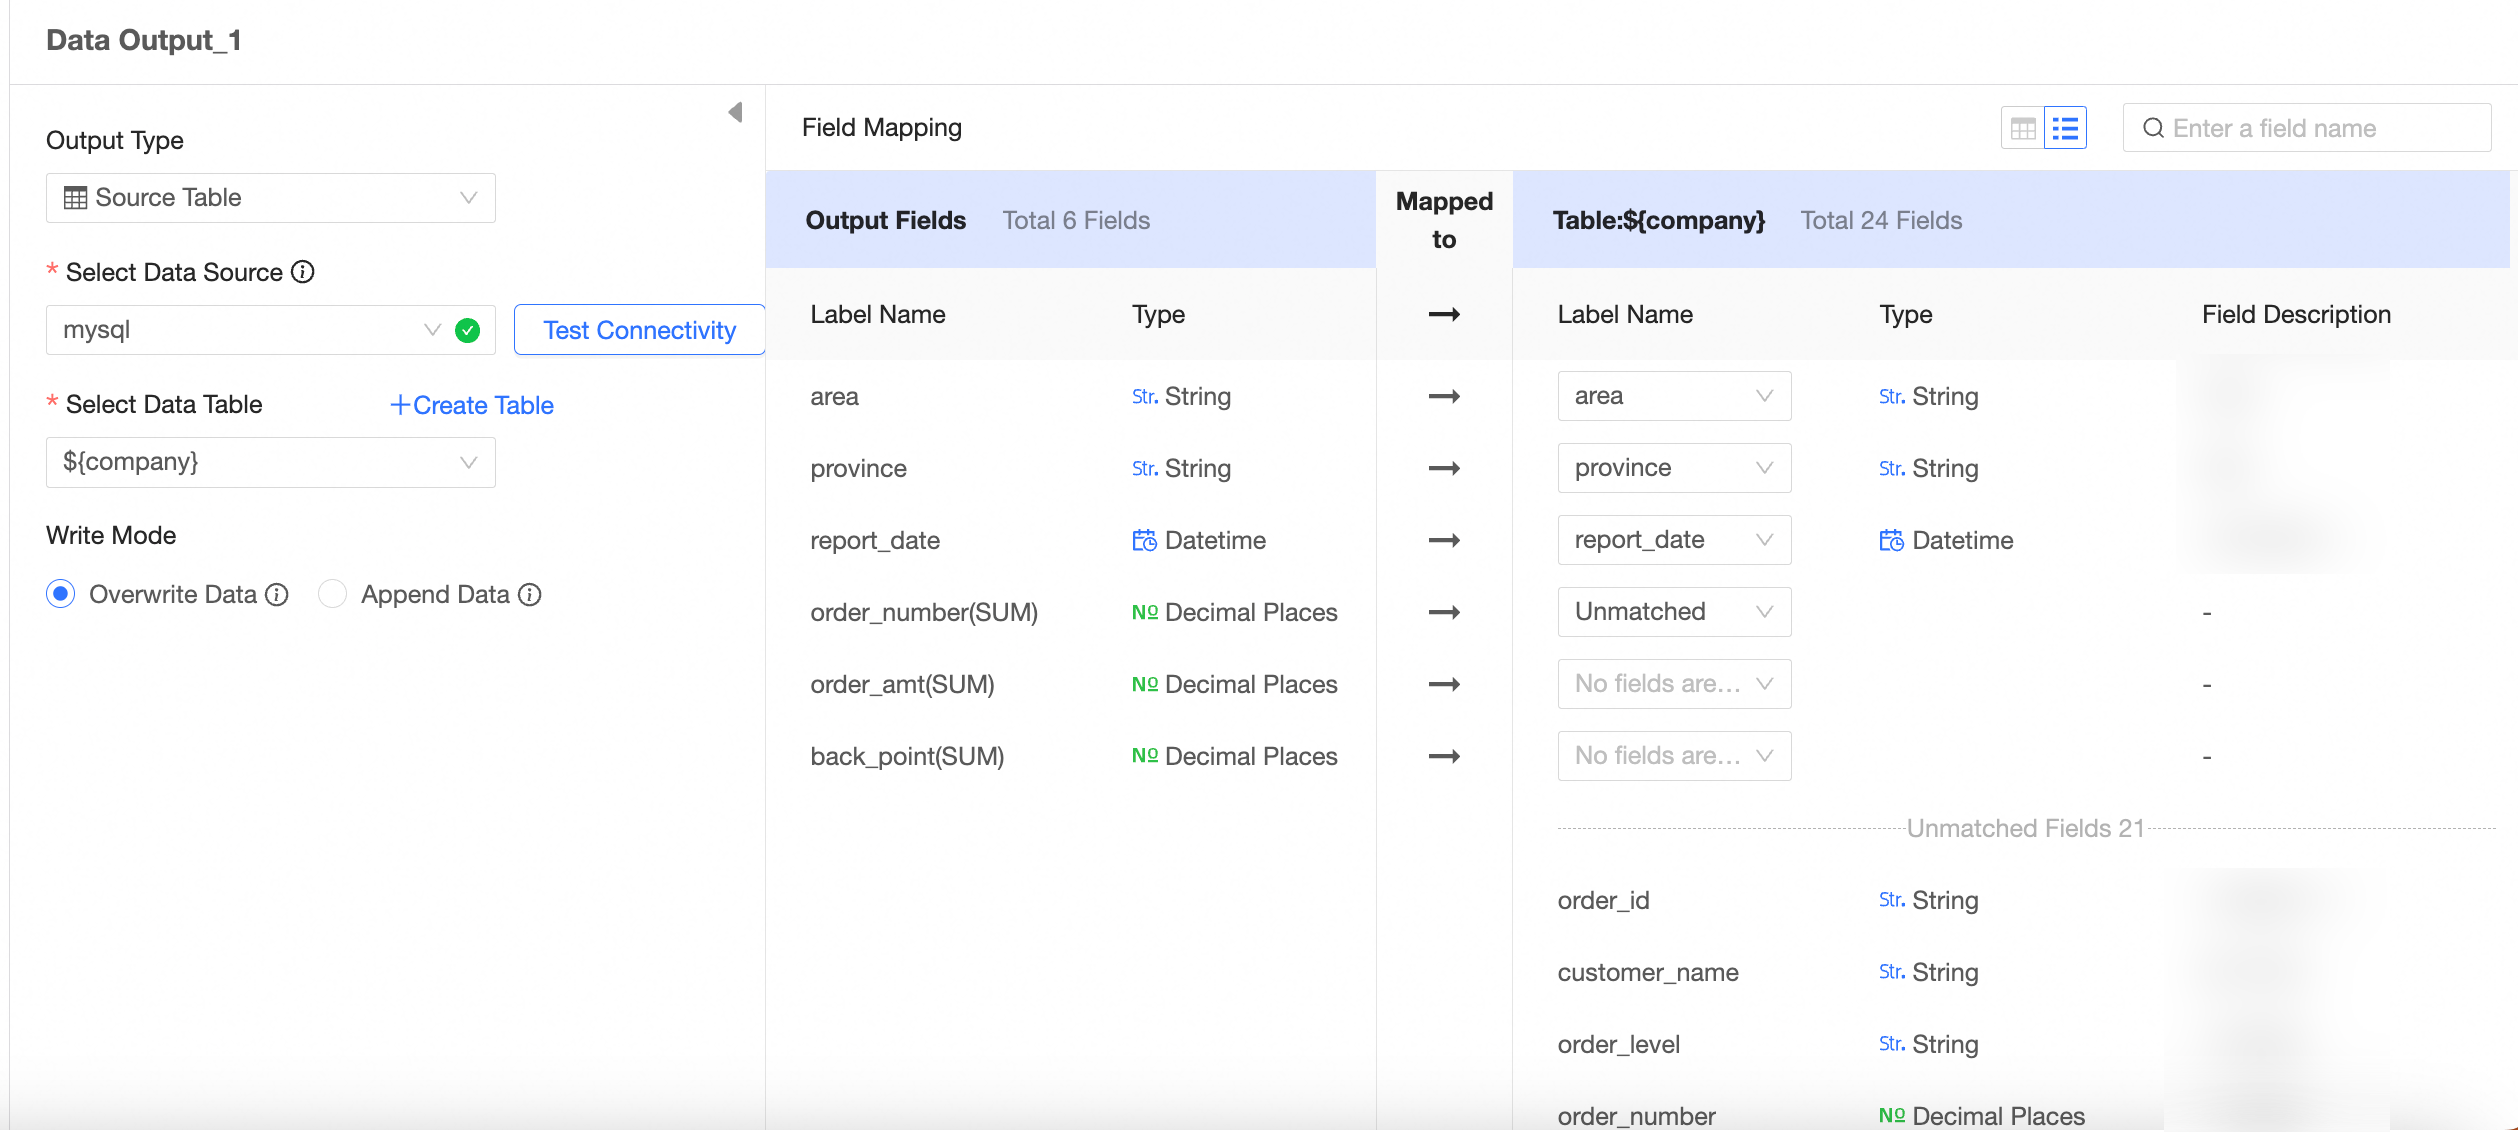
In the Data Output Node Configuration section, configure the output data by following the instructions shown in the following figure.
The output type is data source table.
The output type is Dataset.
After you configure the output data, you must run the command to write data to the table or dataset. You can manually trigger the run, or automatically run it on a regular basis to periodically update database tables. 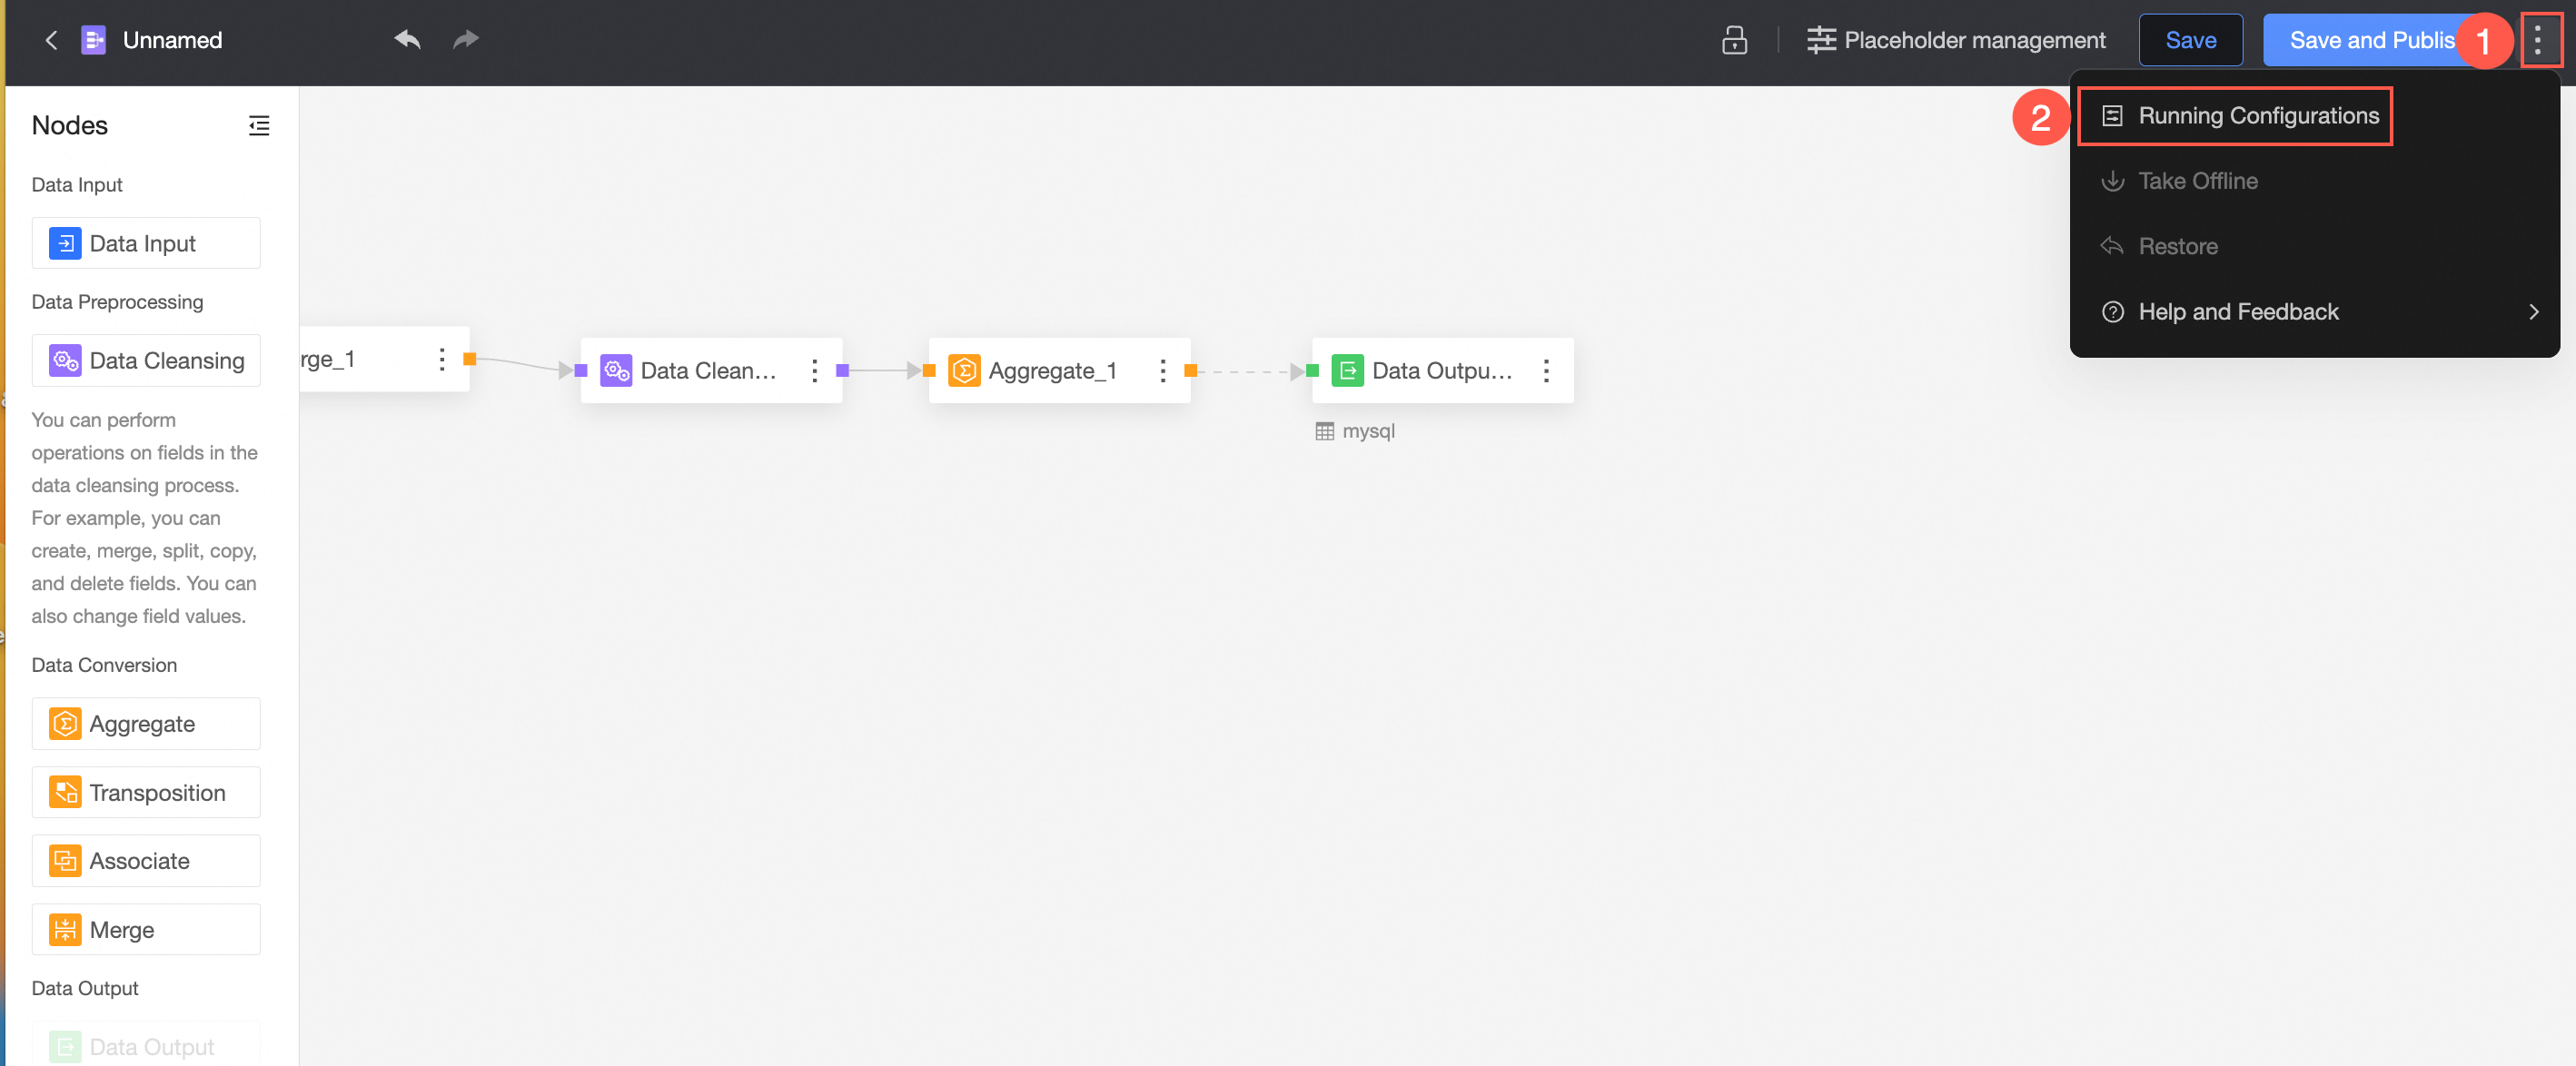 For more information, see Task running configuration.
If you set Output Type to Datacenter, you must configure the workspace information in the Workspace Information section. For more information, see Create and manage a workspace.
Save and publish files
After the configuration is complete, you can click Save or Save and Publish to save the data preparation. 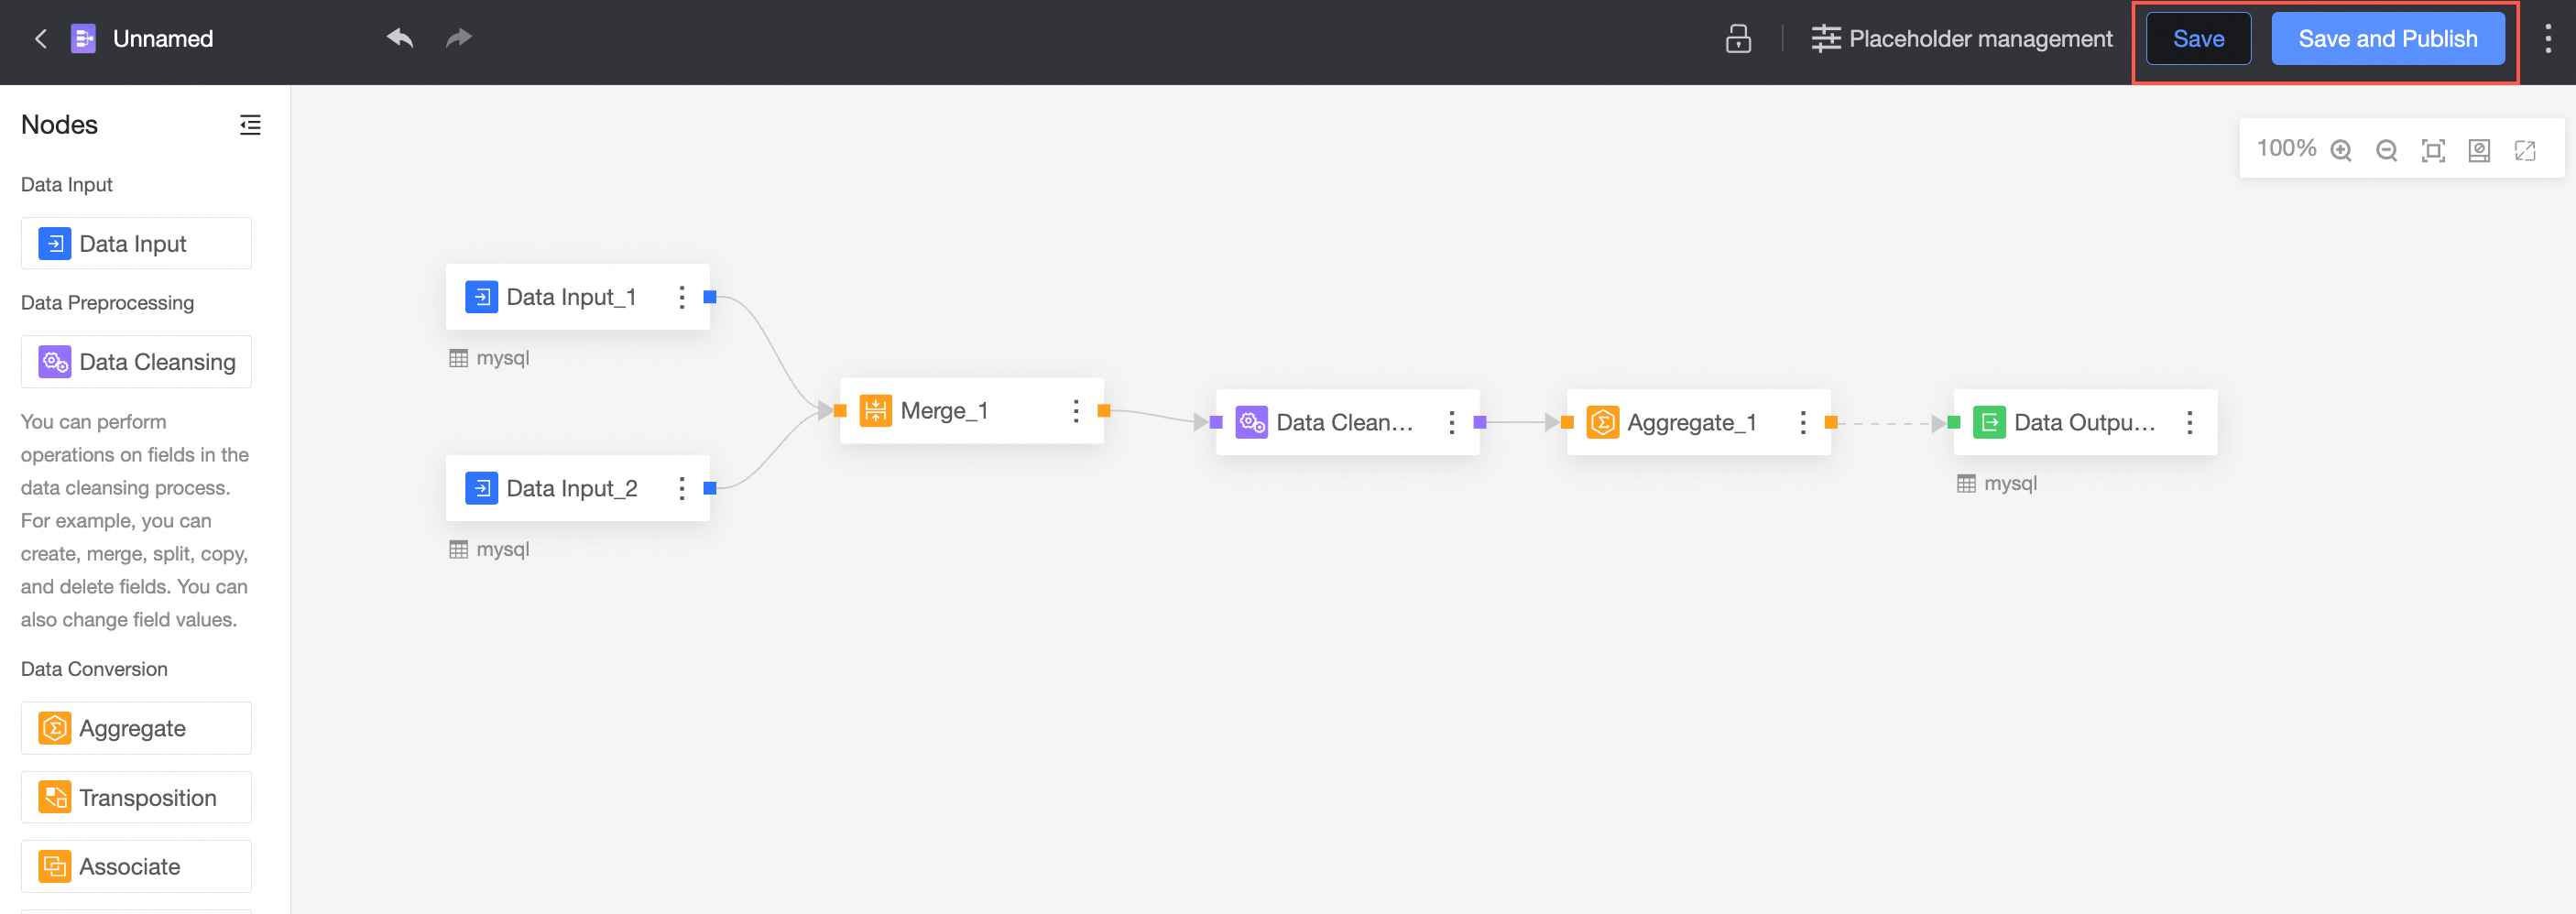
① Save
The save feature saves modifications to a workbook but does not publish the workbook.
If only data preparation is saved, the update point of the data preparation is not visible to the user:
When you add a data preparation, the status of the data preparation is Unpublished. You can publish the data preparation by saving and publishing.
When an update is published in Data Preparation, publish the update point again.
② Save and publish
The Save and Publish feature saves the current operation and publishes the data preparation. This feature is available only for unpublished data preparation.