This topic uses MySQL database as an example to describe how to connect Quick BI to RDS MySQL.
Before connecting Quick BI to RDS MySQL, make sure you have access permissions to the MySQL database. For more information, see Create databases and accounts for an ApsaraDB RDS for MySQL instance. Assume that you already have a MySQL database running properly and the data in this database can be used.
Configure the IP address whitelist in the MySQL database.
Copy the IP address from Quick BI
- Log on to the Quick BI console.
- Choose to go to the data source management page.
- Click to create a MySQL data source.
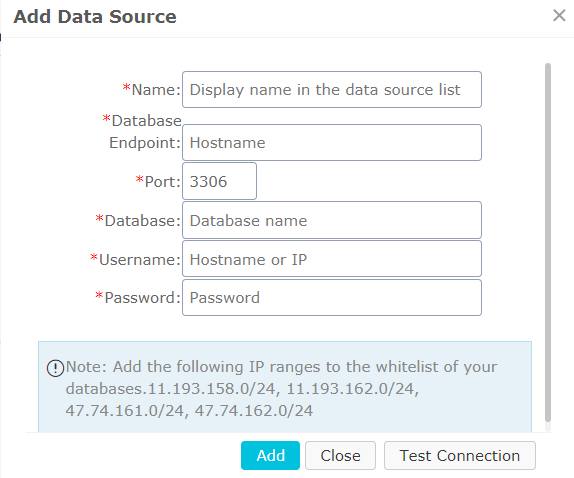
- Copy the IP address displayed in the blue area, as shown in the following figure.
Obtain the endpoint of the MySQL database from RDS
- Log on to the RDS console.
- Select the region where the target instance is located.
- Click the name of the instance to go to the Basic Information page.
The IP address is the database endpoint.
Set the IP address whitelists on RDS
- In the left-side navigation pane, click Data Security to go to the data security management page.
- On the Whitelist Settings tab page, click Modify, as shown in the following figure.
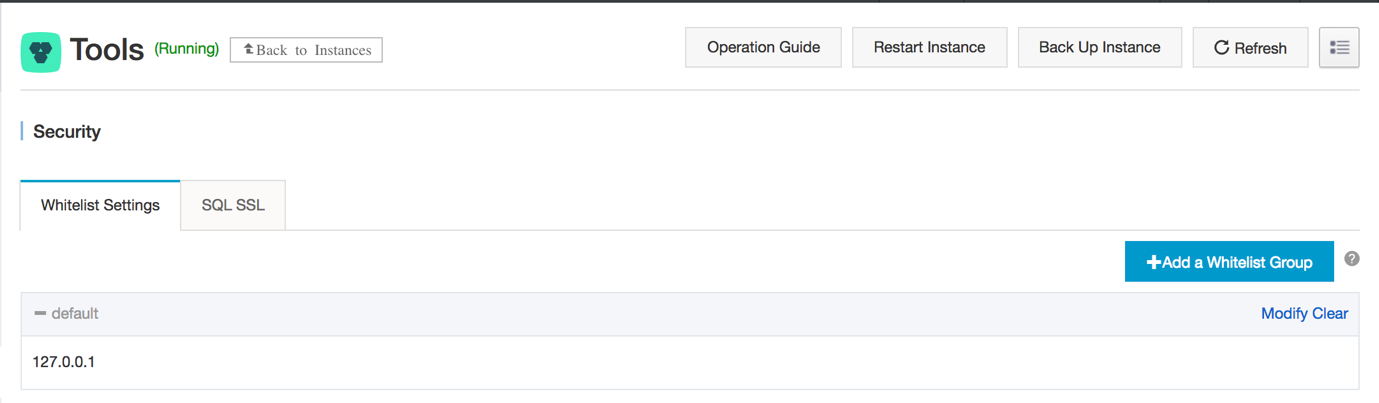
- Click Clear to delete the IP address 127.0.0.1.
- Click Add a Whitelist Group to add a new whitelist group.
- Enter a new group name and paste the IP address in the whitelist area.
- Click OK to complete the whitelist settings.
For more information, see Set whitelists.
Verify the data source connection and create the data source.
- Go back to the Quick BI data source management page.
- Click .
- Enter the data source connection information as shown in the following figure.

- Name: The display name of the data source.
- Database Endpoint: The IP address of the database.
- Port: The port number.
- Database: The database name.
- User Name: The name of the database user.
- Password: The database password.
- Click Test Connection to verify that the data source connection is functioning properly.
If the connection functions properly, a prompt message is displayed.
- Click Add. The data source is added.
More information
You can obtain more detailed information about Quick BI and RDS from the following links.