MaxCompute offers external projects that map to Data Lake Formation (DLF) catalogs to provide real-time access to metadata and data. With this feature, permission management is delegated to DLF. It supports metadata access and read/write operations for data stored in DLF-managed Object Storage Service (OSS). You can map an entire data lake at the catalog level, which enables Paimon-based collaboration across different engines. Paimon_DLF external projects are currently in the invitational preview stage.
Usage notes
Only Paimon-format tables stored in DLF-managed OSS are supported.
Writing to Dynamic Bucket tables is not supported.
Writing to Cross Partition tables is not supported.
Procedure
Step 1: Grant permissions
Grant permissions to a RAM user
If you are using a RAM user, ensure that the following access policies are attached. For more information about how to grant permissions, see Grant permissions to a RAM user.
AliyunRAMFullAccess: If the RAM user does not have this permission, the Alibaba Cloud account must grant it.
AliyunMaxComputeFullAccess: Required to create external data sources and external projects.
AliyunDLFReadOnlyAccess: Required to create external projects. This access policy is required because you must have the 'List' permission for the DLF catalog to create a Paimon_DLF external project.
Grant permissions and activate DLF
Authorize access to cloud resources
When you use DLF for the first time, you must complete the automatic authorization to ensure that DLF can access the required cloud resources.
Log on to the Data Lake Formation (DLF) console and select a region in the upper-left corner.
To the right of Permissions to access cloud resources are granted., click Authorize.
Activate Data Lake Formation
Select a region. MaxCompute and DLF must be in the same region. Before you use DLF, you must activate the service to ensure its availability in the destination region.
To the right of DLF is activated., click Active.
Grant DLF data permissions to the MaxCompute access account
MaxCompute accesses Paimon_DLF data using external data sources and external projects. You must first grant the required DLF data permissions to the MaxCompute access account.
To use the task executor's identity, you must grant the MaxCompute service-linked role permission to access DLF. When MaxCompute accesses DLF, it passes the current task executor's identity. Both MaxCompute and DLF then restrict the task executor within their respective permission scopes. Therefore, you must first create and authorize a service-linked role for MaxCompute. The procedure is as follows:
Log on to the Resource Access Management (RAM) console.
In the navigation pane on the left, choose .
On the Roles page, click Create Role.
In the upper-right corner of the Create Role page, click Create Service Linked Role.
On the Create Service Linked Role page, set Select Service to
AliyunServiceRoleForMaxComputeLakehouseand click Create Service Linked Role.If a message indicates that the role already exists, it has already been authorized. You can ignore this message.
Permission description
Control plane permissions: These permissions are checked when you perform operations in the MaxCompute console. This mainly occurs when you create a MaxCompute external project and attach a DLF Catalog.
These permissions are managed by Resource Access Management (RAM). You must use an Alibaba Cloud account to log on to the RAM console to configure the permissions and grant permissions to a RAM user.
Data plane permissions: These permissions are checked when you read from or write to Paimon tables after you log on to the created external project. This mainly occurs when you create, maintain, or use schemas, tables, and other resources in the attached DLF Catalog. These operations are usually performed using SQL in MaxCompute.
These permissions are managed in the DLF console. You must use an Alibaba Cloud account to log on to the DLF console to configure the permissions and grant permissions to RAM users.
Step 2: Create a Paimon_DLF external data source
Log on to the MaxCompute console and select a region in the top-left corner.
In the navigation pane on the left, choose .
On the Foreign Server page, click Create Foreign Server.
In the Add Foreign Server dialog box, configure the parameters. The following tables describe the parameters.
Parameter
Required
Description
Foreign Server Type
Required
Select Paimon_DLF.
Foreign Server Name
Required
Enter a custom name. The name must follow these rules:
Starts with a letter and contains only lowercase letters, underscores (_), and digits.
Cannot exceed 128 characters.
For example,
paimon_dlf.Foreign Server Description
Optional
Enter a description as needed.
Region
Required
The current region is selected by default.
Authentication And Authorization
Required
The default value is Alibaba Cloud RAM role.
Service-linked Role
Required
This is generated by default.
Endpoint
Required
This is automatically generated. For the China (Hangzhou) region, the Endpoint is
cn-hangzhou-intranet.dlf.aliyuncs.com.Foreign Server Supplemental Properties
Optional
Specifies additional attributes for the external data source. After you specify these attributes, tasks that use this data source can access the source system based on the defined behavior.
NoteFor information about supported parameters, see future updates to the official documentation. More parameters will be made available as the product evolves.
Click OK to create the external data source.
On the Foreign Server page, find the target data source and click Details in the Actions column.
Step 3: Create an external project
Log on to the MaxCompute console and select a region in the top-left corner.
In the navigation pane on the left, choose .
On the External Project tab, click Create Project.
In the Create Project dialog box, configure the project information as prompted and click OK.
Parameter
Required
Description
Project Type
Required
The default value is External Project.
Region
Required
The current region is selected by default and cannot be changed.
Project Name (Globally Unique)
Required
The name must start with a letter, contain only letters, digits, and underscores (_), and be 3 to 28 characters in length.
MaxCompute Foreign Server Type
Optional
The default value is Paimon_DLF.
MaxCompute Foreign Server
Optional
Use Existing: Lists the external data sources that you have created.
Create Foreign Server: Creates and uses a new external data source.
MaxCompute Foreign Server Name
Required
If you select **Select Existing**, select the name of an existing external data source from the drop-down list.
If you select **Create New External Data Source**, the name of the new external data source is used.
Data Catalog
Required
The DLF data catalog.
Billing Method
Required
Subscription or Pay-as-you-go.
Default Quota
Required
Select an existing quota.
Description
Optional
Enter a custom description for the project.
Step 4: Use SQL to access the data source
Select a connection tool to log on to the external project.
List the schemas in the external project.
-- Enable the schema syntax at the session level.
SET odps.namespace.schema=true;
SHOW schemas;

-- Sample result.
ID = 20250919****am4qb
default
system


OK
List the tables in a schema within the external project.
-- schema_name is the name of a schema displayed in the external project.
USE schema <schema_name>;
SHOW tables;

-- Result.
ID = 20250919****am4qb
acs:ram::<uid>:root  emp


OK
Create a schema in the external project.
-- In this example, schema_name is schema_demo_test.
CREATE schema <schema_name>;
Use the new schema.
USE schema <schema_name>;Create a table in the schema and insert data.
If you log on as a RAM user, this operation requires permissions on the DLF Catalog. For more information, see Data authorization management.
Command format:
-- Create a table.
CREATE TABLE [IF NOT EXISTS] <table_name>
(
  <col_name> <data_type>,
  ...
)
[COMMENT <table_comment>]
[PARTITIONED BY (<col_name> <data_type>, ...)]
;

-- Insert data.
INSERT {INTO|OVERWRITE} TABLE <table_name> [PARTITION (<pt_spec>)] [(<col_name> [,<col_name> ...)]]
<select_statement>
FROM <from_statement>
Example:
NoteWhen you write TIMESTAMP data to a Paimon source table, the data is truncated based on its precision. Data with a precision of 0 to 3 is truncated to 3 decimal places, data with a precision of 4 to 6 is truncated to 6 decimal places, and data with a precision of 7 to 9 is truncated to 9 decimal places.
CREATE TABLE schema_table(id int,name string);

INSERT INTO schema_table VALUES (101,'Zhang San'),(102,'Li Si');

-- Query the schema_table table.
SELECT * FROM schema_table;

-- Result.
+------------+------------+
| id         | name       |
+------------+------------+
| 101        | Zhang San  |
| 102        | Li Si      |
+------------+------------+
Switch to the existing 'default' schema.
use schema default;
SHOW tables;

-- Sample result.
ID = 20250919*******yg5
acs:ram::<uid>:root	emp
acs:ram::<uid>:root	emp_detail
acs:ram::<uid>:root	test_table


OK

-- Read the table.
SELECT * FROM test_table;

-- Result.
+------------+------------+
| id         | name       |
+------------+------------+
| 101        | Zhang San  |
| 102        | Li Si      |
+------------+------------+

-- Write to the table and query it to check if the write operation was successful.
INSERT INTO test_table VALUES (103,'Wang Wu');

SELECT * FROM test_table;

-- Result.
+------------+------------+
| id         | name       |
+------------+------------+
| 101        | Zhang San  |
| 102        | Li Si      |
| 103        | Wang Wu    |
+------------+------------+
Common errors
Problem 1: An error occurs when you click to create an external project
Problem description: When you create an external project, the error message "You are not authorized to perform this action." appears.
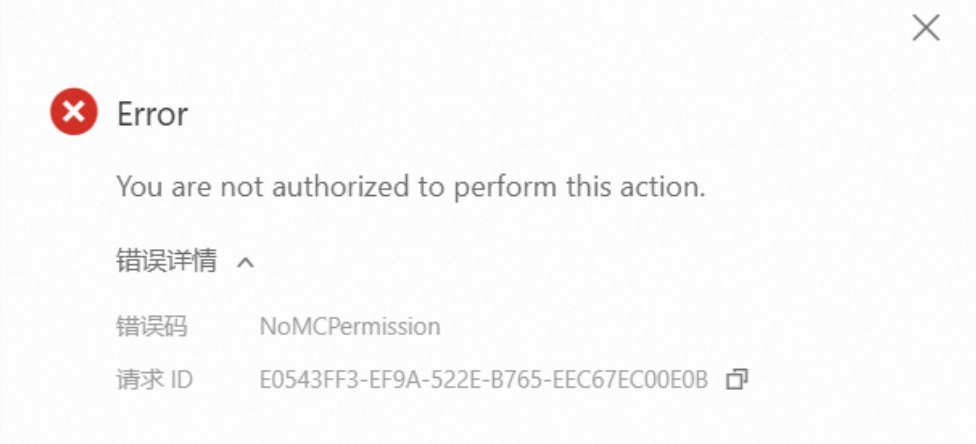
Solution:
If you are a RAM user, first ensure that the
AliyunMaxComputeFullAccesspermission is granted to the RAM user. For more information, see Step 1.This operation requires you to select a DLF catalog. Ensure that the required permissions for DLF are granted. For more information, see Step 1.
Problem 2: An error occurs when you run `show tables` in the default schema of an external project
Problem description: When you run `show tables` in the default schema of an external project, the error message "Forbidden:User acs: ram: :<uid>:user/** doesn't have privilege LIST on DATABASE default" appears.
Forbidden:User acs: ram: :<uid>:user/** doesn't have privilege LIST on DATABASE
Default
Solution:
Log on to the DLF console. In the navigation pane on the left, click System And Security. On the Access Control tab, refresh the page and check whether the current RAM user exists.
If the user exists, click Roles and grant permissions to the RAM user.