Learn how to mount a File Storage NAS (NAS) file system when you create an Elastic Compute Service (ECS) instance.
Prerequisites
You have a NAS file system. For more information, see Create a General-purpose NAS file system.
You have a mount target for the file system. For more information, see Create a mount target.
Background information
The easiest way to mount a NAS file system is to configure it when you create a new Elastic Compute Service (ECS) instance. You can mount up to five NAS file systems during instance creation.
Limitations
Image: Automatic mounting is supported only on ECS instances that use an official Alibaba Cloud image. This feature is not supported for custom images created from snapshots.
Mount path: Only the root directory of a NAS file system can be mounted. Mounting subdirectories is not supported.
If this configuration does not meet your requirements, manually mount the NAS file system after you create the ECS instance. For more information, see Mount a file system on an ECS instance.
Mount a single NAS file system
Log on to the ECS console.
Create an ECS instance. For more information, see Use the custom launch tab to create an instance.
On the Custom Launch page, configure the following key parameters:
Region: Select the region where your NAS file system is located.
Network and Zone: Select the same Virtual Private Cloud (VPC), vSwitch, and Availability Zone as your NAS file system. For optimal performance, select the Availability Zone where your NAS file system resides.
Instance: Select an instance type based on your business requirements.
Image: Select an image based on your business requirements. For Linux, CentOS 7.6 is recommended. For Windows, Windows Server 2019 Datacenter is recommended.
Storage: In the NAS File System section, click Add File System and configure the parameters.
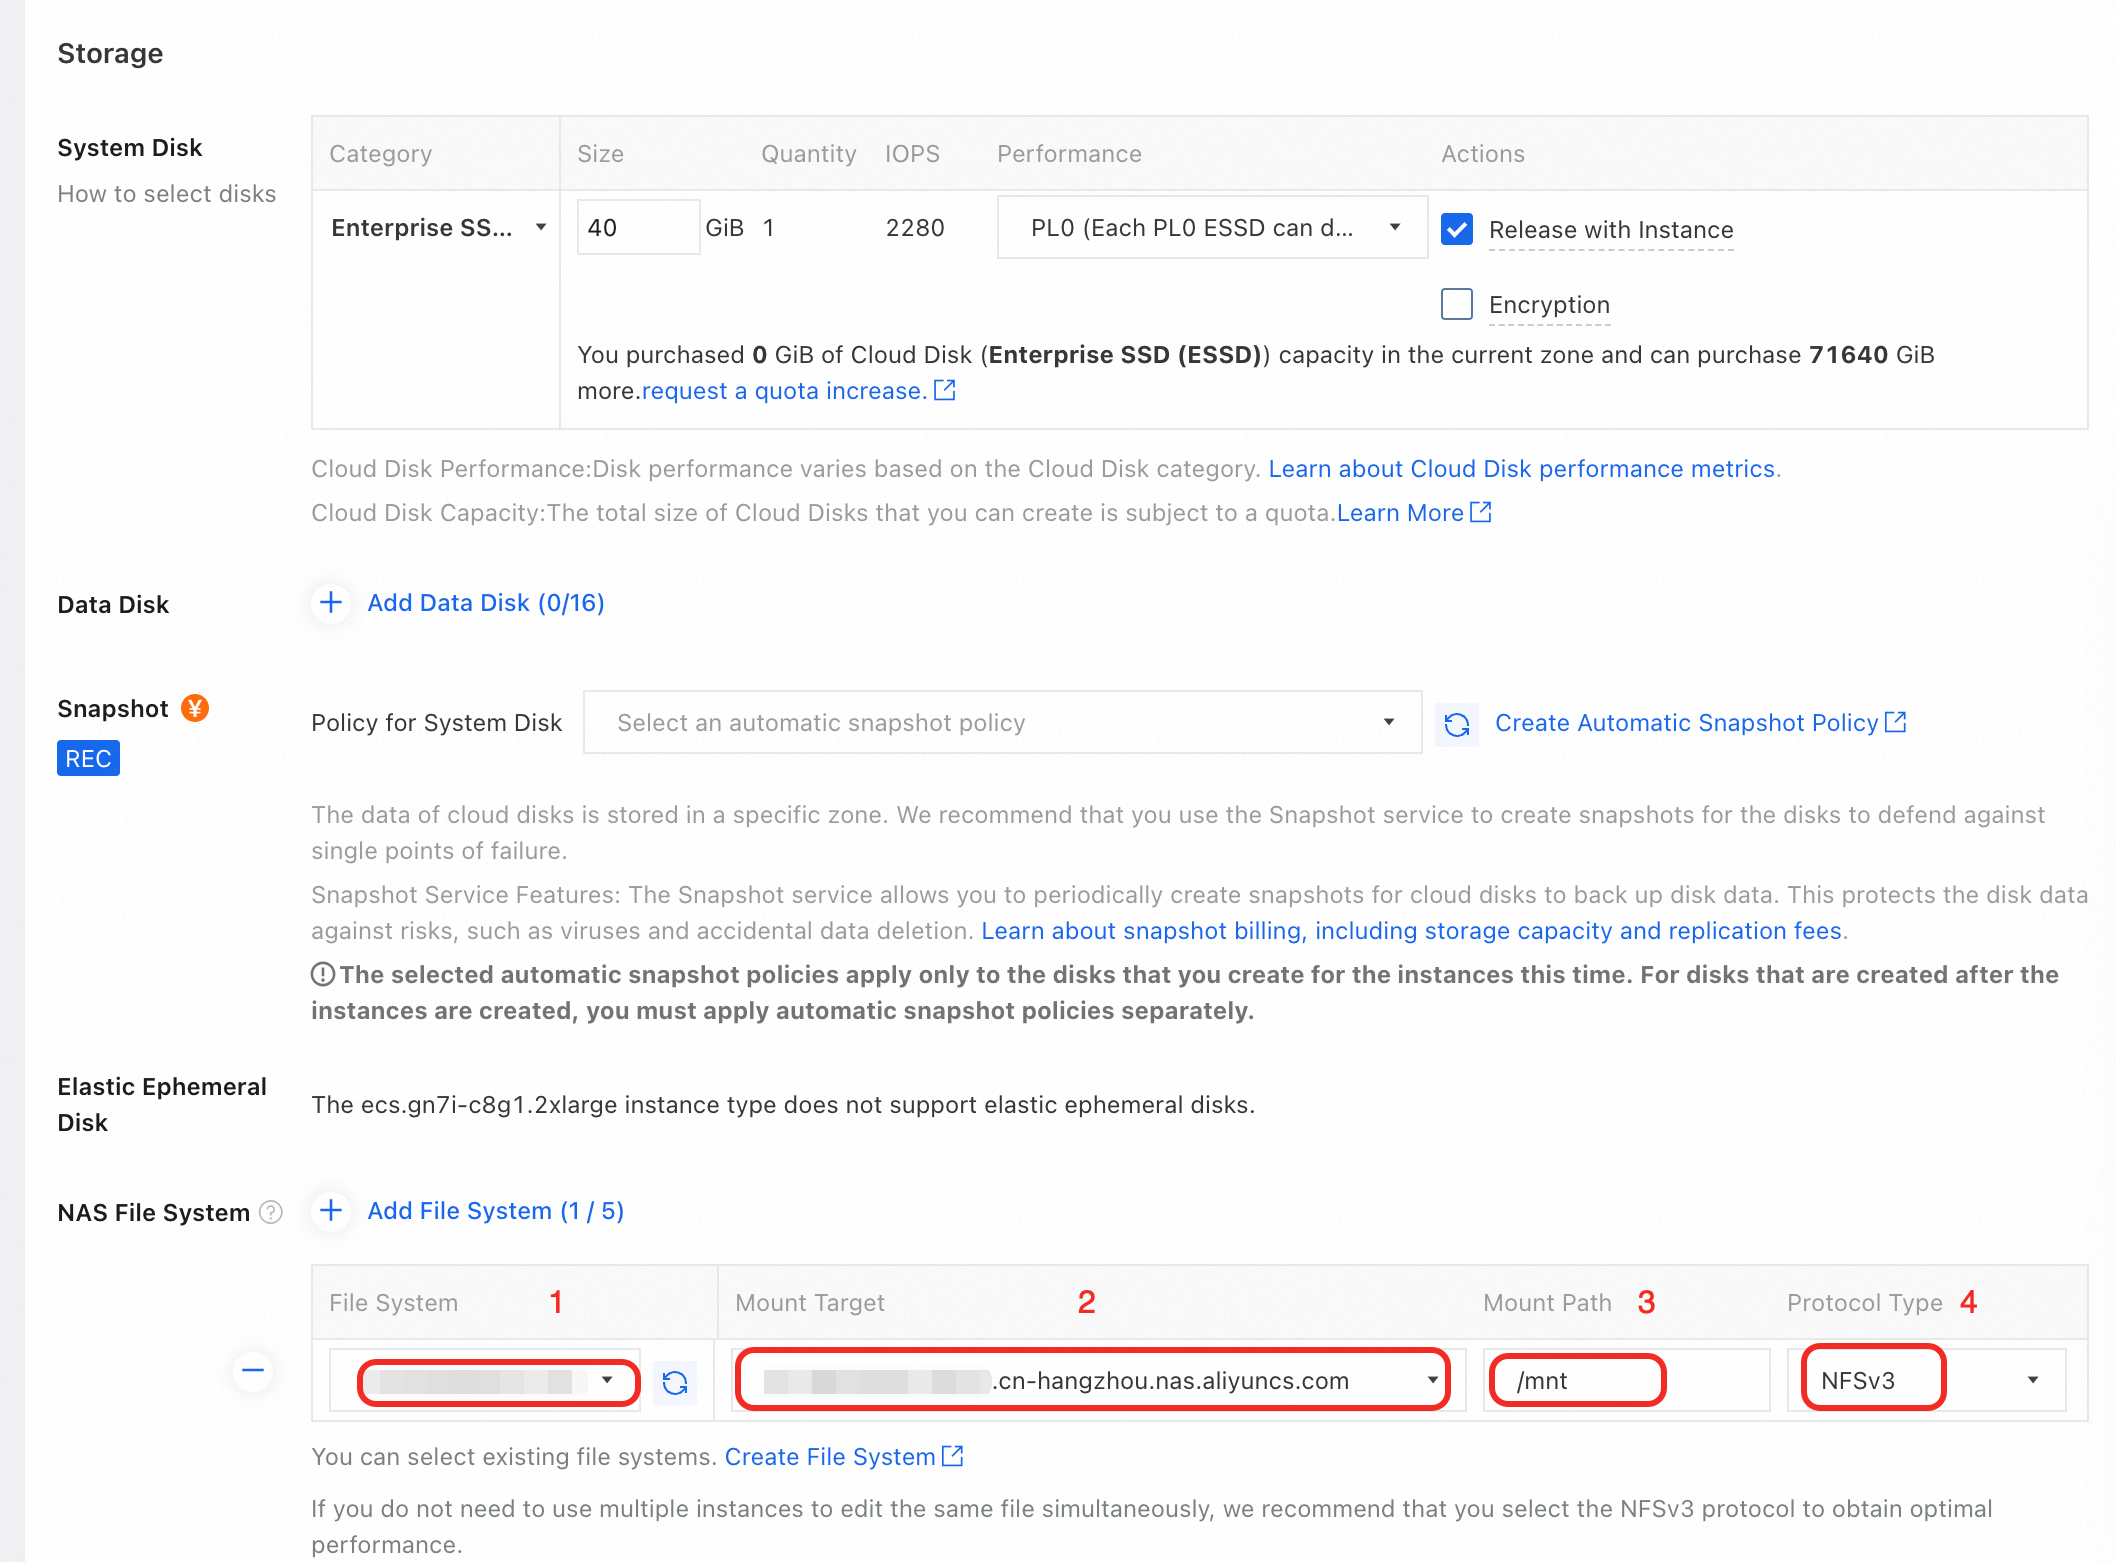
Label
Parameter
Description
①
File System
For Linux images, you can select only file systems that use the Network File System (NFS) protocol.
For Windows images, you can select only file systems that use the Server Message Block (SMB) protocol.
②
Mount Target
The mount target connects the ECS instance to the NAS file system. The mount target must be in the same VPC as the ECS instance.
If no mount targets are available, create one first. For more information, see Create a mount target.
③
Mount Path
The local path on the ECS instance for mounting the file system. For example, enter
/mntfor a Linux instance orZ:for a Windows instance.④
Protocol Type
If you are mounting an NFS file system, select NFSv3 or NFSv4.0. Select NFSv3 for most use cases that do not require file locking.
If you are mounting an SMB file system, select SMB.
Mount multiple NAS file systems
To mount multiple NAS file systems on the new ECS instance, click Add File System again for each additional file system. Note the following:
Mount Target:
All mount targets must belong to the same Virtual Private Cloud (VPC).
If no mount targets are available in the selected VPC, you can create them. For more information, see Create a mount target.
Mount Path:
Each mount path must be unique.
For Linux images, mount paths can be nested. For example, you can use
/mntand/mnt/sub.
If you need to mount more than five file systems, submit a ticket.
Verify the mount
After the ECS instance is created, the system automatically mounts the NAS file system. The system also automatically remounts the file system when the instance restarts. To verify the mount:
Linux instances
To view information about the mounted NAS file system, run the
df -hcommand. In the output, Used shows the used capacity, and Size shows the maximum capacity of the file system. Billing is not based on the maximum capacity.
The automatic mount configuration is saved in the /etc/fstab file. You can edit this file to change the mount path. For more information, see Mount an NFS file system on a Linux ECS instance.
Windows instances
Open File Explorer. The SMB file system appears as a mapped network drive.
If the drive does not appear, enter
\\192.168.xx.xx\mysharein the File Explorer to access the drive.192.168.xx.xxis the IP address of the server. Replace it with the actual IP address.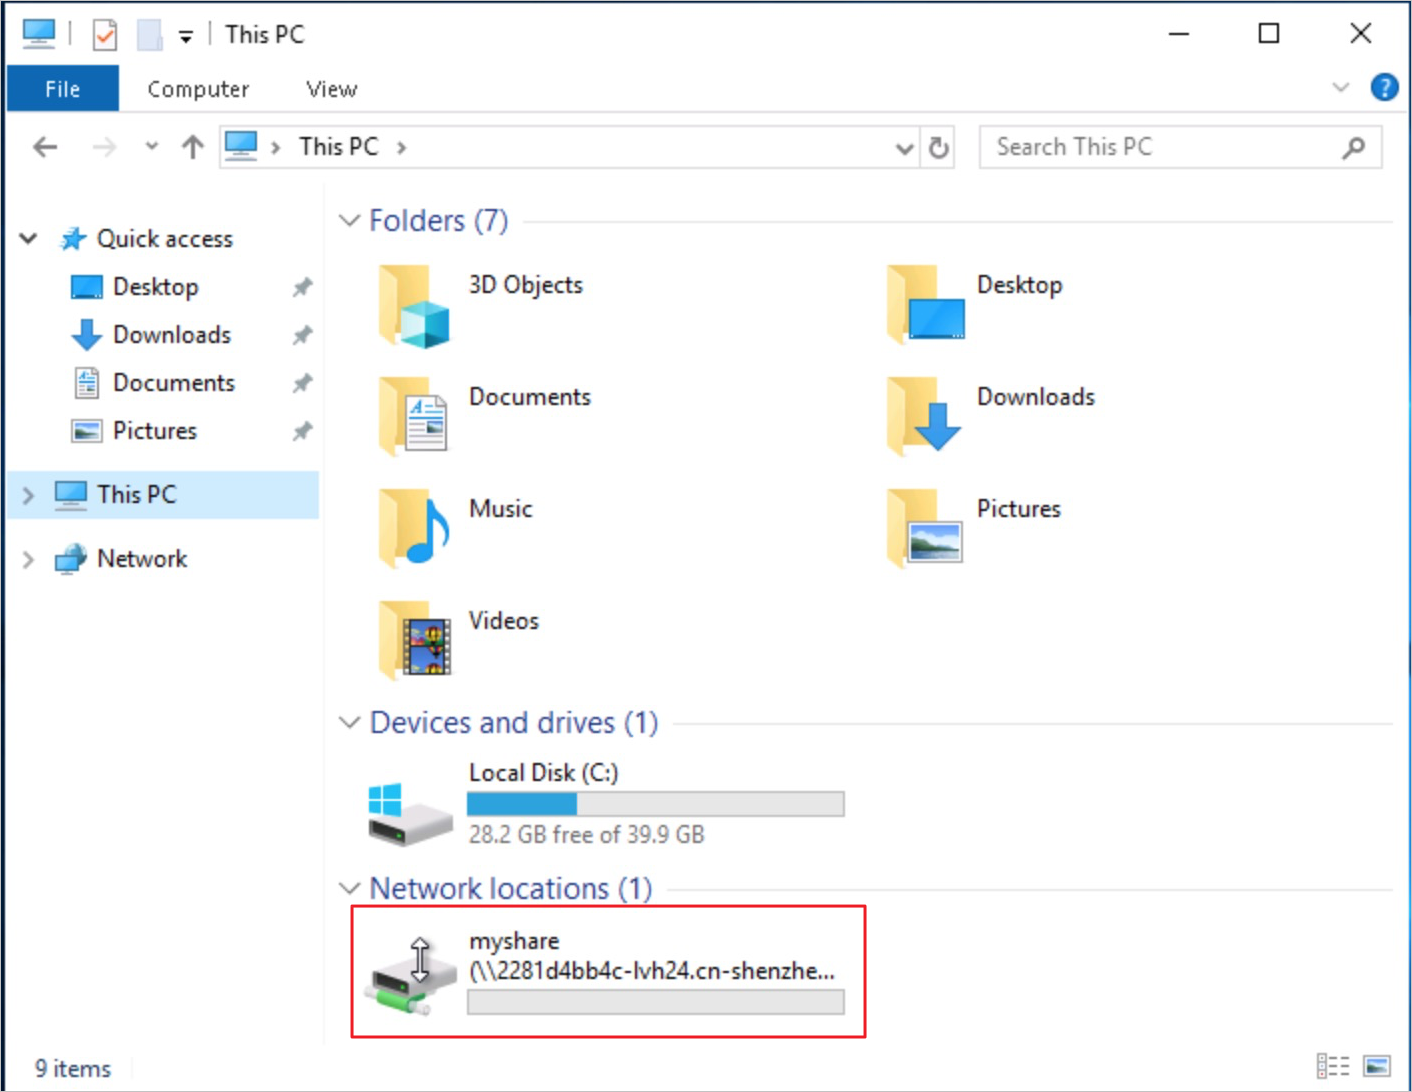
The automatic mount configuration is saved in a startup script, such as C:\ProgramData\Microsoft\Windows\Start Menu\Programs\StartUp\my_mount.bat. Modify this script as needed.